
Field Test – Multicam Tropic
Introduction
For a very long time now, I have been asked on a regular basis to do a field test of Multicam Tropic. Easier said than done, since the pattern is actually not that easy to get in Europe and also because I cannot jump on any pattern my readers want me to test.
Luckily enough Recon Company helped me out in this regard and I was able to get my hands on a set. This proved to be already very insightful in comparison with PenCott Wildwood and also SloCam. Some of those pictures you might have already seen.
So without further ado, let’s get into the topic and see what we got.
Multicam Tropic
Multicam Tropic does not need an introduction, or backgrounder. Being one of the most well known camouflage patterns, Multicam has been available in several different colorations since late 2013. The “Tropic” variant is specifically designed for “verdant” and “dense jungle”. Being the green variation that it is, it comes to no surprise that the pattern has been used in temperate environments as well, as long as the vegetation features a fresh green appearance.
Multicam Tropic
Using the same pattern elements as the original Multicam, the “Tropic” variant consists of:
- olive,
- bright green,
- green,
- dark brown
- dark green
As a result of the same pattern and the colour combinations, it is possible (and also intended) to mix the various variants with gear made from the original Multicam. This is a direct result of the US Army Camouflage Improvement Effort, which was asking for such a solution in its tender.
With that being said, let’s go quickly over the usual caveats and then jump right into the field test.
Methodic Remarks
As always, I want to mention the usual caveats beforehand: First of all, I do not claim any scientific standard with my camouflage comparisons. Also, I conduct them with my best knowledge and the available resources. This time for example, I used a SloCam Boonie to provide a better silhouette disruption, since the basecap was just too obvious to detect.
The pictures were taken at the same locations I always use to make my camouflage comparisons. That way you can compare the various field tests I have done so far with each other.
Before I start, please consider the following – as always:
I did not edit the pictures in any special way, except the following:
- Lens correction
- Watermark
- Blurred my face out if necessary
- .jpeg compression to make it web compliant
- I always do a proper white balance to make colors appear the way they are.
A short explanation to the environment and the procedure:
The pattern was tested in a Central European environment. Information about the various locations will be stated in the subsections. The pictures portray three different positions:
- Standing in the open (to get an idea of the pattern in this particular surroundings and if the colors match it)
- Kneeling
- The prone position (to mimic basic, up to ideal concealment without using vegetational enhancements) If the vegetation is too high, I leave that position out.
As always I photographed the patterns with a wide angle lens at first and then with 35mm focal length, which mimics the actual picture the human eye would perceive at this distance. Having in mind the three different positions mentioned before, I usually end up with 6 pictures of each location.
This time one location is missing. The open field. Reason for that is quite simple. At the moment it is so overgrown, that I would not be visible even when standing.
Furthermore:
Given the huge amount of pictures in my field tests, I will continue with my modus operandi from my previous camo reviews and not describe or comment on each picture. Instead I will give a more thorough analysis at the end of each location subsection.
With that being said, let’s take a closer look at the pictures themselves. Please keep the description of the locations in mind, especially with regards to the environmental situation.
Multicam Tropic
Location 1
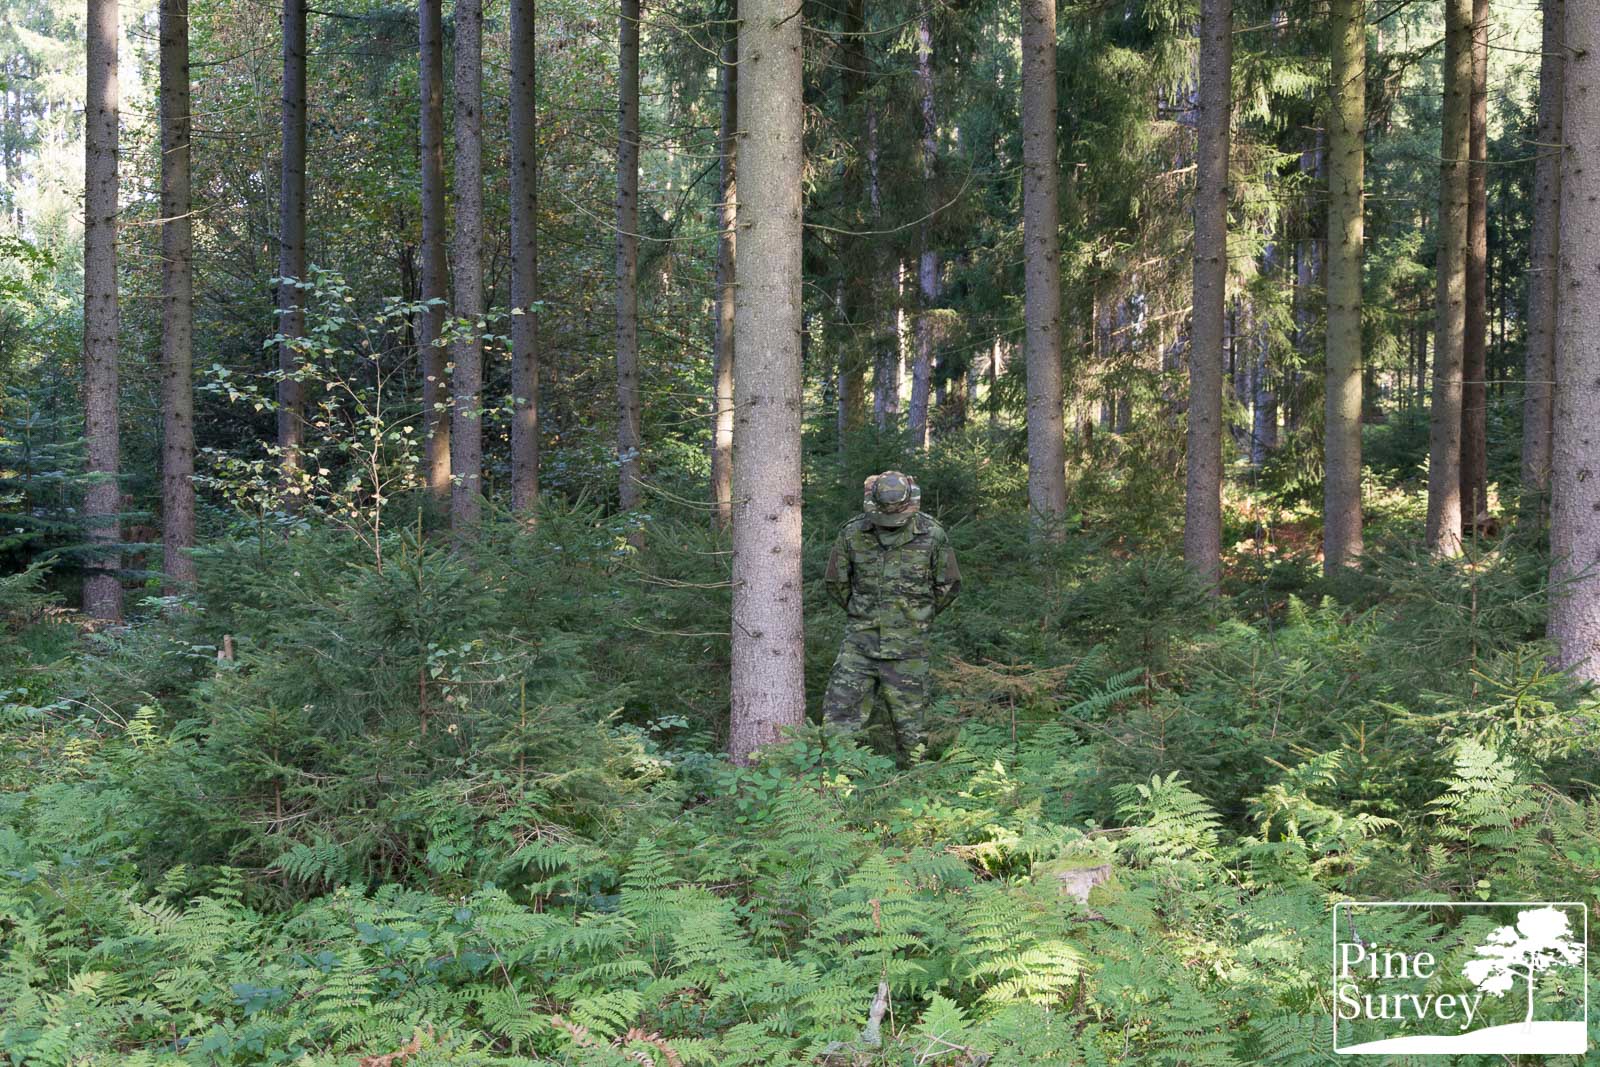
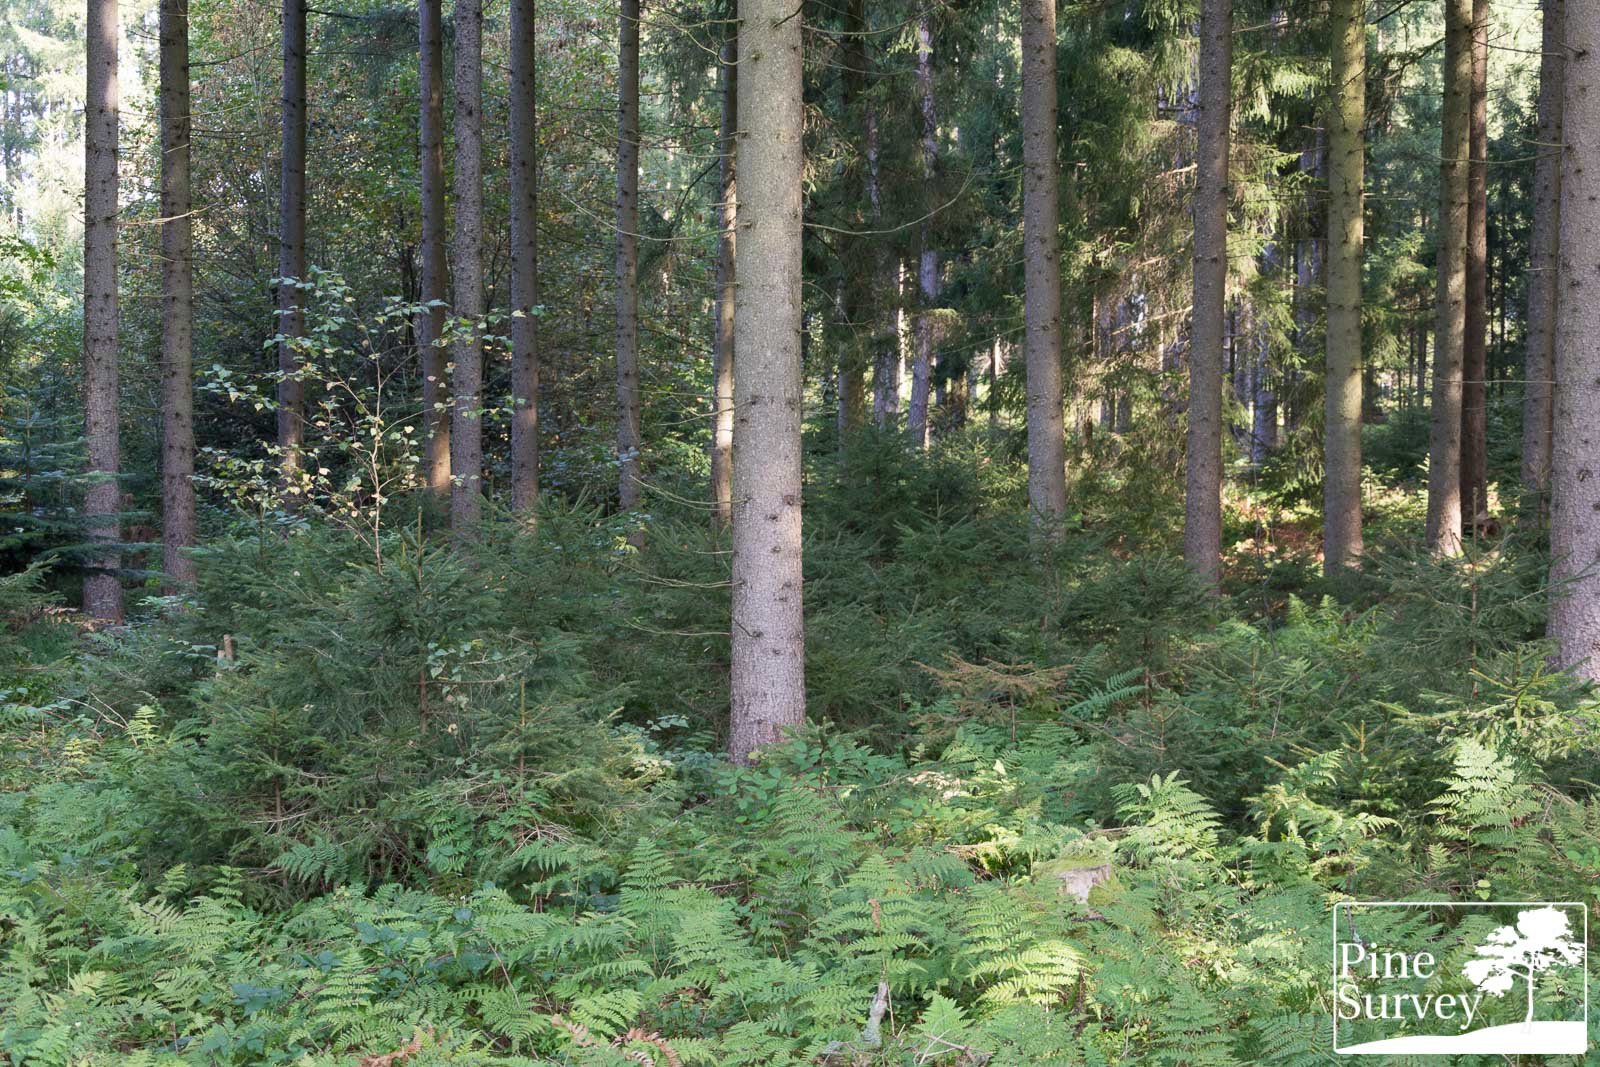
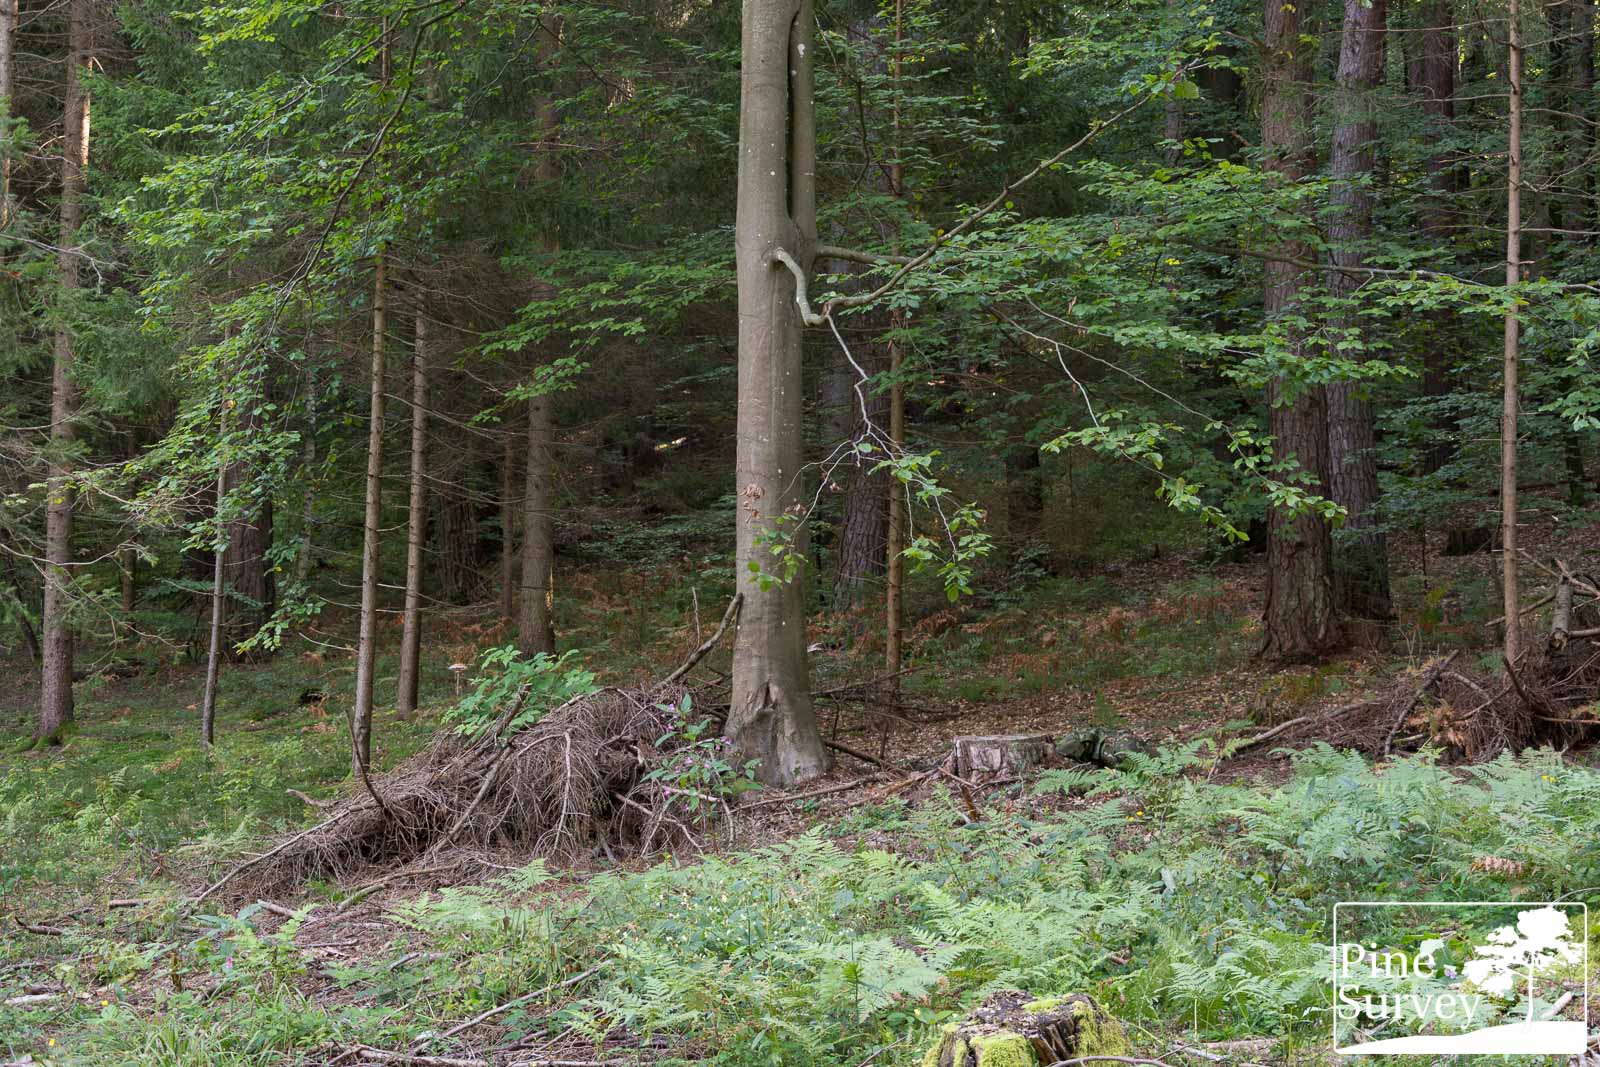
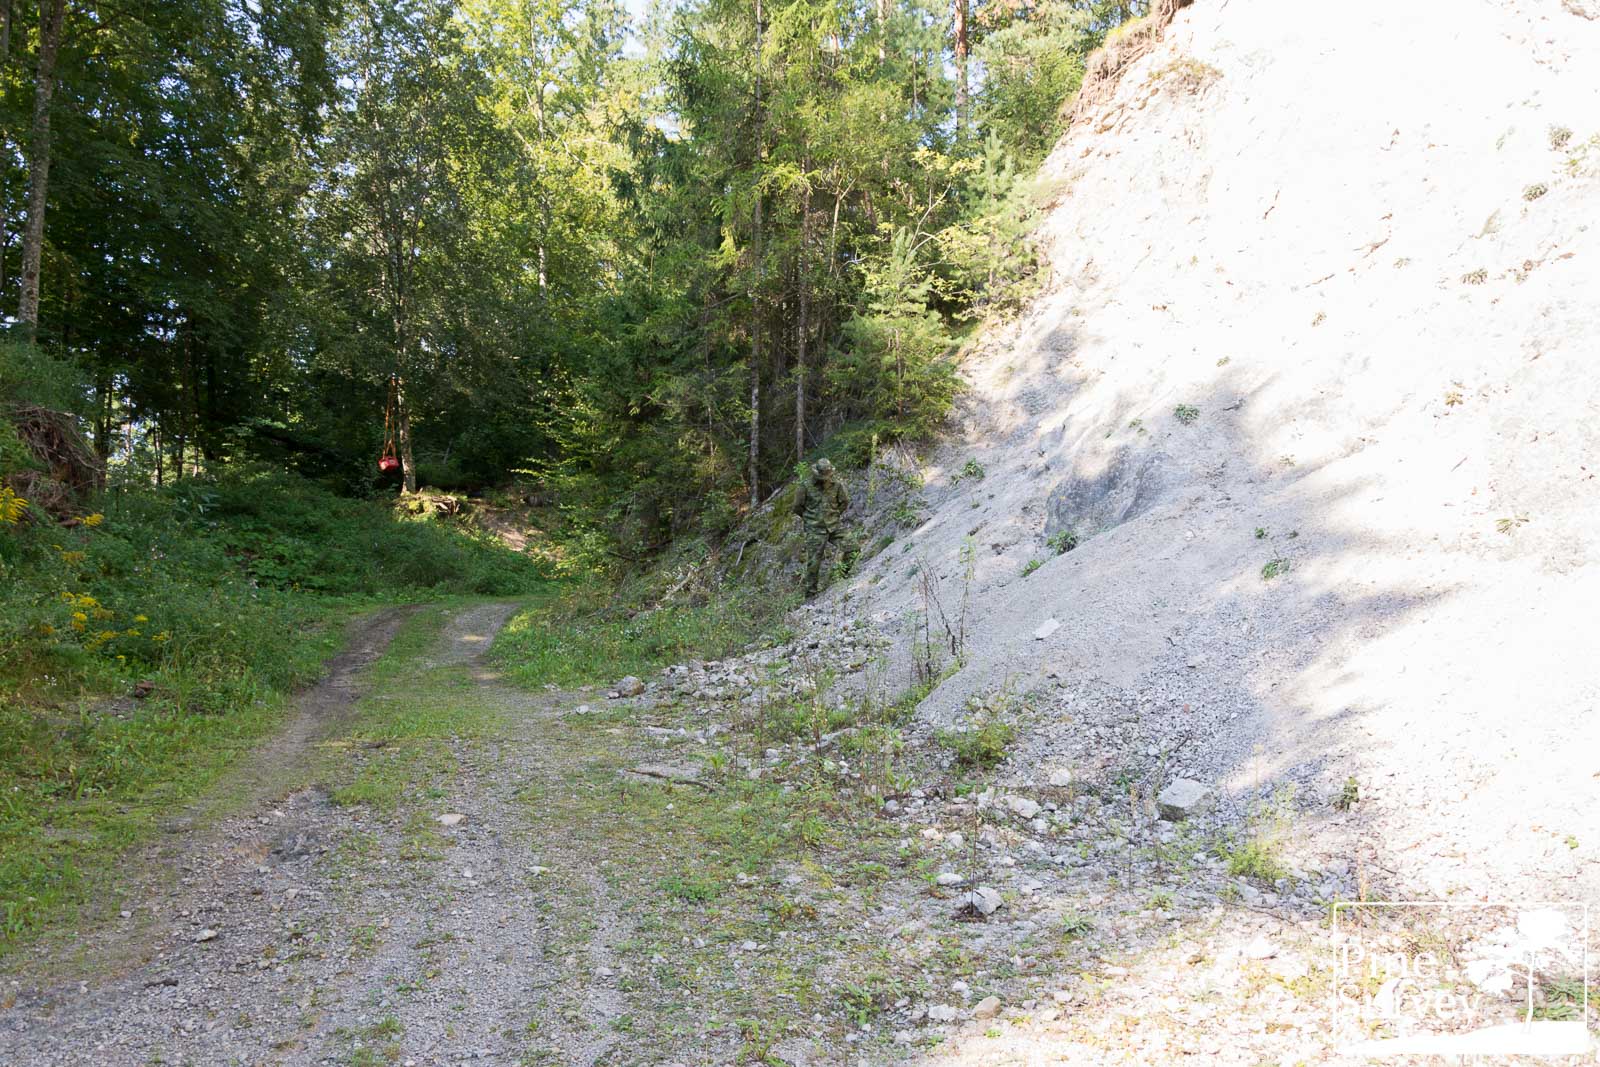
This first location is the standard one I always start with in all my field tests. It is a typical European mixed forest with a high foliage canopy and some basic bushes, ferns and little trees on the ground. These pictures were taken mid September, so the vegetation is already a bit decaying but still green.
The pictures were taken before noon under a clear sky.
The camera is standing roughly 10m away from the human silhouette.
Wide angle – standing position
Wide angle – kneeling position

Wide angle – prone position
35mm focal length – standing position

35mm focal length – kneeling position
35mm focal length – prone position
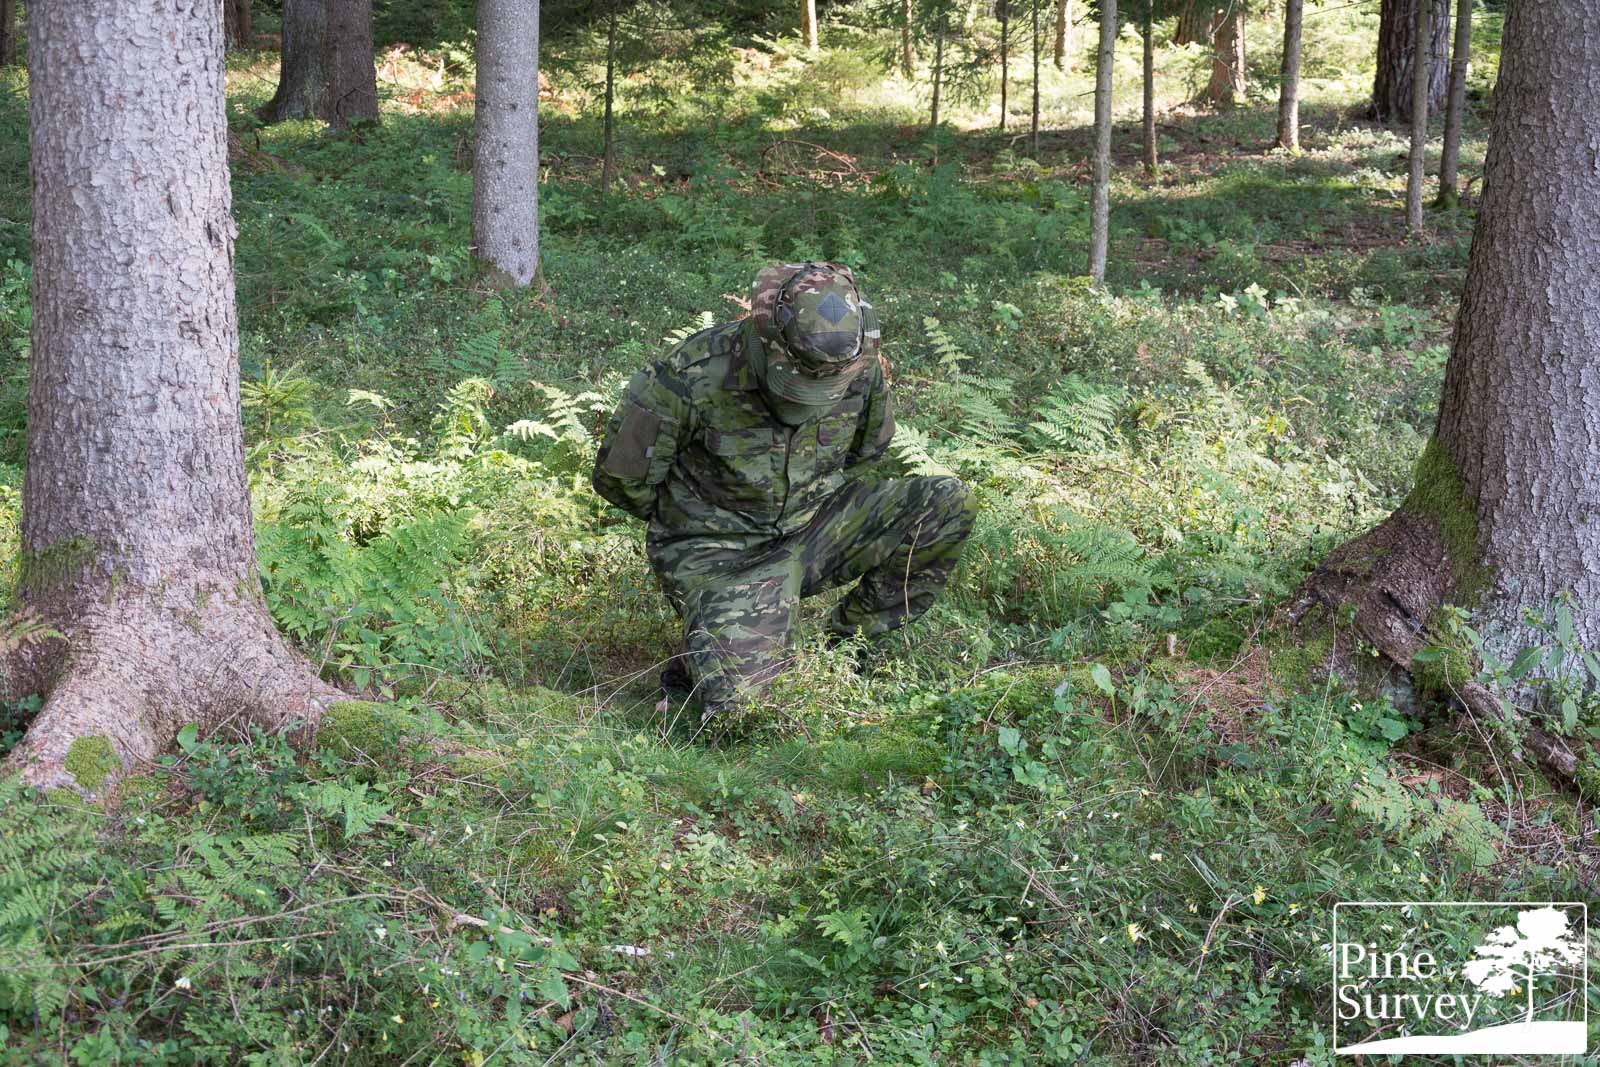
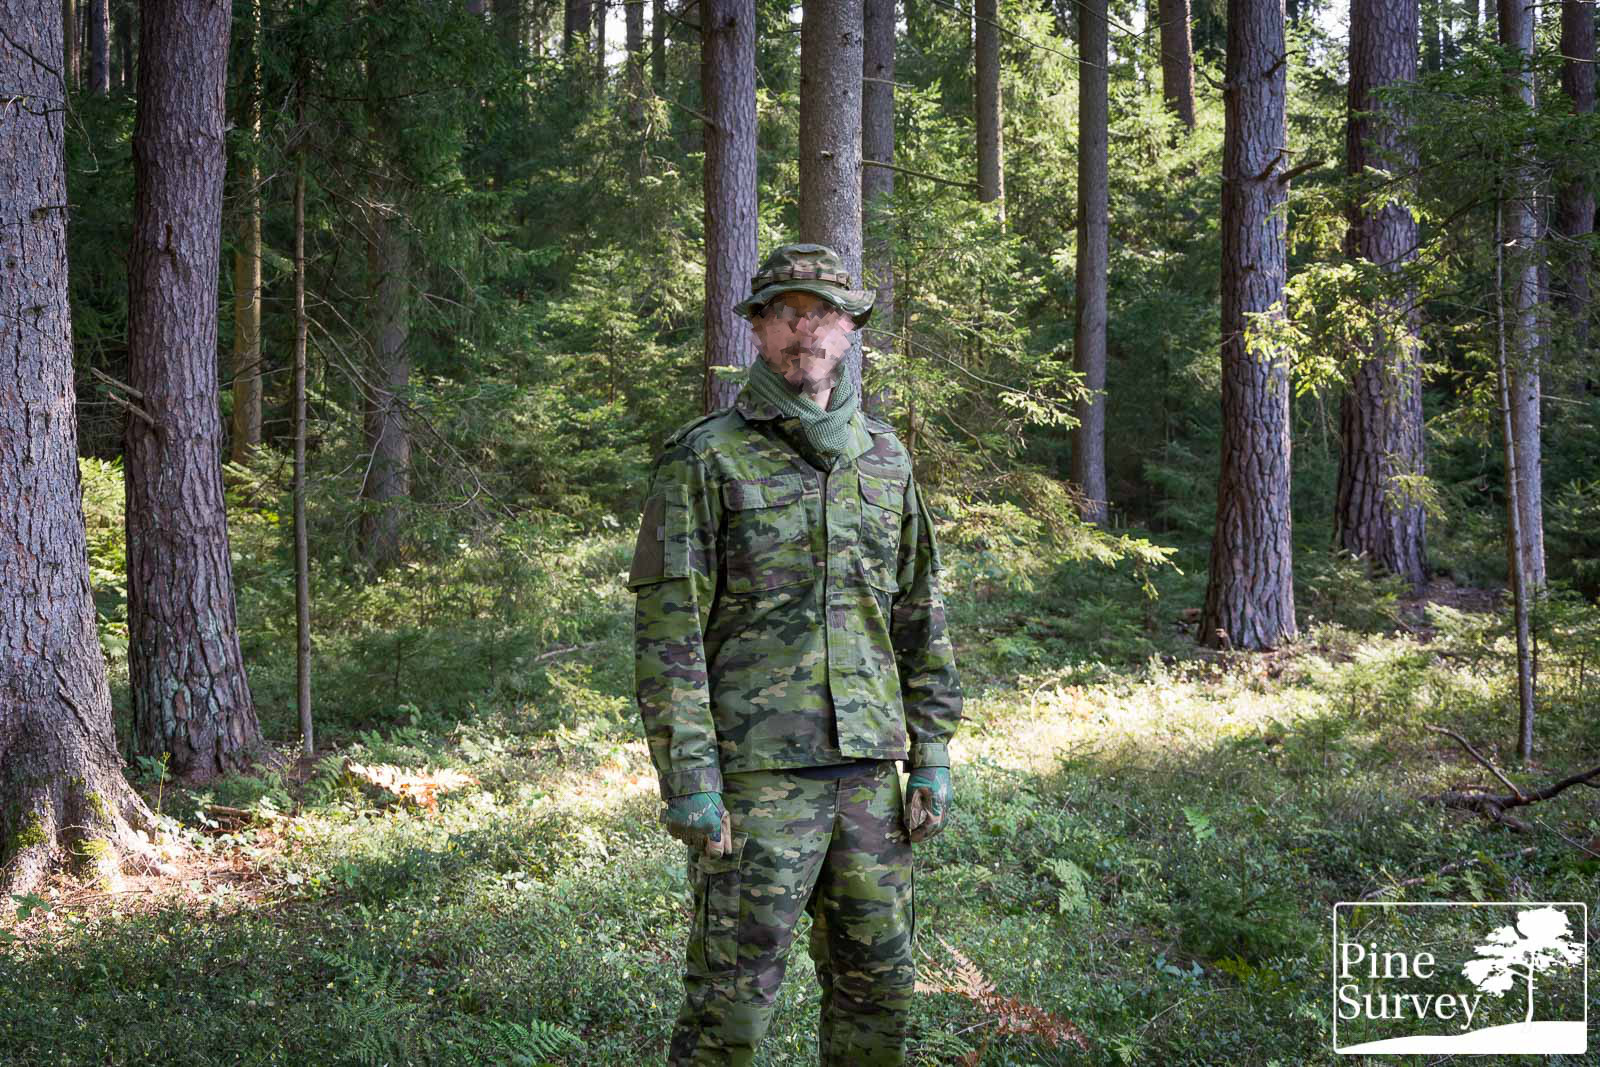
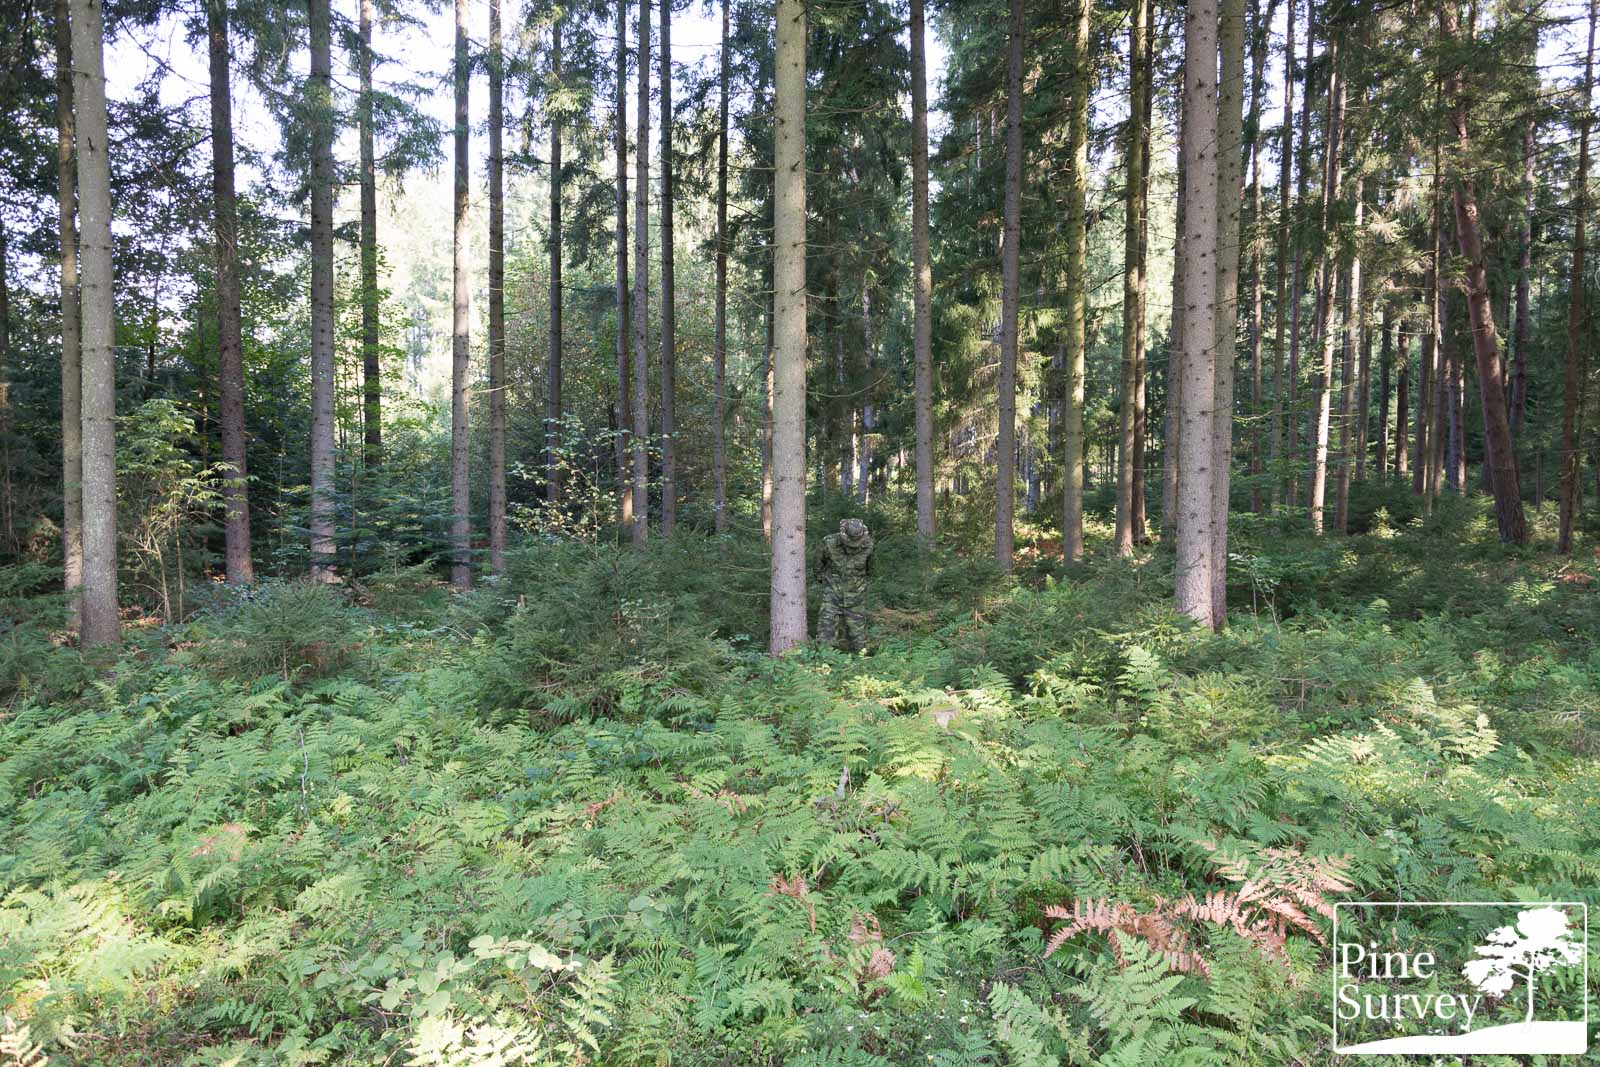
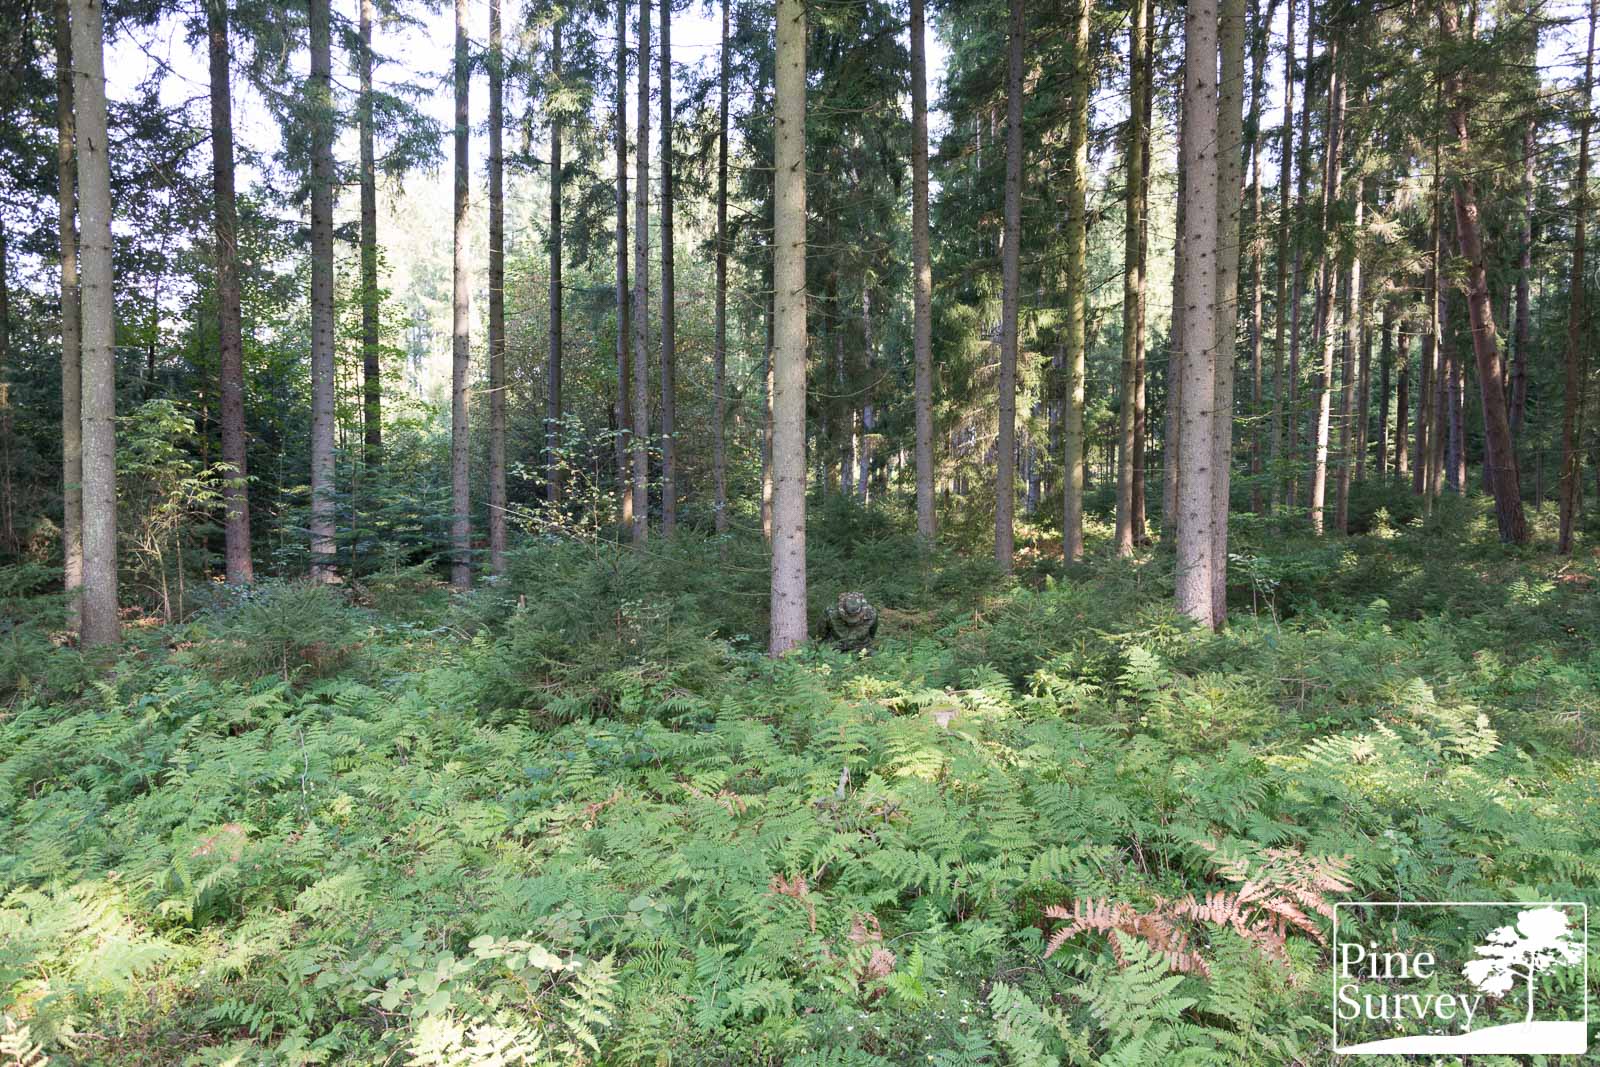
Observations – Location 1
As always we begin with the wide angle lens picture, which gives us the impression of a much longer distance than the actual 10m.
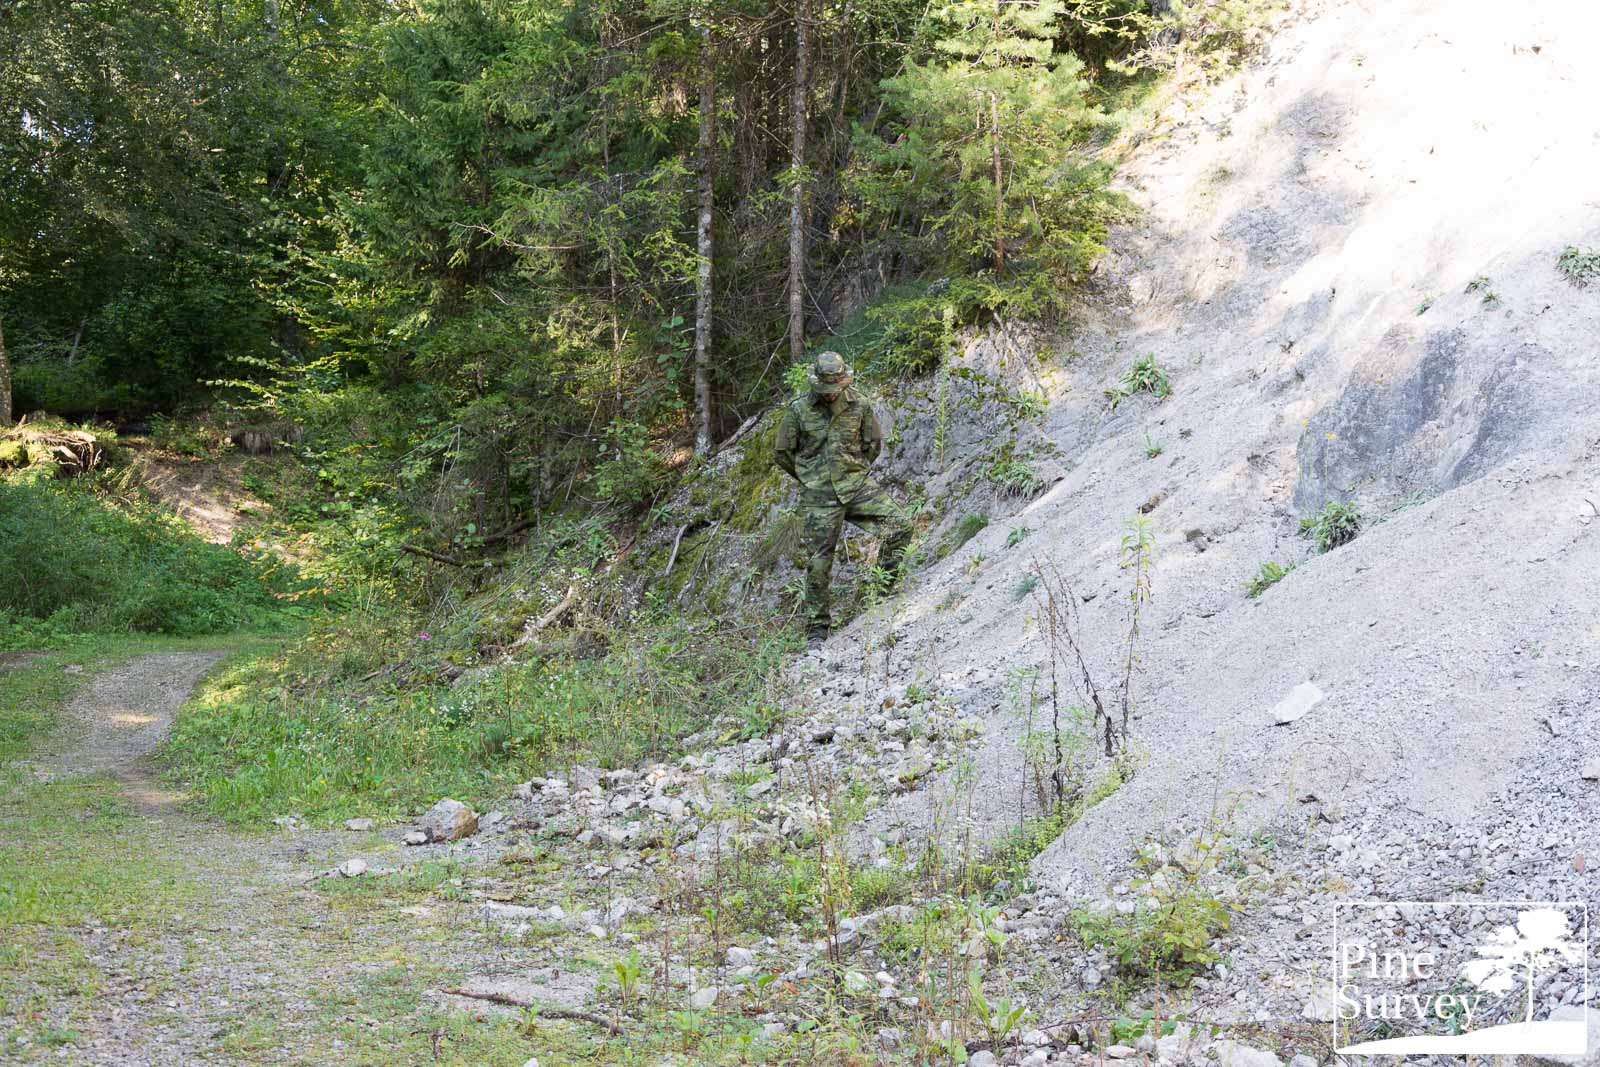
In the standing position you can see, how Multicam Tropic perfectly blends into this scene. The overall green appearance of the pattern perfectly matches the surrounding vegetation. The darker midi and macro elements provide a certain disruption. While the dark brown comes close to natural shadows or branches, the olive coloured spots mimic the effect of light touching vegetation. That being said, it is also obvious, that at this close distance contrast is already very low and the overall appearance starts to become monochrome green.
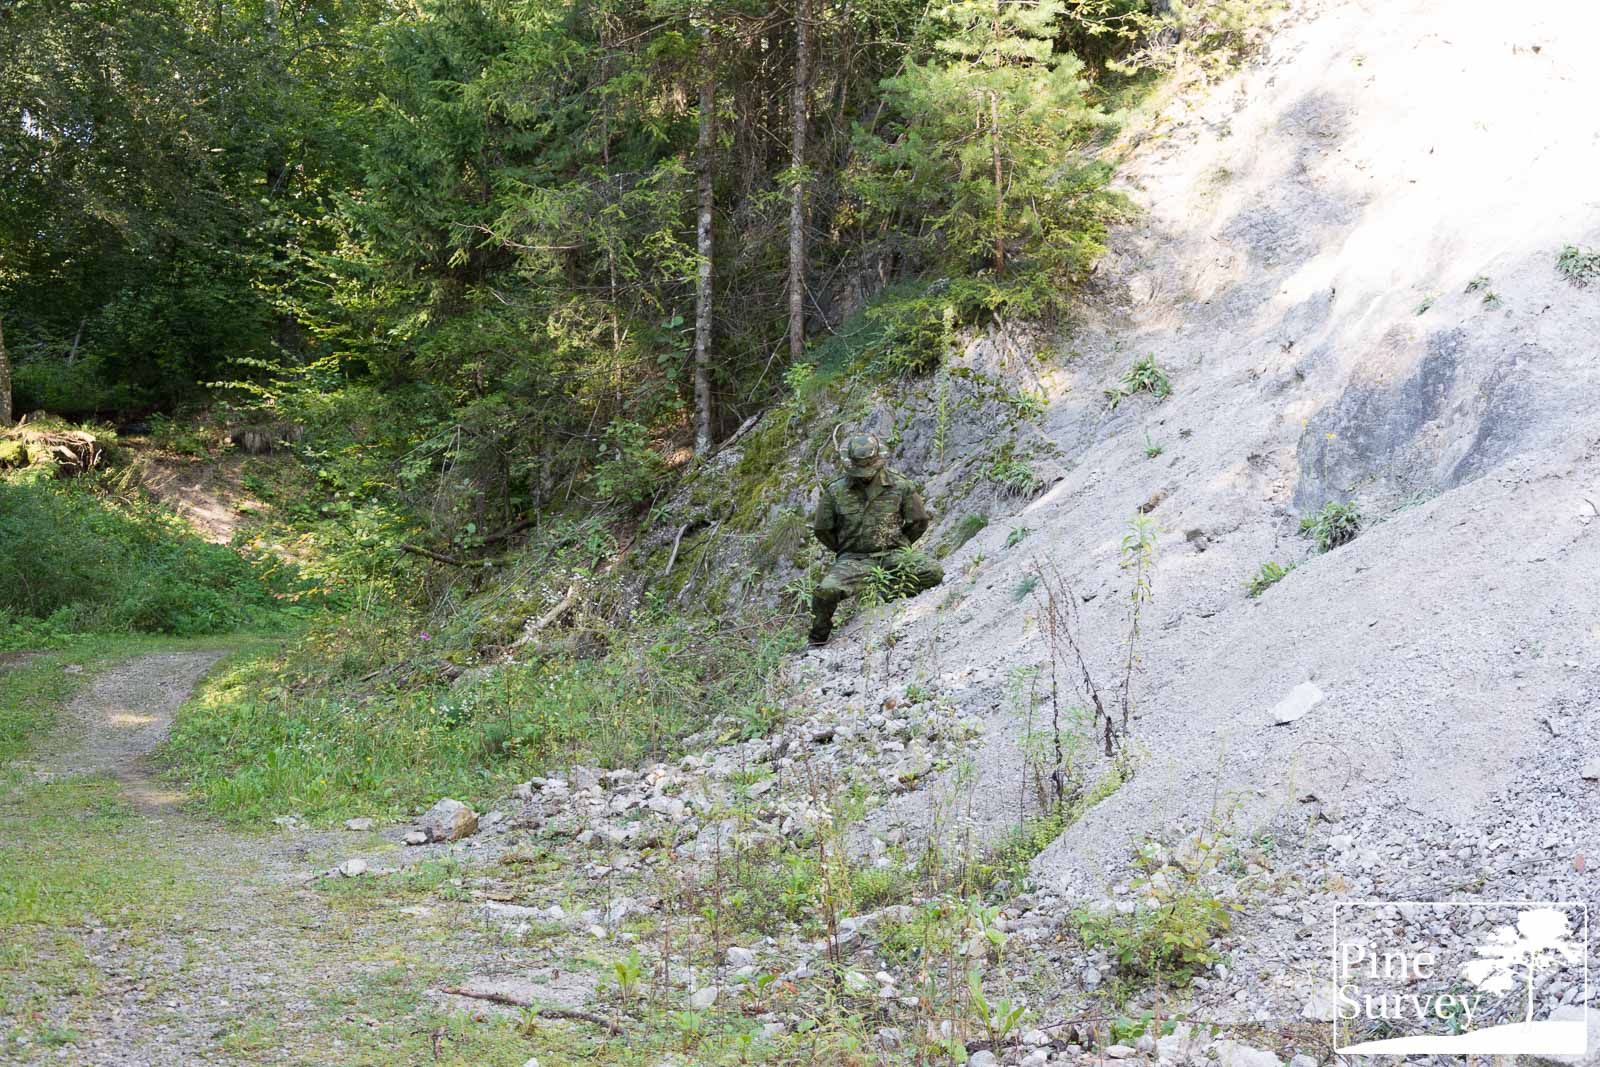
This becomes apparent when kneeling down. While the human silhouette is barely visible because of the excellent blending effect, you cannot make out any more pattern elements. The SloCam boonie gives you a better idea, what I mean in this regard.
The prone position is added here just for the sake of completeness. Behind the ferns you find perfect concealment.
The 35mm focal length provides pictures of what the human eye would witness in real life at this location.
The standing position gives a perfect look at what I just said earlier: The excellent blending of colours with the surroundings, the decent disruption by dark brown elements, as well as an overall organic look. The kneeling position underlines this observation furthermore. At this close range you can still see some of the elements and how the coloration works in this setting. The contrast of the elements is good enough to produce a diverse area, which blends into the surrounding. Blending is the main focus here, since there is no working macro element for disruption.
The prone is again just added for completeness. The ferns cover everything.
Location 2
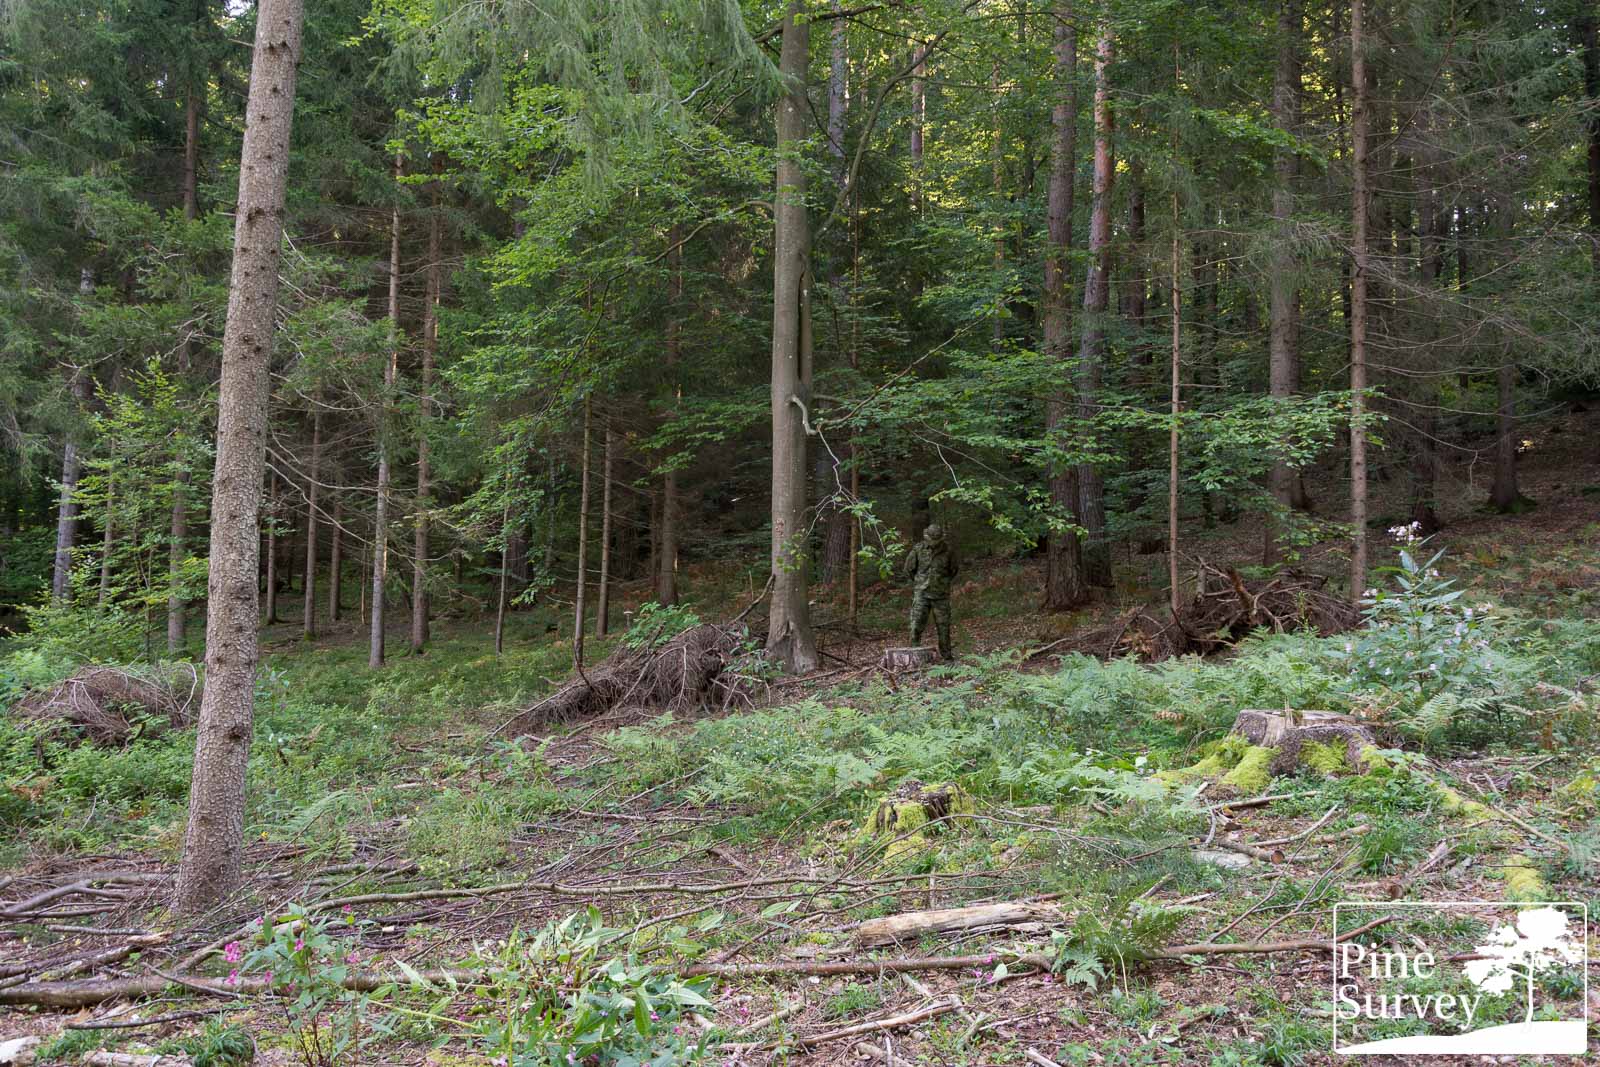
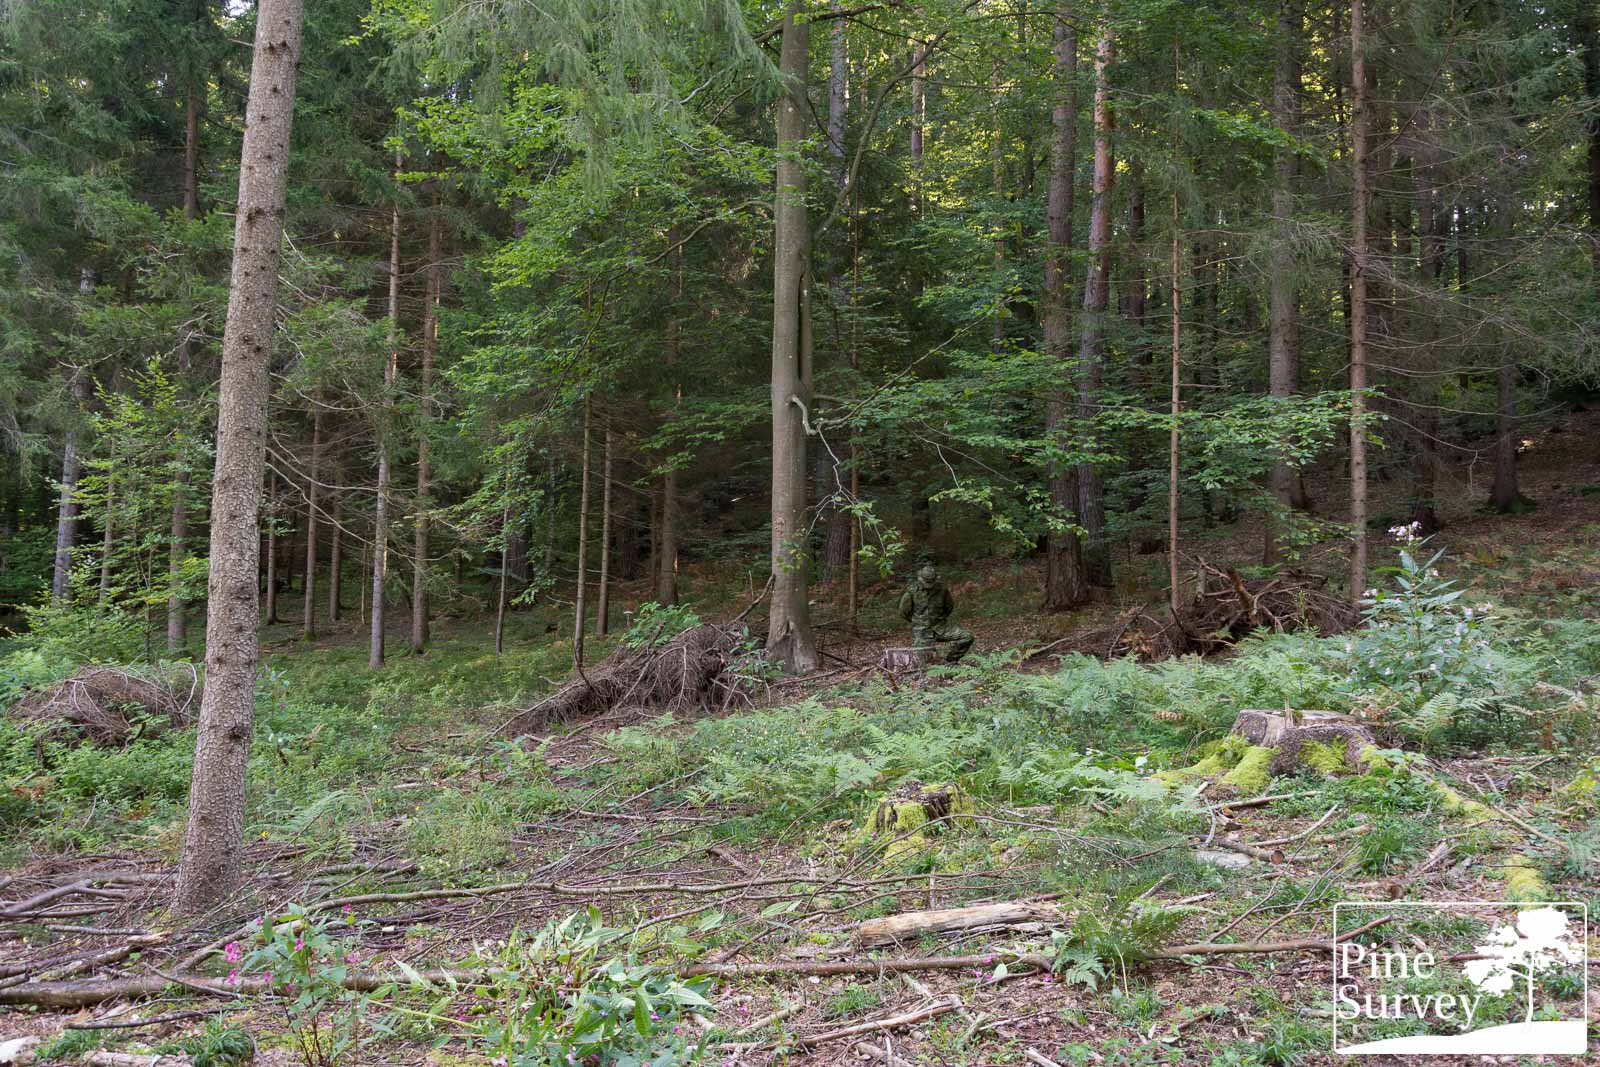
This location is a mixture of deciduous and coniferous forest. You will find strong contrasts between brown and green vegetation, a slightly denser undergrowth and a partly closed canopy, with a clearing on the side.
As already mentioned before, this location was strongly worked on. Deforestation is an issue and the tree I usually lean on is gone. I tried to recreate the usual scenes as best as I could. The forest floor is covered with beech leaves, and cut branches. The pictures were taken before noon, under a bright sky.
The camera is standing roughly 15m away from the human silhouette.
wide angle – standing position
wide angle – kneeling position

wide angle – prone position

35mm focal length – standing position

35mm focal length – kneeling position
35mm focal length – prone position
Observations – Location 2
At this location one can clearly see how Multicam Tropic becomes less effective very quickly. Again starting with the wide angle lens and different light conditions, it is apparent that the overall appearance becomes too dark.
While the pattern still blends into the environment because of its mainly green look, the various midi and macro elements are difficult to make out. At the same time the dark brown, in combination with the dark green, makes the silhouette quite dark. When going into a kneeling position, these observations apply as well, although the silhouette gets disrupted by the lowered position. The prone is a different story… being partly covered by the tree trunk, not much surface area is there to be identified.
Again, the 35mm focal length gives a clear impression of the actual situation. While the overall green appearance still blends into the surroundings and the various dark brown elements provide a certain disruption, you can still see that Multicam Tropic is a bit too dark in this setting. At the same time the light brown leafs are creating a problematic environment, putting the pattern outside of its comfort zone.
Kneeling down lowers the silhouette again, improving the camouflage effect in the process. Multicam Tropic provides a working blending effect that provides long enough concealment. At the same time disruption is not a factor here.
For the prone position the above mentioned statements apply.
Location 3
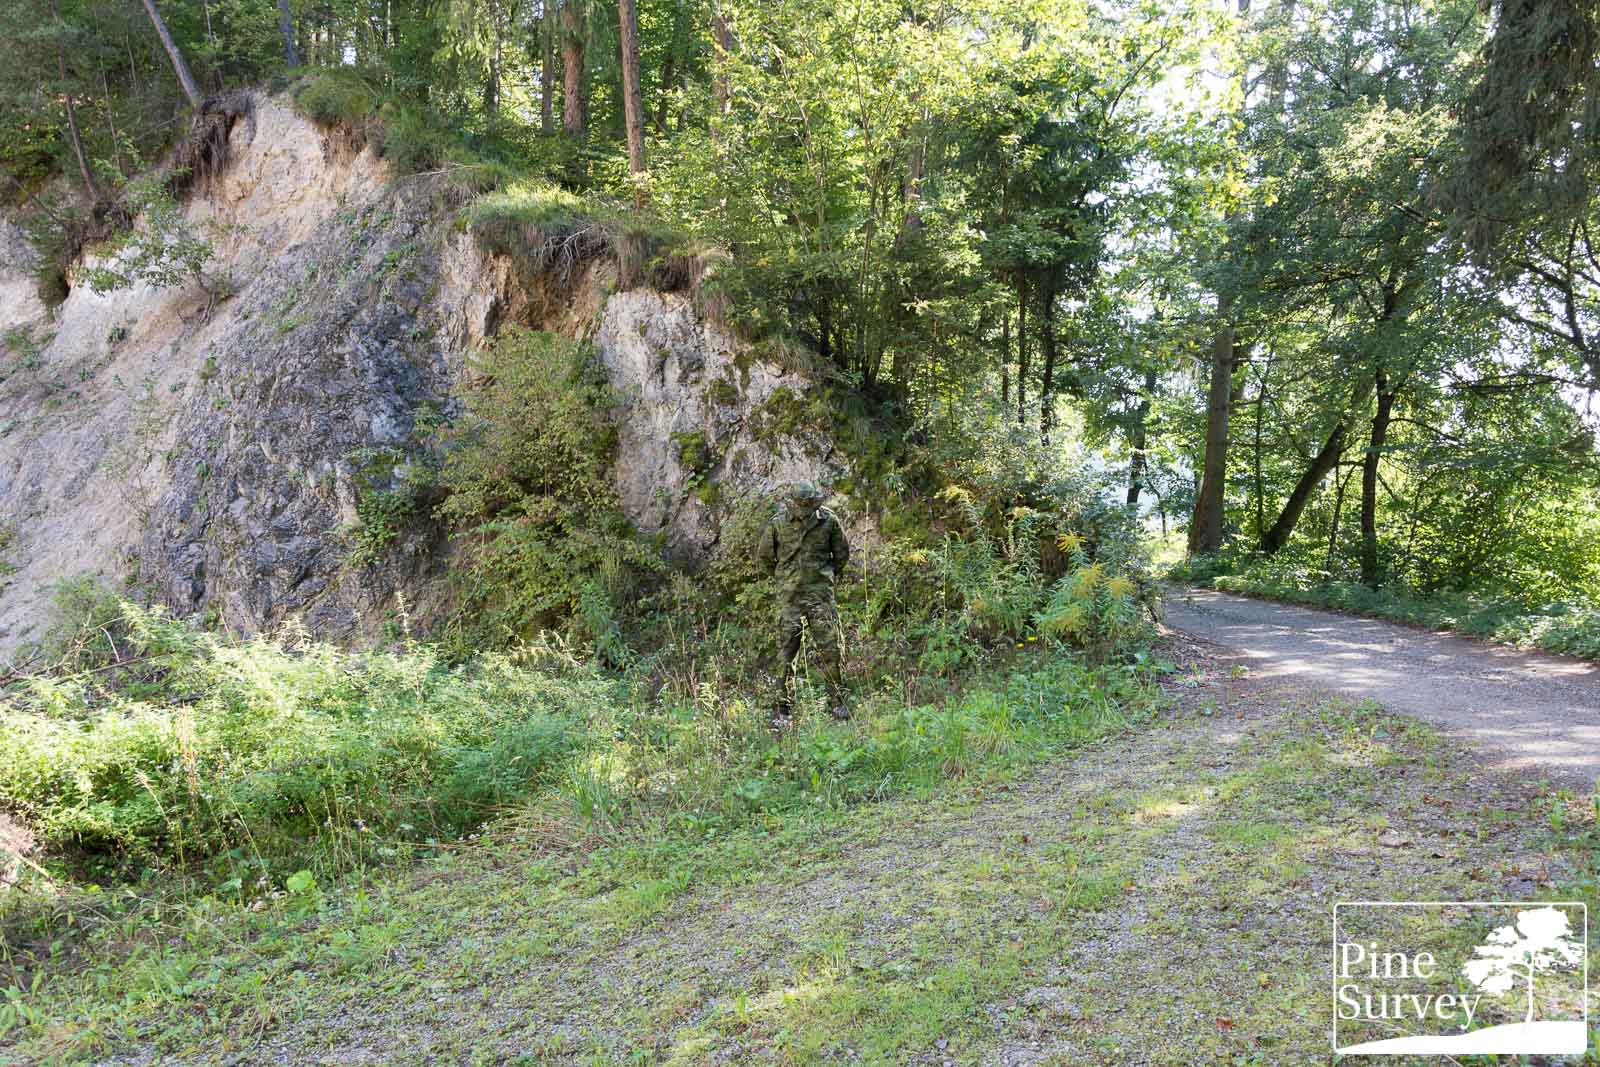
Last but not least – location number 3 is the gravel pit, which I use sometimes to spice things up. I will post two different spots in the same pit without the prone position.
Being the last days of Summer, and shortly before noon, the light is bright and hard, showing contrast of shadows and white areas.. Distance to camera: 10m and 15m.
wide angle – standing position
wide angle – kneeling position
35mm focal length – standing position

35mm focal length – kneeling position
wide angle – standing position

wide angle – kneeling position
35mm focal length – standing position
35mm focal length – kneeling position
Observations – Location 3
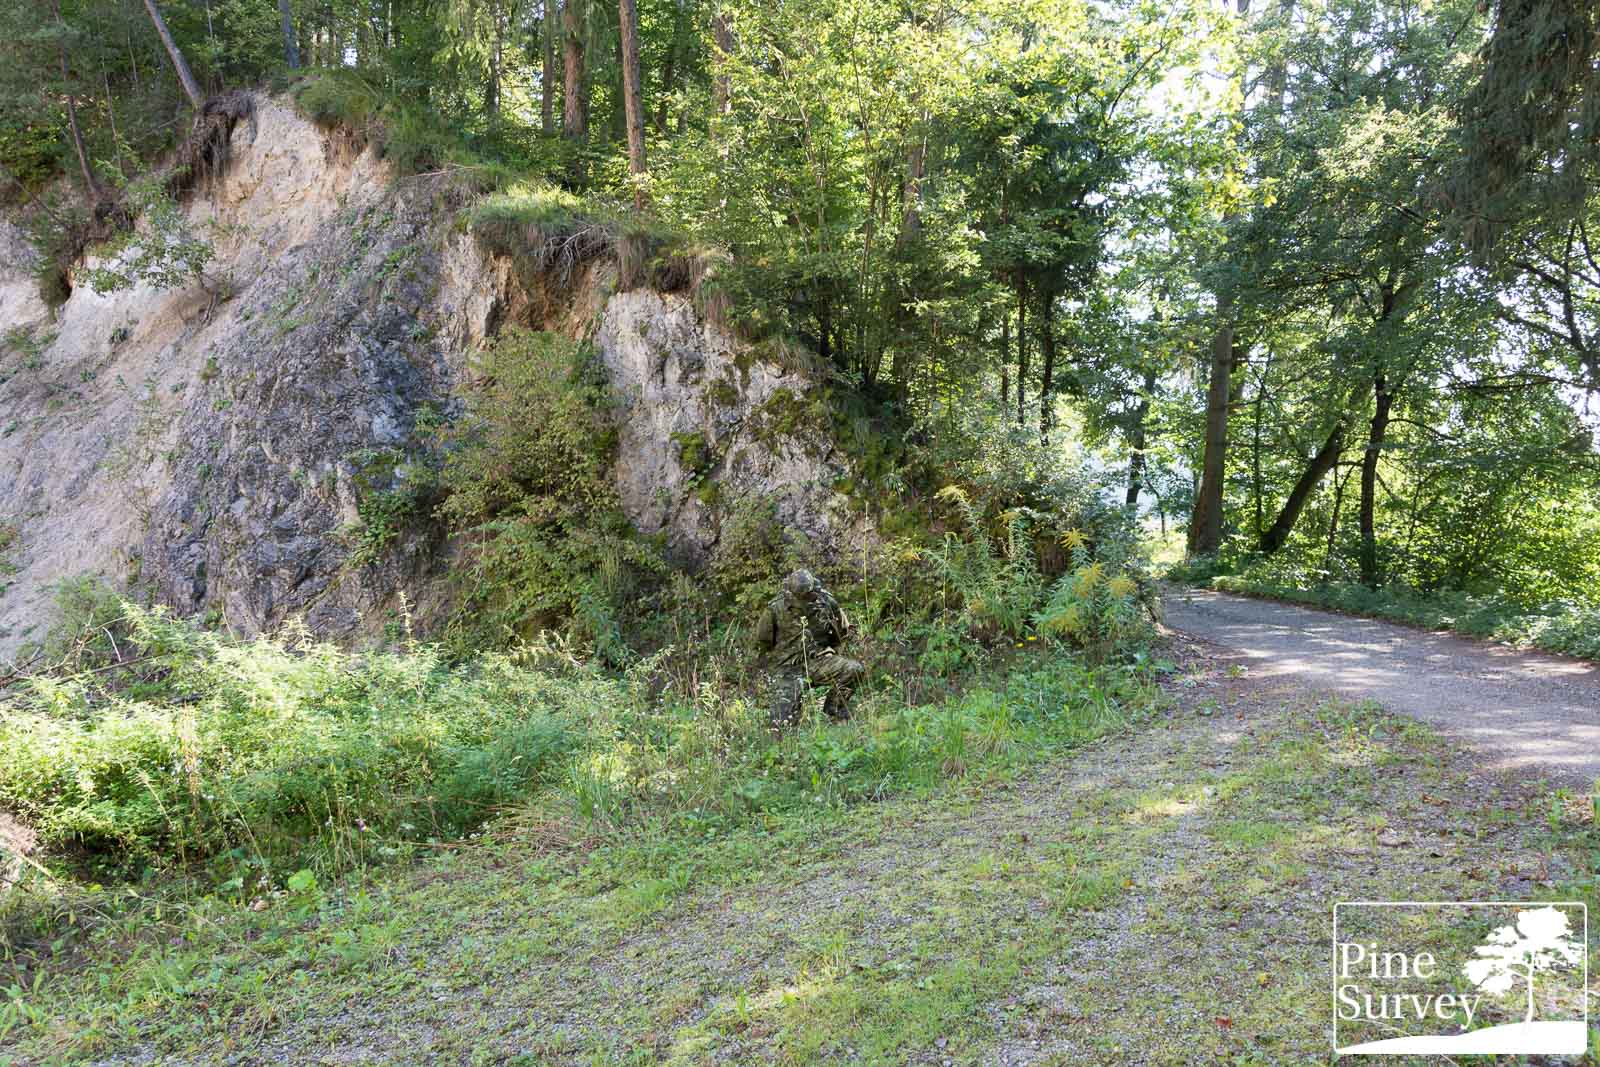
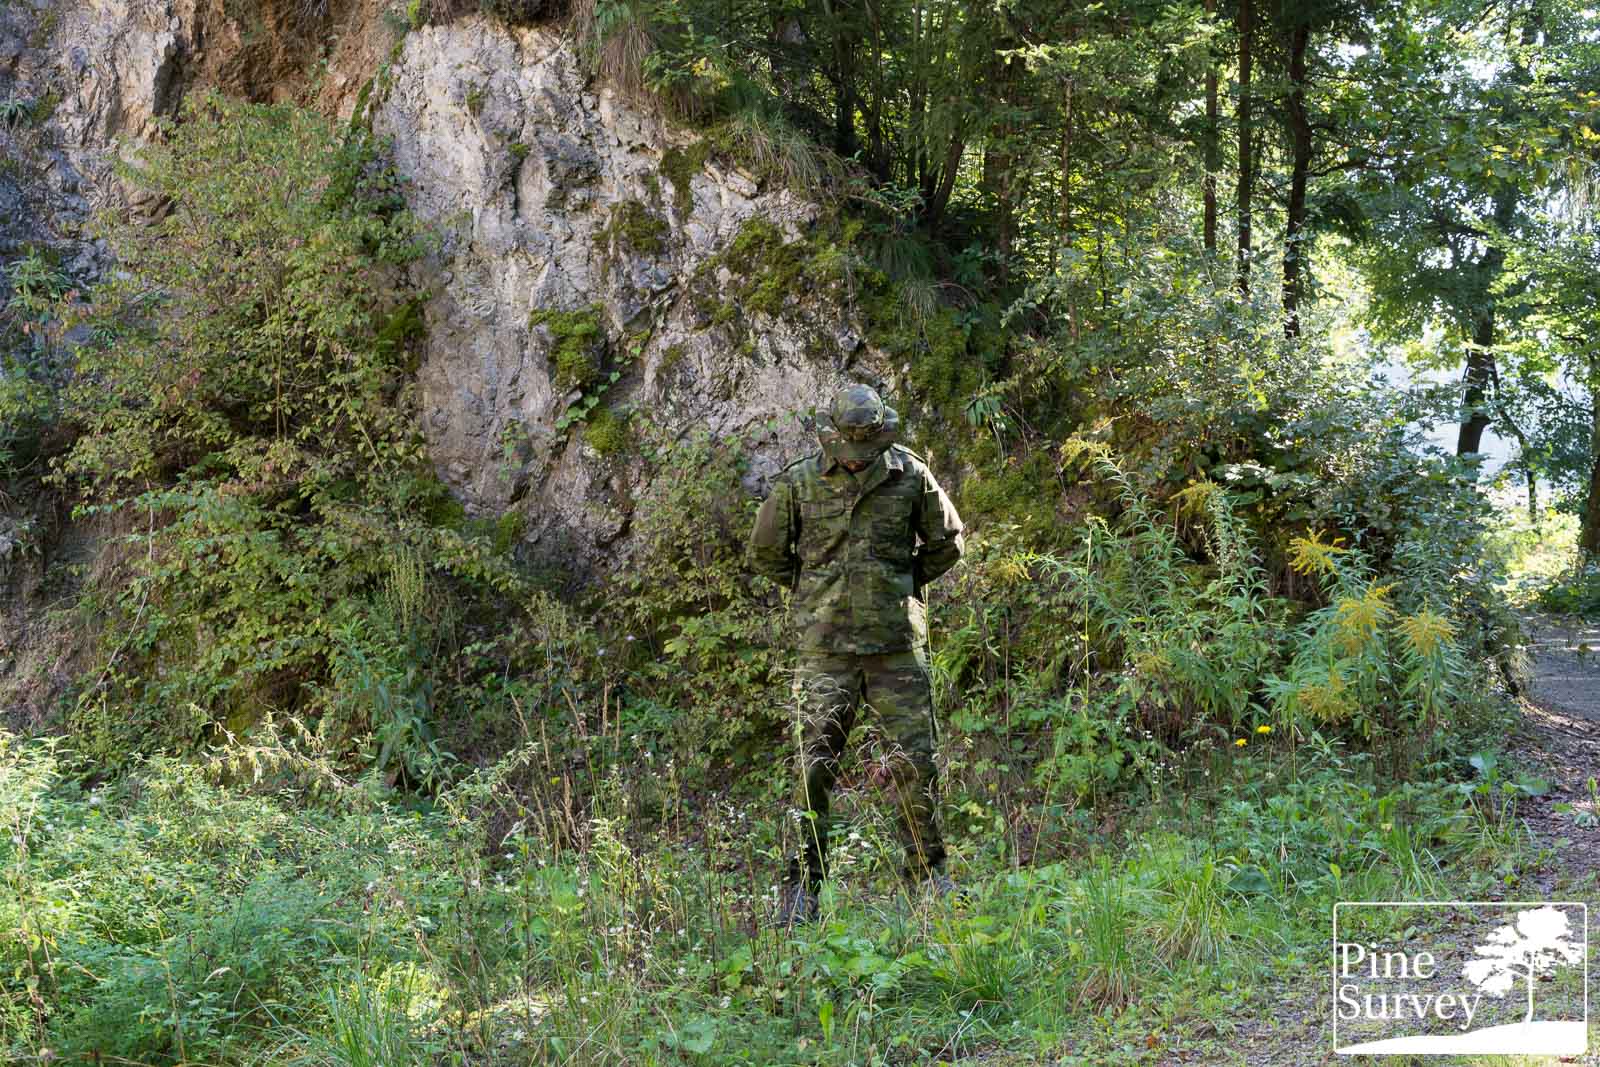
The first spot is a very “busy” location, when it comes to the surroundings. Grass, rocks, branches and nearby trees. The wide angle lens already gives you a very convincing impression of Multicam Tropic. Even against the backdrop of a rock it blends perfectly into the surrounding vegetation. It demonstrates the well chosen coloration for the pattern. Especially when going into the kneeling position this becomes even more apparent.
The pictures using a 35mm focal length further underline these observations. Multicam Tropic is excellent in blending into lush green environments. However, and this has to be mentioned, this picture also demonstrates the minimal contrast and relevant macro elements.
The same can be said about the second spot. This one is even further away from the comfort zone of Multicam Tropic. But still, it manages to blend into the setting. Interestingly enough here the standing position is a better choice, because of the location.
Both wide angle and 35mm focal length give a decent impression and I believe by now I would only repeat myself.
Which brings us to another point…
Addendum – Slocam versus MC Tropic
Of course I have to address the elephant in the room, SloCam versus Multicam Tropic. There are still plenty of people out there, who do not know the Slovenian camouflage pattern and immediately dismiss it as a bad Multicam copy and/or a Multicam Tropic knock off.
For those of you who are interested in the background of SloCam, you can read more about it here. By doing so, you will also realize that the pattern is several years older than the Tropic variant of Multicam, and far from a copy.
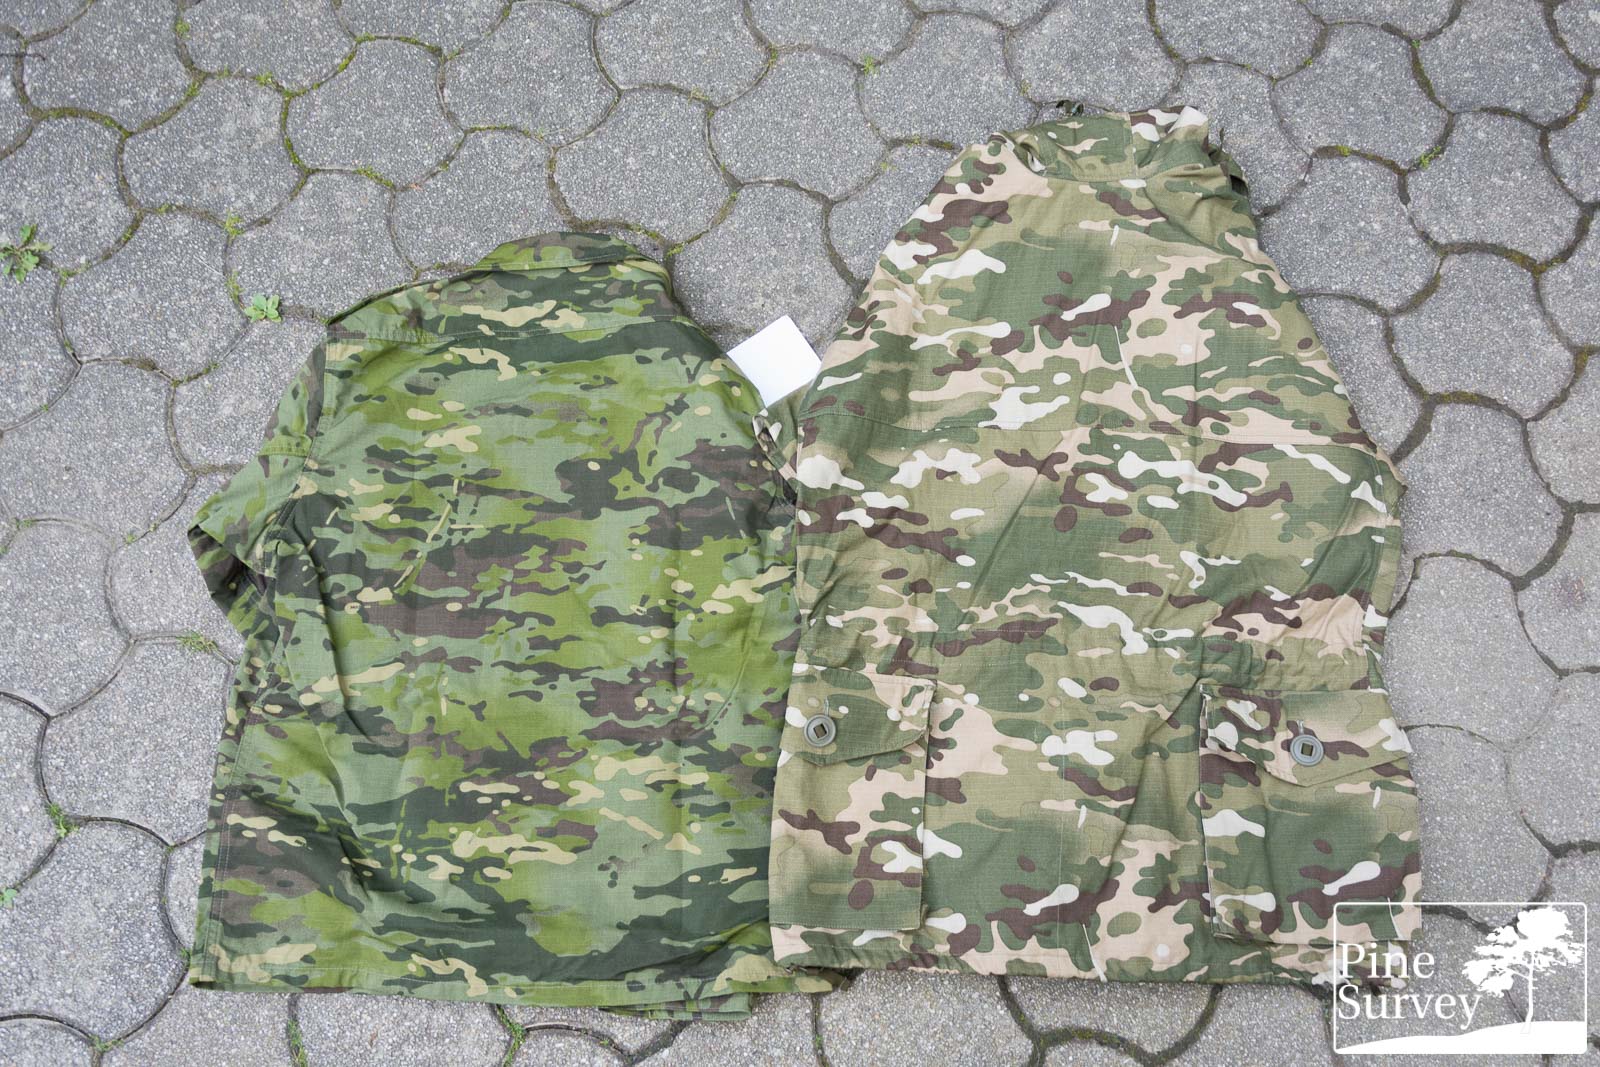
Multicam Tropic (left) and SloCam (right)
Putting both patterns next to each other, one will quickly realize the stronger contrast of the SloCam camouflage pattern. Adding to that, the colours of SloCam are more in the spectrum of drier environments and the elements bear no resemblance to those of Multicam. At the same time you will find the same concept of rounded midi and macro spot type elements, making the two camouflage patterns compatible and recognizable (Slovenia wanted something unique, but also something to show their NATO affiliation).
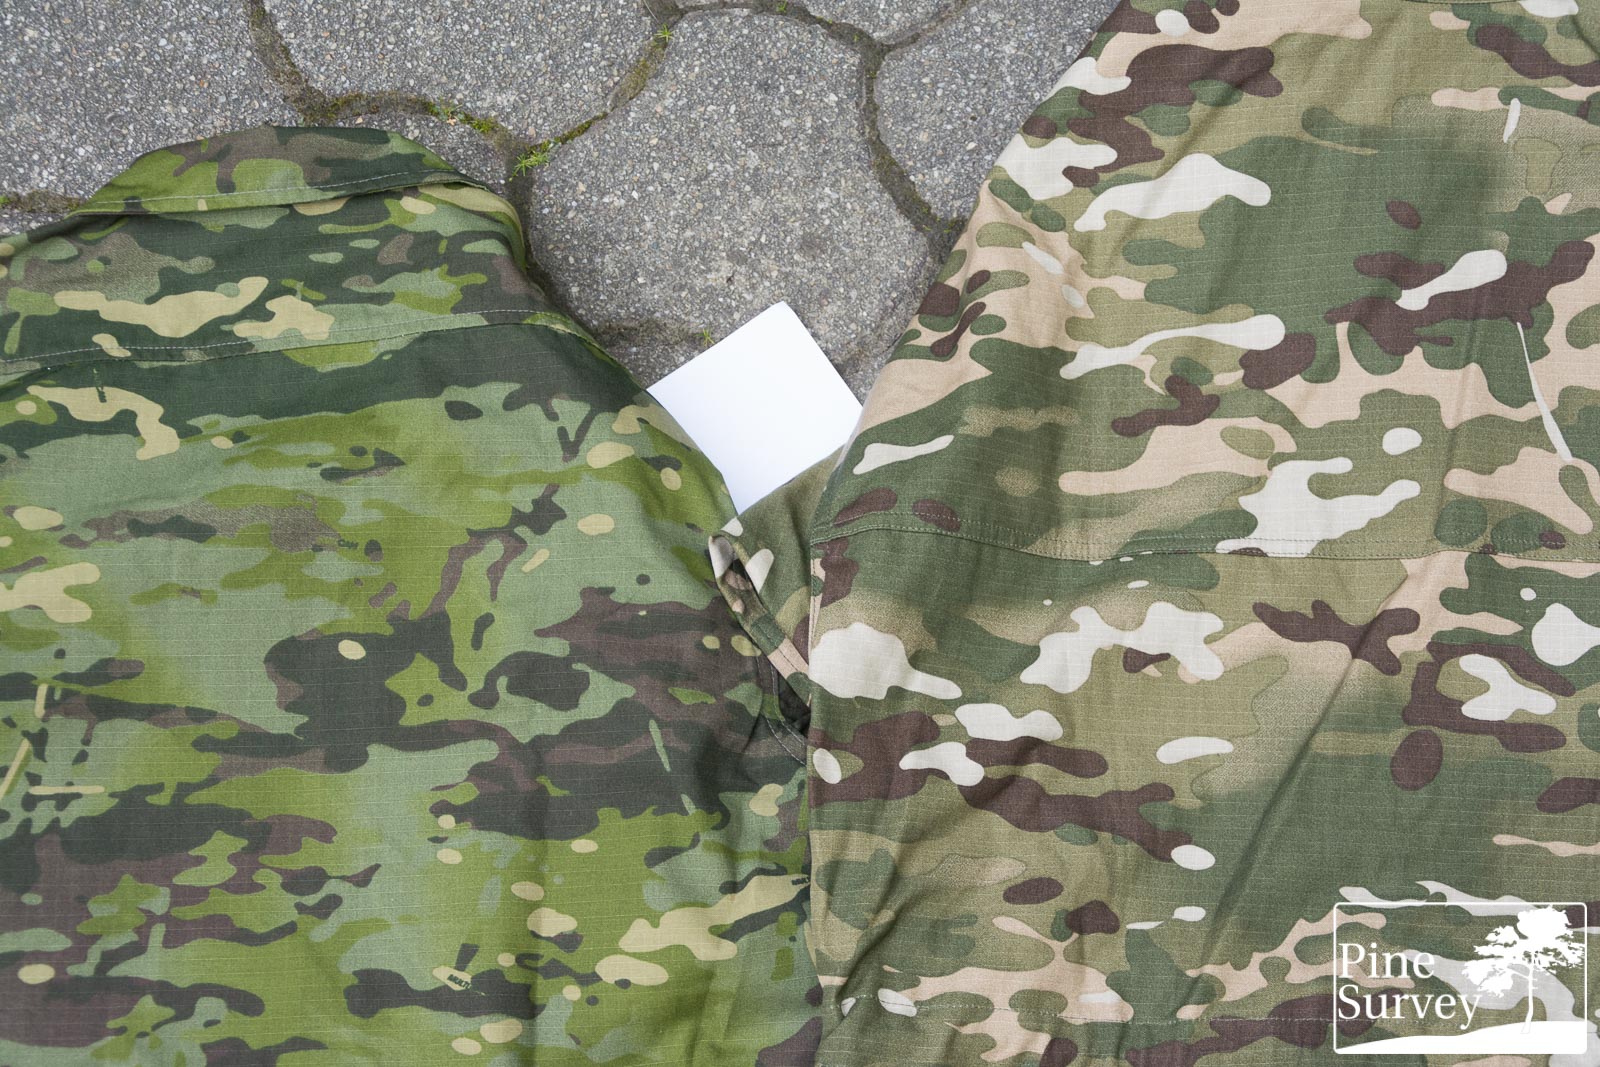
Close up to both patterns
Concept wise, SloCam is a true universal camouflage pattern. If you look through the blog you will see plenty of proof for that. Multicam Tropic is a very specialised camouflage, as was already mentioned in the above sections.
I hope this side by side pictures give you a better understanding of the differences between the two.
Conclusion
Multicam and its various variations have gained a large fanbase and wide use in the armed forces around the world. Becoming somewhat of an unofficial NATO Standard in the last few years and also gaining popularity with other forces, one cannot imagine a world without Multicam.
The Multicam Tropic variant proves to be just as effective as its “parent”, but at the same time it is suffering from the same downsides: lacking contrast and missing dominant macro elements. So while it gives the user a “good enough” camouflage effect, it also becomes somewhat redundant at longer engagement distances. The Multicam family of patterns mainly work with the concept of blending. The added benefit of visual disruption is only partly to be found, when looking at the patterns in the field.
As a result, being overall green and without meaningful contrast, a solid coloured uniform in the same hue would be just as effective from 20m and further.
With that being said one has also to mention that it is a very appealing camouflage pattern. It simply looks good and has the according effect for the esprit de corps – which is one important factor most people seem to forget when it comes to camouflage.
With that being said, I hope I was able to give you yet another decent impression of a camouflage pattern.
I want to thank Recon Company, for making this review possible. It was long overdue and they made it possible for me to take a look at this pattern.
Until next time – take care!
No Comment
You can post first response comment.