
It is a pleasure for me to present you yet another article from the Outdoor Series. As always, my dear friend and Pine Survey contributor Deep Forest took a closer look on a topic, that might come in handy for you, when being out in the wild.
Cooking without a pot the Neolithic way – the cooking pit
Introduction
Sitting by the fire and cooking is a really nice thing to do. To have this possibility is not only a question of comfort and having something tasty to eat, but can also be essential: Basically, water from every natural source should be cleaned und purified somehow to prevent negative effects on the human body (see my early review on the “LifeStraw”, and we’ll most likely come back to this topic with another review) – one of the easiest ways is to just cook it.
Just as a remark here: only water collected directly at a source in the mountains and/or rainwater collected after approximately 30 mins of rain should be excluded from this rule. Secondly, flesh from hunted “animal sources” should be also well done to prevent diseases and bacteria. Even some plants have to be cooked to be edible.
Thus, cooking with a fire is quite important. And when you are equipped with some metal cans or even pots or pans, everything is fine. When the task is to grill some small animals or fish, a grill out of fresh green branches or some sticks can be prepared easily. But on one occasion I realized that cooking can be quite a challenge:
I was on a two-days stay in the woods, just equipped with my small survival kit and my knife. When I had prepared my camp site, I started a fire easily. Also finding some edible plants nearby was no challenge at all – for dinner, there would be a nice salad out of stinging nettles (delicious, when prepared the right way, otherwise quite “hot” in taste) with some nuts, and some wild strawberries for dessert. Everything you need. But as I had no water bottle with me, I needed some water to drink. At that time, I did not have my LifeStraw in use.
I had a small pond as water source nearby, but the water was muddy and obviously not drinkable without purification. I knew I would have to cook the water before consumption. But how? I had nothing with me to cook it (I had only my small Survival Kit, which has a plastic case and not my “big” one in a metal can). Without a cooking possibility, I would not be able to have a nice drink with my meal…
The principle behind the cooking pit
Remembering a trick I read a few years ago in a book on primitive technology and bushcraft, I crafted a “digging stick” with my knife (I’ll also do a review on this, from my point of view, essential improvised tool someday) and began to build a so called “cooking pit”. The idea behind it is basically simple: If you don’t have a container or pot to hang over the fire, you have to build one – and bring the heat of the fire to the “pot”.
- First, I dug a small hole in the ground. How big depends on what you want to do with it – I prefer a size that can contain at least three to four litres of water. But you can also build it smaller or bigger. Regardless of how big you dig the hole, one thing is important: The bottom of the hole should not be round, but as flat as possible – you’ll see why later.
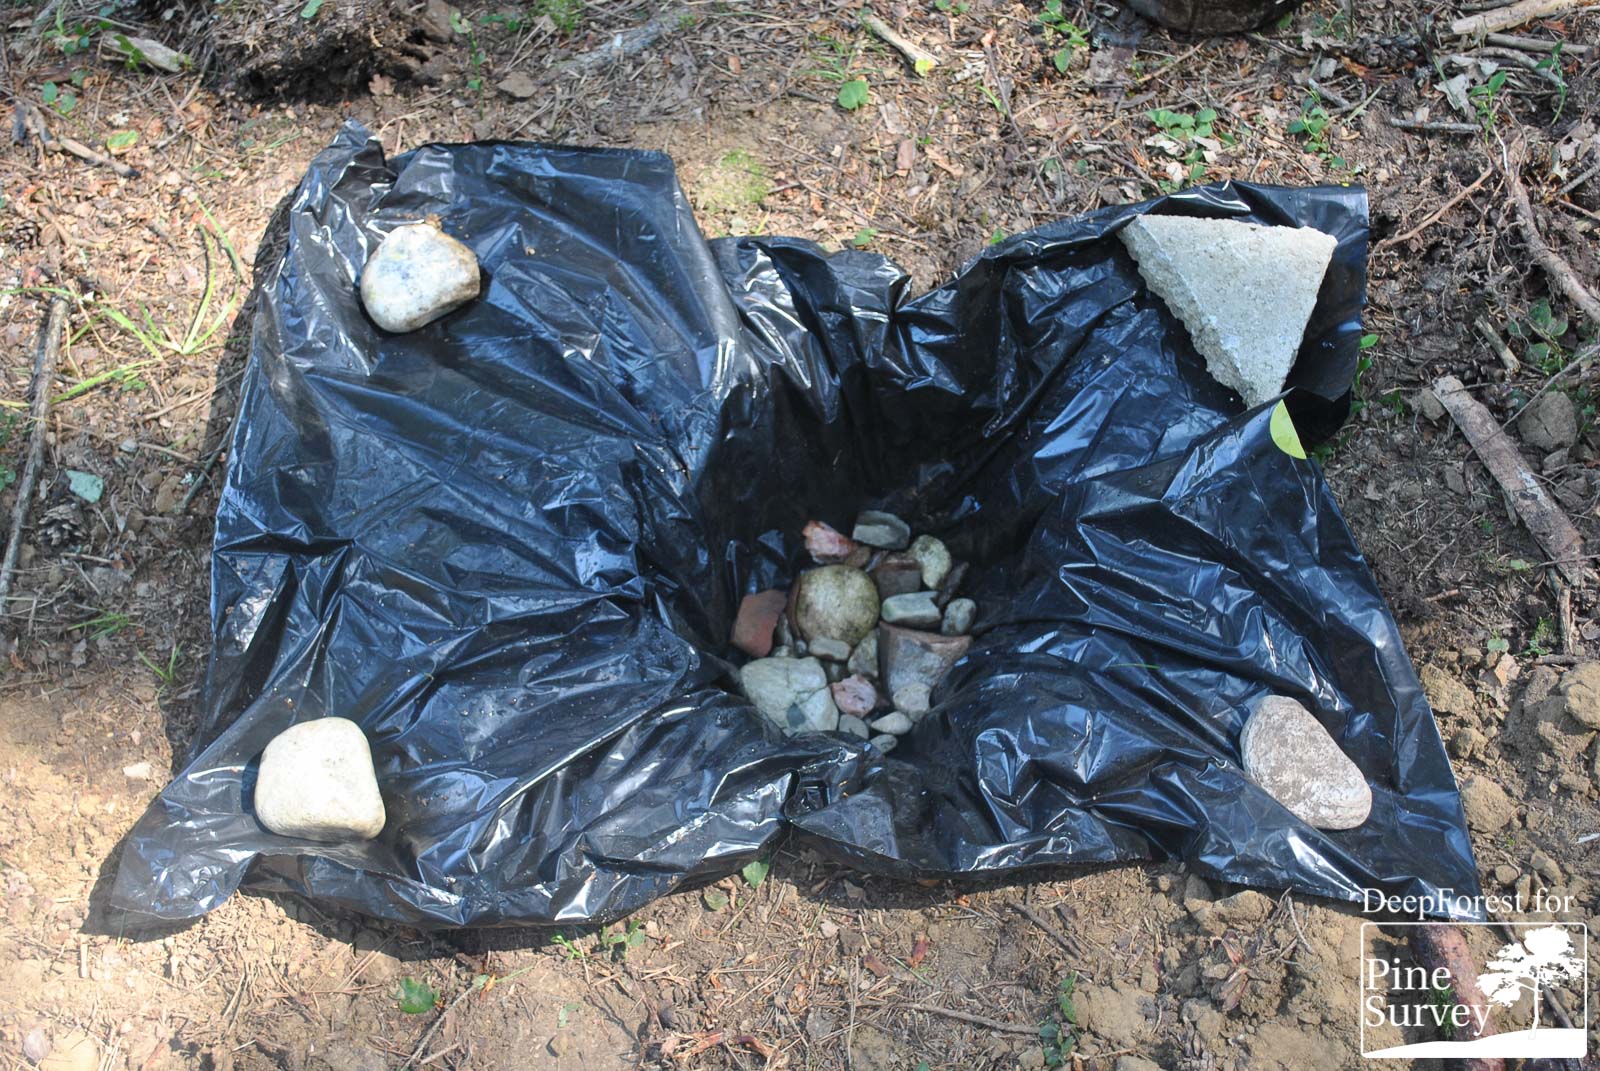
- Then, I started out and collected some stones, around 10 to 15 with a size of my fist and 4 bigger ones. It was no problem to find them near the shore of the pond. The bigger ones I carried to the hole, the others I placed in the blaze of my burning campfire. I would need them later. Now, I needed one of my most beloved “outdoor equipment” from my survival gear – an ordinary black garbage bag (I’m also planning to do a review on the role of garbage bags for outdoor and “survival” situations – this is no joke, the possibilities of these large plastic bags are nearly endless, and really worth a long review!). I placed the garbage bag into the hole, in a way that the bottom and the sides of the hole are completely covered by the bag. The heavy stones were used to fix the ends of the bag at the edges of the hole, so that the bag could not sink in the hole.

The prepared cooking pit
- Now, I needed another search trip – I collected a small bag full of very small pebbles, approximately 0,5 cm in diameter, with no sharp edges if possible. I placed them in the pit, in a way that they covered all of the bottom. Now, my cooking pit was nearly completed – all I needed now, was water. I collected some with the plastic case of my survival gear and filled the pit with it.
Now, finally, I had some time to rest by the fire. After around 20 minutes, I took a look for the stones in the fire. They had heated up in the meantime. “Hot stones” are also an outdoor method you should keep in mind – they can be useful for many, many things. Just to mention some of them, besides cooking: you can use them to heat your tent or emergency shelter (they can even be used as “floor heating” for some shelter types made with rescue blankets!), can help to keep a hypothermic person warm, or they can even serve as a “carry-on oven” for long trips in the cold (be sure to also read a review on this “tool” here!).
With the help of two sticks, I poured the hot stones out of the fire – they were way too hot to touch them directly, even with my gloves. These hot stones would serve as some kind of “immersion heaters” for my cooking pit. Slowly, I placed them in the water of the pit, on the bottom, on the small pebbles, NOT on the foil of the garbage bag. This is the reason why the bottom of the pit should be flat – then you have more space for your “hot stones” and they will not touch the plastic foil on the sides.
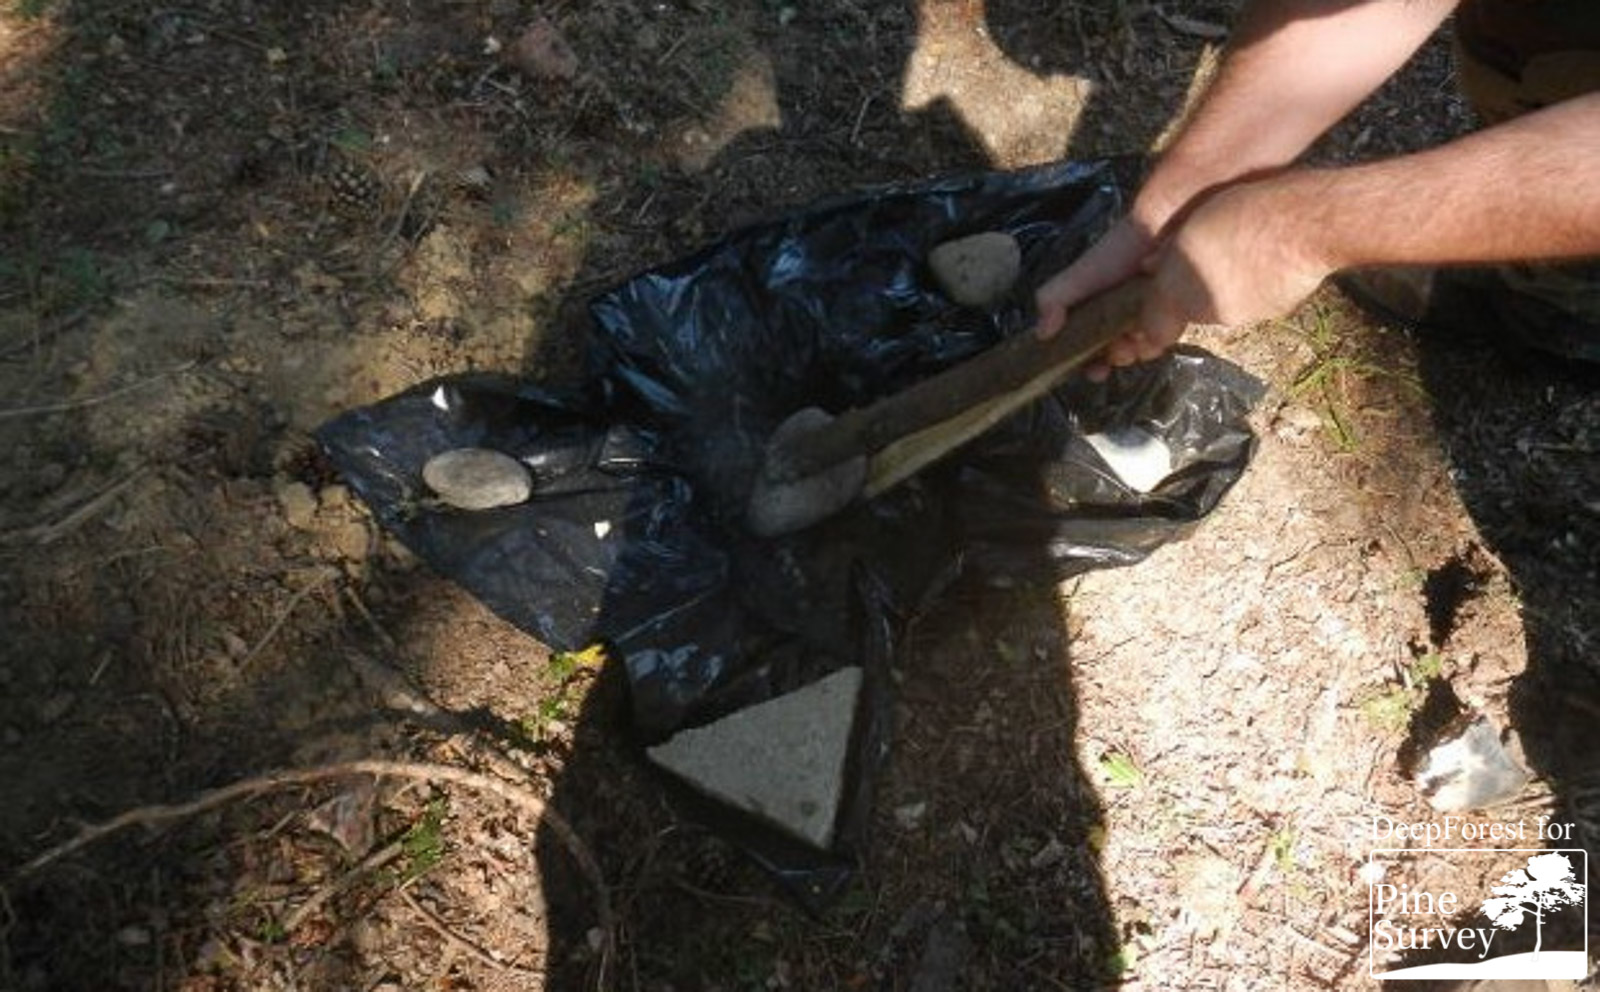
Putting the hot stones into the pit
The stones (I have learned my lessons in thermodynamics!) emitted the heat to the much colder water, and the water slowly heated up. After using 15 stones, the water nearly boiled. A few hot stones more, and I had boiled the water long enough to be purified. I let it cool down, and could finally enjoy some good drink with my “wilderness meal”, looking at a nice sunset near the pond.
The important points of this method
The cooking pit is a good idea not only for purifying water, but also for cooking other things like soups, stews or tea. It can also come in handy when you need hot water to prepare “outdoor meals” from bags.
The most important thing to think of: Always be careful to place the hot stones only on the small pebbles at the bottom – because otherwise you would damage the plastic foil. A problem you don’t have with the wood and clay version (we’ll talk about these alternatives later in detail).

The boiling water…
To heat up the water, it is recommended to always use about three to four stones at a time, then remove them with “clean” tools – to prevent overflow and too much stones in the water. After removing the cooled stones, add new, hot ones.
It is a good idea to clean the stones after removing them from the fire. Just pour some water over them. They will not lose much heat, and you will not have the ashes and dust from the fire in your drink or soup.
Alternative construction methods – wood and clay
As with many methods and tricks, the more suitable materials you have, the easier it is to construct them. But how to prepare a cooking pit without a plastic foil available?
As always, it just takes some knowledge on “natural” materials and resources and some know-how to find another way. Regarding a cooking pit without plastic foil, there are (from my point of view) two alternatives: Using a wooden log and, if available, loam soil. The woods I’m usually around for practice, I’m lucky to have both possibilities. Therefore, I had enough opportunities to try these two ideas out.
The Wooden Cooking Pit
First, the “wooden” cooking pit. In principle, this method is rather simple: you have to find a wooden log or thick branch big enough to carve a “bowl” in it. Basically, it is not necessary to search for some “special” type of wood, for example a very hard one – every log big enough will do. It is a real advantage to have a big log that was sawed in pieces of 20 to 30 cm in length – having a flat side makes the carving easier. But it is not necessary – you can also carve a bowl in the side of a big branch or log – it just takes a little more effort to get a bowl deep and wide enough to contain enough water.
And the carving really takes some time – when you only have a knife, you’ll need at least 3 to 5 hours (maybe even more, depends on your practice, the wood, the knife used etc.). When you have carving tools available, the work is of course much easier and faster. But I don’t carry them around usually, therefore the chances are high that I’ll not have them when I need them – the odds are higher that I have a can or a bowl with me, to be honest. Thus, it is a lot effort to carve a wooden “cooking pit”. And the second problem is that some of the water collected in the wooden cooking pit will sink into the wood and will therefore be lost for you. The advantage is that when you are finished with the carving, no further working steps and materials are necessary. The wood will withstand the hot stones without any problem.
The Clay Cooking Pit
Due to the fact that the “wooden” alternative is quite a lot of work, I began to look for alternatives soon – and found a solution using loam from the ground. In the woods I’m usually practicing, when you dig into the ground, you have about 5 to 10 cm of humus soil, and beneath you can find light-brown loam soil. This natural loam was used in earlier times to burn bricks for the houses in close vicinity of the woods – and is indeed a perfect “low-tech-material” to work with.
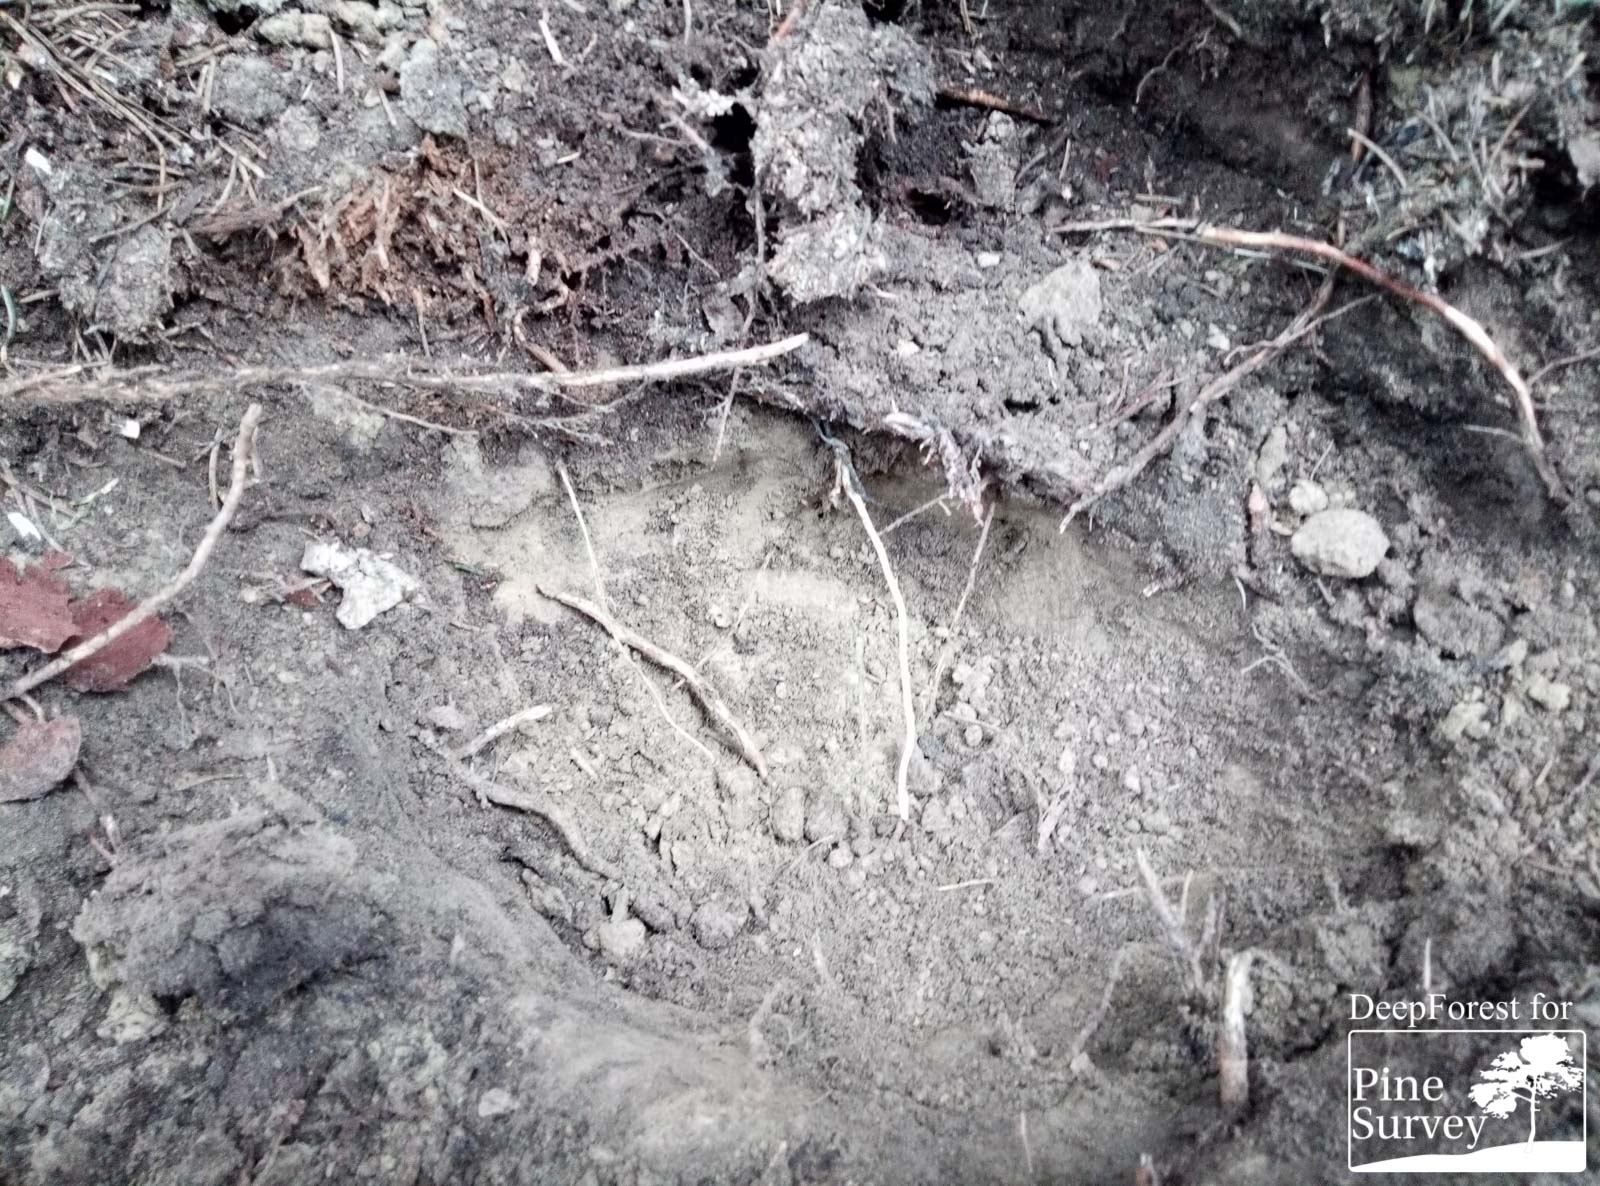
Looking for clay underneath the forest soil
If you mix the dry loam with some water, you get some sticky clay easy to form. But how to burn it? When we want to use the clay for preparing a cooking pit, there is an easy solution – you burn it right in the pit. Here is how it can be done.
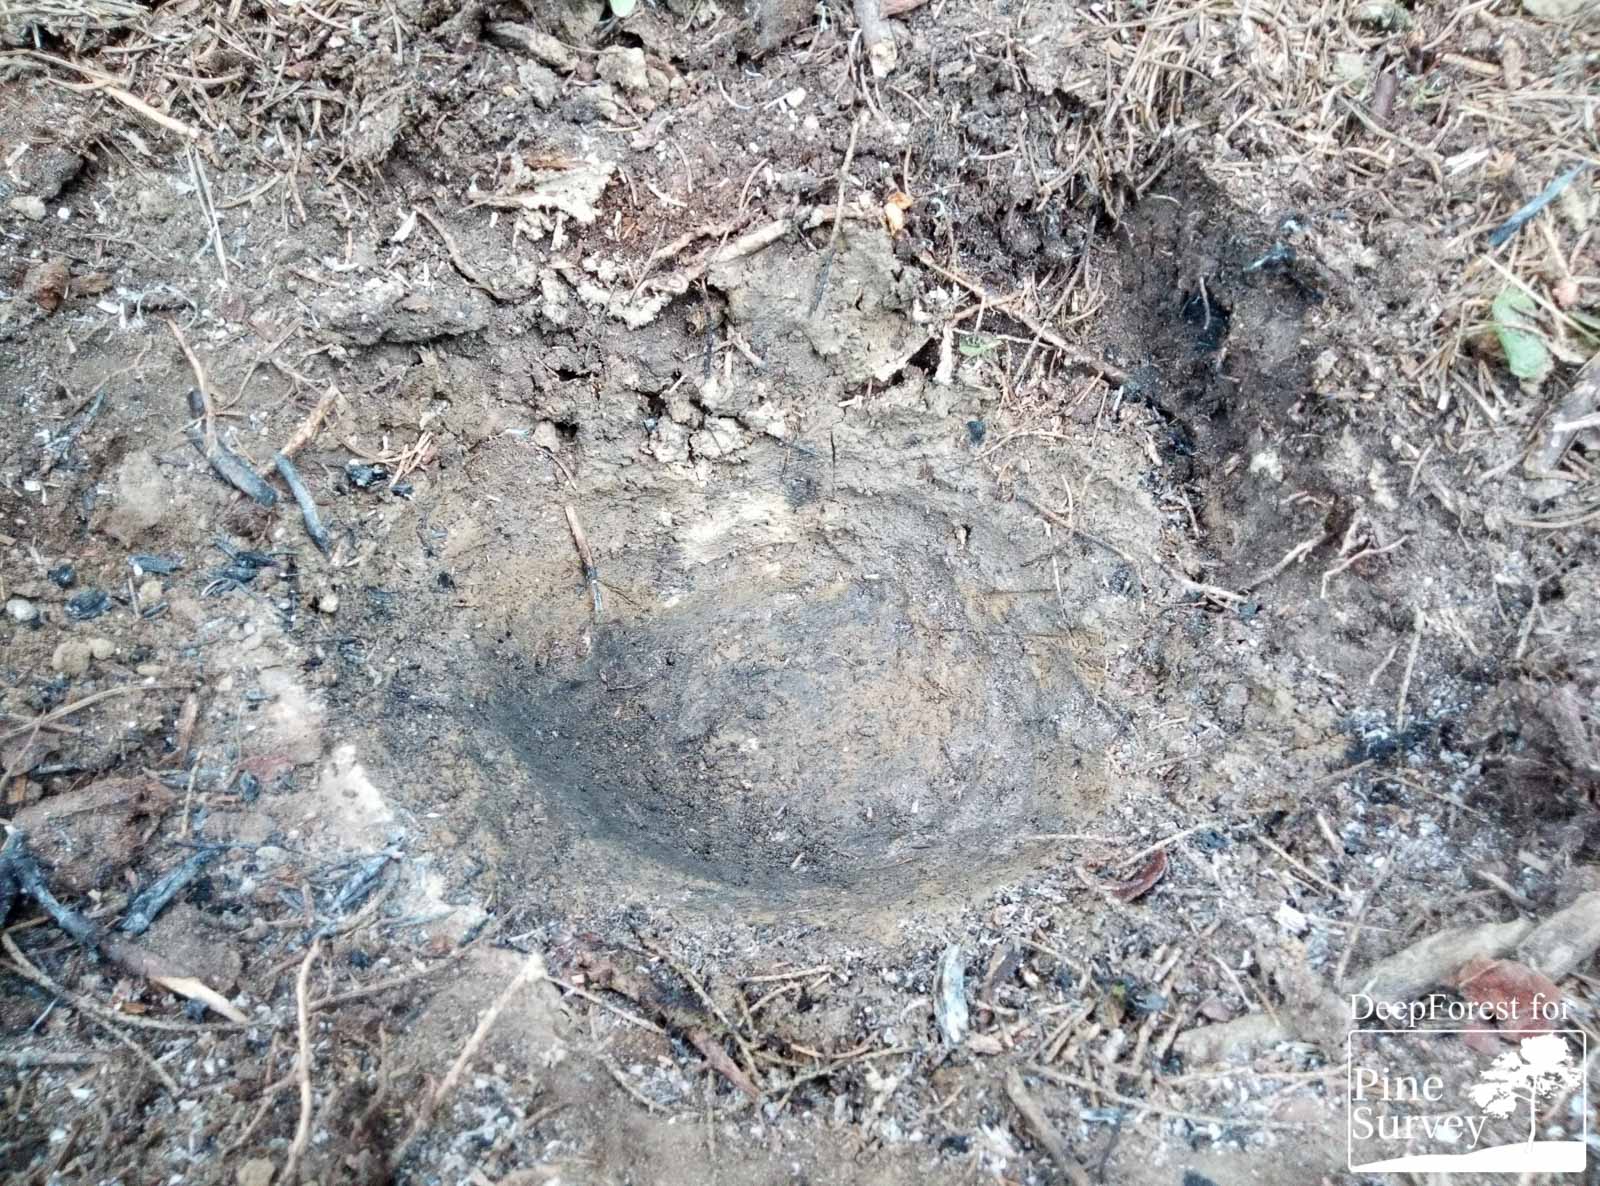
- First, I dug a hole like for the “common” version of the pit with the plastic foil. During this, as I reached the first layers of usable loam, I already collected the loam besides the pit for further use. Then I dug a second hole nearby, just as a source for more loam soil.
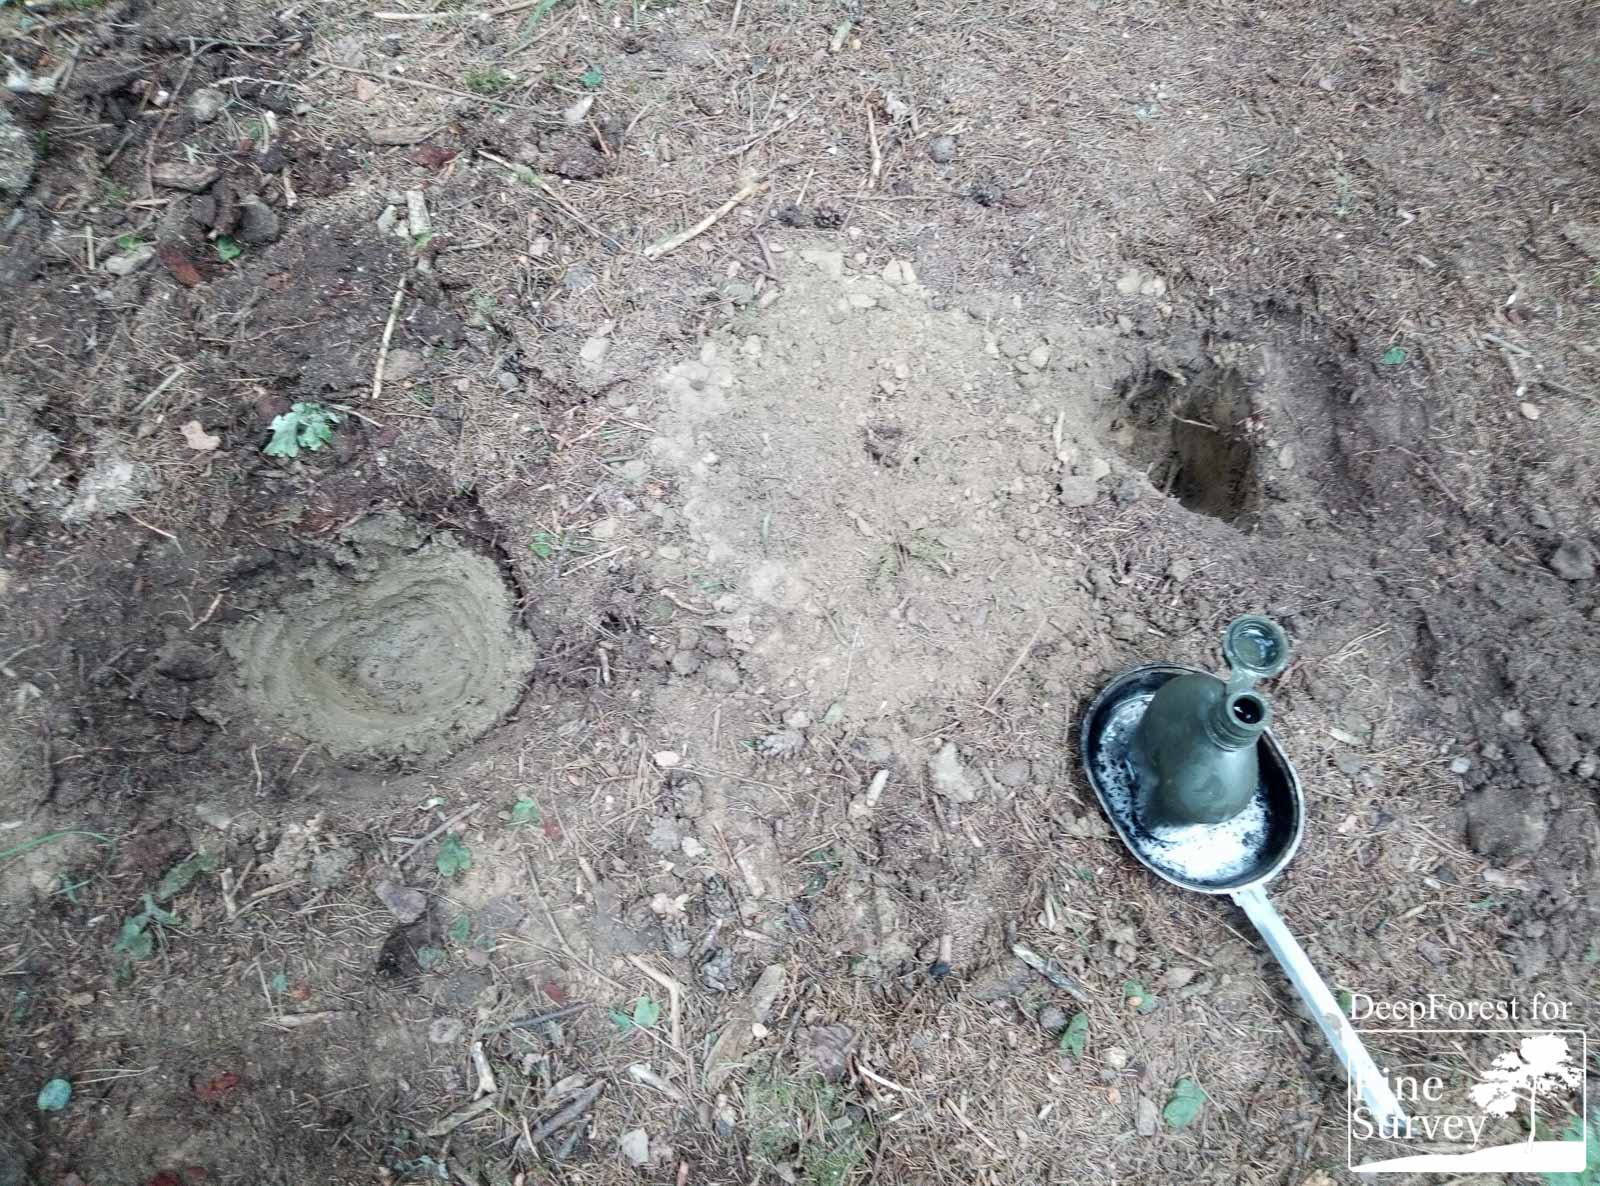
Preparing the cooking pit
- As soon as I had collected enough material, I went down to the nearby pond and got some water with my plastic canteen (which is, unfortunately, made out of plastic – and therefore not suitable for cooking and boiling. I know, with a metal canteen, all this work would not be necessary!). Besides the pit, I mixed the loam with the water to get the clay I needed. Now, I used the clay to cover the walls and the ground of the pit with a layer, 1 cm thick at least. It can be tricky to accomplish that, as the clay also sticks to your fingers. Here, a trick that bakers use comes in handy: When they have to form bread and other pastries, they first cover their hands with flour, because then the fresh pastry doesn’t stick to their hands. Thus, before you begin working with the clay, rub your hands with a portion of dry loam soil – it will prevent the wet clay to stick to your hands and makes your work easier.

The Clay cooking pit with the still wet clay walls
- After covering the pit with the clay, I tried to flatten the clay layer as good as possible. It is a good idea to rub your hands again with dry loam before that – otherwise, it can happen that parts of the clay will stick on your hands, the layer gets damaged, and you have to fix the holes.
After finishing the “polishing works”, I had to take care that the clay layer doesn’t dissolve when I fill the pit with water. Also, I wasn’t interested in having clay in my drink. Therefore, the clay had to be burnt to become hard and solid. The easiest way is to light a fire in the hole. I used my shovel to bring some blaze from the camp fire and used it to ignite some small branches. Soon, a nice little fire burned in the pit. I kept the fire for about half an hour, small, but as hot as possible, also using some glowing wood pieces from the bigger fire.

Fire for burning the clay

Burning the cooking pit
I waited until the fire went out, and I cleaned the pit from the remains of the fire as good as possible, but very carefully to not damage the clay layer. As expected, the layer had become very hard, like the inside of a ceramic bowl. In this prepared cooking pit, cooking water with hot stones is no problem at all.
The hardened clay
Just one more tip: If you don’t want to have ashes in your drink (there is no problem to digest some ashes from a fire, as fresh ashes from a fire is the “cleanest”, most sterile thing you can imagine, because no bacteria or virus survives the heat of a fire), just use some water to clean out the cooking pit before first use.
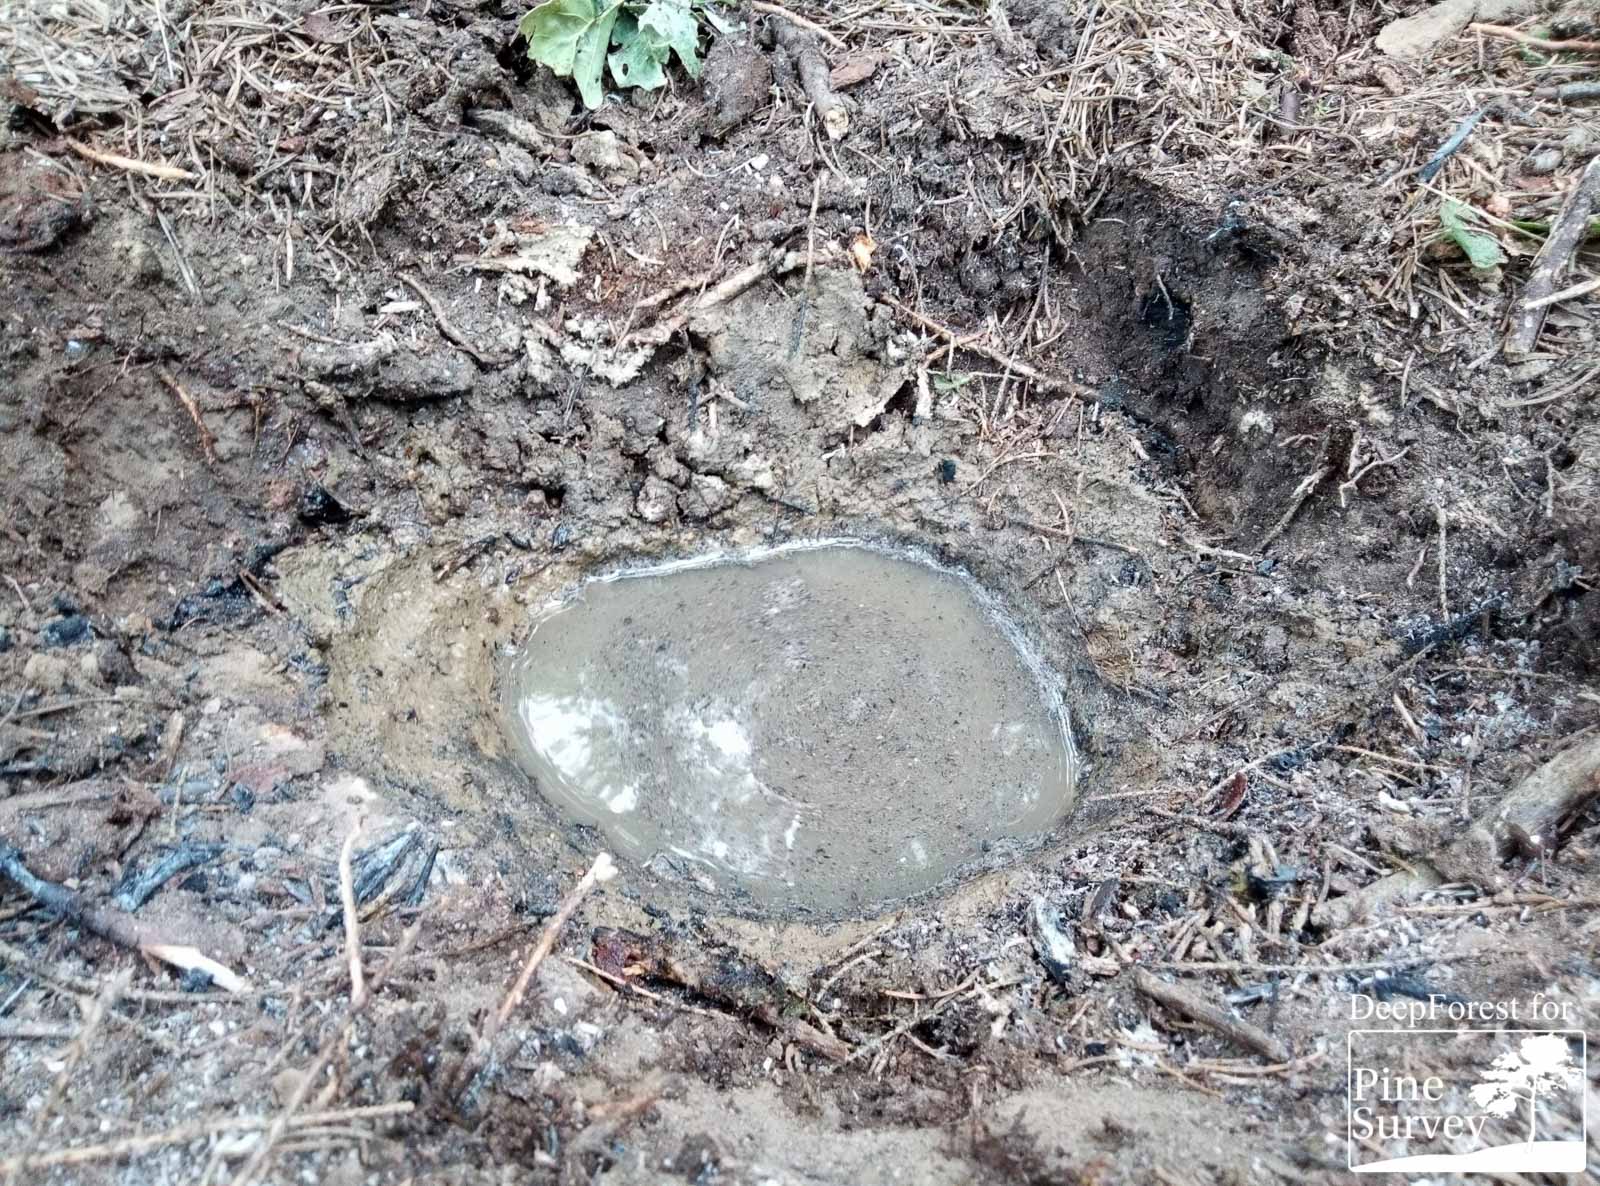
Applying water
This method is, besides the one using a plastic foil, a very good one and means, compared to the wooden alternative, much less effort. But, of course, to use this method, you need suitable loam nearby and this is the major disadvantage. Be assured, ordinary humus soil or earth soil doesn’t work, as you cannot harden it by burning. But if you find loam at the place you are, I would recommend to use this method (and rest assured, there are much more possibilities with this material when it comes to bushcraft – but also this will be the topic for further reviews here).
Conclusion
The cooking pit is a very good basic principle when it comes to cooking or boiling water without metal cans or pots – and as you can use it to purify water for drinking, knowing this method can be a lifesaver. As soon as you understand how it works, it means not much effort – basically. Therefore, I would recommend to always carry a plastic foil (like a rain cover or a garbage bag) with you, as with this, you can build a cooking pit fast and everywhere.
If you don’t have this, look for loam or, in the worst case, a wood log – the last one means much more effort, but it works.
And be assured – it gives you quite a comfort after a long hike in cold weather, when you can sit by your campfire and sip on a portion of your self-created soup out of your cooking pit.
Bon appétit!
No Comment
You can post first response comment.