
In my last review I took a closer look at three different semi-arid, transitional camouflage patterns: PenCott BadLands, Camogrom and Kryptek Highlander. For the sake of readability I split it in two parts – after all I had compiled around 30 pictures.
Part 1 put the various camouflage patterns under absolute extreme exposure, showing the worst case for them to work in their respective environments. Today I want to give you Part 2 of this camouflage field test and present two additional scenarios in which the patterns find more ideal settings.
For introductory remarks on method and disclaimers, please visit Part 1 of the review!
So let us jump right in!
Scenario 2 – The Green Zone/water hole
Most semi-arid patterns were designed for the need of the user to have a camouflage pattern that works in fast changing environments in semi-arid or literally transitional surroundings, e.g. if you are coming from a dry grassland and have to enter a water hole or agriculture area.
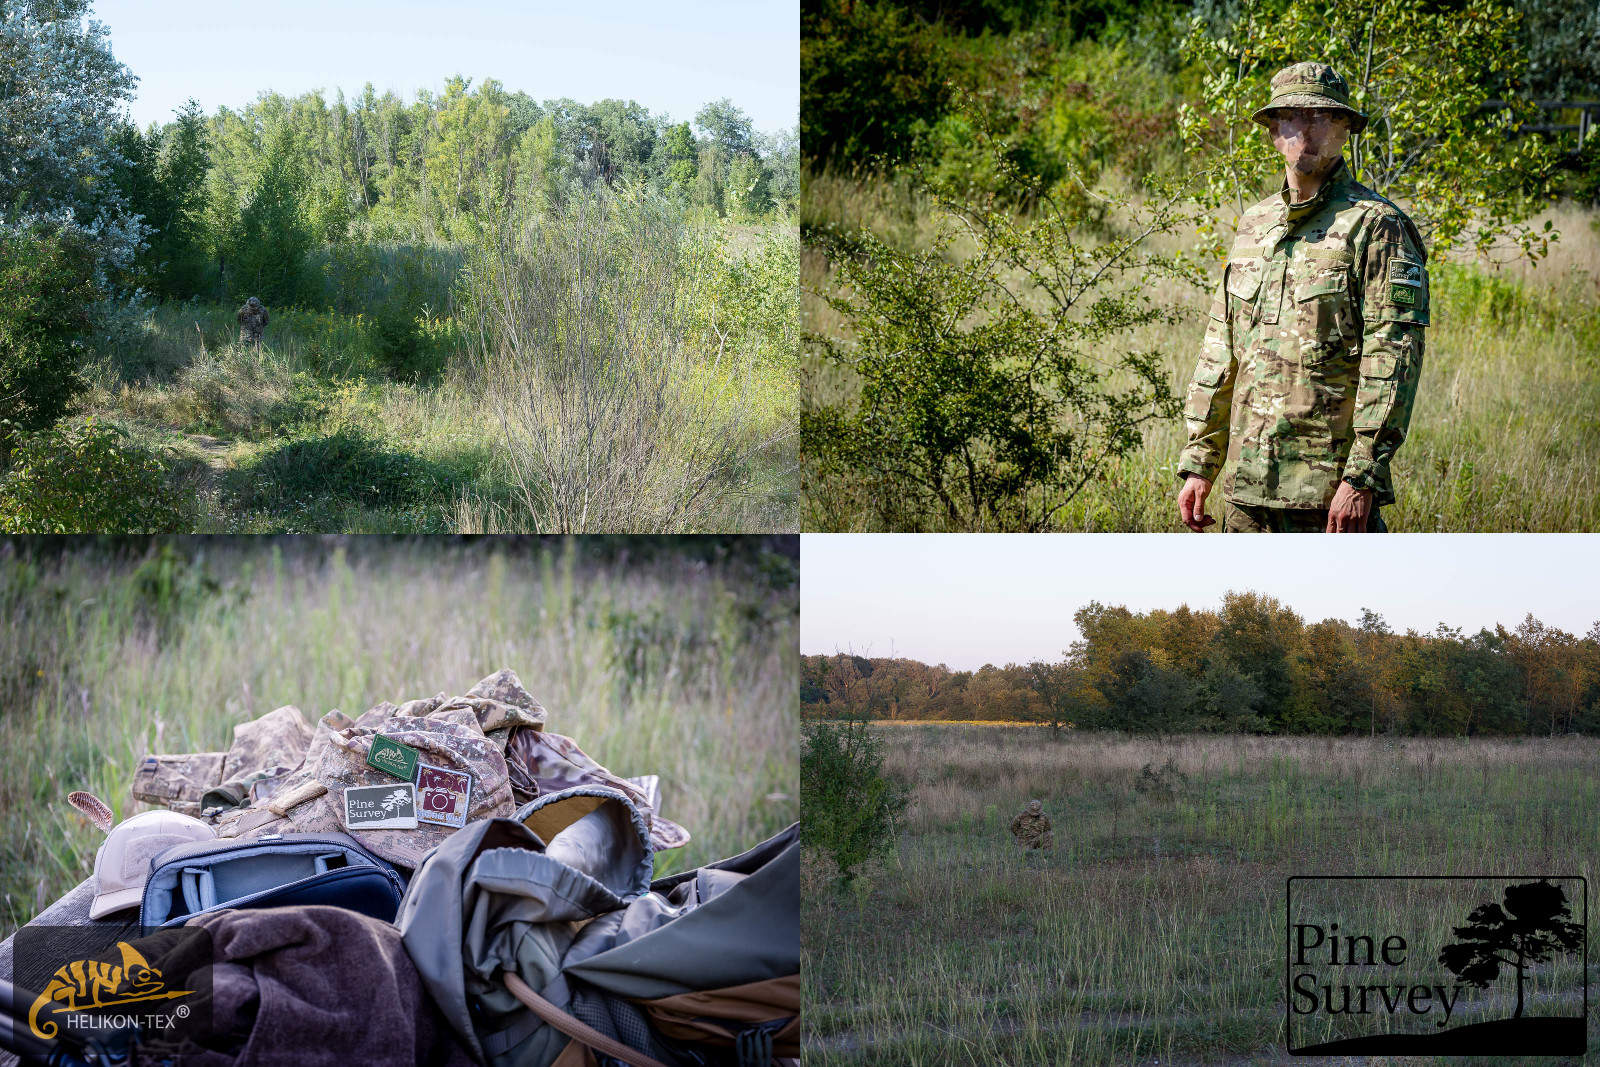
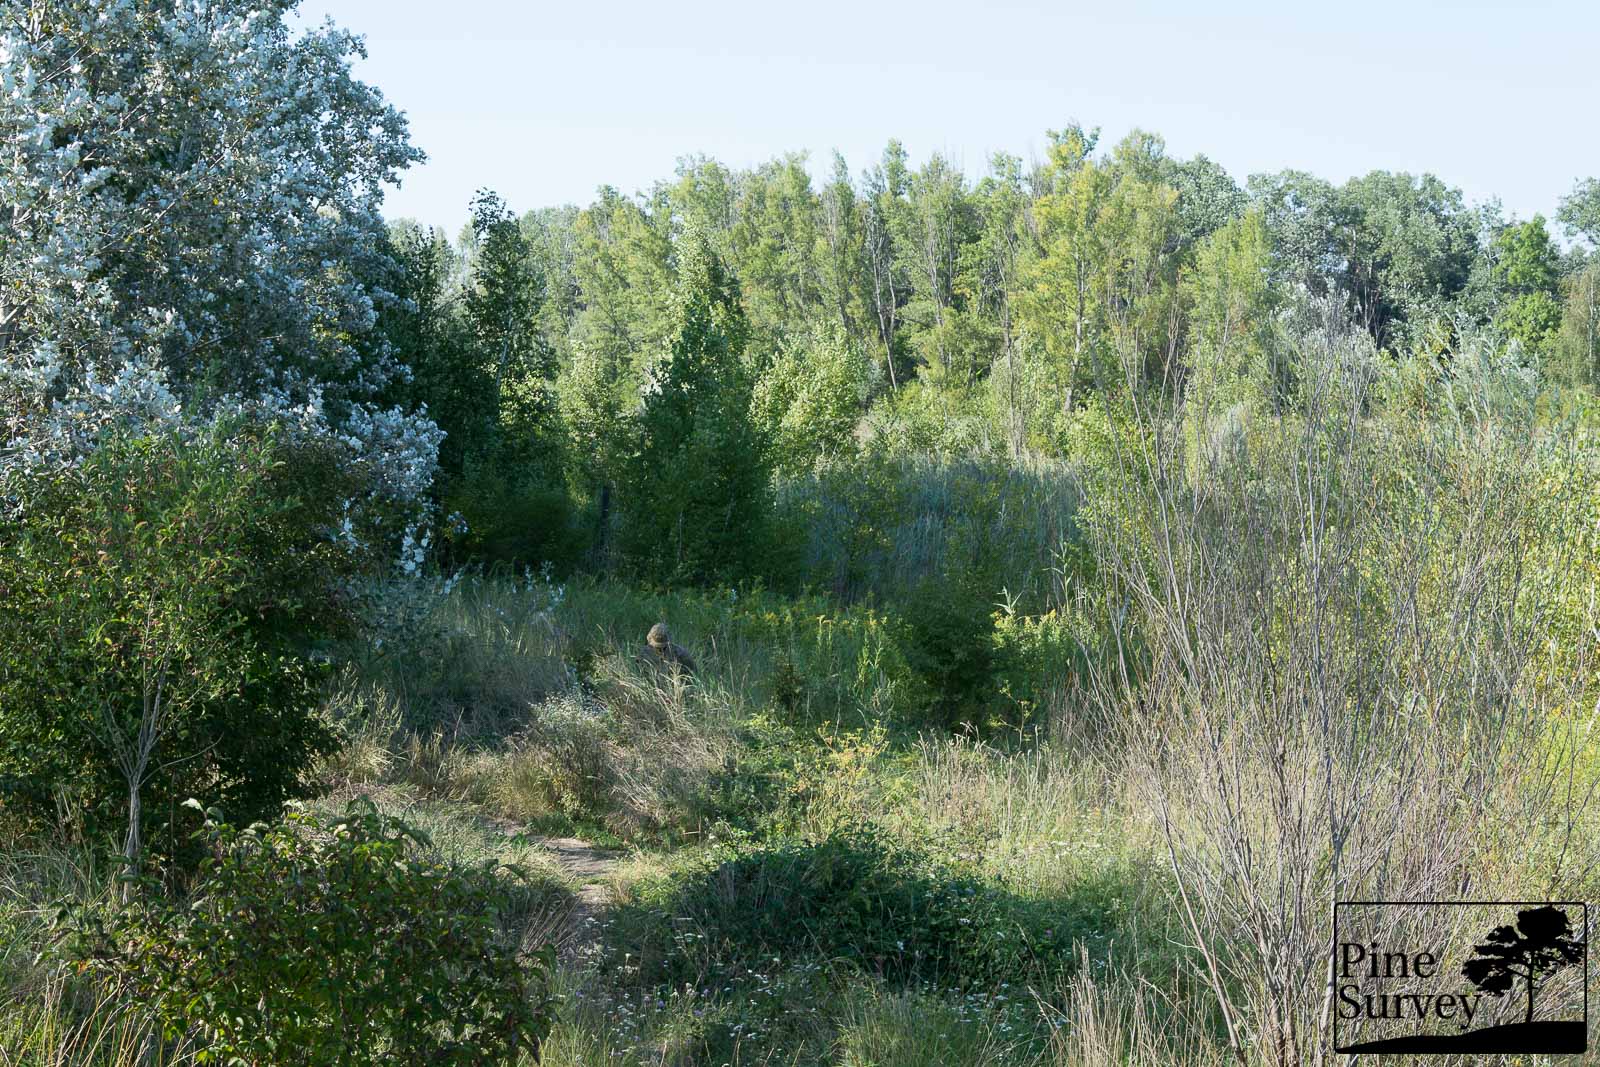
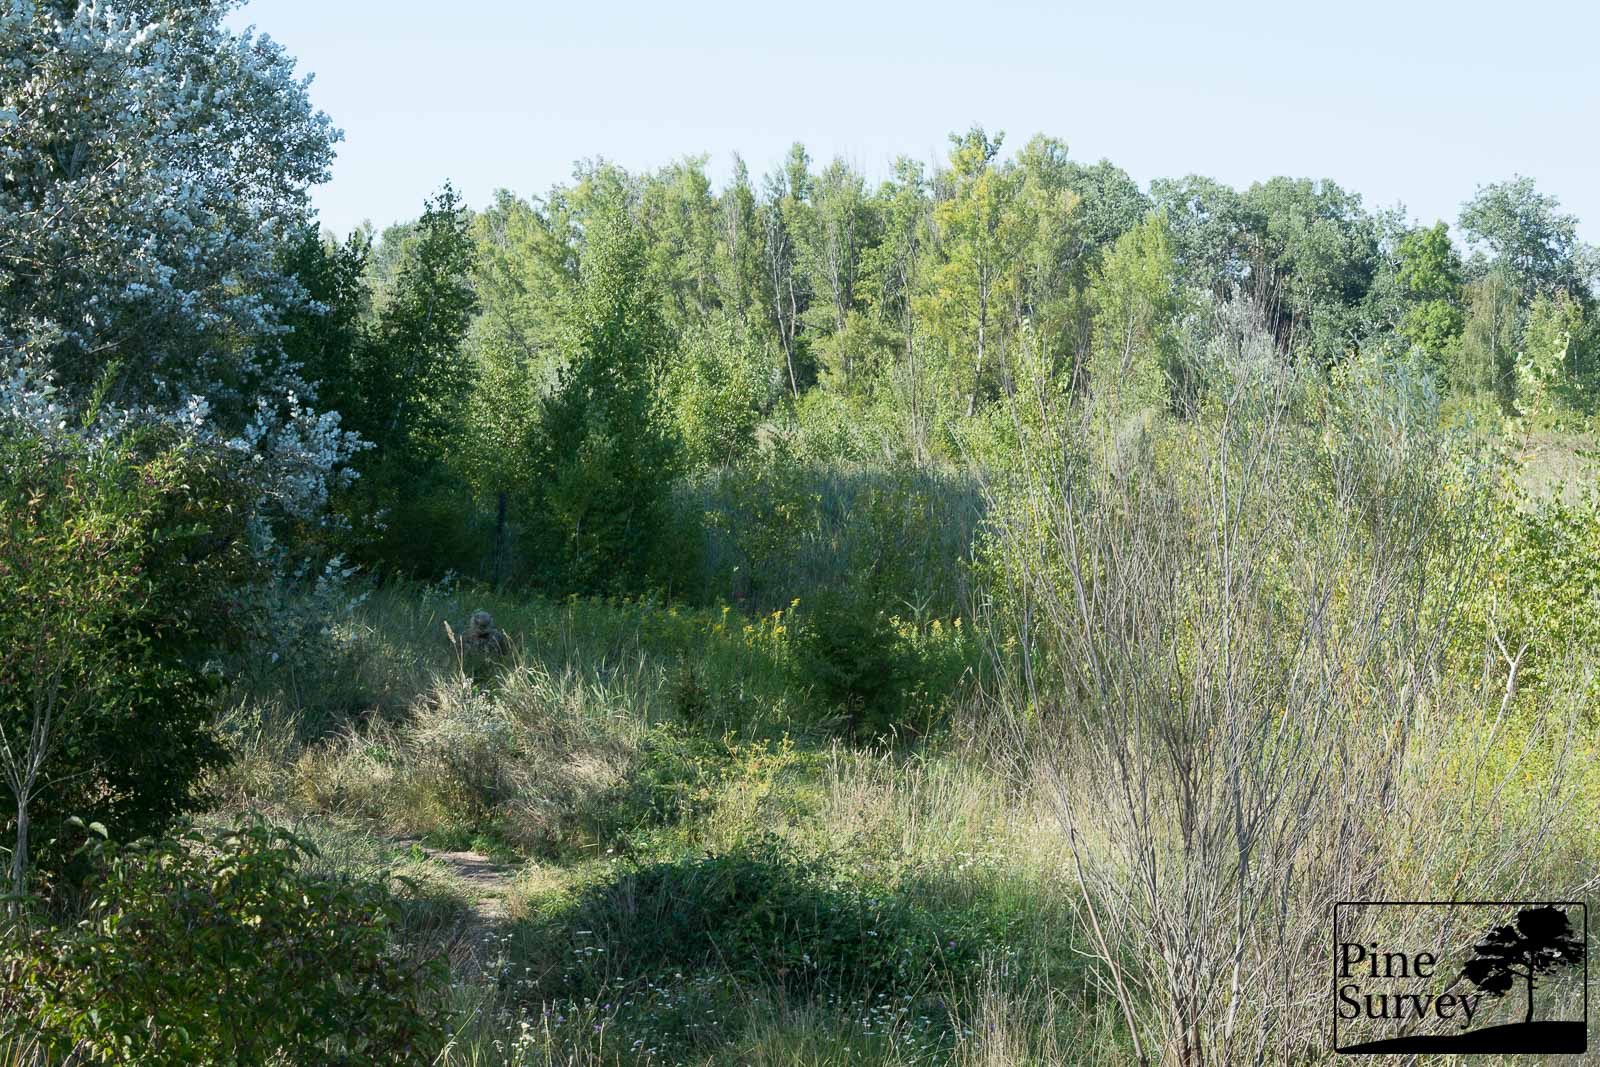
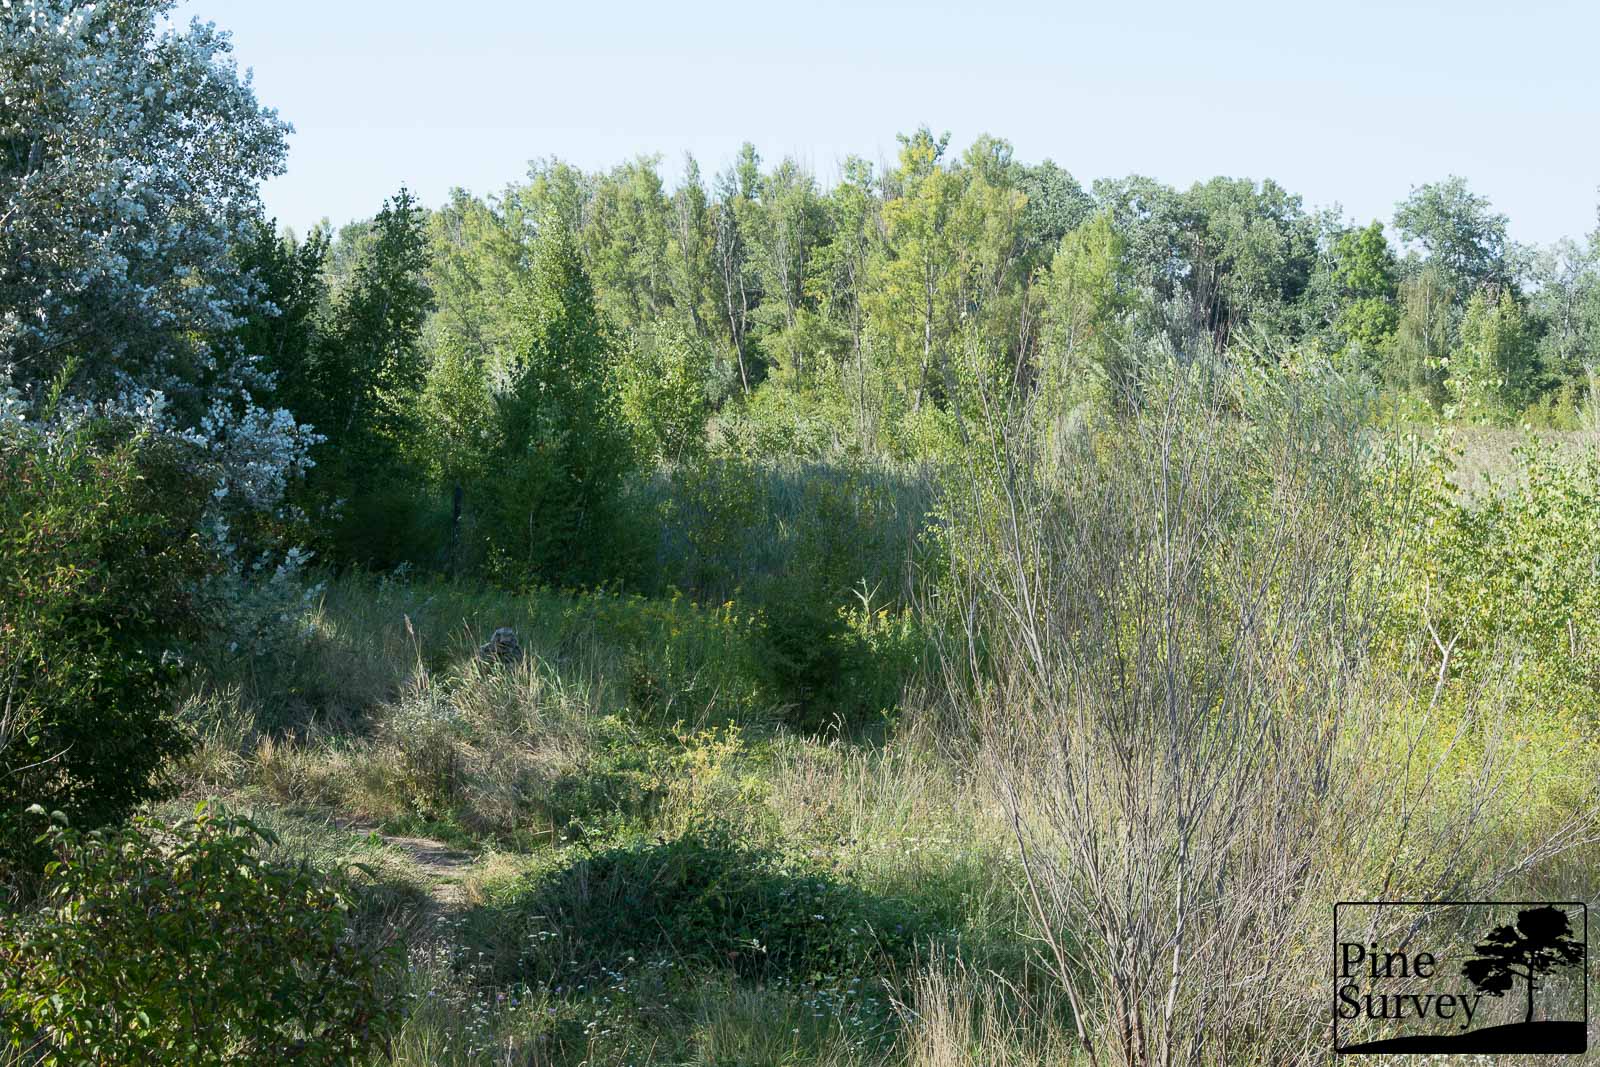
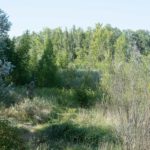
In this scenario we have an elevated position by the camera again, but the user will be in thick undergrowth near wetlands, and trees. The distance is roughly 20m and the patterns are working in the shadows of the trees.
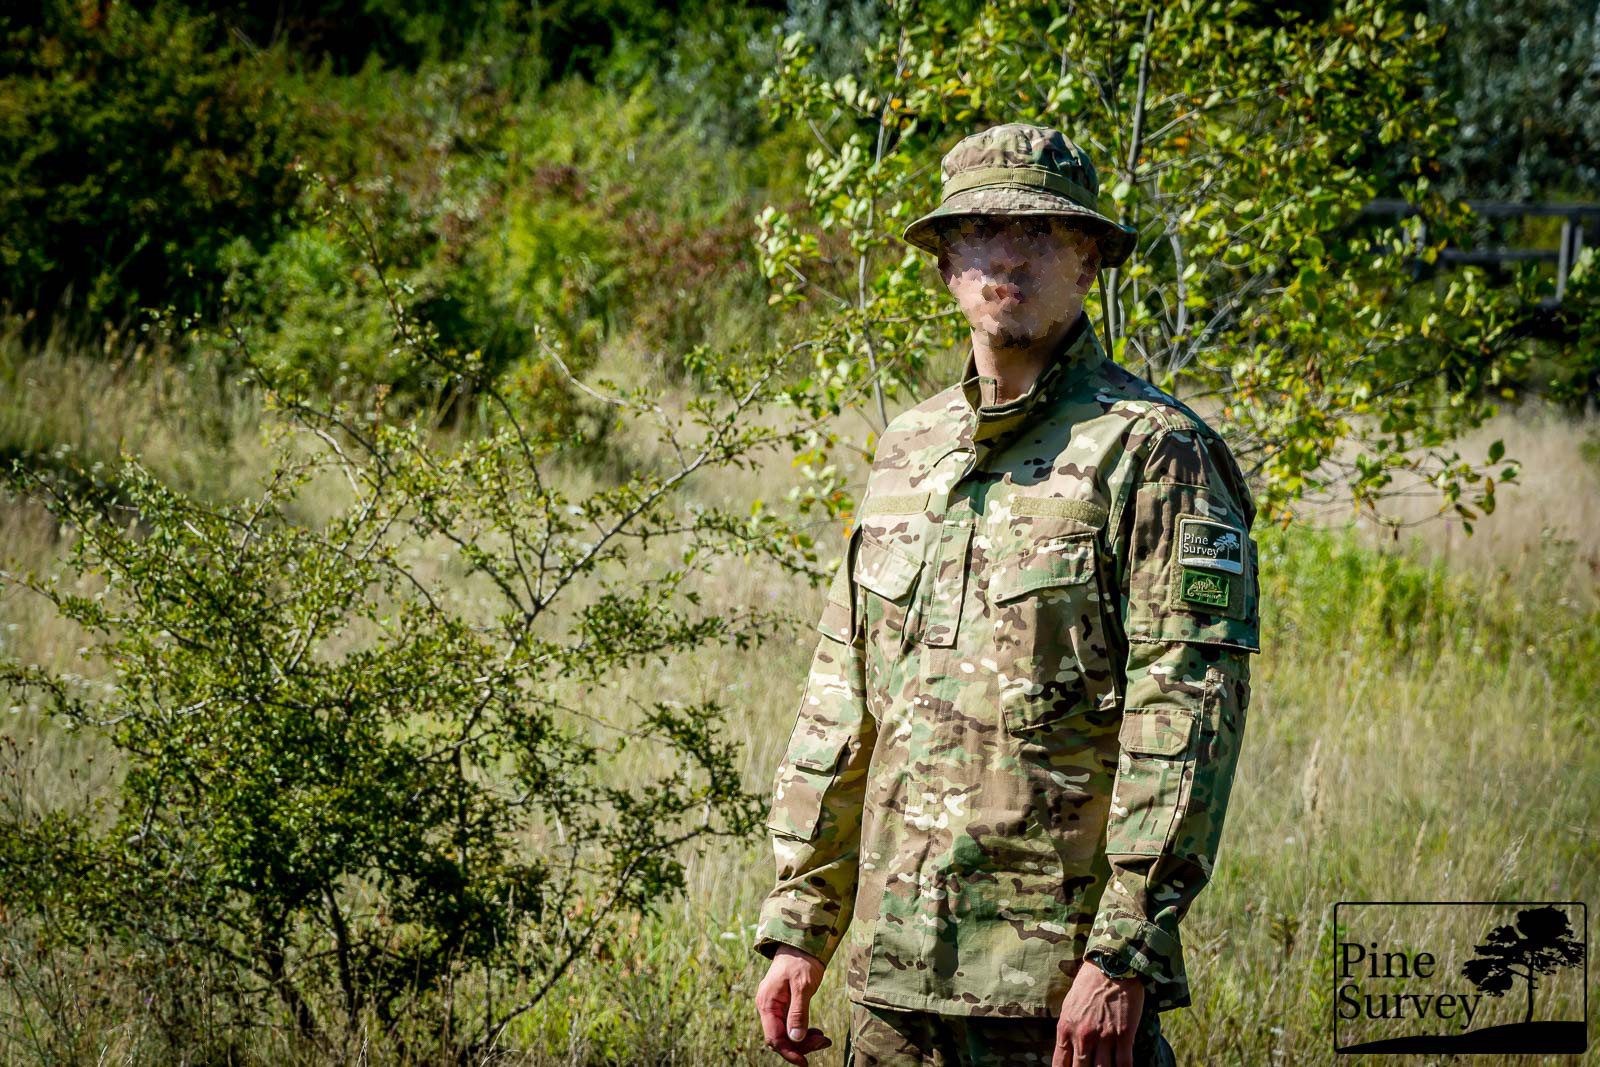
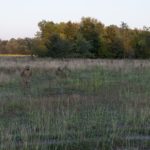
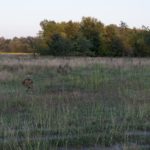
Pattern 1
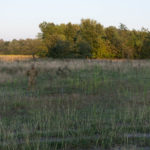
The midi- and macro elements of Pattern 1 are clearly visible and the colors are mixing with the rich colorful environment of this scenario.
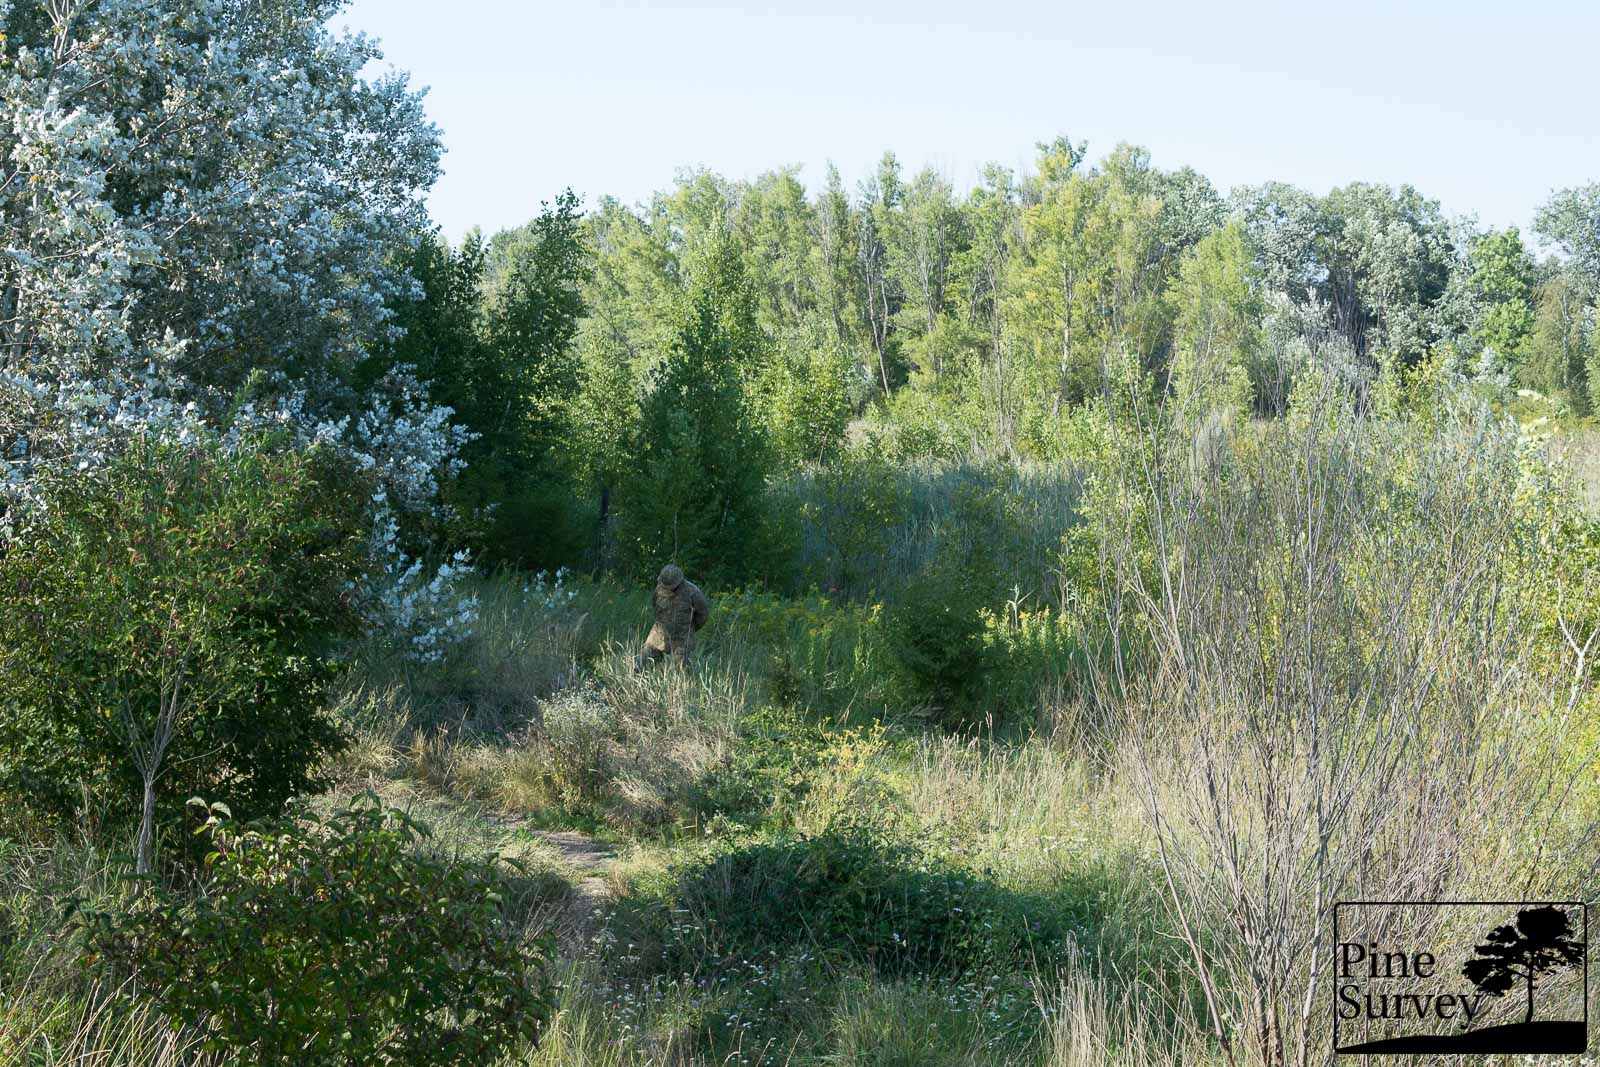
Pattern 1 – standing, 35mm
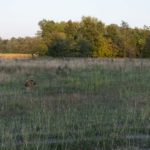
When going into the kneeling position the concealment is very practicable.
Pattern 1 – kneeling, 35mm
Pattern 2
Similar to Pattern 1 you can see the midi- and macro elements of Pattern 2 in this surroundings. The colors blend into the environment, although you can see the darker silhouette because of the solid green background – as with Pattern 1.

Pattern 2 – standing, 35mm
Kneeling improves the situation – obviously – and gives a satisfactory concealment.
Pattern 2 – kneeling, 35mm
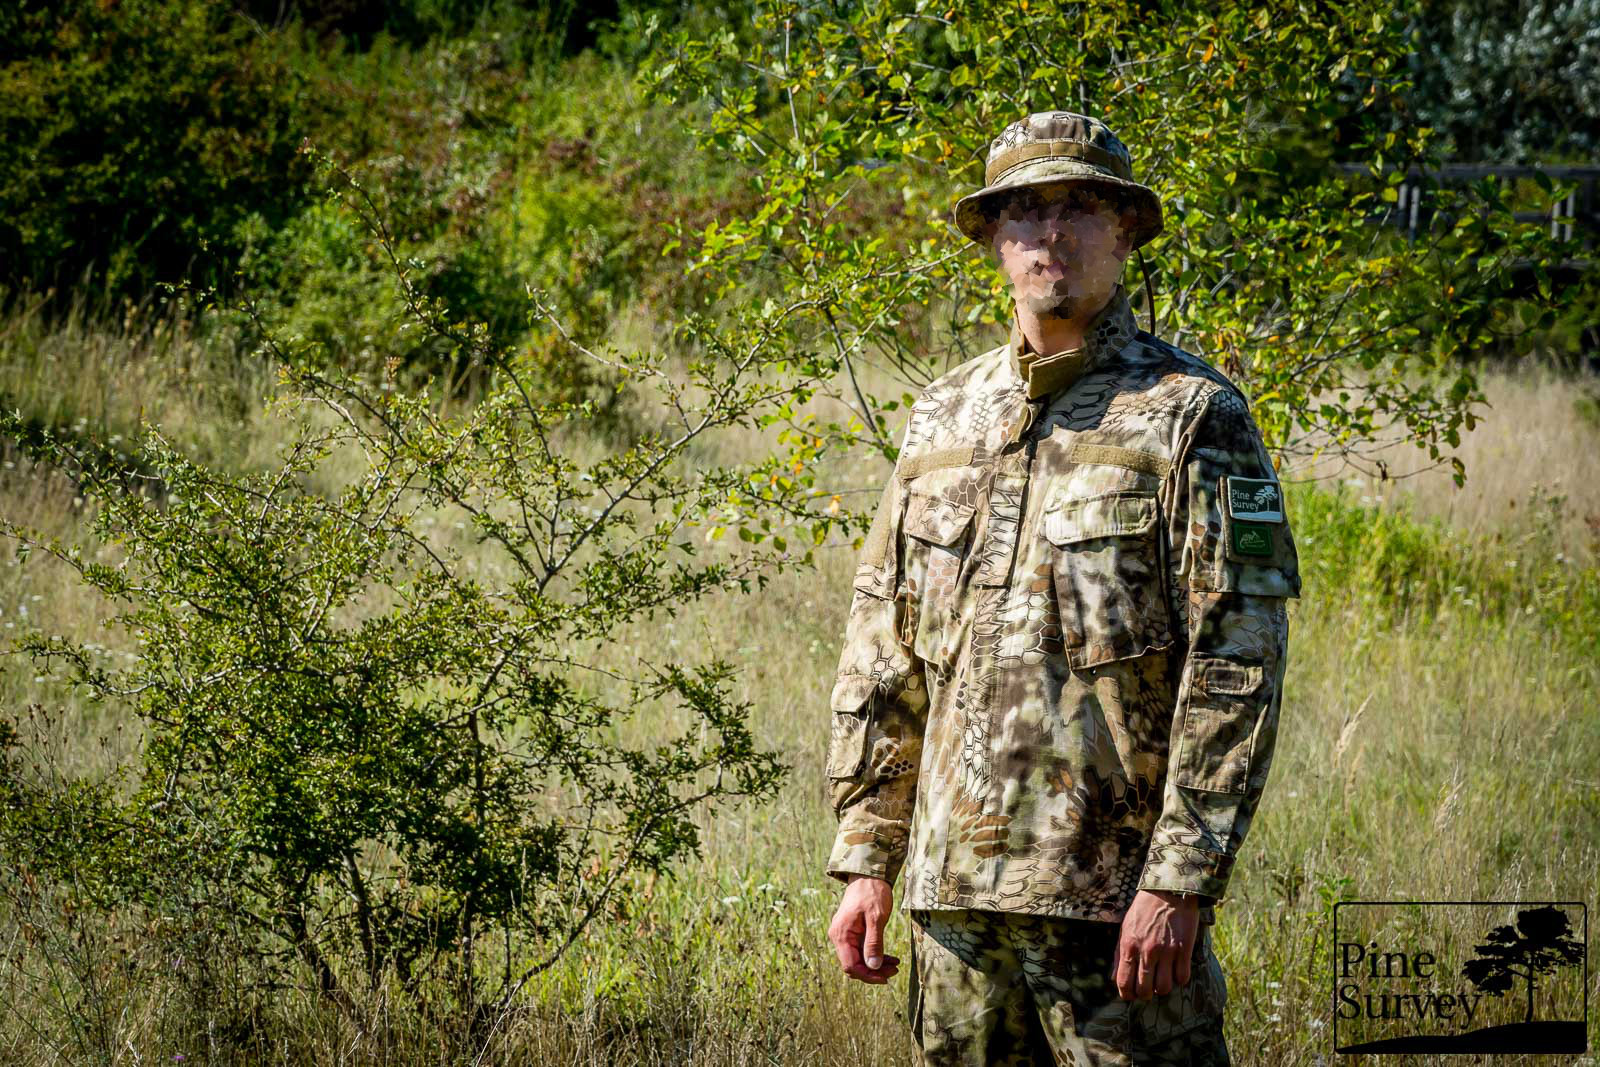
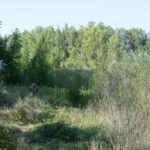
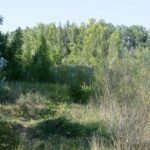
Pattern 3
Since the macro elements of Pattern 3 are the darkest of all three patterns, they are visible the most in this particular situation. Nevertheless the silhouette blends in with its surroundings just like the other patterns, although not quite as well.

Pattern 3 – standing, 35mm
In the kneeling position concealment is working properly.
Pattern 3 – kneeling, 35mm
Conclusion for Scenario 2 – The Green Zone/water hole
Semi-arid patterns have to be the most flexible patterns of camouflage patterns in my opinion. It is no wonder that most of them are considered or designed to be so called “universal” camouflage patterns. The problem to have a suitable concealment option for environments that change from dry and khaki/sandy colors to wet and greenish ones, is hard to tackle.
With this scenario we wanted to give you the extreme opposite situation to scenario 1.5. Situations can change quickly and these three patterns give you an option to work these changes properly – one better than the other. Patterns 1 & 2 managed to blend in better than Nr. 3 when it comes to colors. At the same time Pattern 3 was breaking up the silhouette more aggressively due to its contrasts.
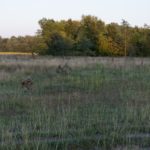
Scenario 3 – The Savanna at dawn situation
Semi-arid and transitional environments differ obviously. The terrain in Central Asia and the Middle East for example is complex enough – try making a sudden jump to Africa! I am not saying my pictures are able to give you a decent comparison to these mentioned regions. But if you get some feeling or a sense of it at least, then I am satisfied.
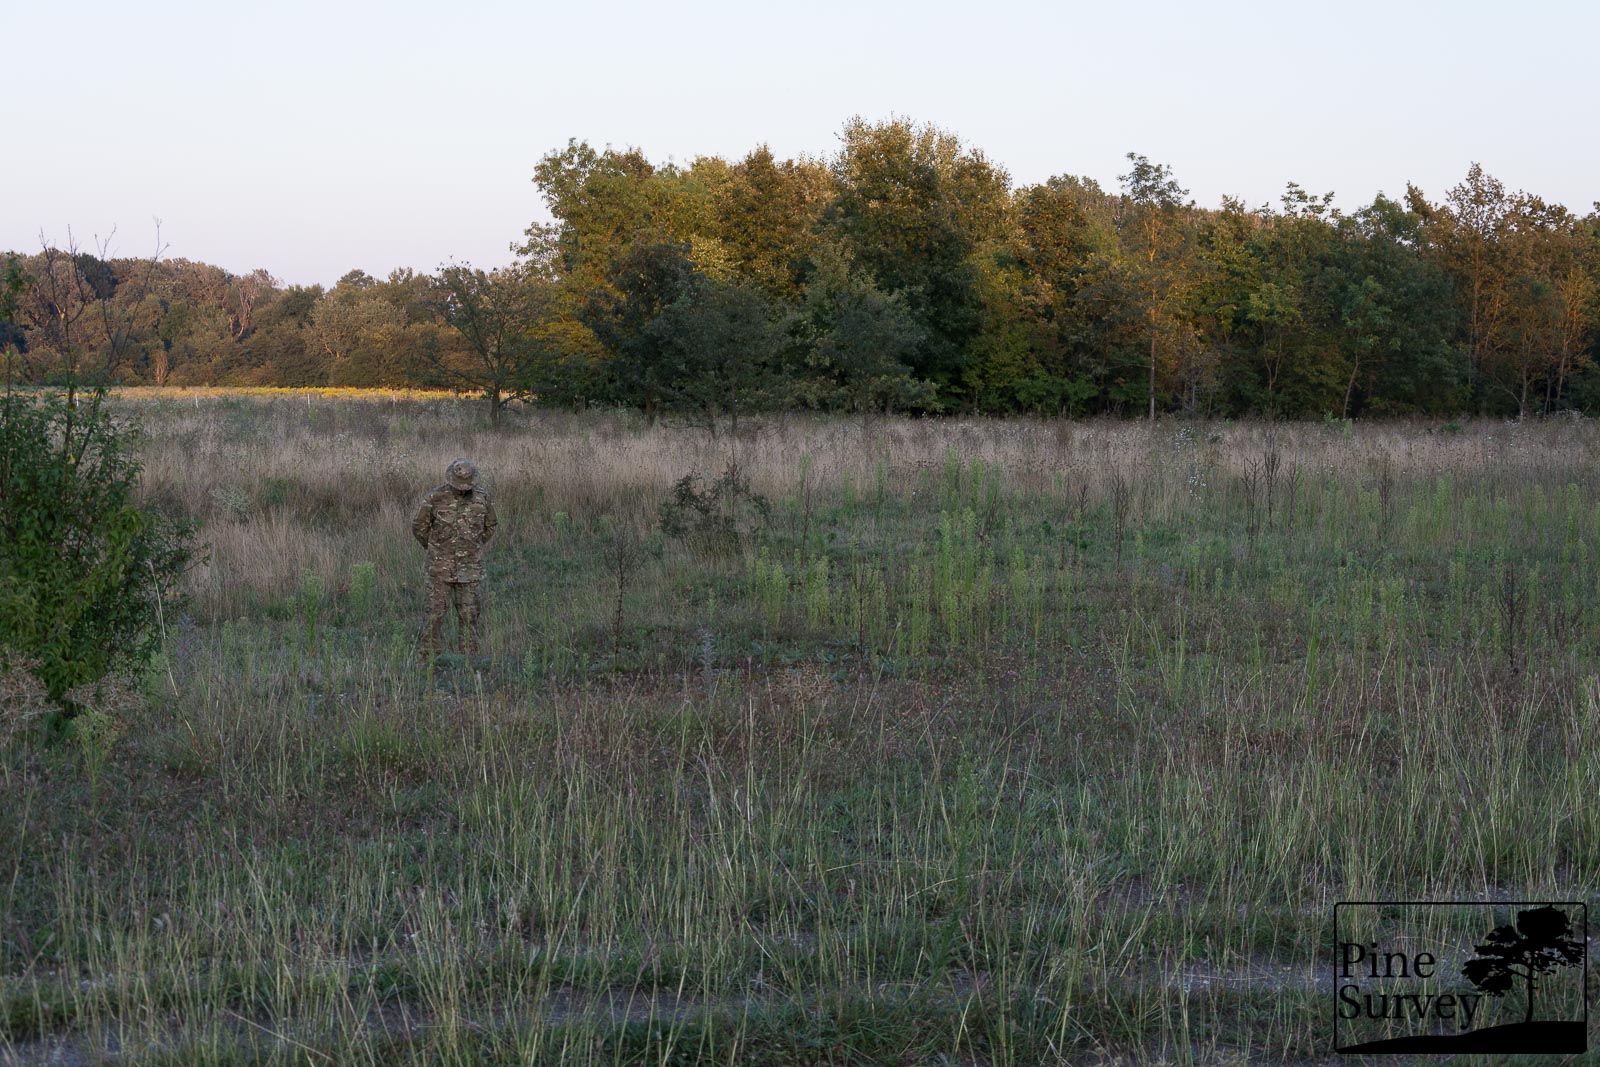
The last scenario is at dawn, in an open field with mixed dry and wet grass and scattered brushwood. The distance to the camera is around 20m as before.
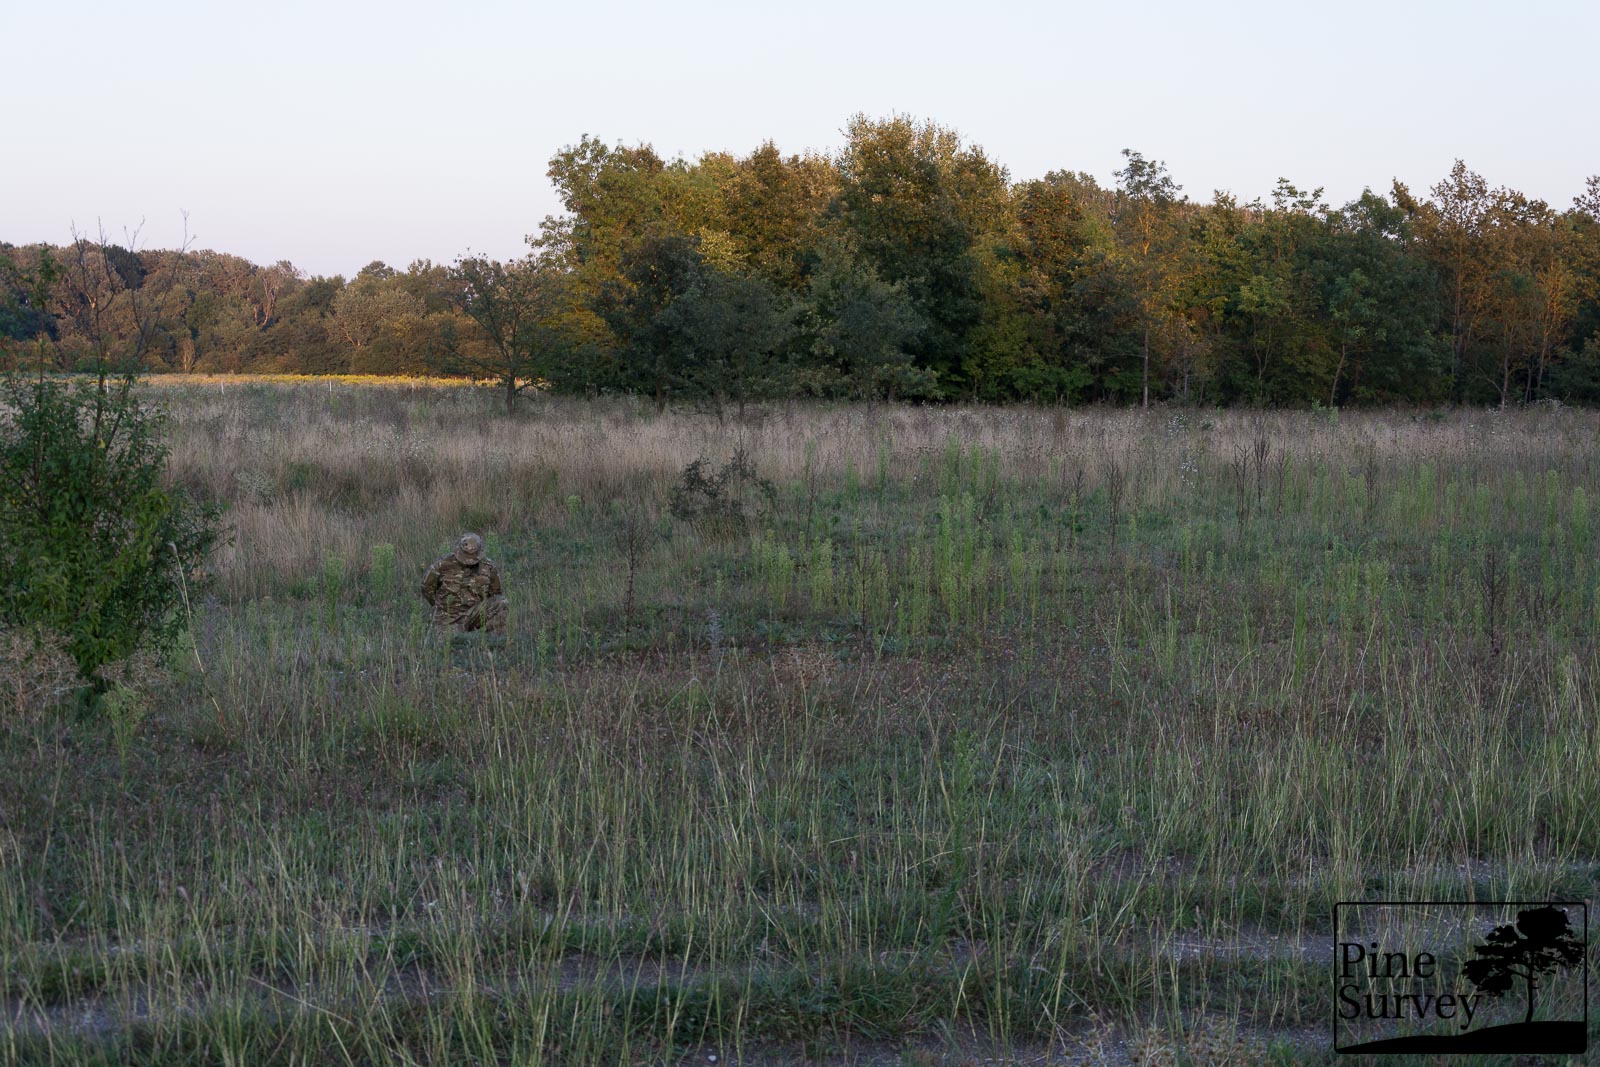
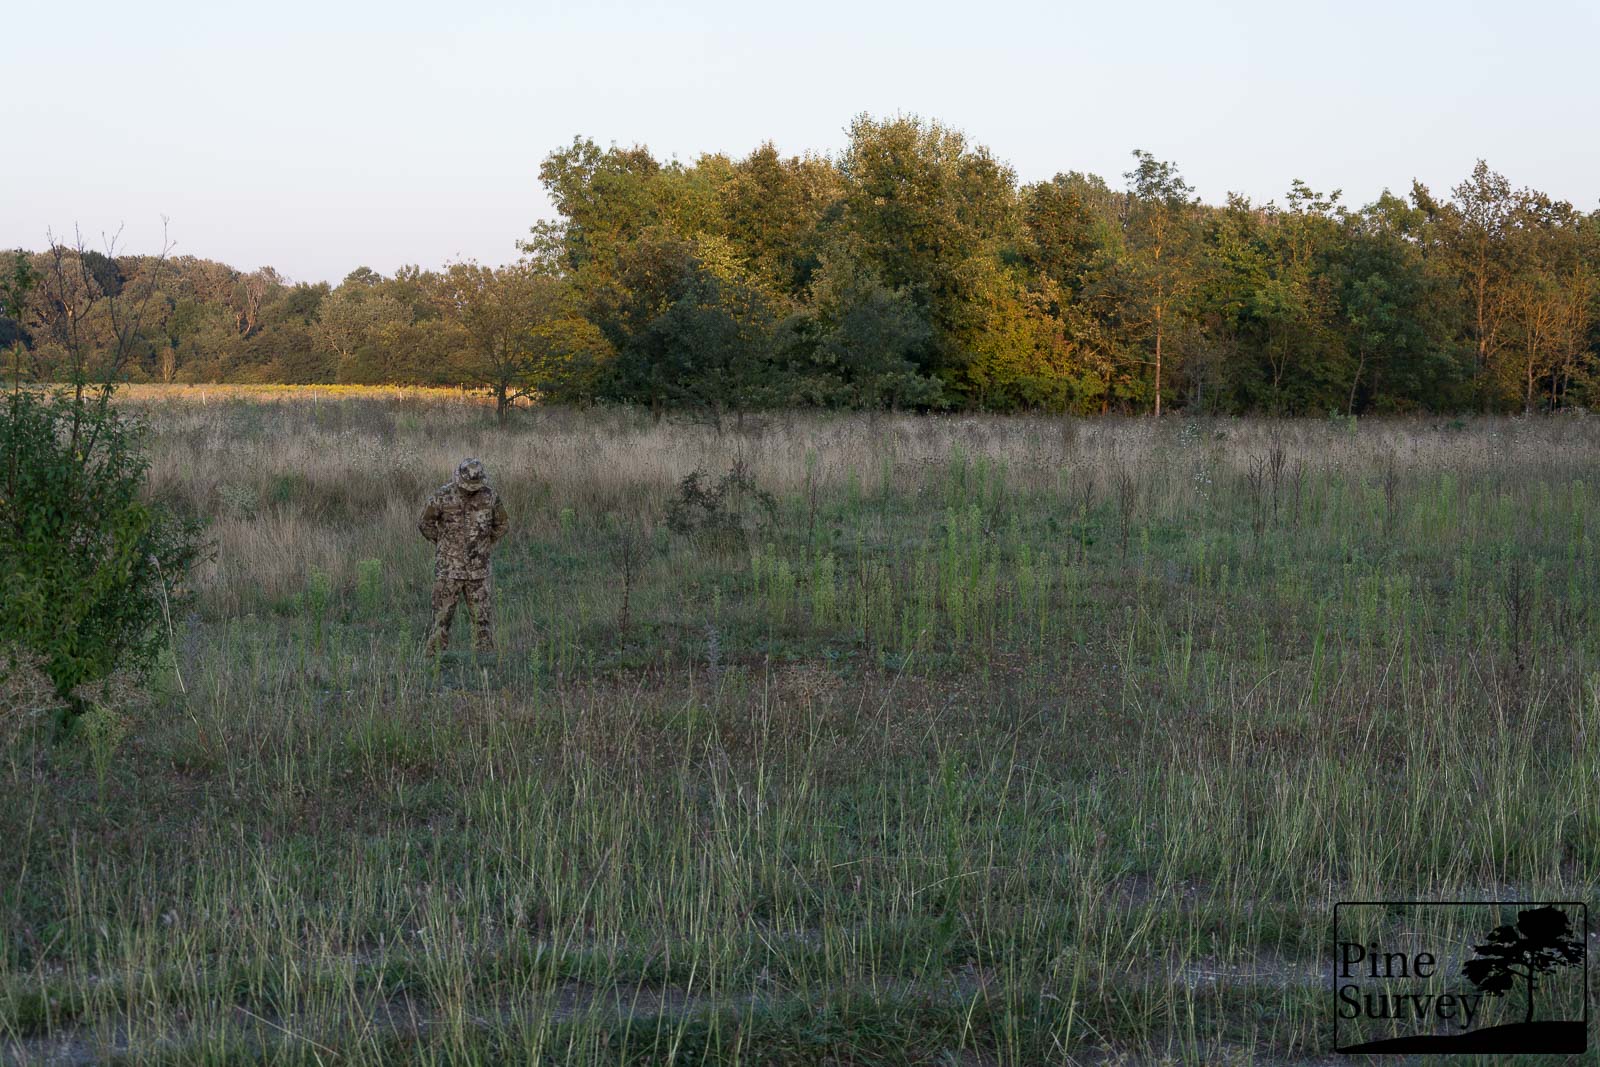
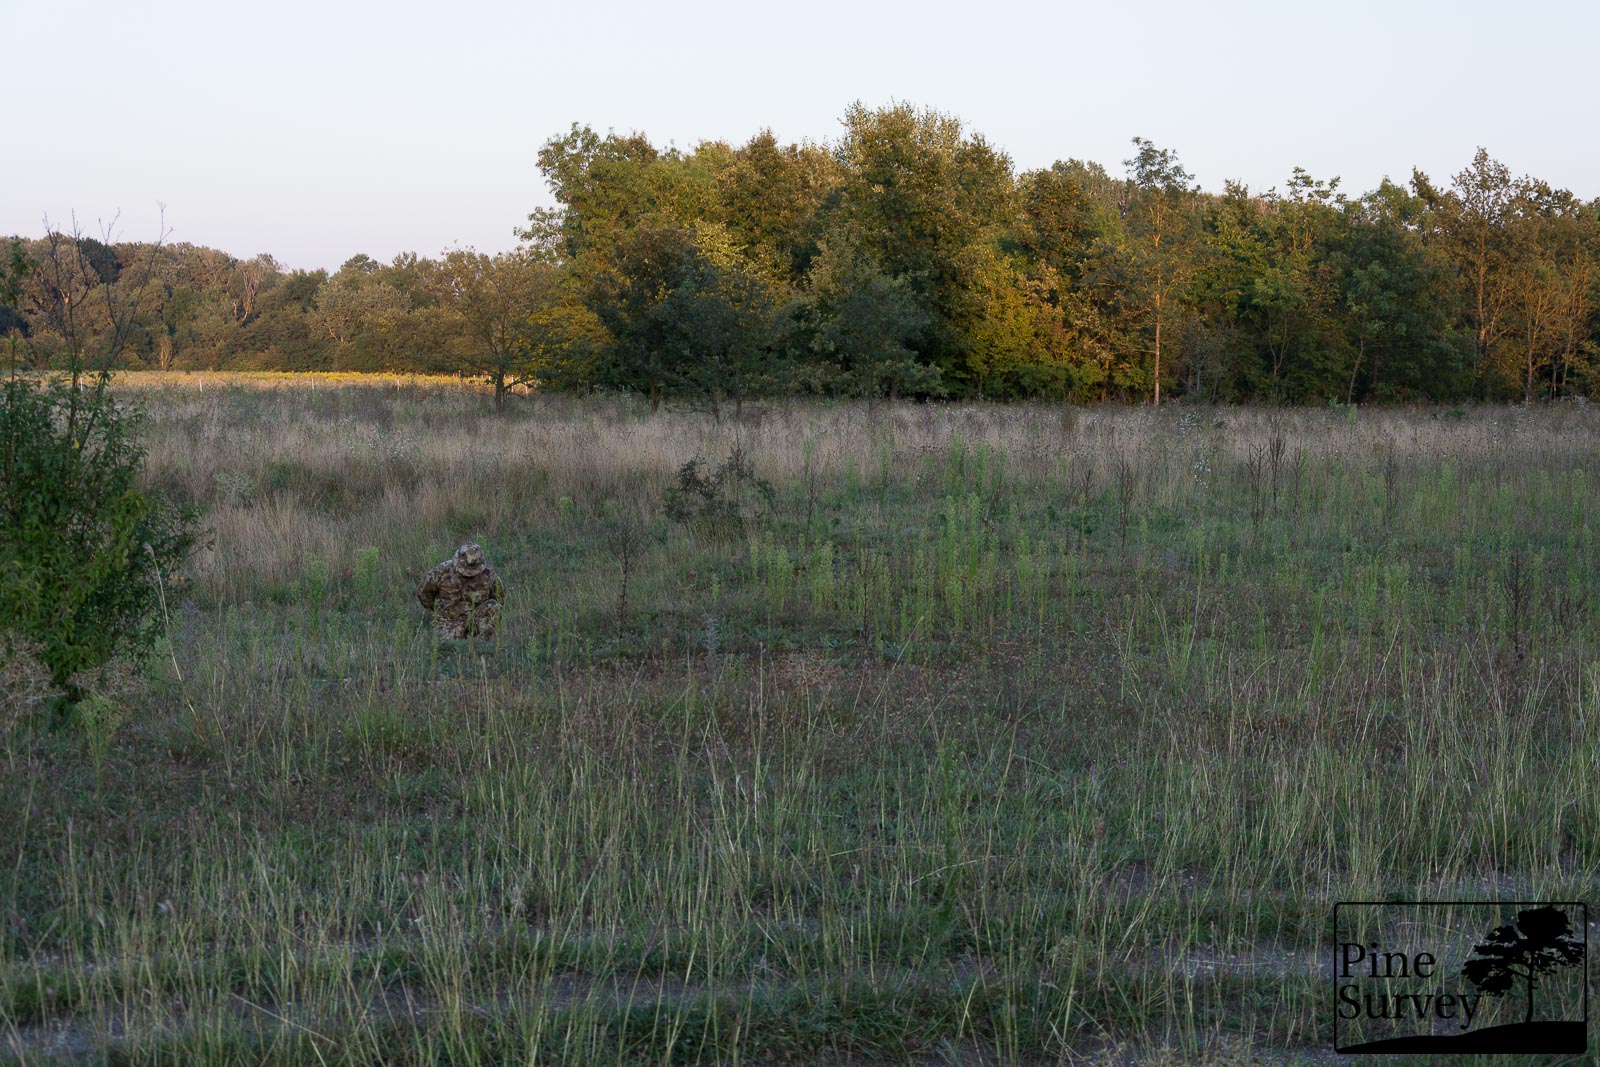
Pattern 1
In this scenario, at dawn, the various colors of the micro-, midi- and macro elements come to play. Especially the micro- and midi elements are working with the various fine contrasts of the grasses in the vicinity. The silhouette blends in with the surrounding colors. In fact the first thing you notice is my face (that’s were face paint should come in).
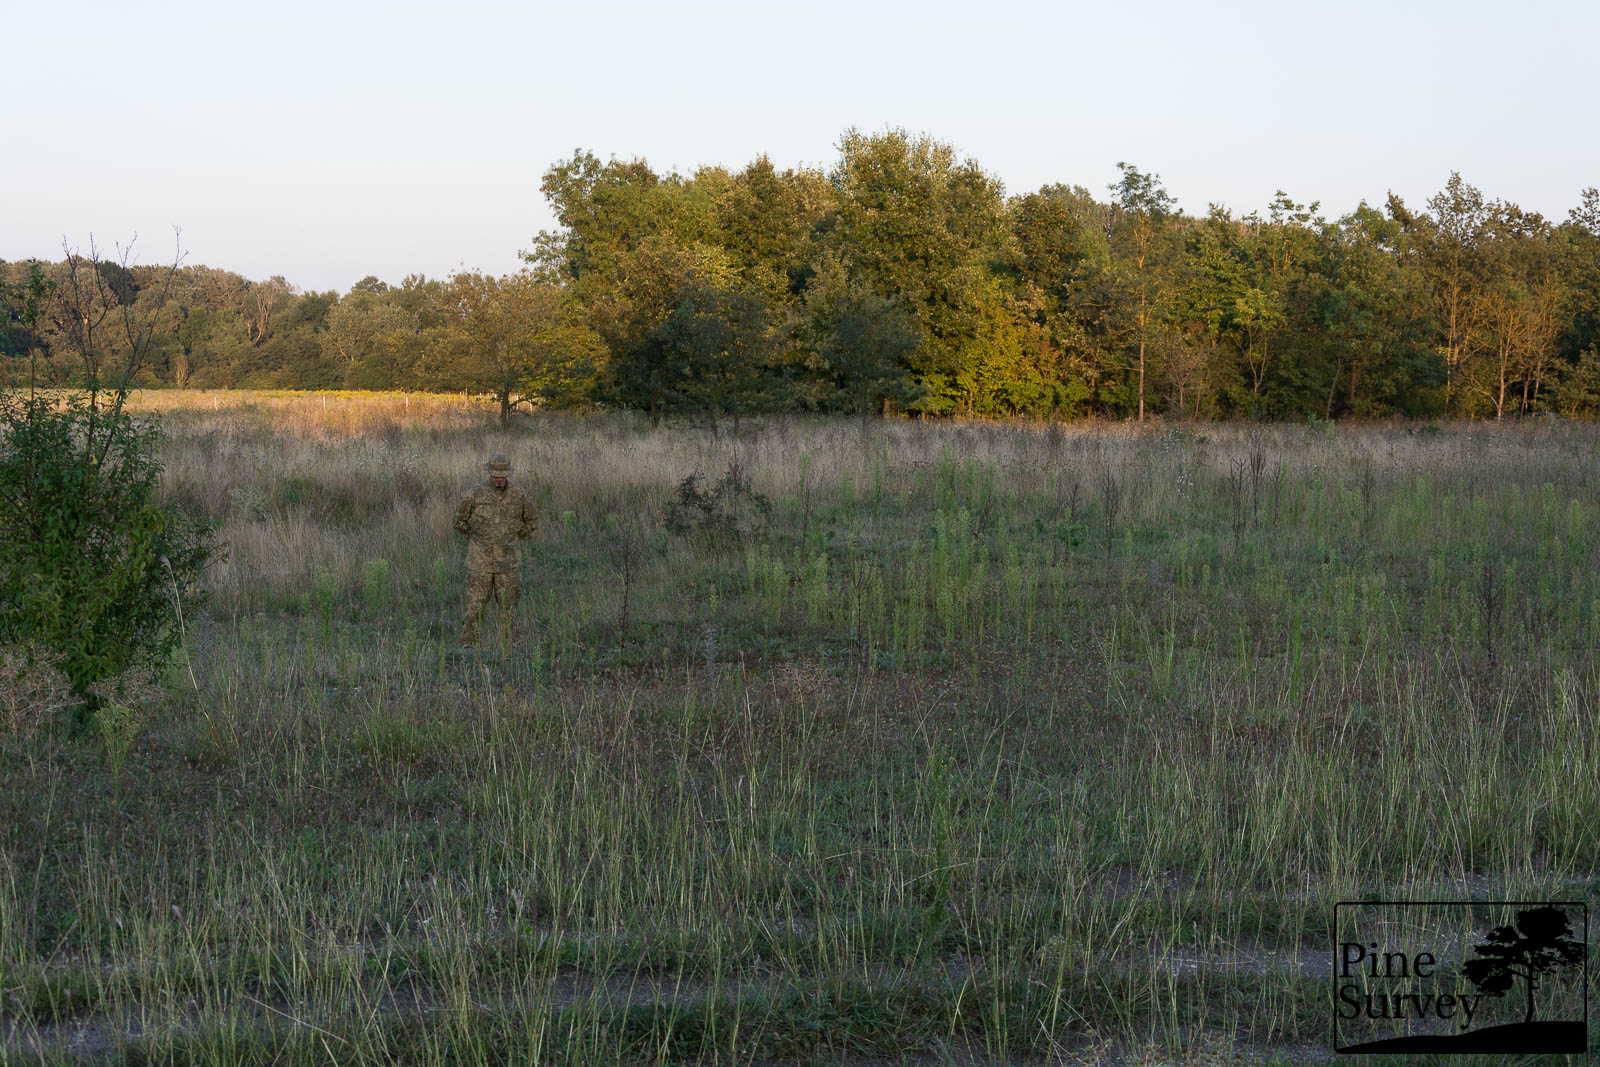
Pattern 1 – standing, 35mm
When kneeling the legs start to disappear, while the upper body is a little bit darker because it is casting a light shadow.
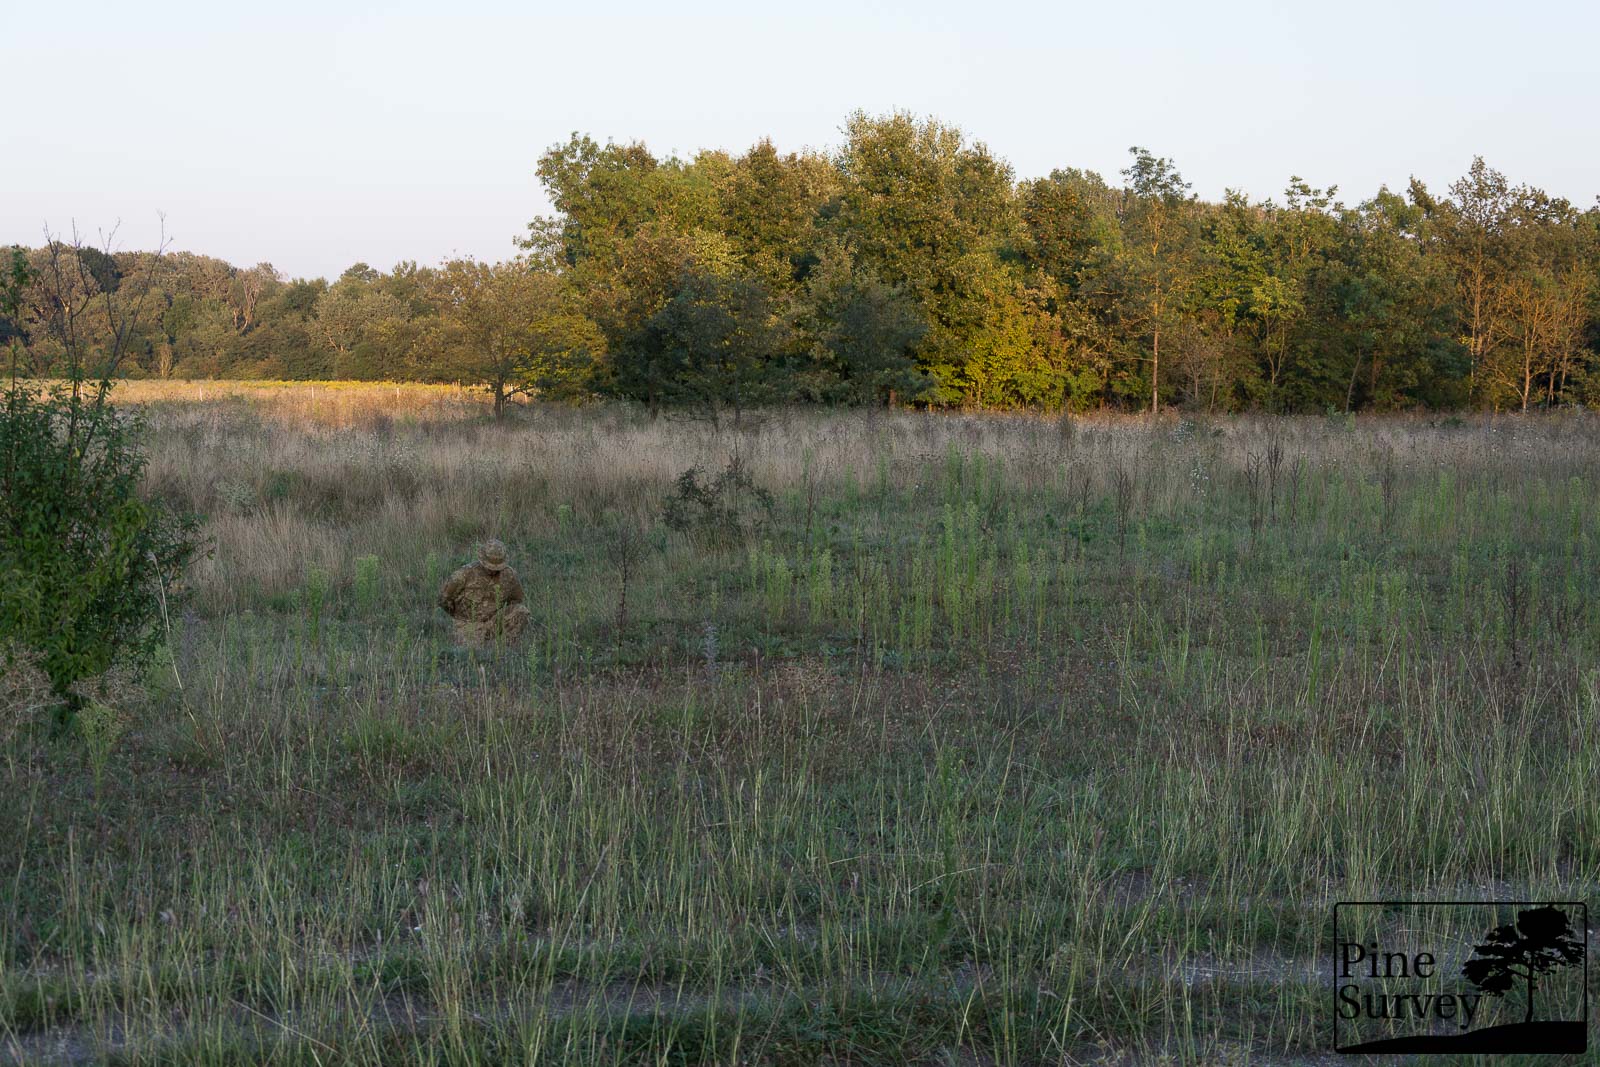
Pattern 1 – kneeling, 35mm
Pattern 2
With light vanishing fast, Pattern 2 appeared a little bit darker than Pattern 1. Nevertheless the contrasting midi elements are quite visible and mix with the surroundings. The colors blend in with the background, although in a slightly different way than Pattern 1.
Pattern 2 – standing, 35mm
While kneeling the upper body appeared to be darker again, thus highlighting the silhouette a little bit. Nevertheless you can see how good the colors match the surroundings.
Pattern 2 – kneeling, 35mm
Pattern 3
Again – in comparison to the other two patterns, Nr. 3 is more dominant when it comes to the macro elements. In this particular situation it breaks up the silhouette very aggressively, but not to the advantage of the pattern. Because of the darker colors Pattern 3 stands out more than Nr. 1 & 2.
Pattern 3 – standing, 35mm
This is more apparent while kneeling, since the upper body gets darker because of light conditions.
Pattern 3 – kneeling, 35mm
Conclusion for Scenario 3 – The Savanna at dawn situation
Especially in early evening, low light situations these three patterns completely change in their appearance. Micro-, midi- and macro- elements become more apparent and change the perception of the camouflage patterns.
If you actually blur your vision deliberately and put the pictures out of focus, you will see how the silhouettes start to disappear. Knowing that you won’t have a complete focused field of view in reality this might give you an idea, how these patterns could work for you.
Final conclusion
With this two reviews I was hopefully able to give you a better idea how three different camouflage patterns work in semi-arid environments. The scenarios captured the spectrum from ideal environment to brutal exposure.
At the same time it became apparent, how important it is for patterns to have micro- and midi elements for close proximity situations. Most patterns only feature midi- and macro elements for longer distances.
Especially the micro elements are the ones making a pattern appear more organic. The last scenario is actually a very good example how midi- and macro elements don’t have to be very distinctive (or better said high contrast) to blend into the surroundings.
Pattern 1 has much more subtle macro elements and appears to be more organic therefore, since the blending of colors is acchieved in a different way. Pattern 2 is mainly compiled of midi elements which blend into each other. Both of them appear to be more natural in this particular surrounding while Pattern 3 stands out with high contrasting macro elements.
That being said, all three patterns had their highs and lows in the various scenarios. It is for the viewer to decide which pattern would work best for their particular needs. Since all three of them are designated transitional patterns, it was clear from the beginning, that differences would be very hard to distinguish. Nevertheless it became apparent that there are patterns out there worth looking at, although they are not necessarily major “players” in the tactical world like Multicam and all of its derivatives.
The consensus of my partner and me during the photoshoot was that Patterns 1 & 2 had a close competition, with Pattern 3 being behind just a little bit. The last scenario was the most revealing in that regard.
With that being said… here is the revelation on the patterns (by now, you should know for yourselfs actually):
Pattern 1:
PenCott Badlands
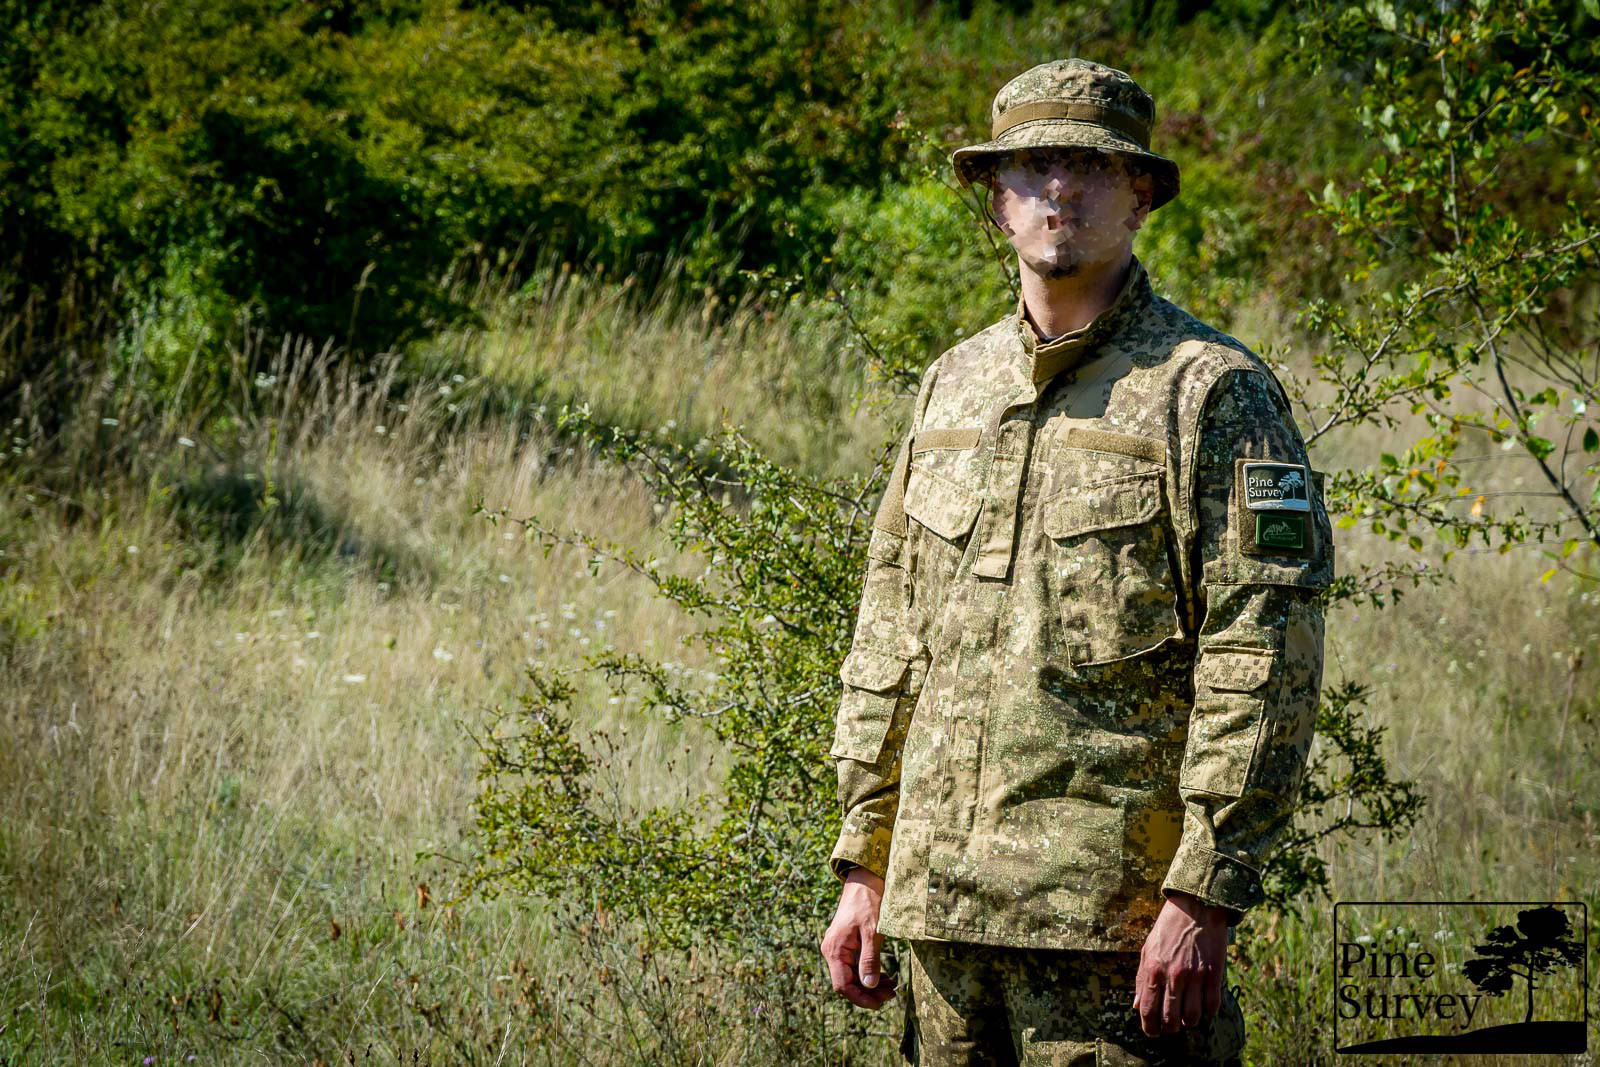
Pattern 1: PenCott Badlands
Pattern 2:
Camogrom
Pattern 2: Camogrom
Pattern 3:
Kryptek Highlander
Pattern 3: Kryptek Highlander
All the pics were made with CPU Uniforms and Boonies by Helikon-Tex… should the question arise which garments I was wearing.
![]()
I would like to say my sincere thanks to the company, for giving me the opportunity to make this comparison. You can look forward to a comparison with temperate woodland patterns in the near future. If you follow me on Facebook and Instagram, you might have already seen 1-2 pictures. Thanks again to N. for his help during the photoshoot!
Last but not least I hope I was able to give you another interesting read.
Take care! Until next time!
-
- Pattern 1 – kneeling, 35mm
-
- Pattern 1 – standing, 35mm
-
- Pattern 1 – kneeling, 35mm
-

- Pattern 1: PenCott Badlands
-
- Pattern 2 – standing, 35mm
-
- Pattern 2 – kneeling, 35mm
-
- Pattern 2 – standing, 35mm
-
- Pattern 2 – kneeling, 35mm
-

- Pattern 2: Camogrom
-
- Pattern 3 – standing, 35mm
-
- Pattern 3 – kneeling, 35mm
-

- Pattern 3 – standing, 35mm
-
- Pattern 3 – kneeling, 35mm
-

- Pattern 3: Kryptek Highlander
No Comment
You can post first response comment.