Fieldtest: Phantomleaf WASP II – Z1B
Introduction
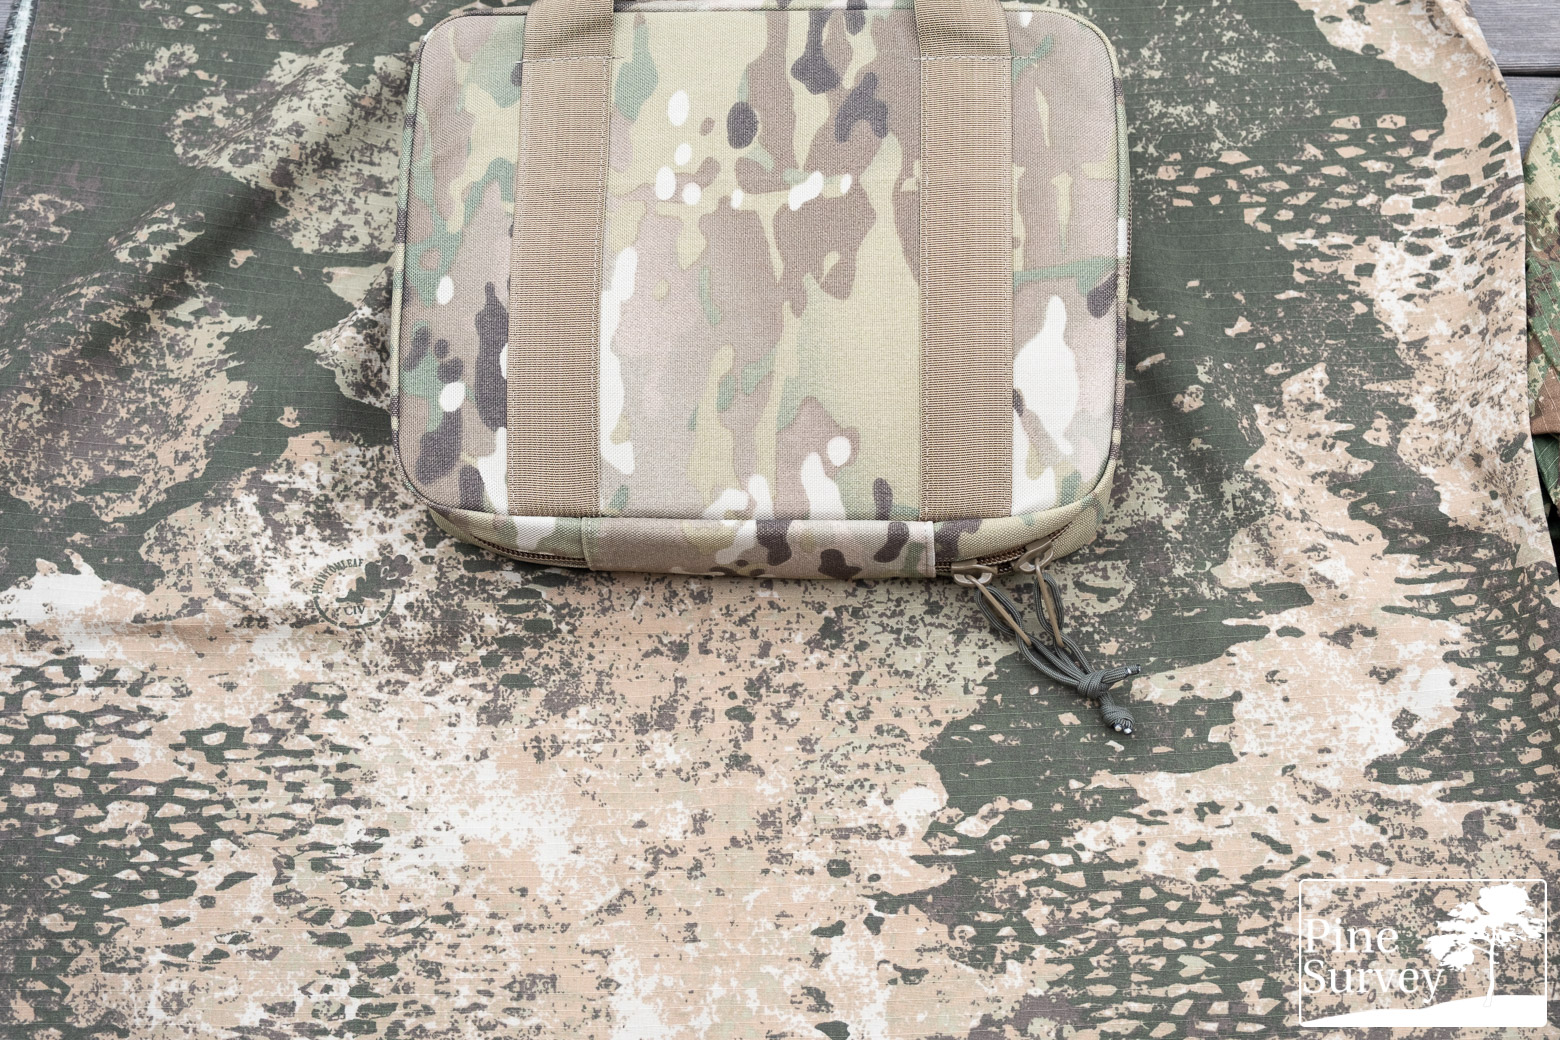
Phantomleaf WASP II Z1B was introduced almost a year ago and I was able to get my hands on it quite early. First a piece of NyCo to get some initial impressions and later in summer 2024 the first items of Leo Köhler, namely the Einsatzkampfjacke (aka the KSK Smock) as well as the Einsatzkampfhose (or the KSK Pants). While the pattern itself would have been perfect for the dry season in late summer, the moment I got the whole set it began to rain, and since then it was simply impossible to make a representative test.
That being said, I was able to take several sets of pictures over the course of the last months and now it is time to finally share them with you.
Before I start the deep dive into the effectiveness of Phantomleaf WASP II Z1B, the obligatory methodic remarks apply.
Methodic Remarks
As always I want to point out several important aspects beforehand. First of all, I do not claim any scientific standard with my camouflage comparisons. I also conduct them with my best knowledge and the available resources. That being said, this is as comparative as it gets on the internet and on one platform in particular.
The pictures are usually taken at the same locations I always use for my camouflage comparisons. That way you can compare the various field tests I have done so far with each other. For this particular test two new locations were added, to show the pattern in its intended environment.
Before I start, please consider the following – as always:
If not stated otherwise I did not edit the pictures in any special way, except the following:
- Lens correction
- Watermark
- Blurred my face out if necessary
- .jpeg compression to make it web compliant
- I always do a proper white balance to make colors appear the way they are.
A short explanation to the environment and the procedure:
The pattern was tested in a Central European environment. Information about the various locations will be stated in the subsections. The pictures usually portray three different positions:
- Standing in the open (to get an idea of the pattern in this particular surrounding and if the colors match it)
- kneeling
- A leaning position (to mimic basic concealment/cover, without using vegetational enhancements)
As always I photographed the pattern with a wide angle lens at first and then with 35mm focal length, which mimics the actual picture the human eye would perceive at this distance. Having in mind the three different positions mentioned before, I usually end up with 6 pictures of each location. This time I also added a 50mm set to the article, as location XYZ is portraying a longer distance.
Furthermore:
Given the amount of pictures in my field tests, I will not describe or comment on each picture. Instead I will give a more thorough analysis at the end of each subsection.
With that being said, let’s take a closer look at the pictures themselves.
Phantomleaf WASP II – Z1B
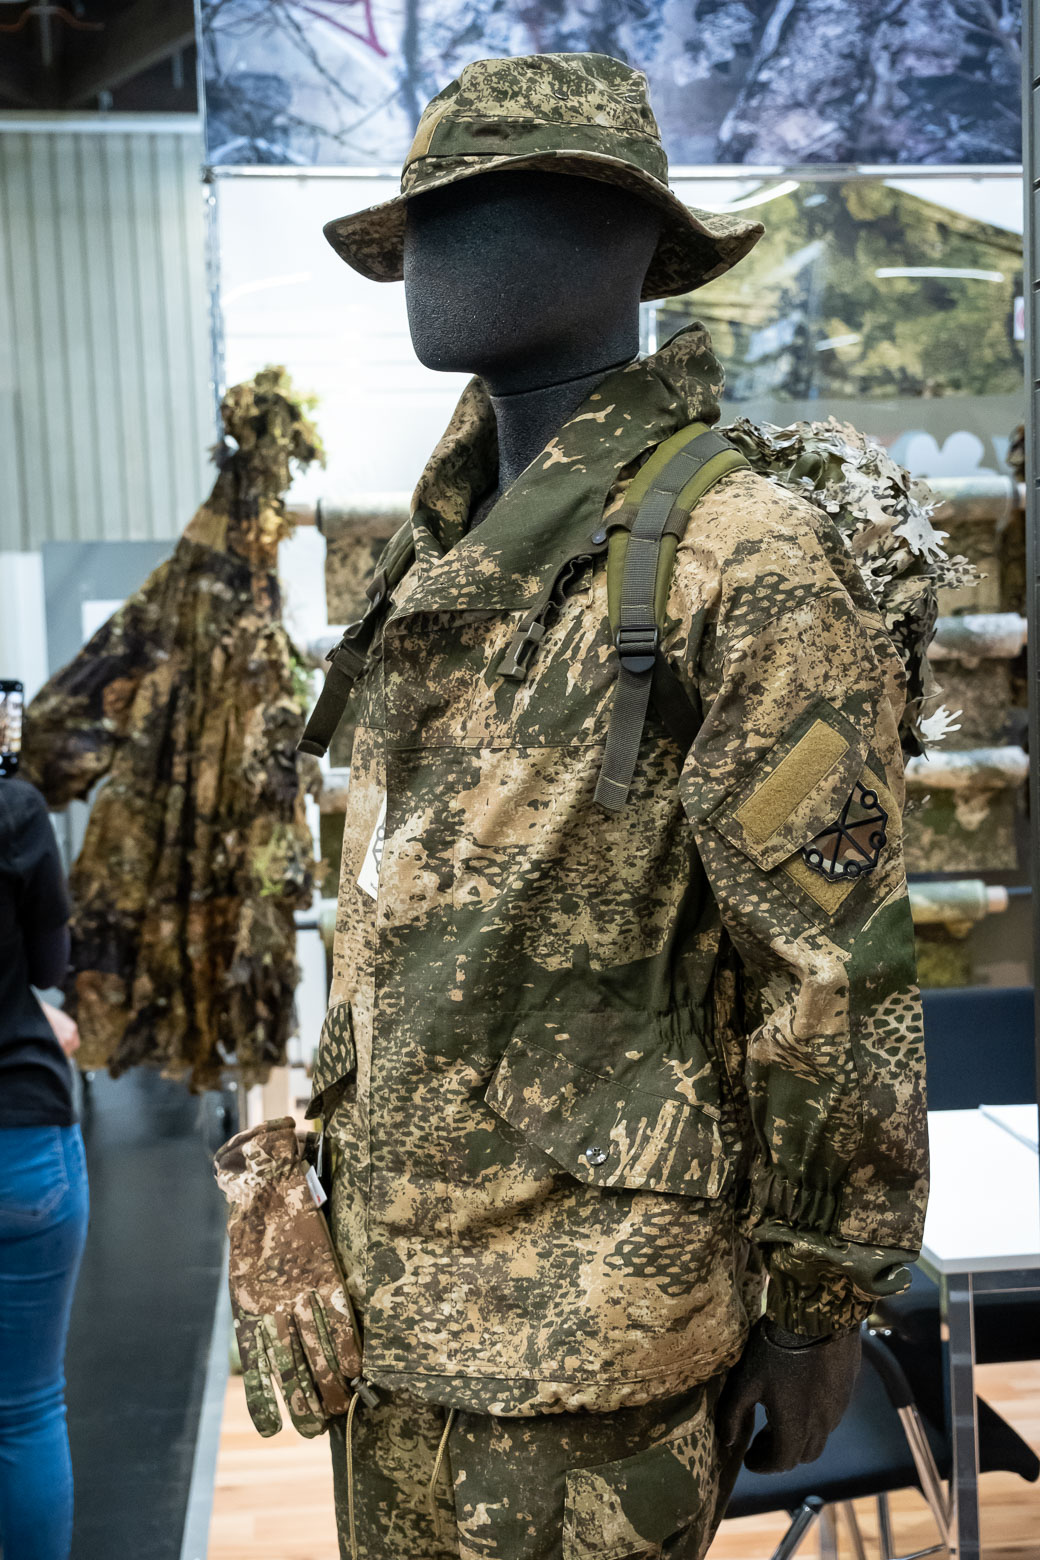
Phantomleaf WASP II Z1b is primarily designed for rock deserts. The official characterizations says it is “designed for the regions above the tree line and tundra zones from the low lying scrub to bare rock and boulder, but also to some extent those that are snow covered.”
In conversations with Florian Lenz, I was also told that one of the goals was to create a pattern with a coloration that can work in combination and/or as an alternative for Multicam. Having these two aspects in mind, the intended area of deployment is a semi-arid environment or that of dead vegetation.
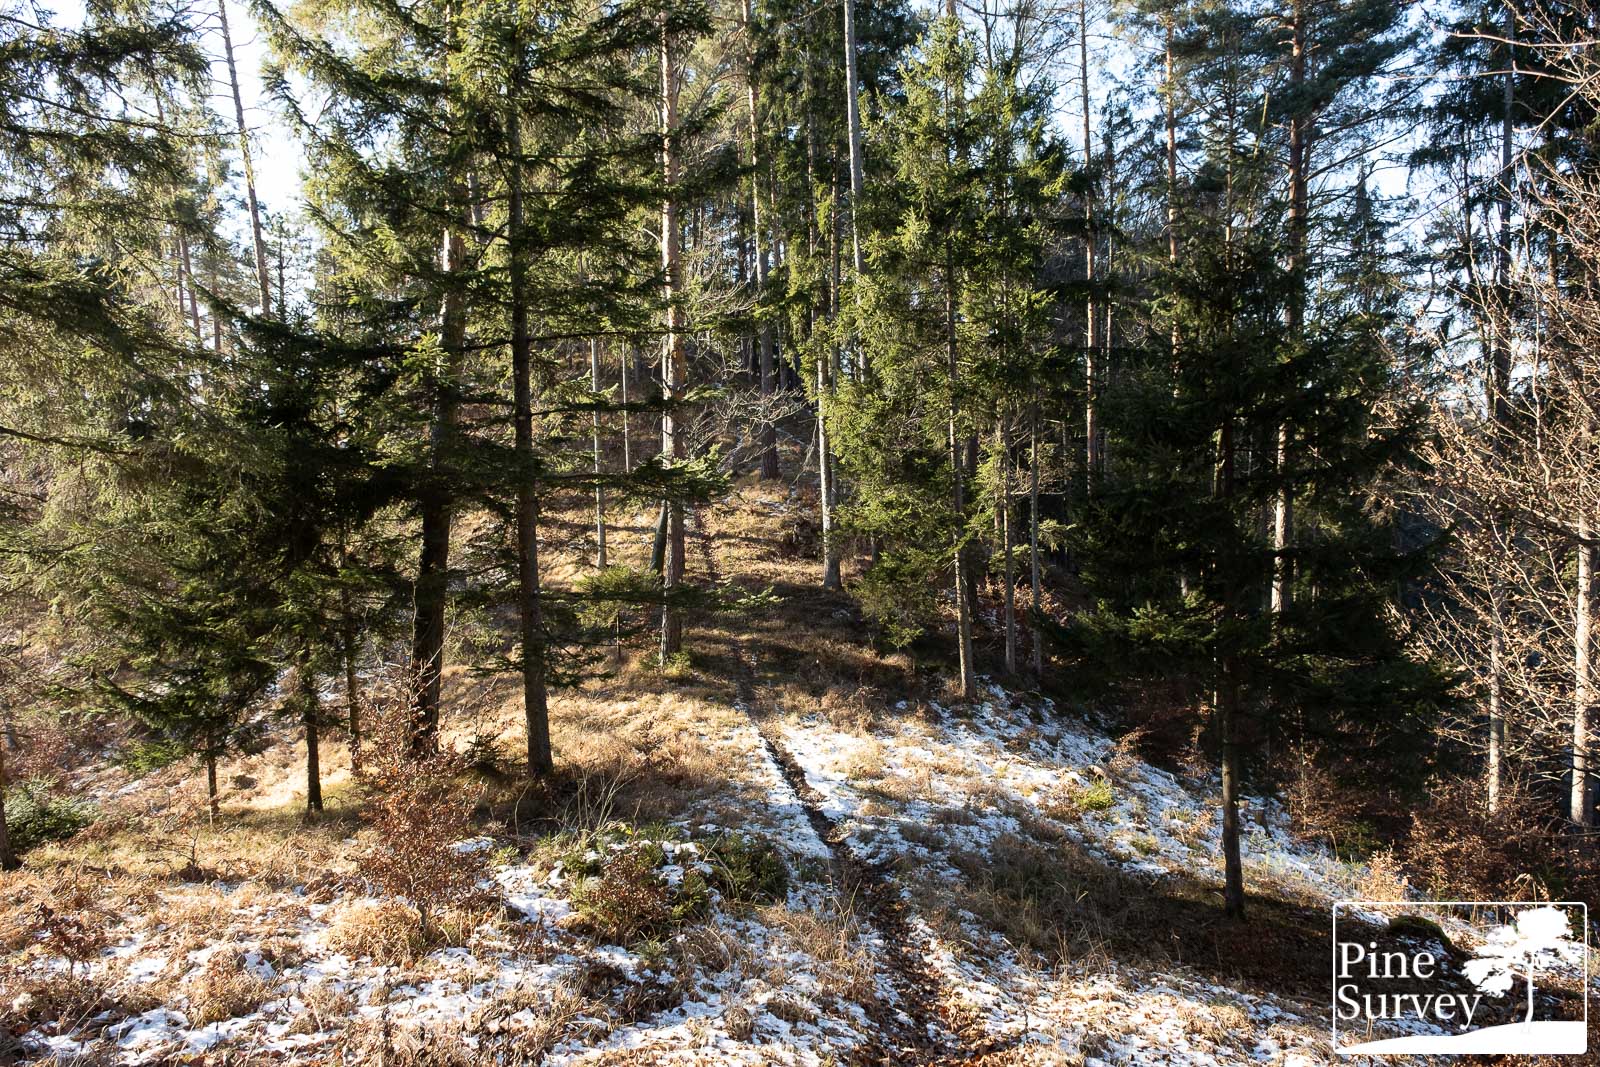
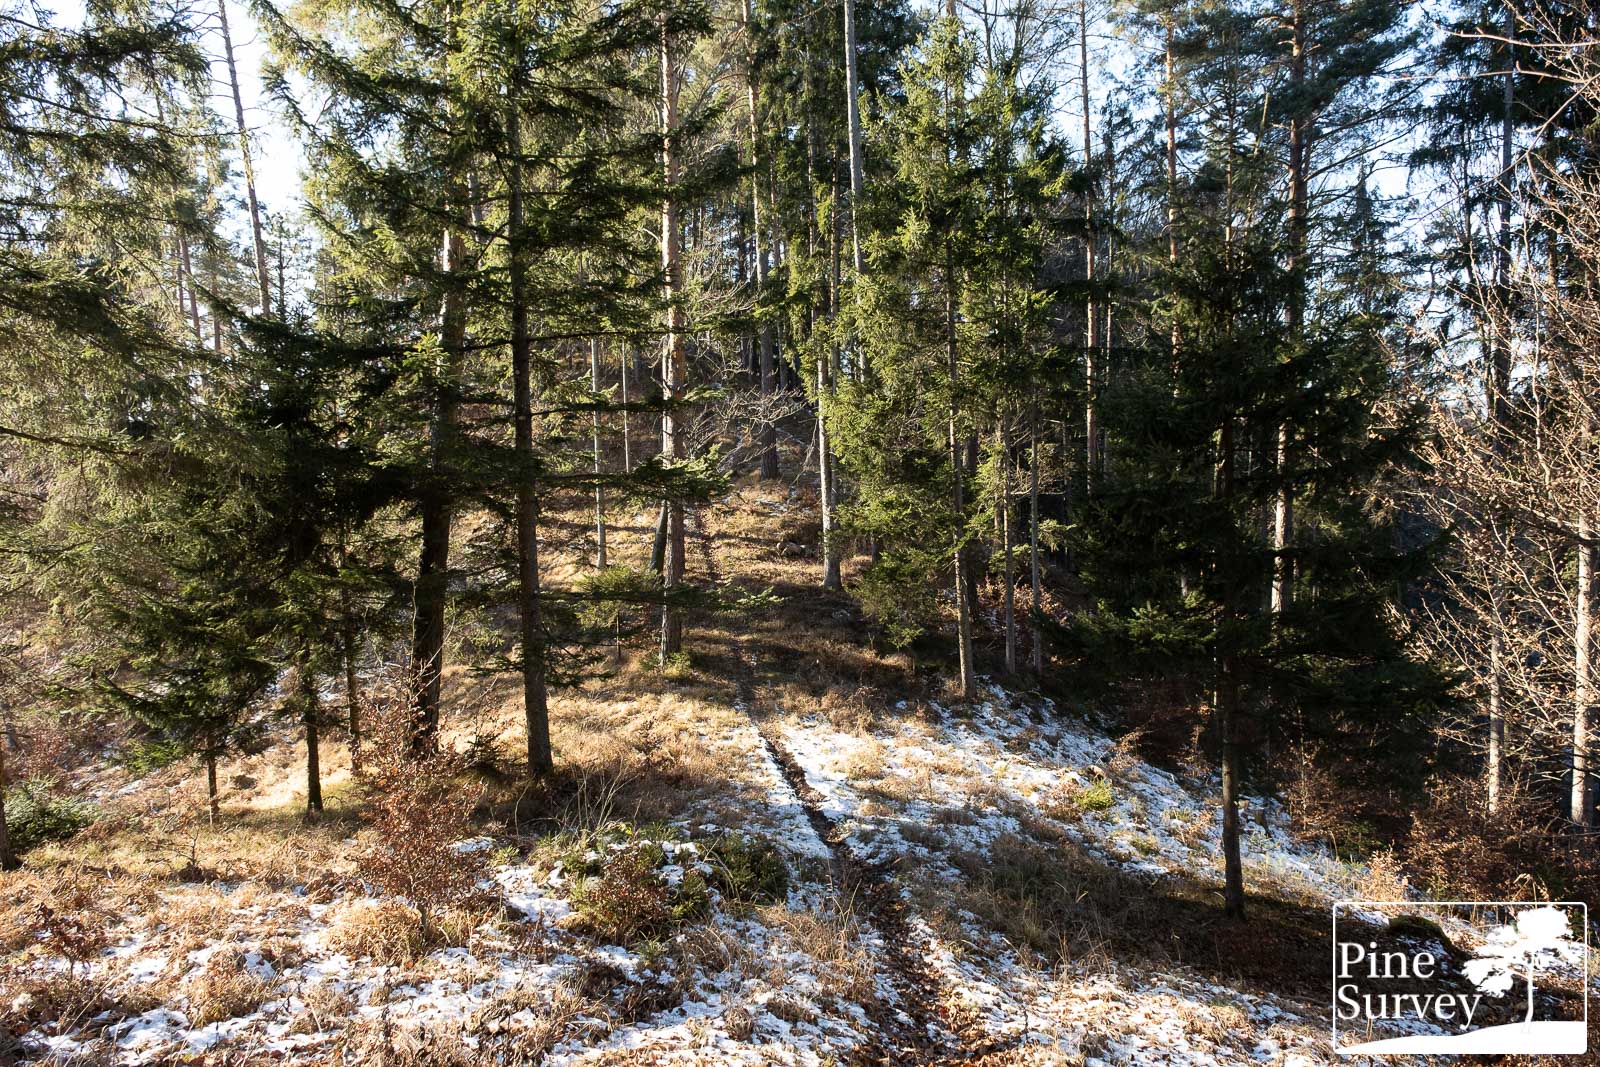
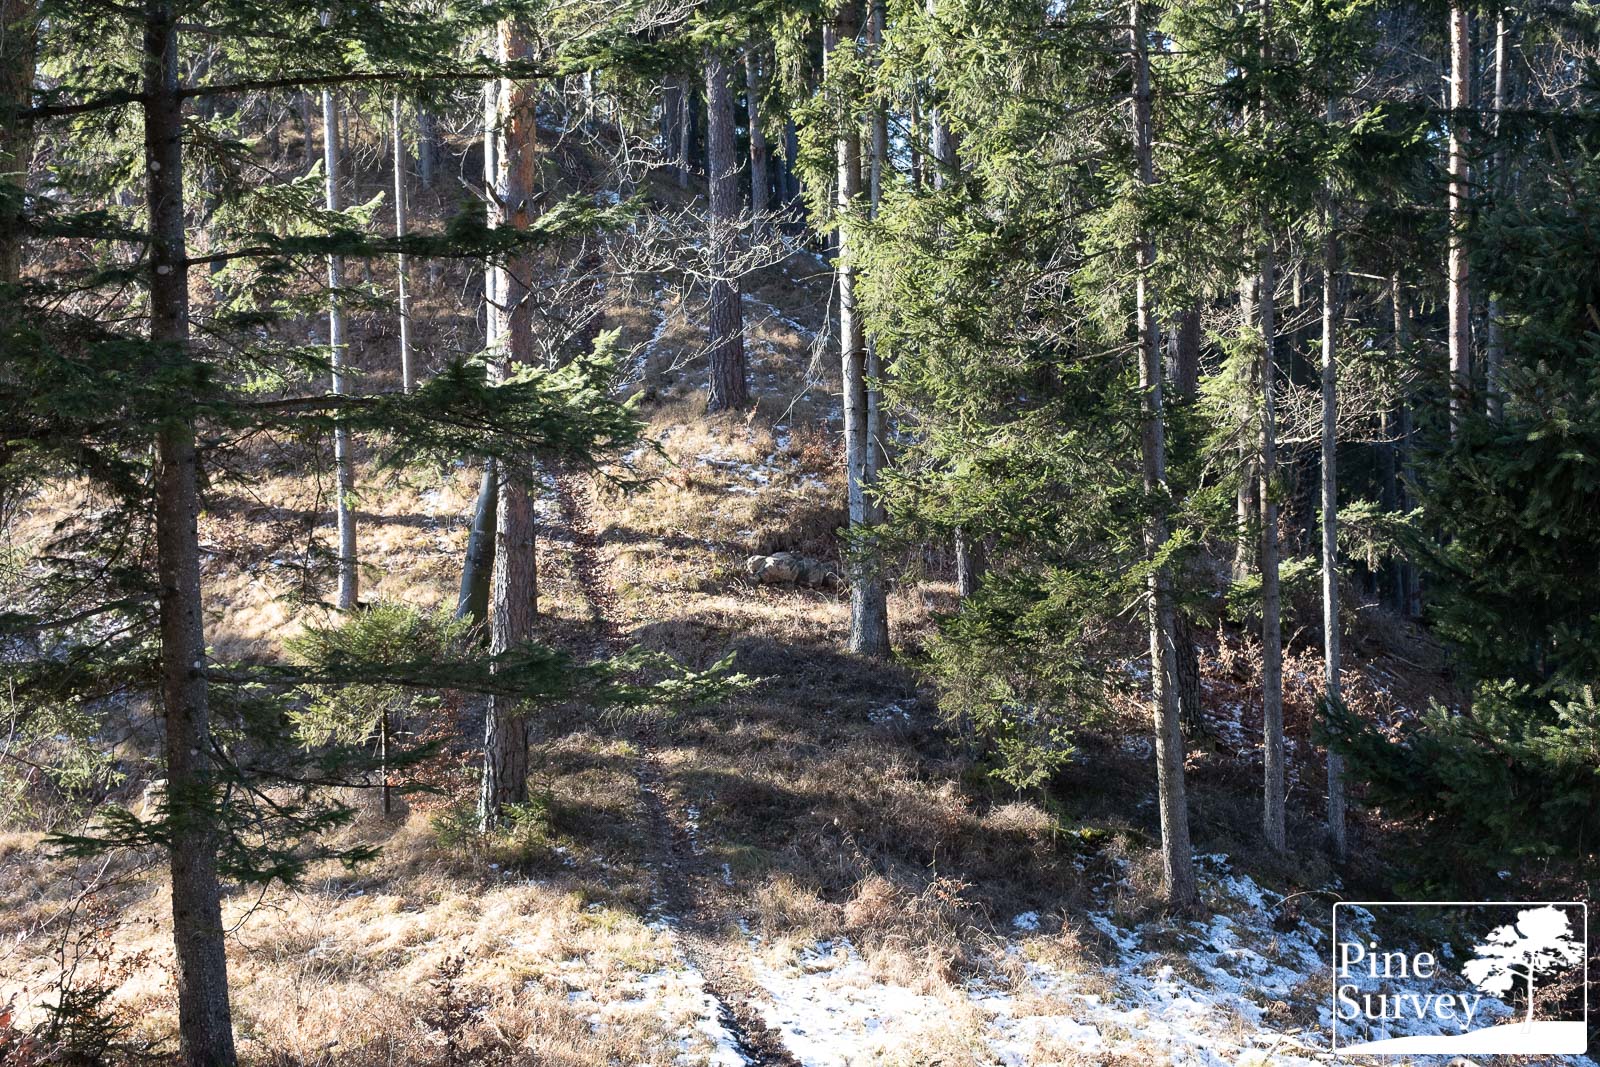
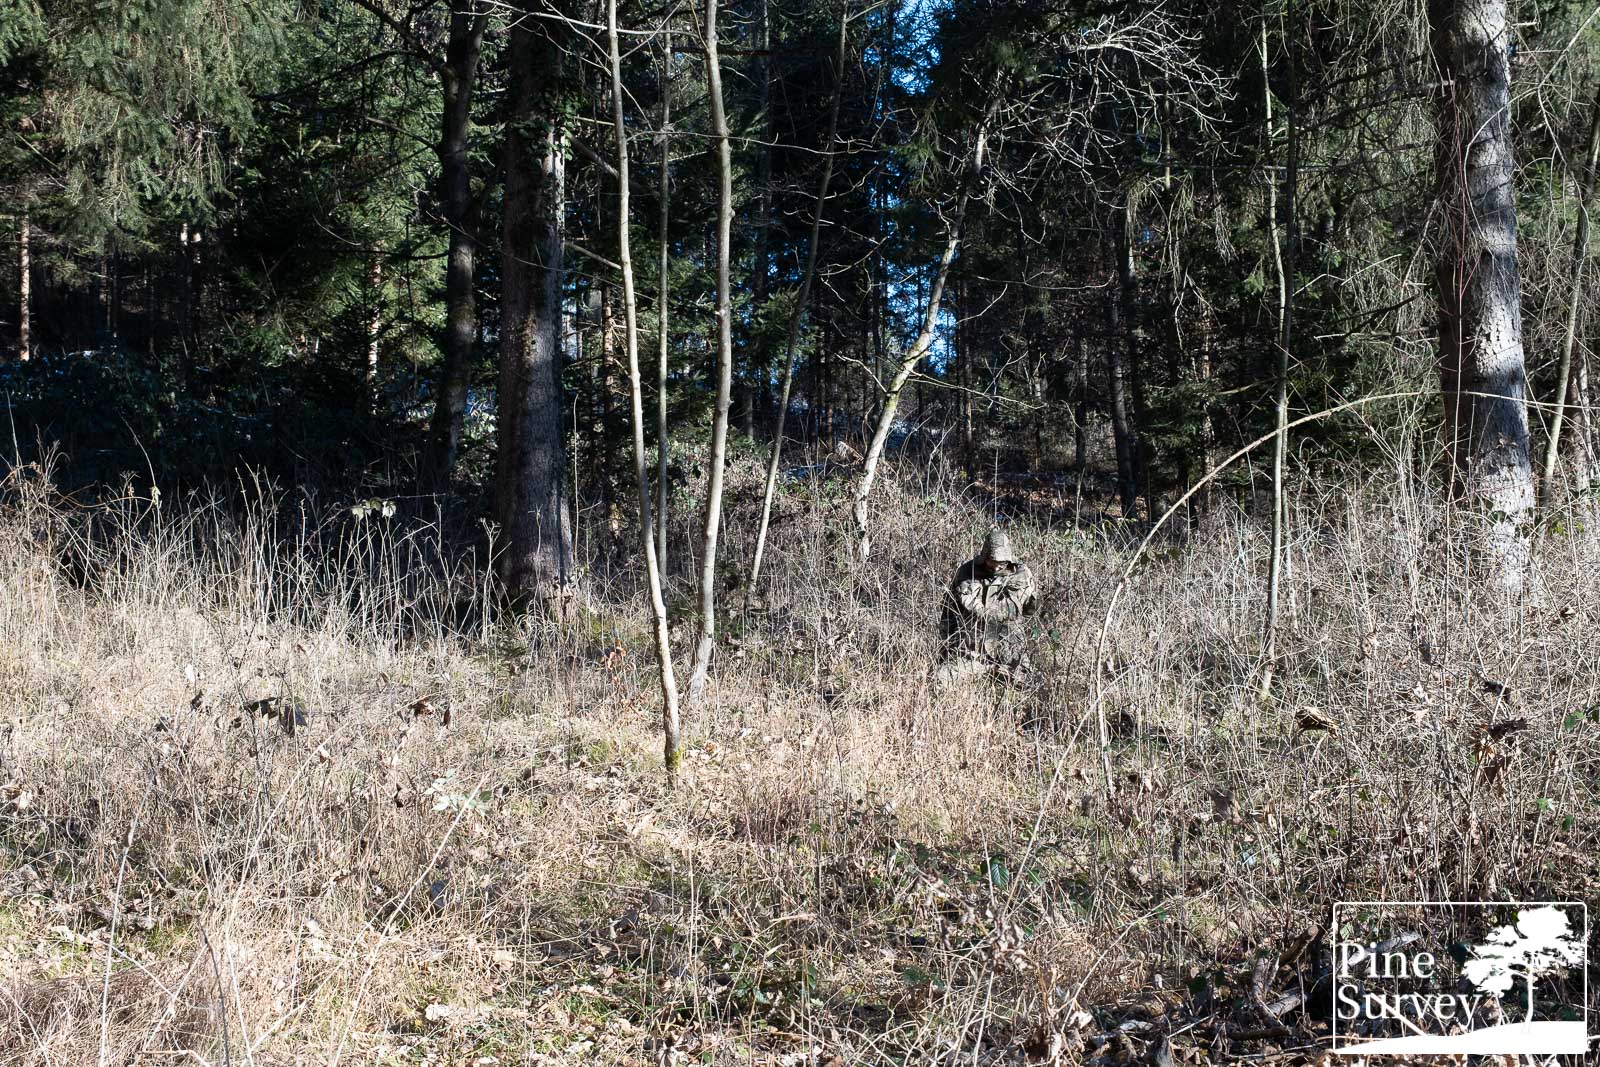
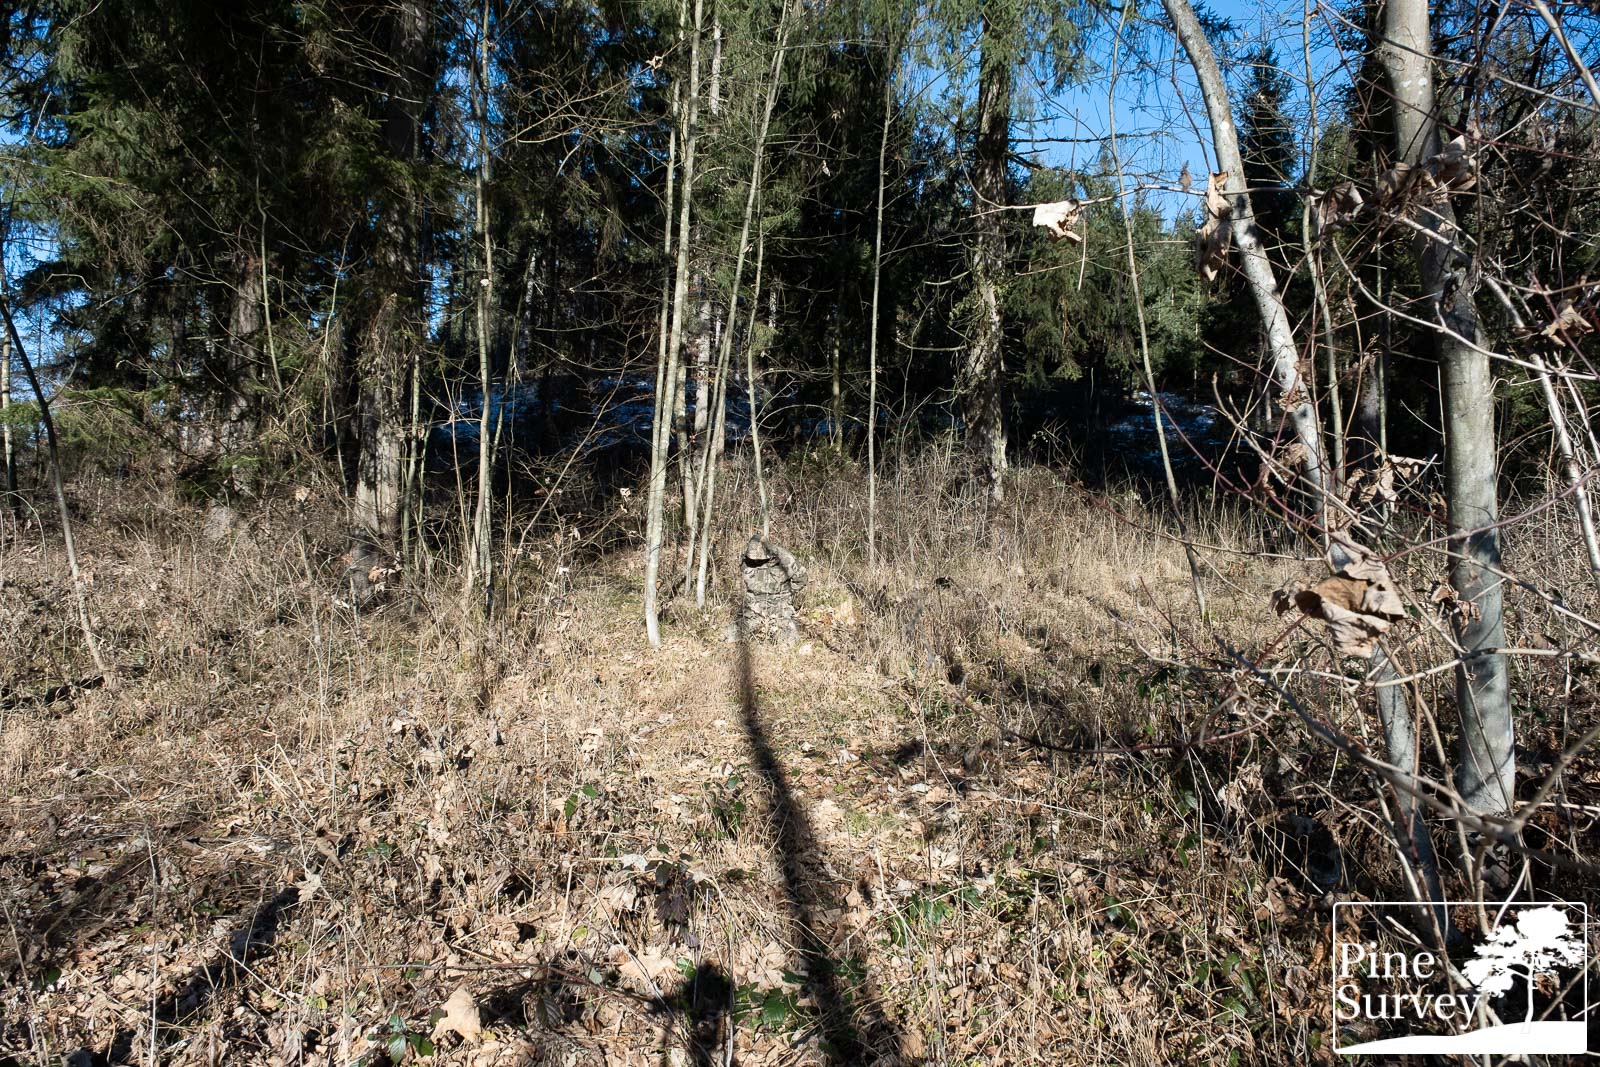
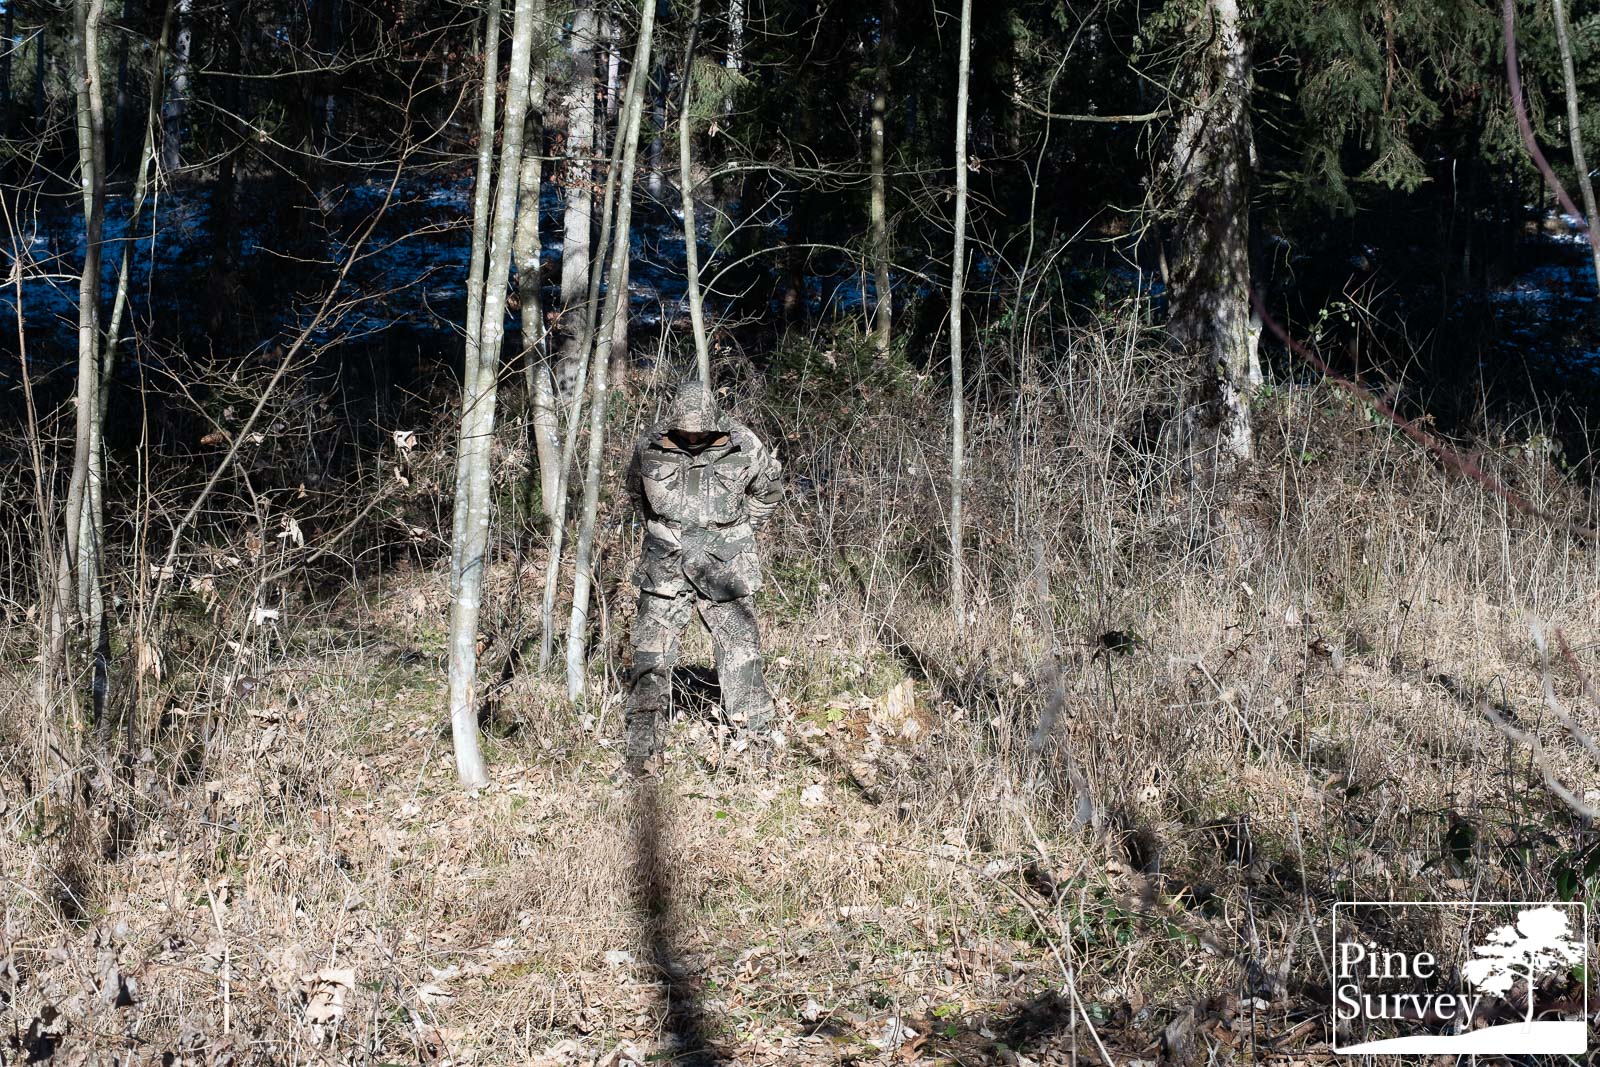
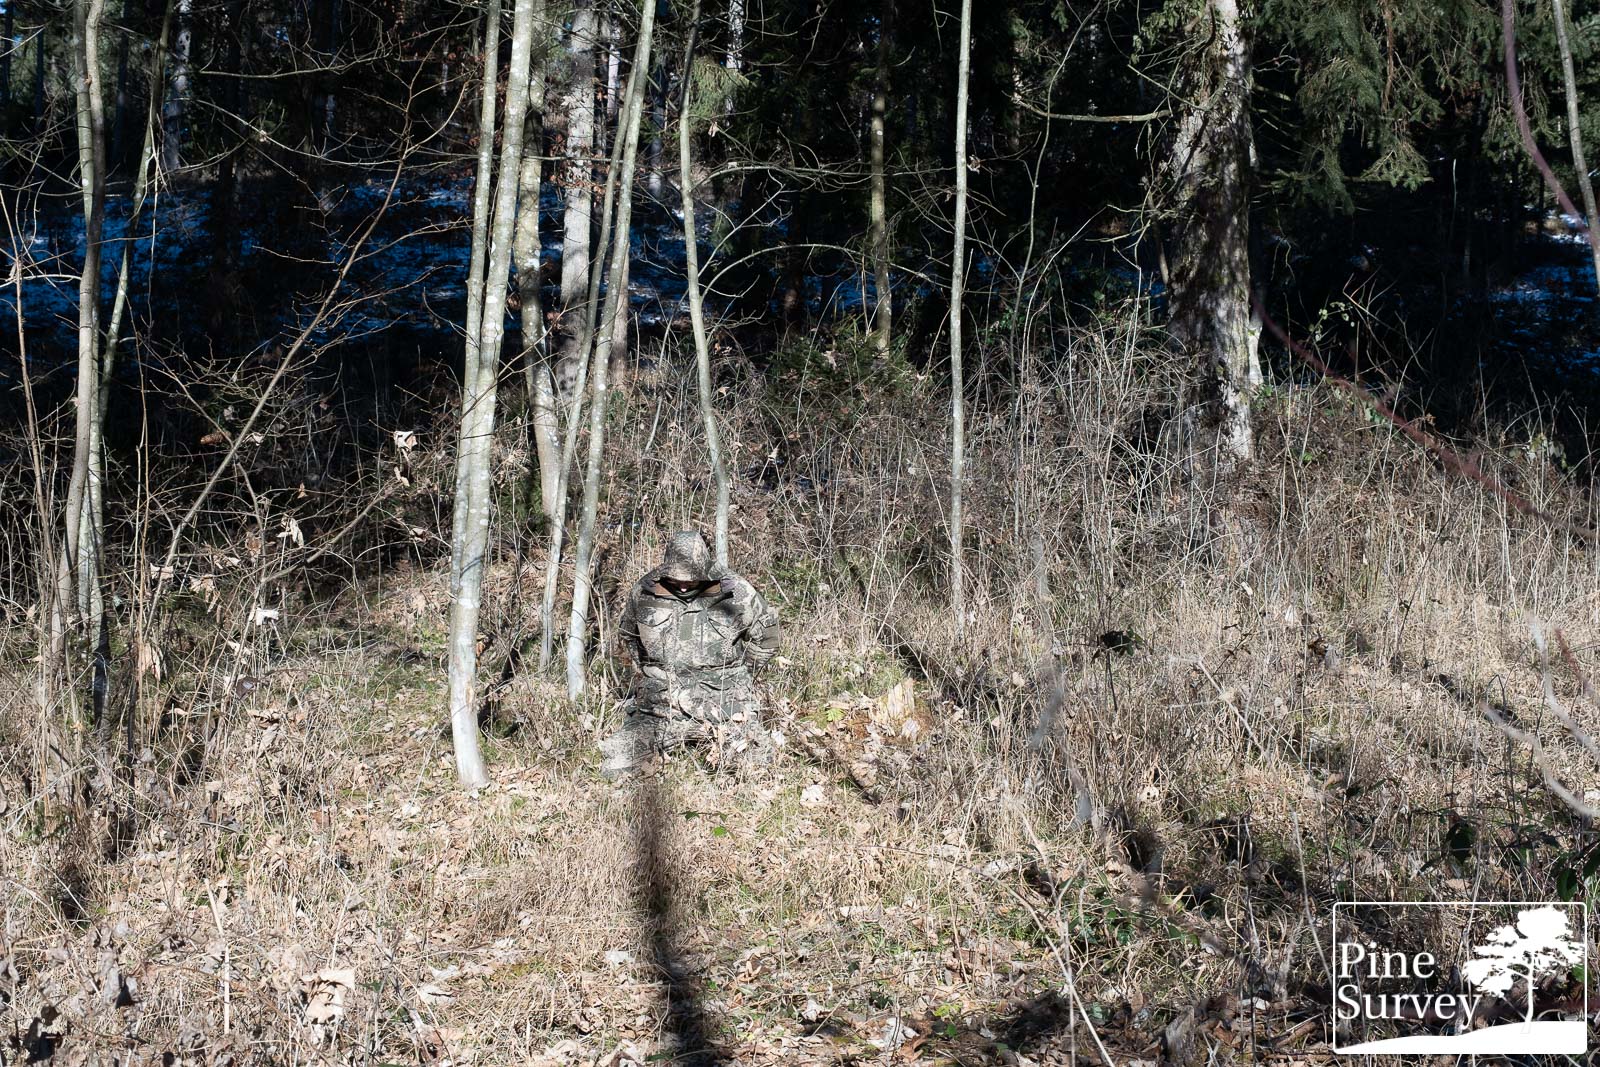
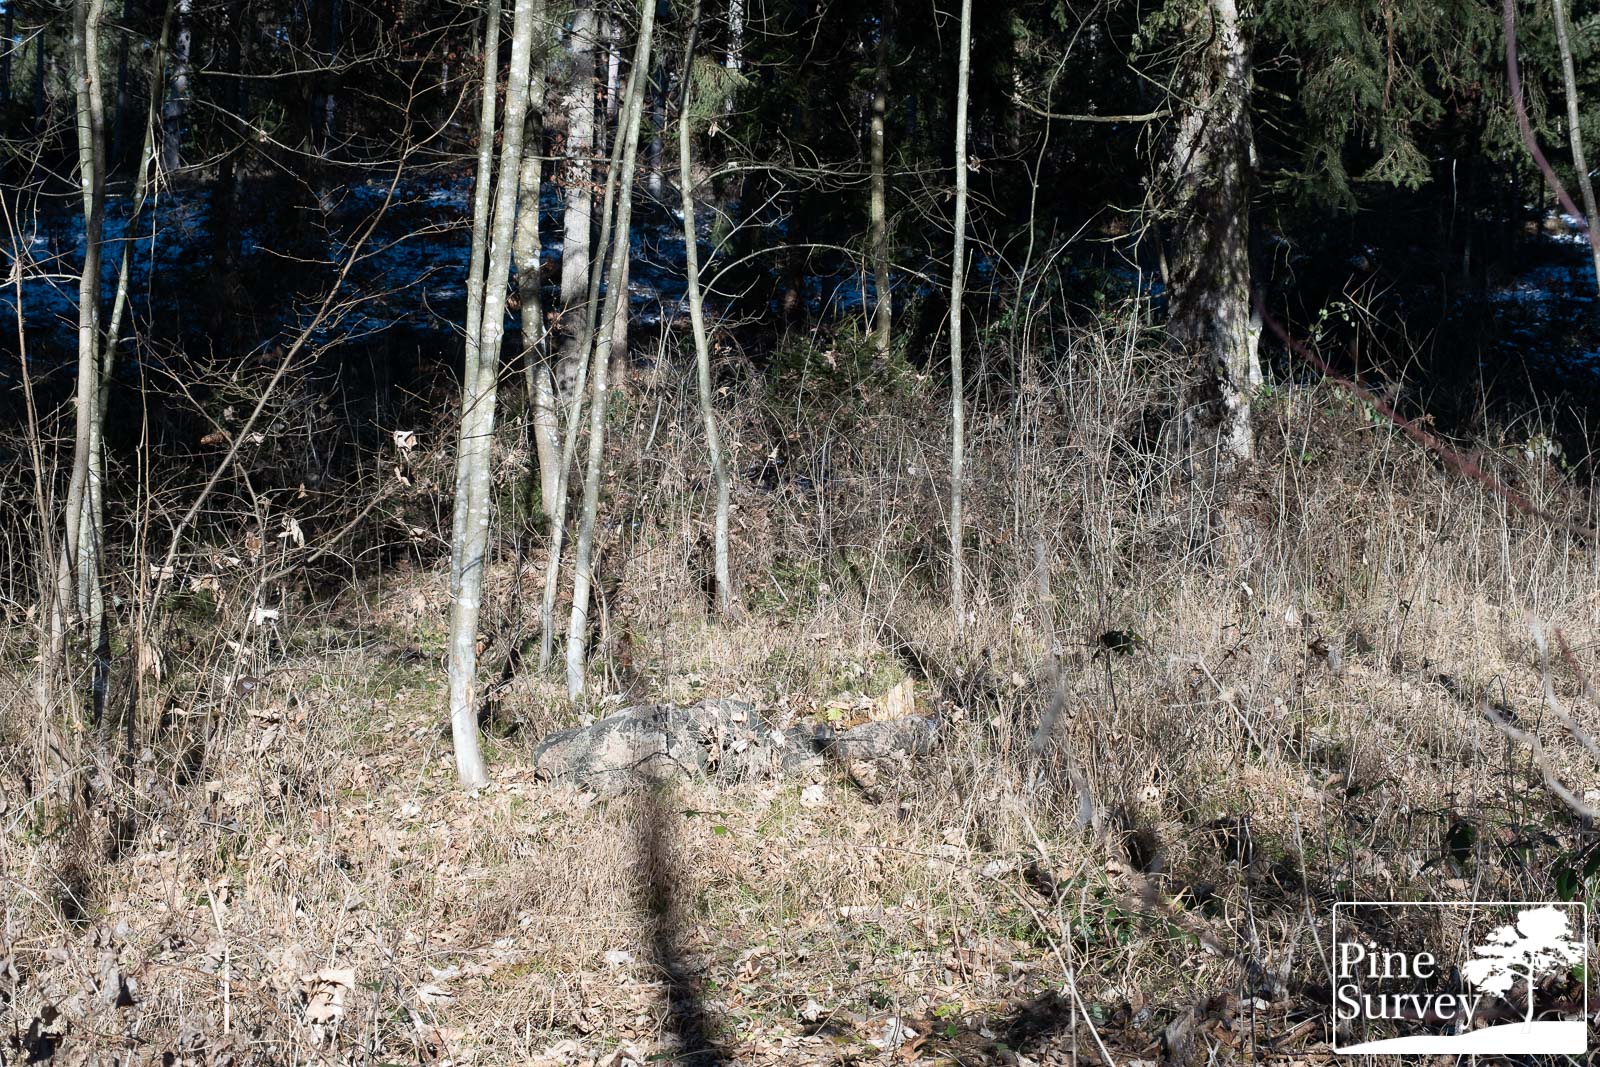
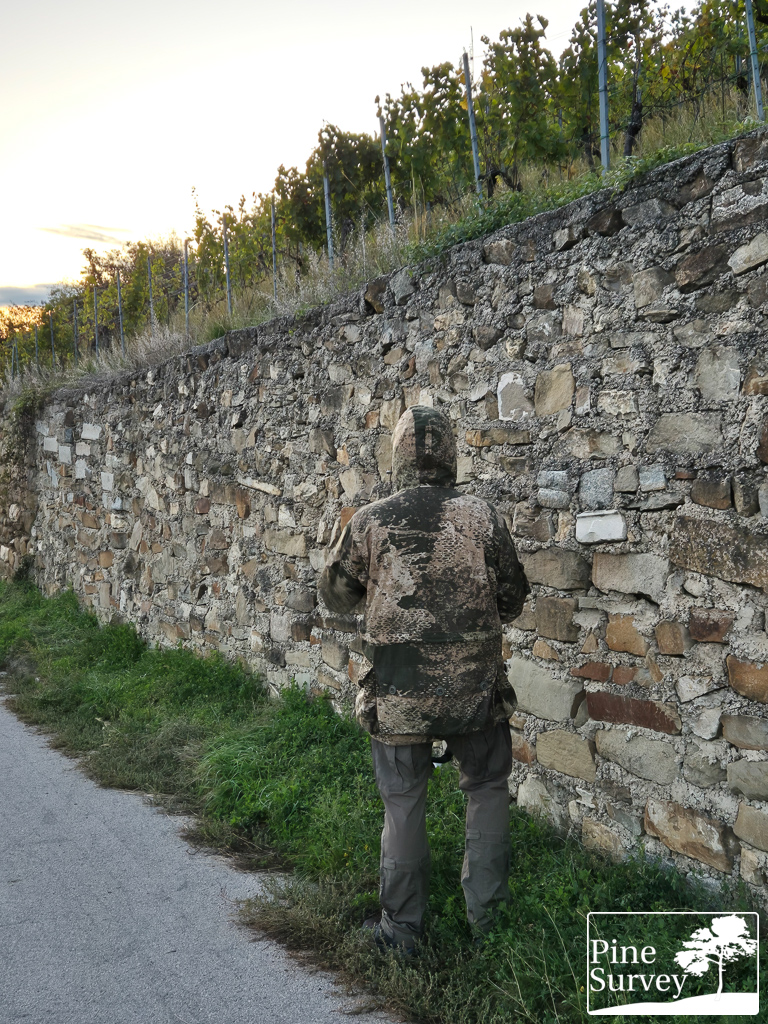
Location 1
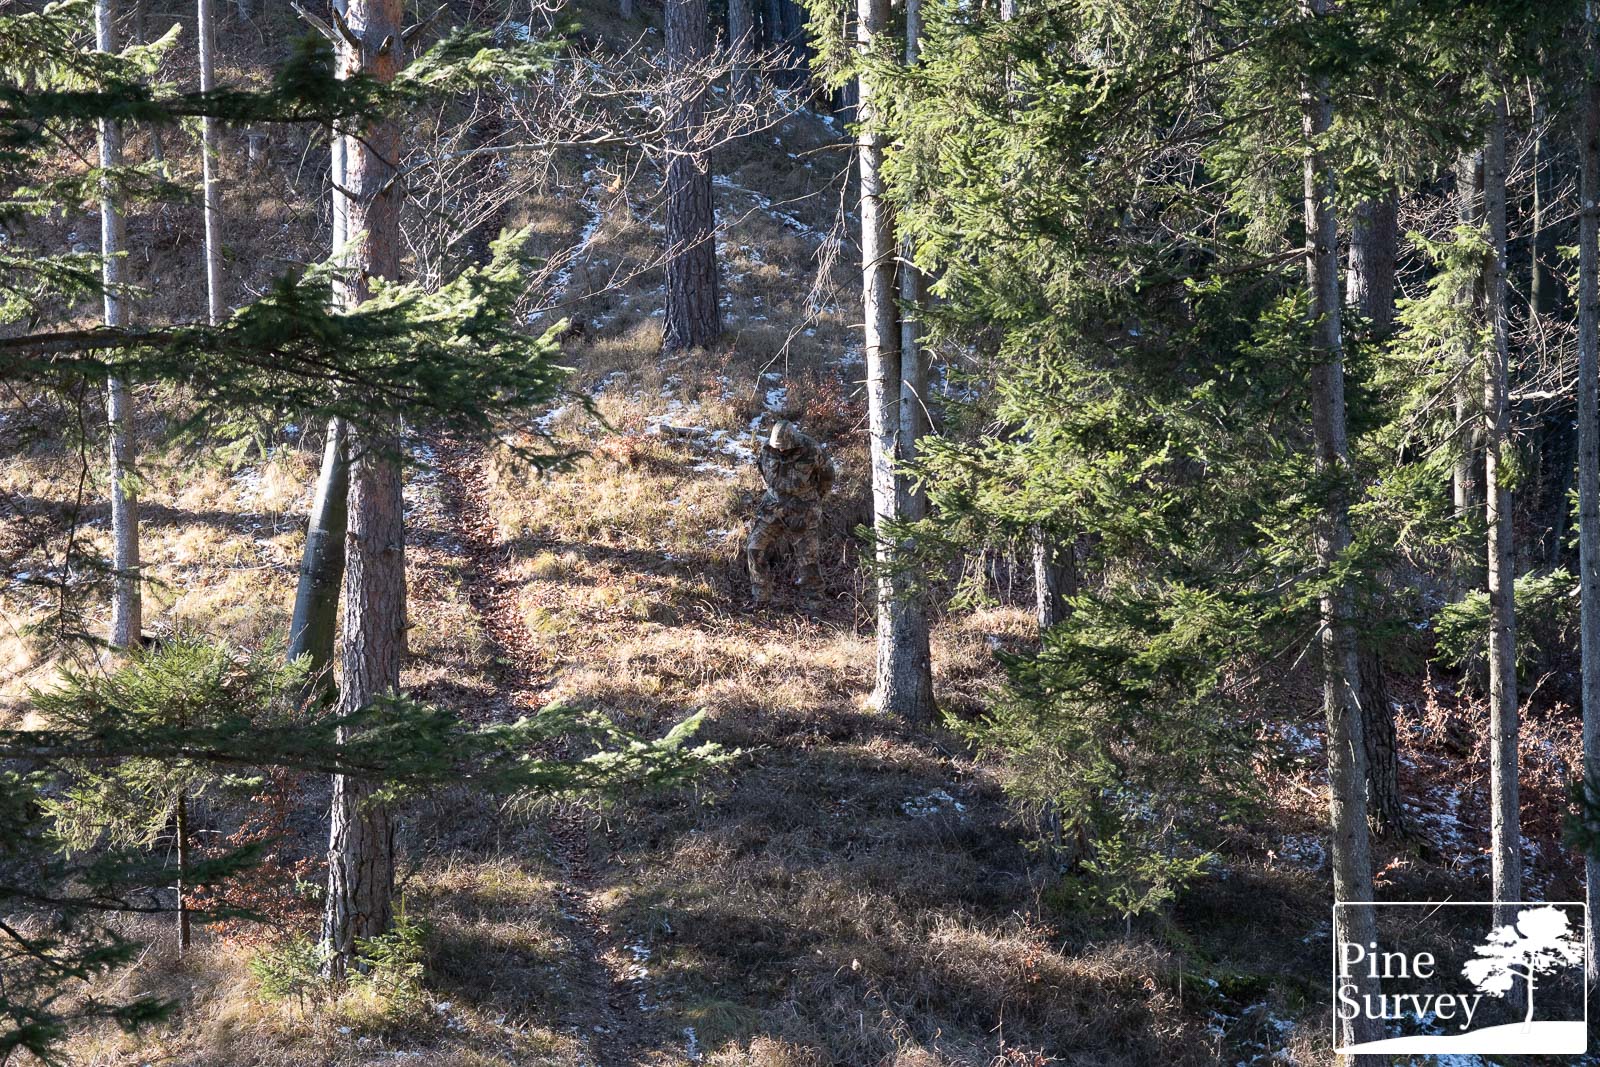
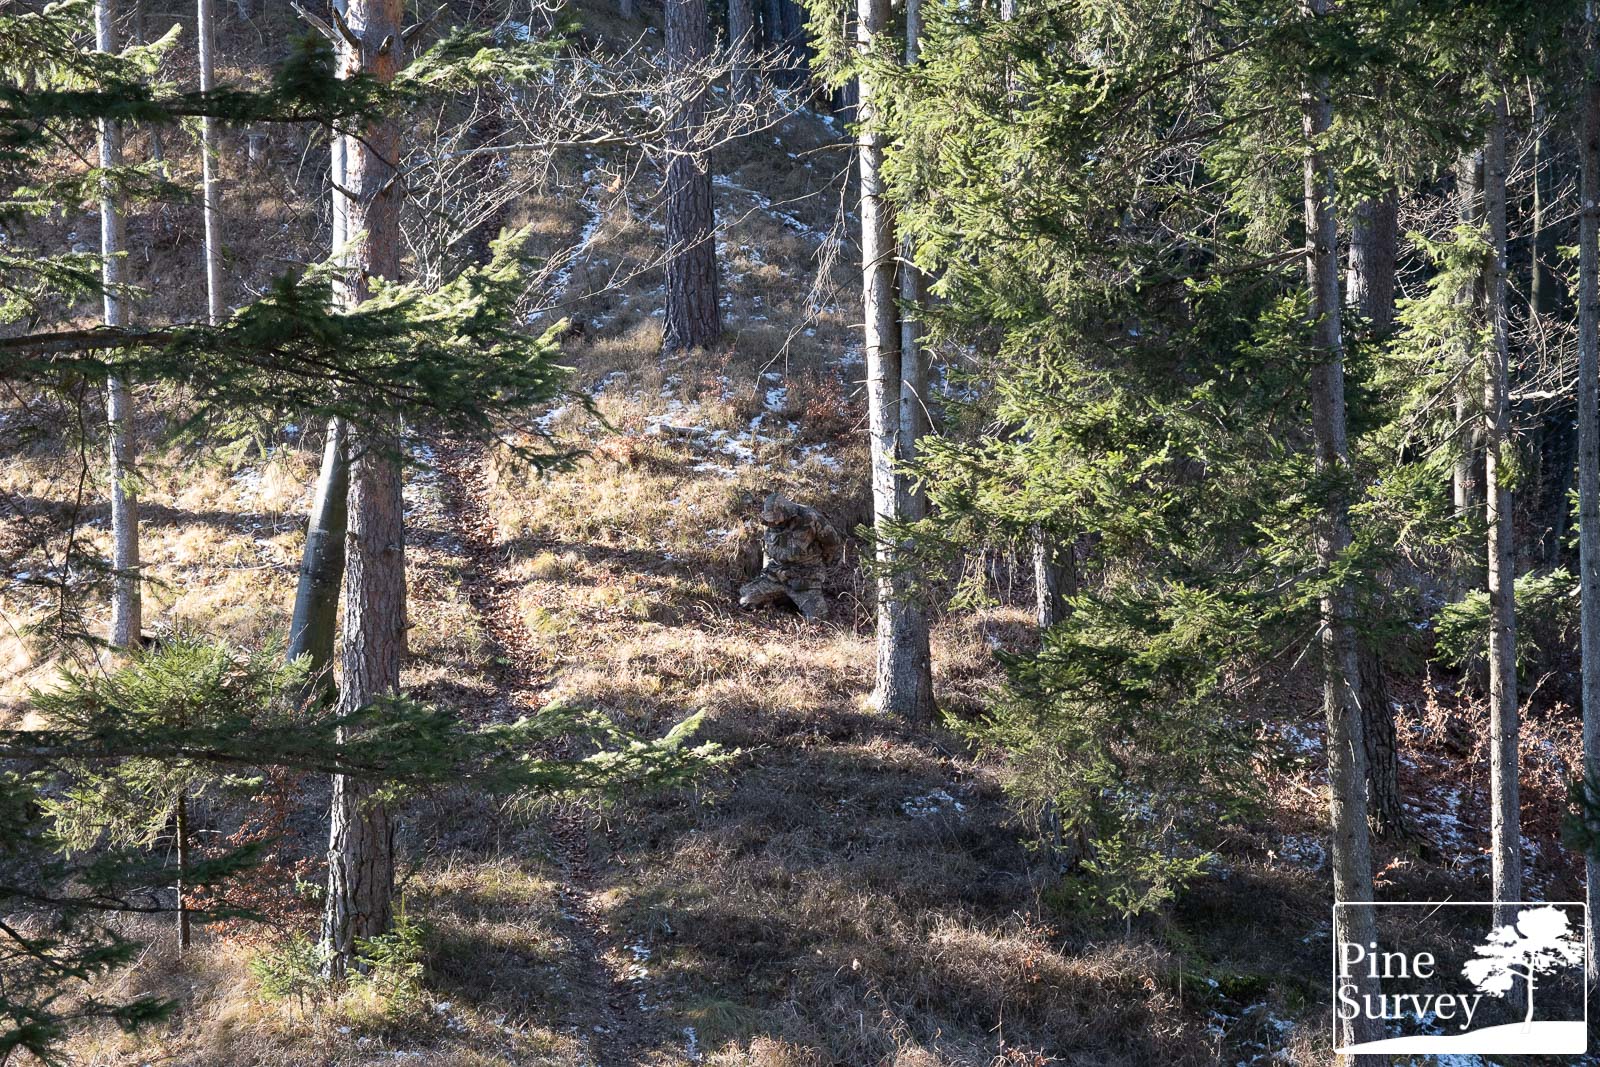
The first location is completely new, as I was trying to get as high as possible on the sea level. It is a pine forest in the hills of Carinthia during Winter 2024, with very light snow, dry and yellow ground that is mixed with some greens of grass as well as red leaves of the occasional beech.
Time was around noon, with a cloudless sky and a bright sun, creating strong shadows and contrasts. Distance to the camera was 25-30m.
Because of the distance, 50mm focal length is added to the mix to get a closer look.


Observations – Location 1
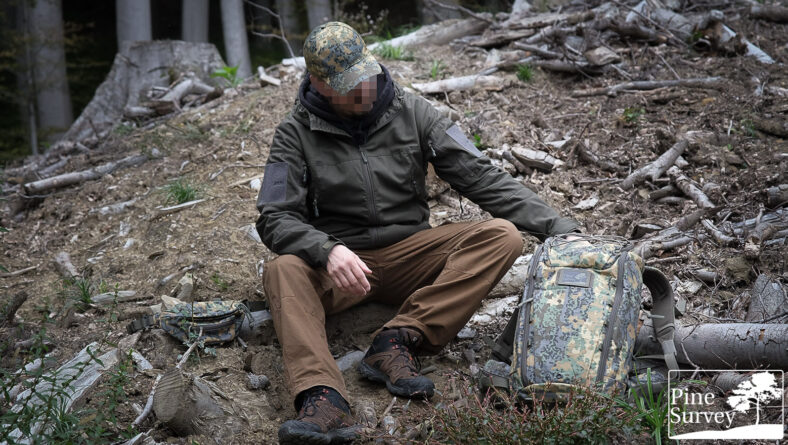
With the wide angle lens, the observer gets the impression of a longer distance, which is quite interesting in this regard, as the importance of disruption comes into play. Even though the silhouette is dead center of the picture and in the standing position, it is very difficult to make out the person in this setting. While the colors of Phantomleaf WASP II Z1B match the surroundings very well and make it blend into the environment effortlessly, the added disruption by the strong contrast completely breaks up the silhouette of the person. The kneeling position adds to this effective camouflage performance, as the human shape is lowered to the ground. The macro elements of the WASP II pattern are clearly at work, and can be observed as soon as one knows where to look. This means that at this long distance there is a working pattern and not one that merges into a perceived one colored blob.
The prone makes the concealment most effective, as always, as the body is close to the ground and hard to detect anyway. That being said, the mix of matching colors and disruptive elements provide an excellent camouflage effect, making the person look like a tree trunk or dead wood.
Changing to 35mm focal length and the roughly same impression one would get with the human eye at this location, the standing position is more easy to identify. As a result of the backlight and bright background, the torso stands out a bit, even though the colors match the surroundings and the macro elements are strongly disruptive. The blending and disruptive effect can be especially observed around the legs, with the one on the right side merging into the background.
By kneeling down, the backlight effect vanishes and Phantomleaf WASP II Z1b can perform much better in this location. Because of its organic pattern placement, the macro elements give the human shape the look of a tree trunk. Especially the head section blends into the background. With the prone the above mentioned statements apply.
Coming to the 50mm pictures. These are added to get a closer look and as the light changes, one can also get a more comprehensive understanding of the camouflage performance. Starting with the standing position, the backlight is not as apparent as before. The green macro elements blend together with the green and brown background, resulting in a strong disruption of the person. At the same time, the brighter main color blends into the background. The kneeling position improves the overall camouflage effect and at this point any description would get repetitive. One eye catcher and “give away” is the triangular shadow, as a result of the sitting position. Regarding the prone: the above mentioned statements apply.
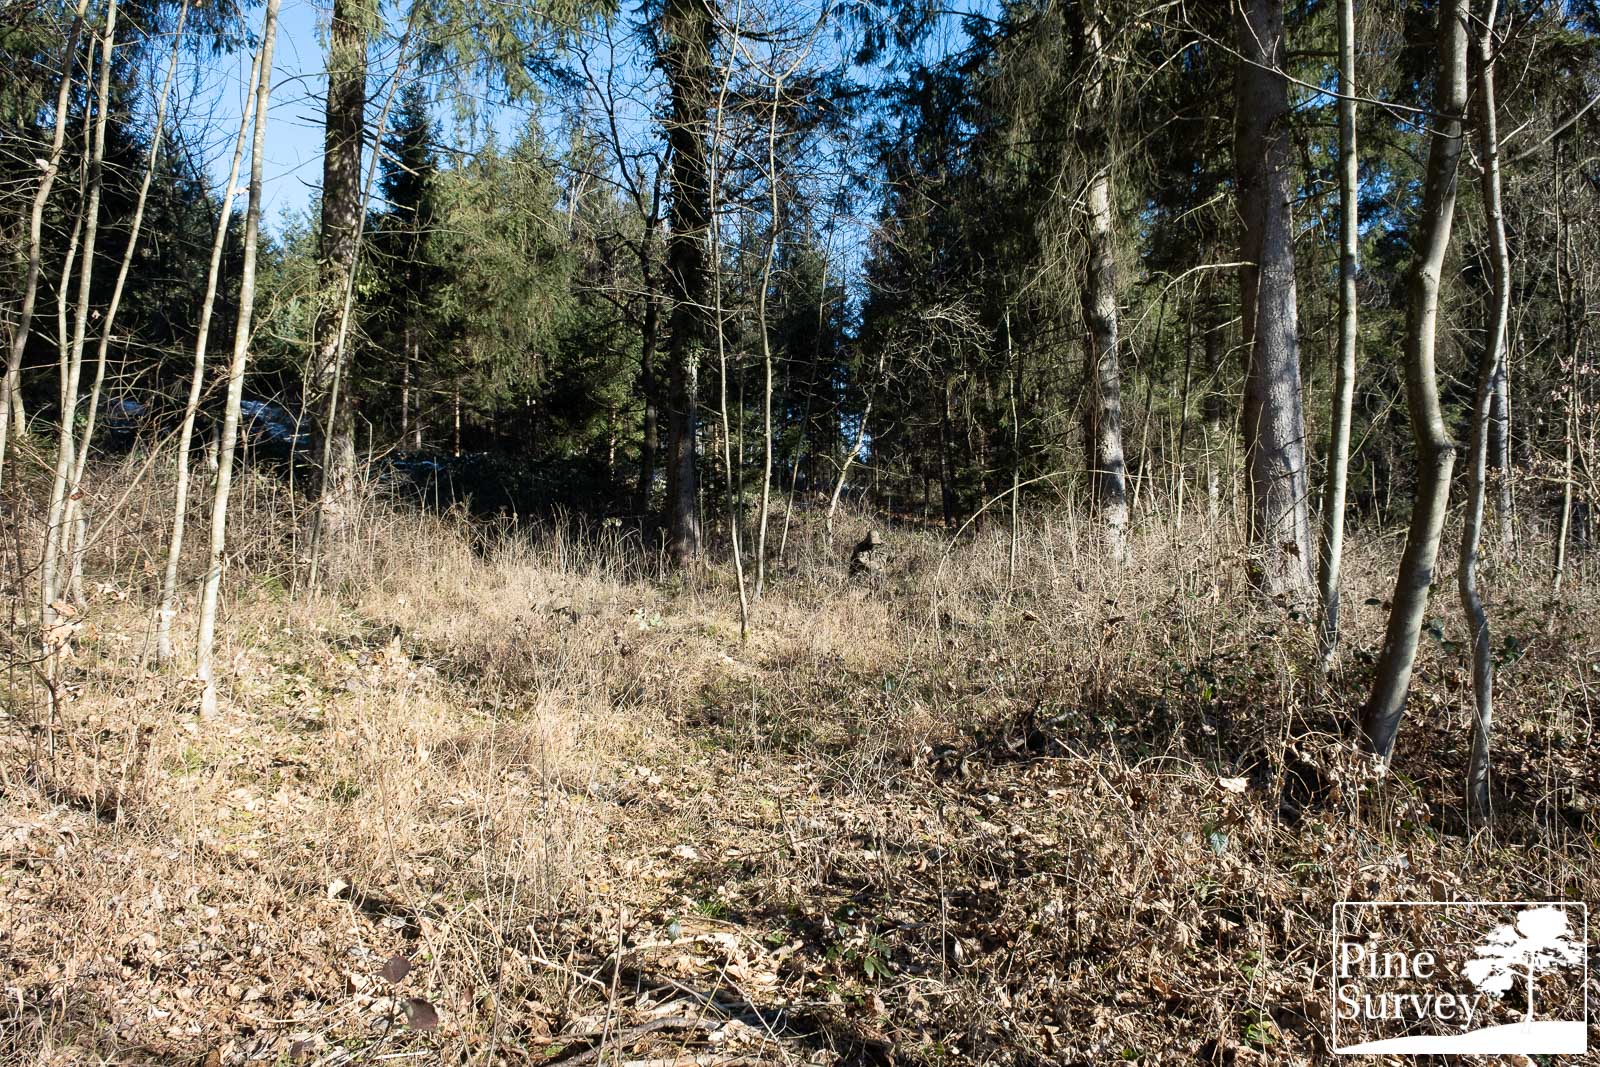
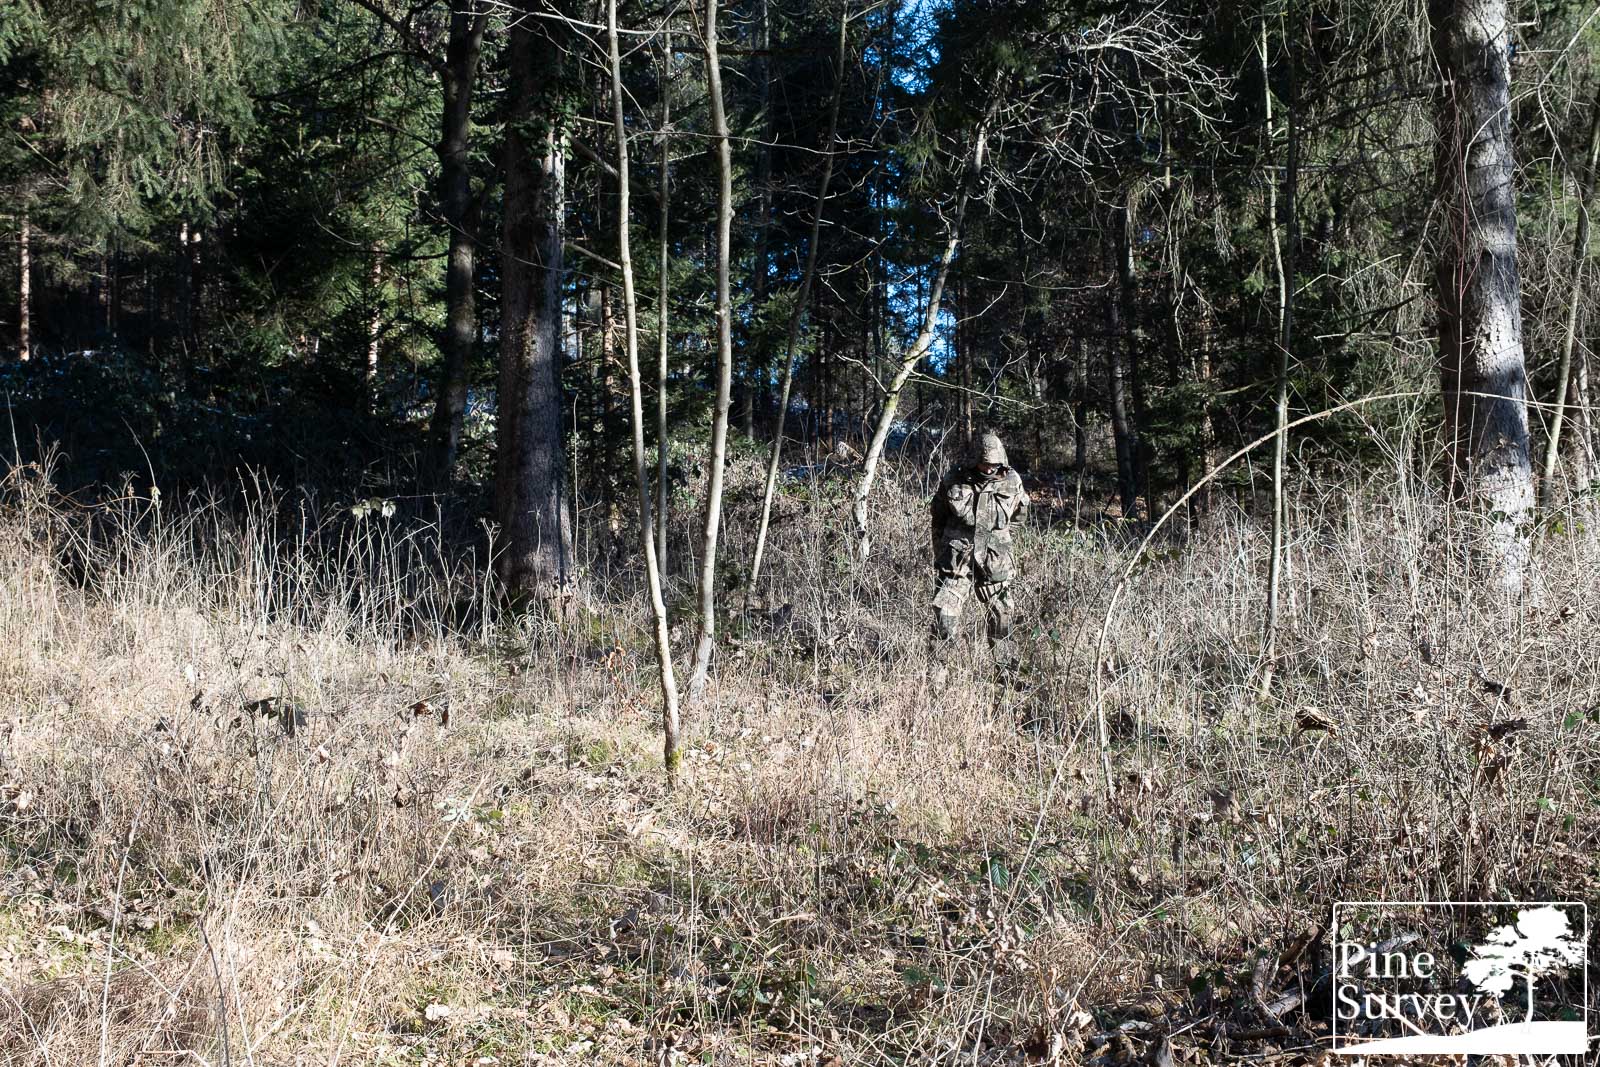
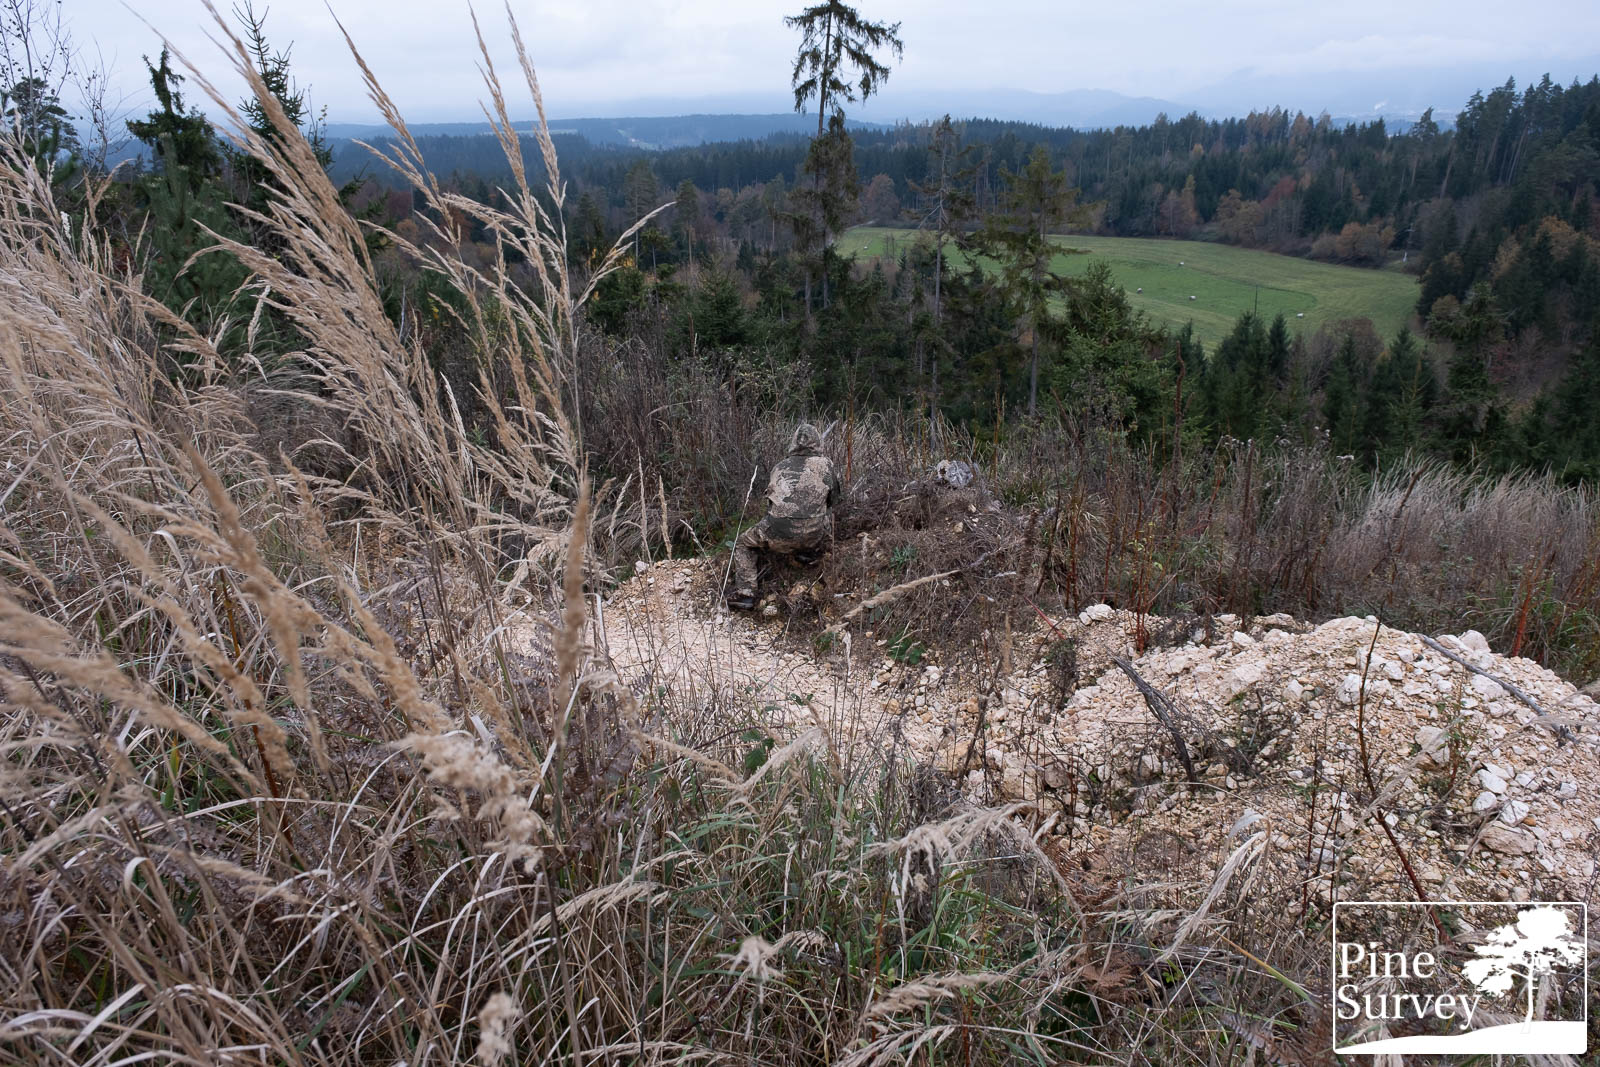
Location 2
For the second location I chose a forest opening with dead underbrush, to show the pattern’s performance in a dry environment full of dead vegetation. The area is covered with dead leaves, dry wood and grass as well as the occasional green grass that is fighting its way through the dead vegetation. It is a mixed forest and it was shortly after noon in winter 2024 on the same day as location 1. This means a bright sun, direct and hard light and as a result strong shadows. The distance to the camera was approximately 10m.


Observations – Location 2
The pictures from location 2 show the challenges for camouflage patterns under direct sunlight. For most patterns, isoluminance (lacking contrast at a certain distance, resulting in a solid color effect) and fabric shine become an issue. Despite the hard and direct sunlight, Phantomleaf WASP II Z1B still has a working macro pattern, even though it is barely visible in the standing position, when looking at the wide angle lens pictures. Adding to that is the bright background, that highlights the human shape a bit more. That being said, the colors blend into the environment easily. When kneeling down, the macro elements break up the silhouette and the color mix of ivory and tan perfectly mix into the surroundings. Knowing that I usually place the person dead center, it makes it easy to find the human shape, as a result of the shadow. However when going into the prone, it is almost impossible to identify any shapes, as a result of the blending and disruptive properties. Changing between the pictures shows that there is barely any visual obstacle in front of the lying person.
Looking at the pictures with 35mm focal length, one can see the contrast of the dark green macro elements and their disruptive effect, particularly on the legs. When standing the biggest challenge is the shadow created by the hard light. That being said, the mix of tan and green colors mix with the vegetation of the surrounding forest. This becomes more apparent when kneeling down or going into the prone. Especially the latter is a perfect example of how the bright background makes the shadows of the standing and kneeling positions problematic in comparison. When lying down, it is almost impossible to locate Phantomleaf WASP II Z1B.
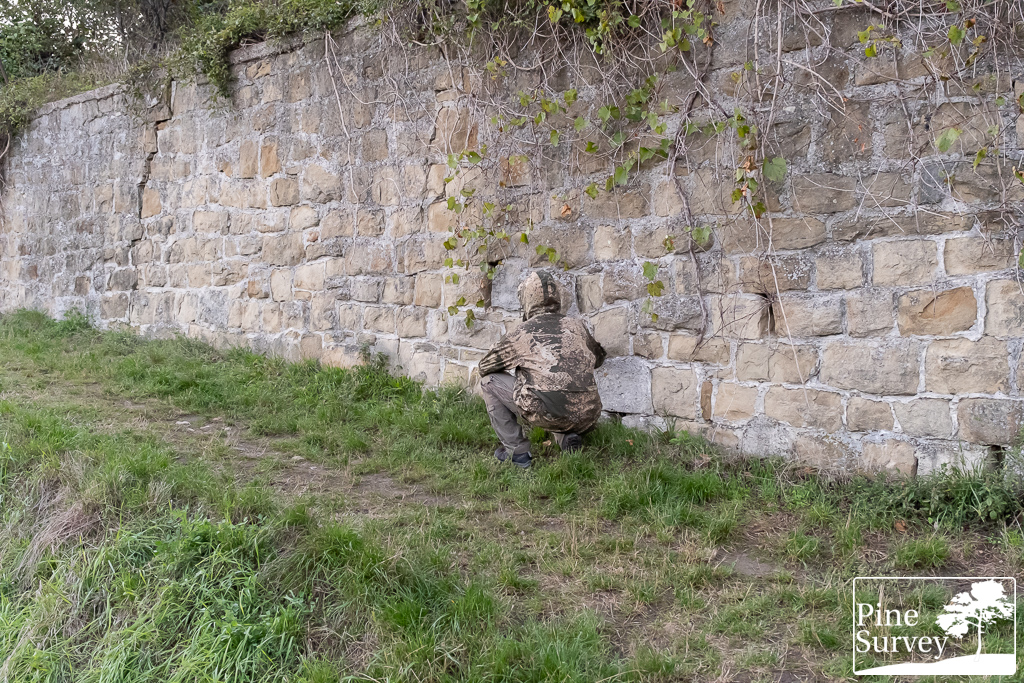
Location 3
Location 3 is the same area as location 2 on the same day and the same time of the day. The perspective was changed to a different angle, to change the shadows and provide a more frontal experience. What I did not realize was the large shadow created by the hood as well as the coyote brown collar of the fleece jacket underneath the Leo Köhler smock.
Distance to the camera is approximately 5m.


Observations – Location 3
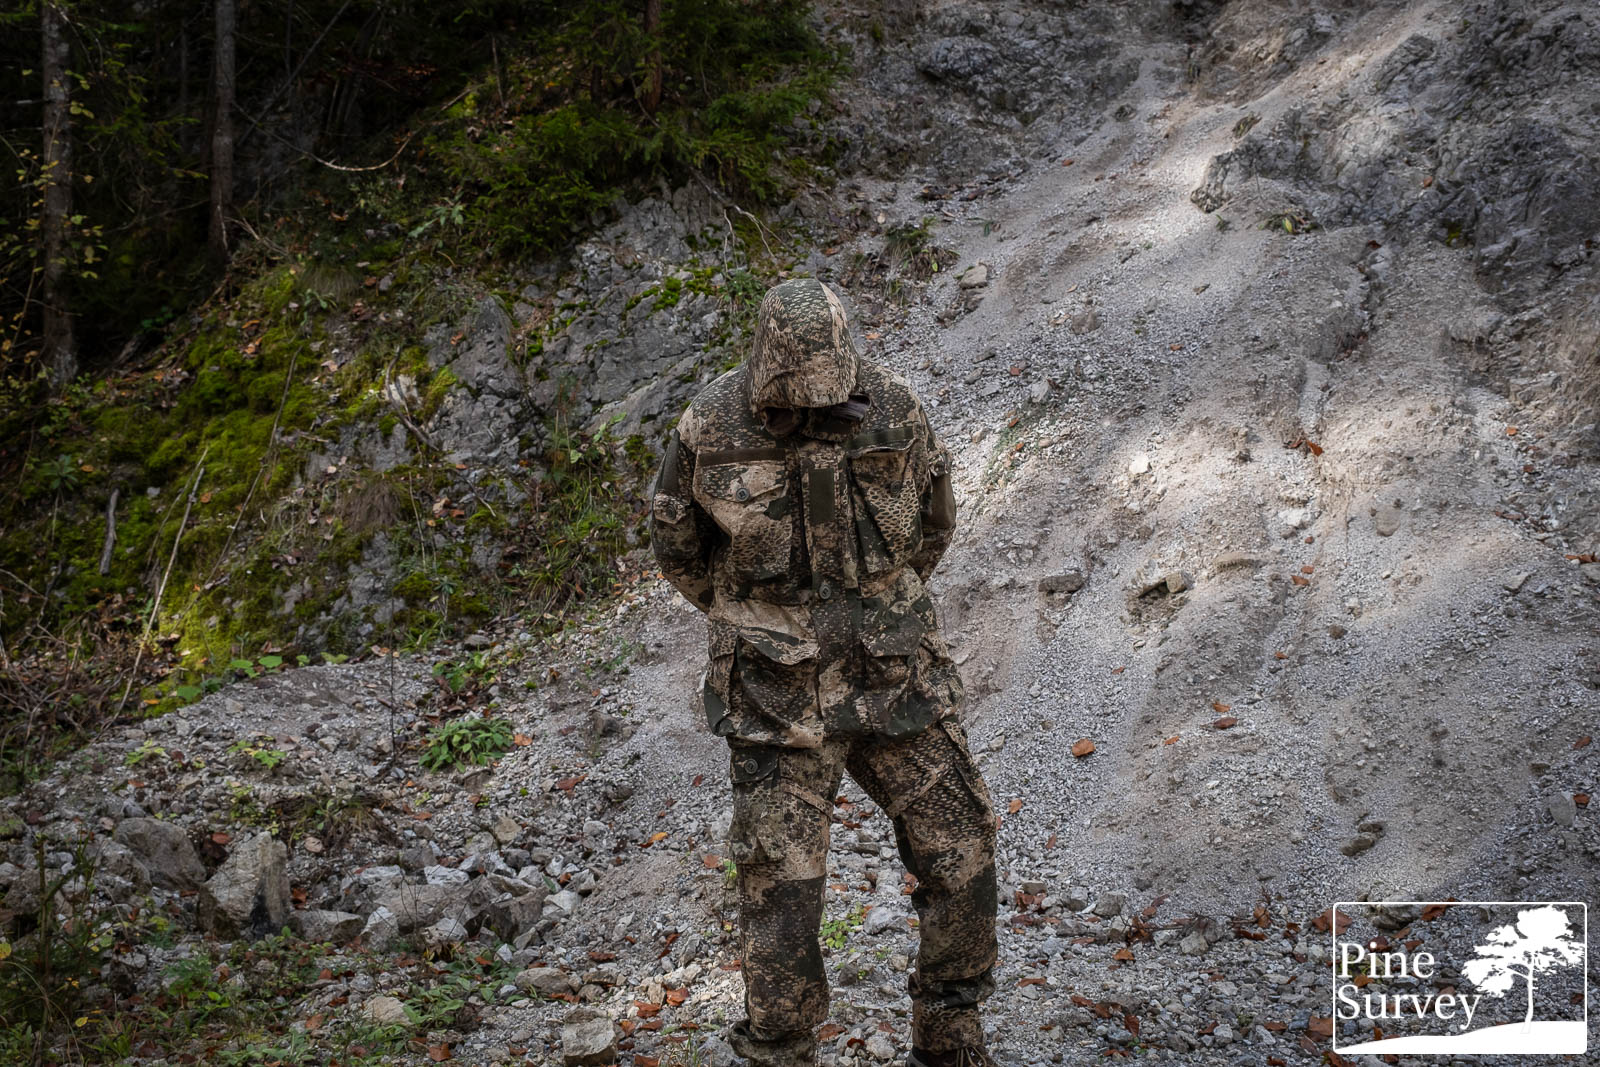
Having the issue of harsh light and the resulting shadows in mind, I wanted to provide additional impressions, by changing the angle. One can see how the effectiveness of a pattern is also affected by these little changes in light and perspective. When looking at the pictures of the wide angle lens, one can see how the standing person is blending into the background very well. Especially the legs, which are usually the biggest issue because of the angles, melt into the forest floor. The macro elements do their part to disrupt them further. The same can be said for the torso. The most apparent aspect is the dark shadow, created by me using the hood of the smock in lack of a boonie in Phantomleaf WASP II Z1B. The same issue can be observed in the kneeling position. While the complete human shape is disrupted by the macro elements, and even some of the midi fractals, the shadow in the face area stands out. However, this is one of many shadows in the picture with us knowing that there is a person kneeling on the floor – without that information, it would be impossible to spot or realize, someone is there.
The last remark is underlined by the picture of the prone position. The micro, midi and macro elements perfectly fit that environment. As does the mix of colors.
There is no need to describe the 35mm pictures in this location. By now I would only repeat myself and the pictures speak for themselves. The only thing worth noting is the issue of the dark shadow of the hood, which can be mitigated by proper concealment of the head and face.
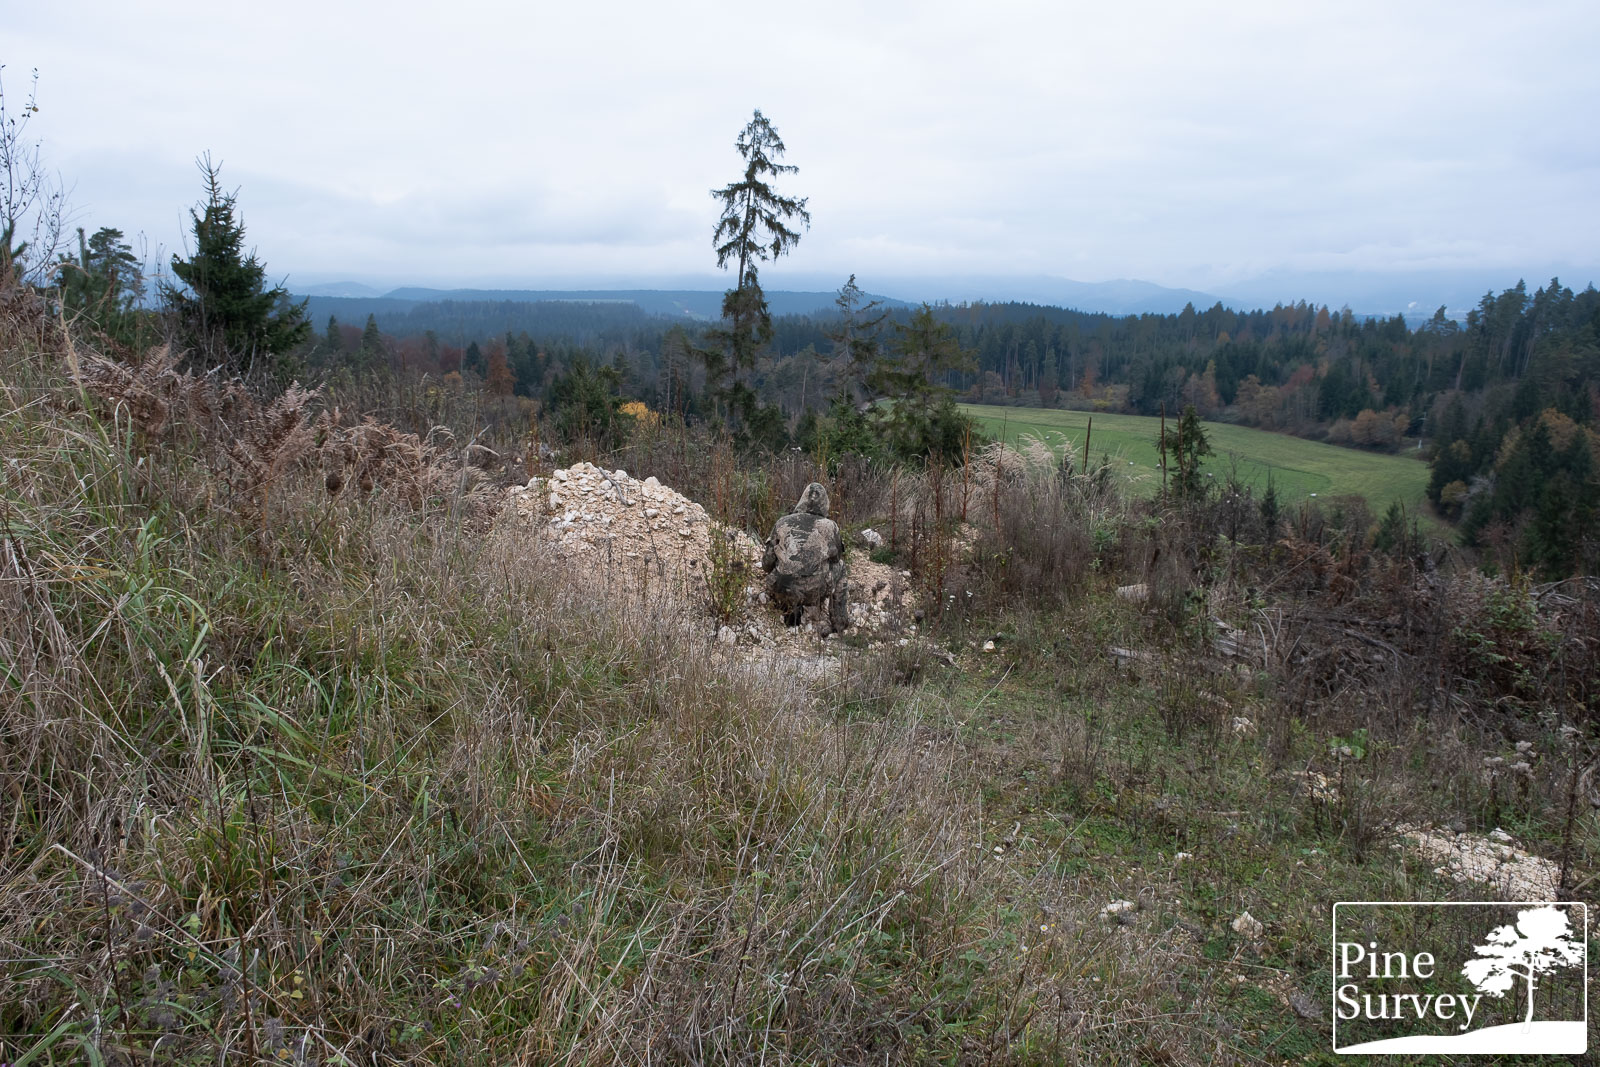
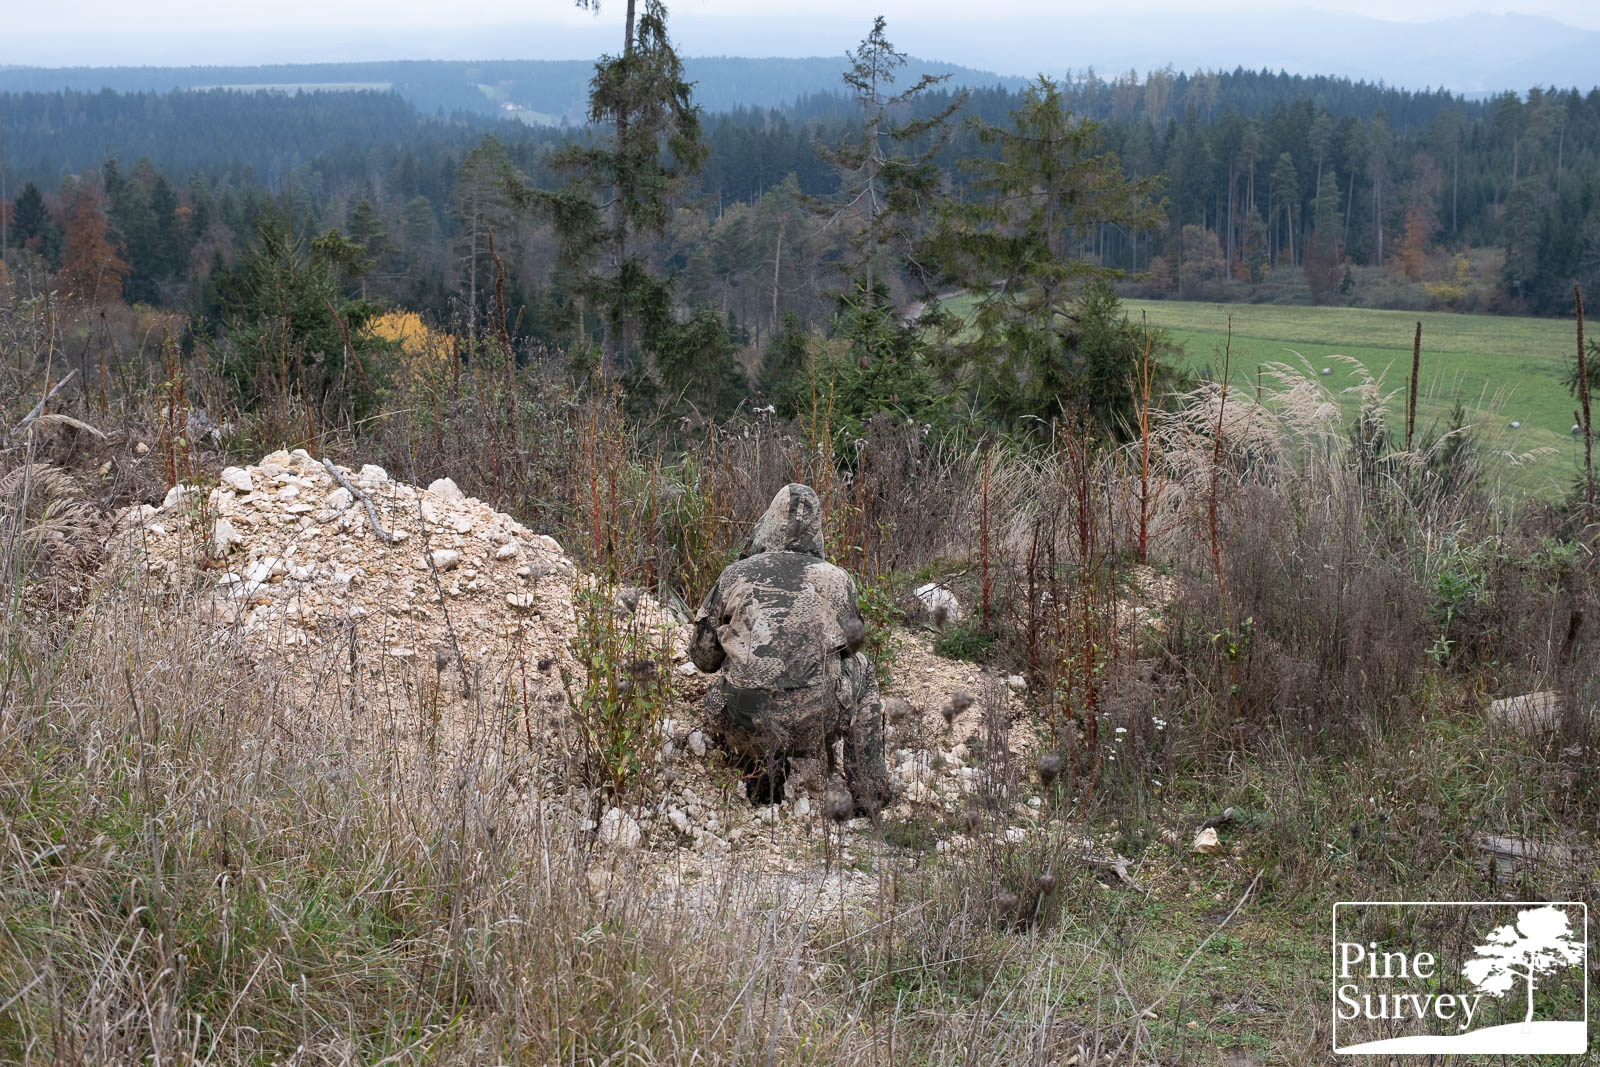
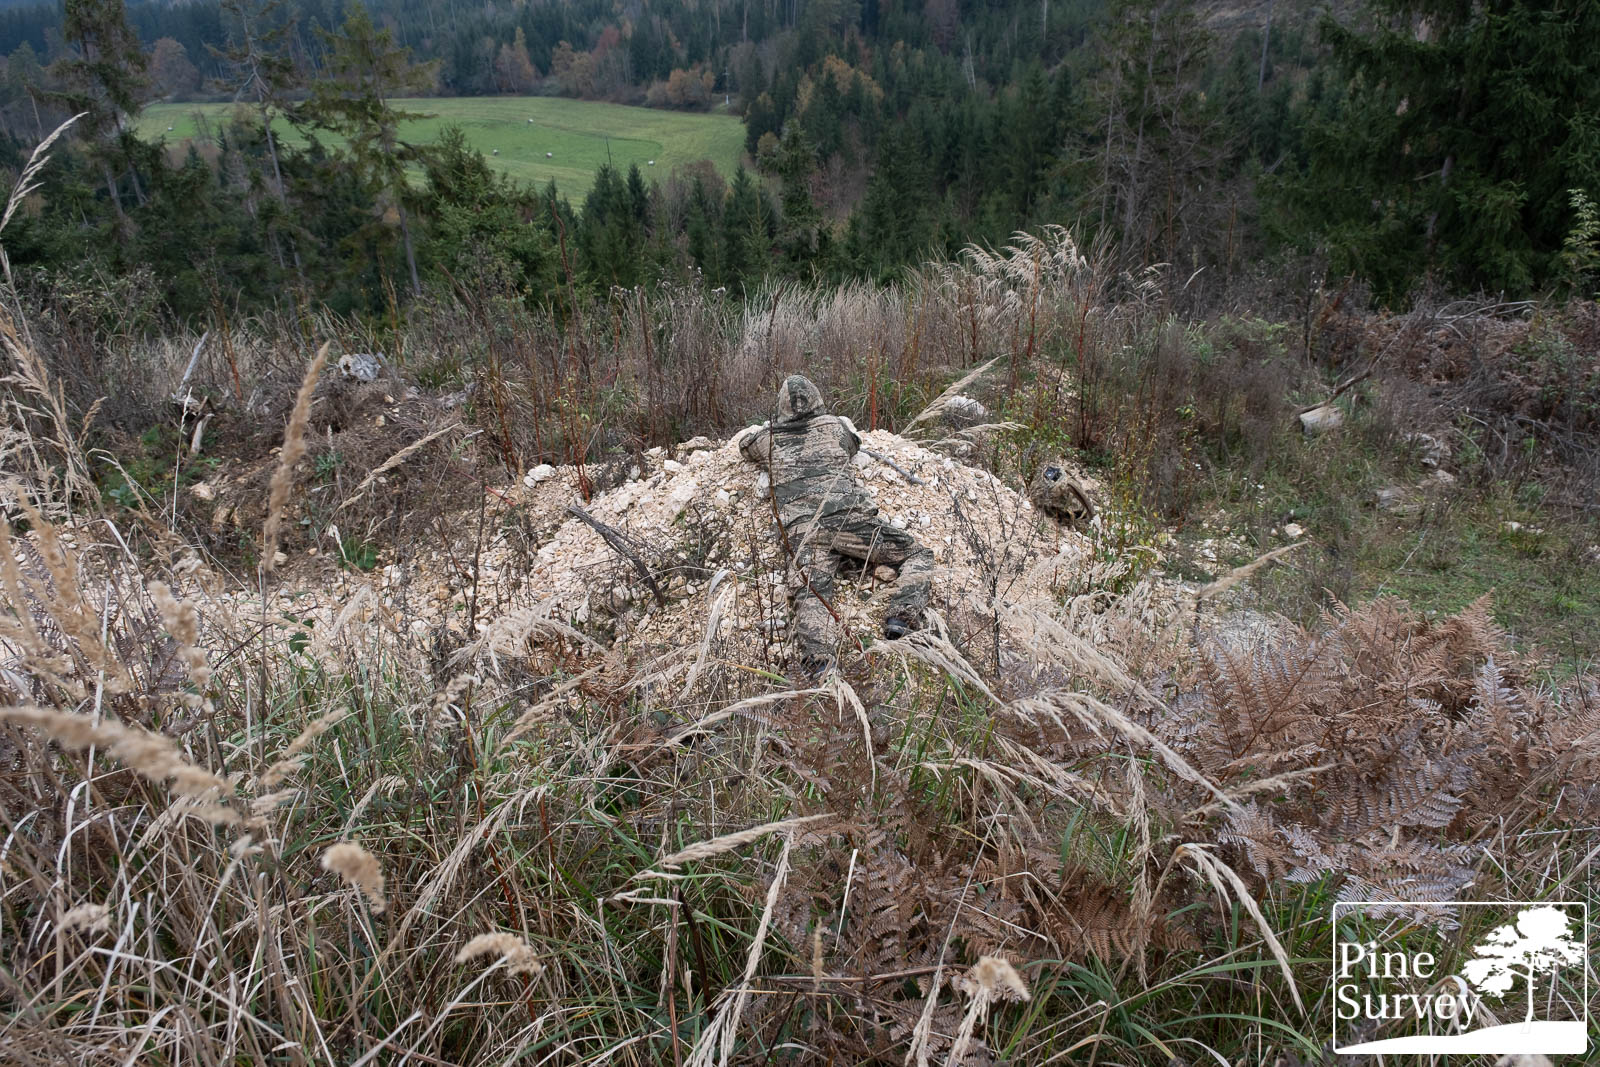
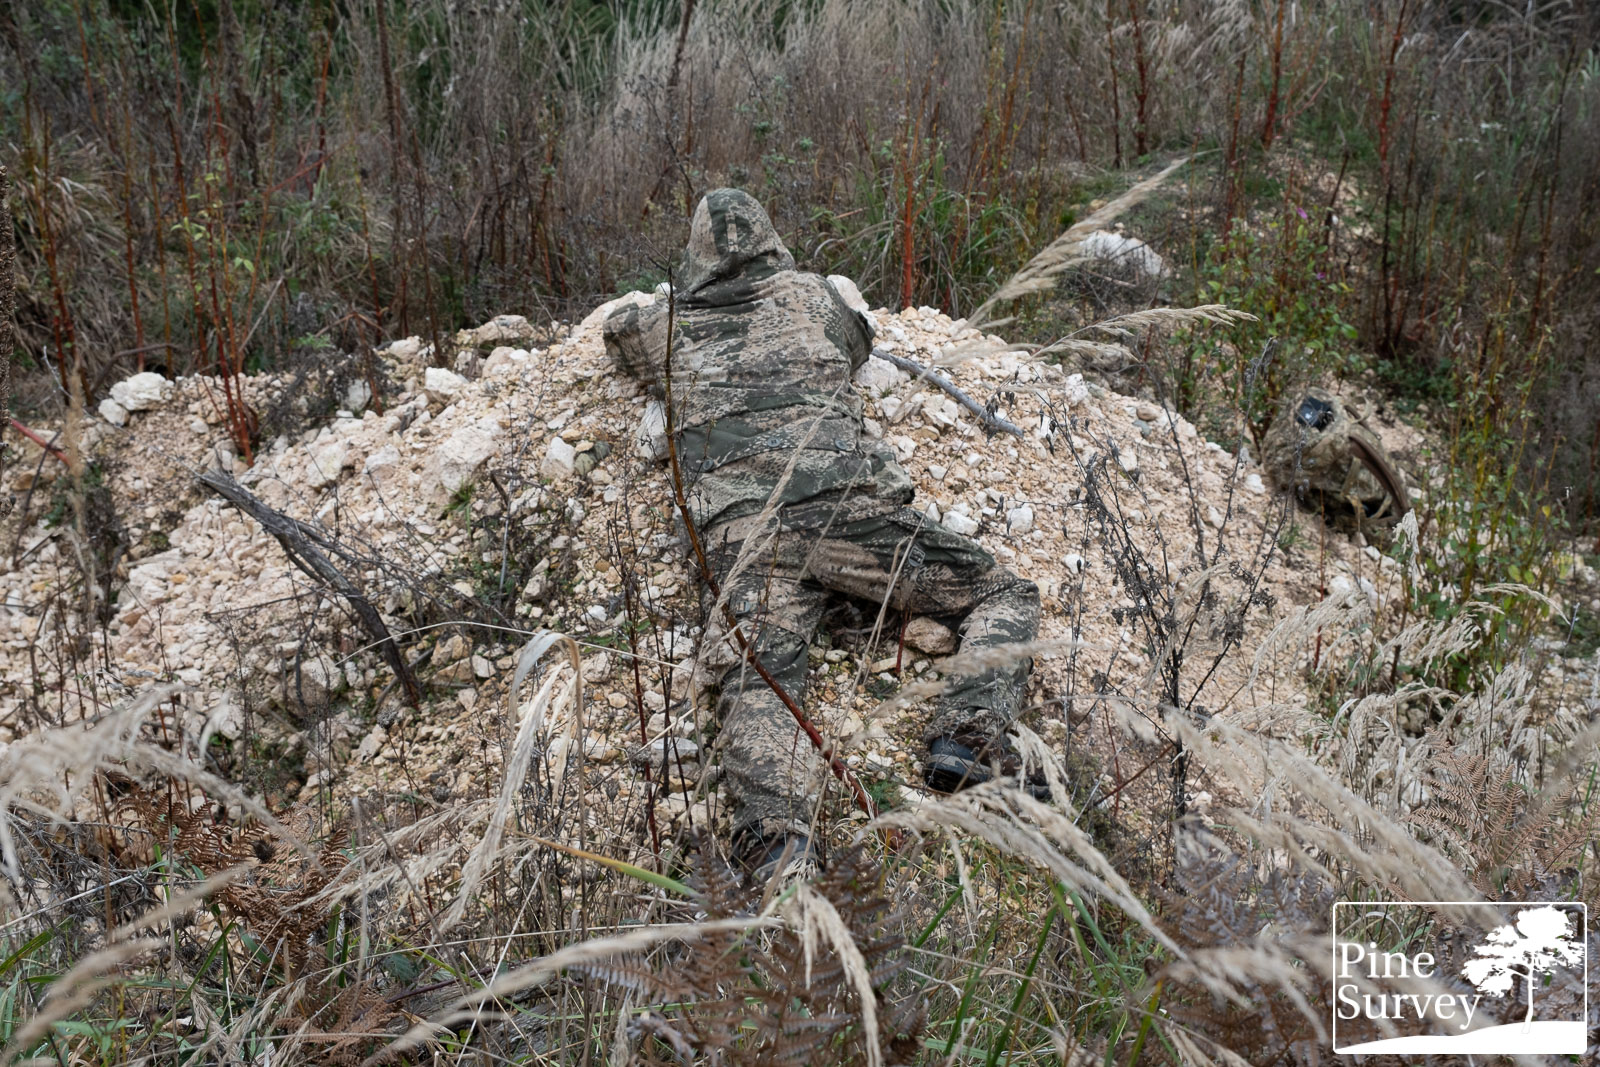
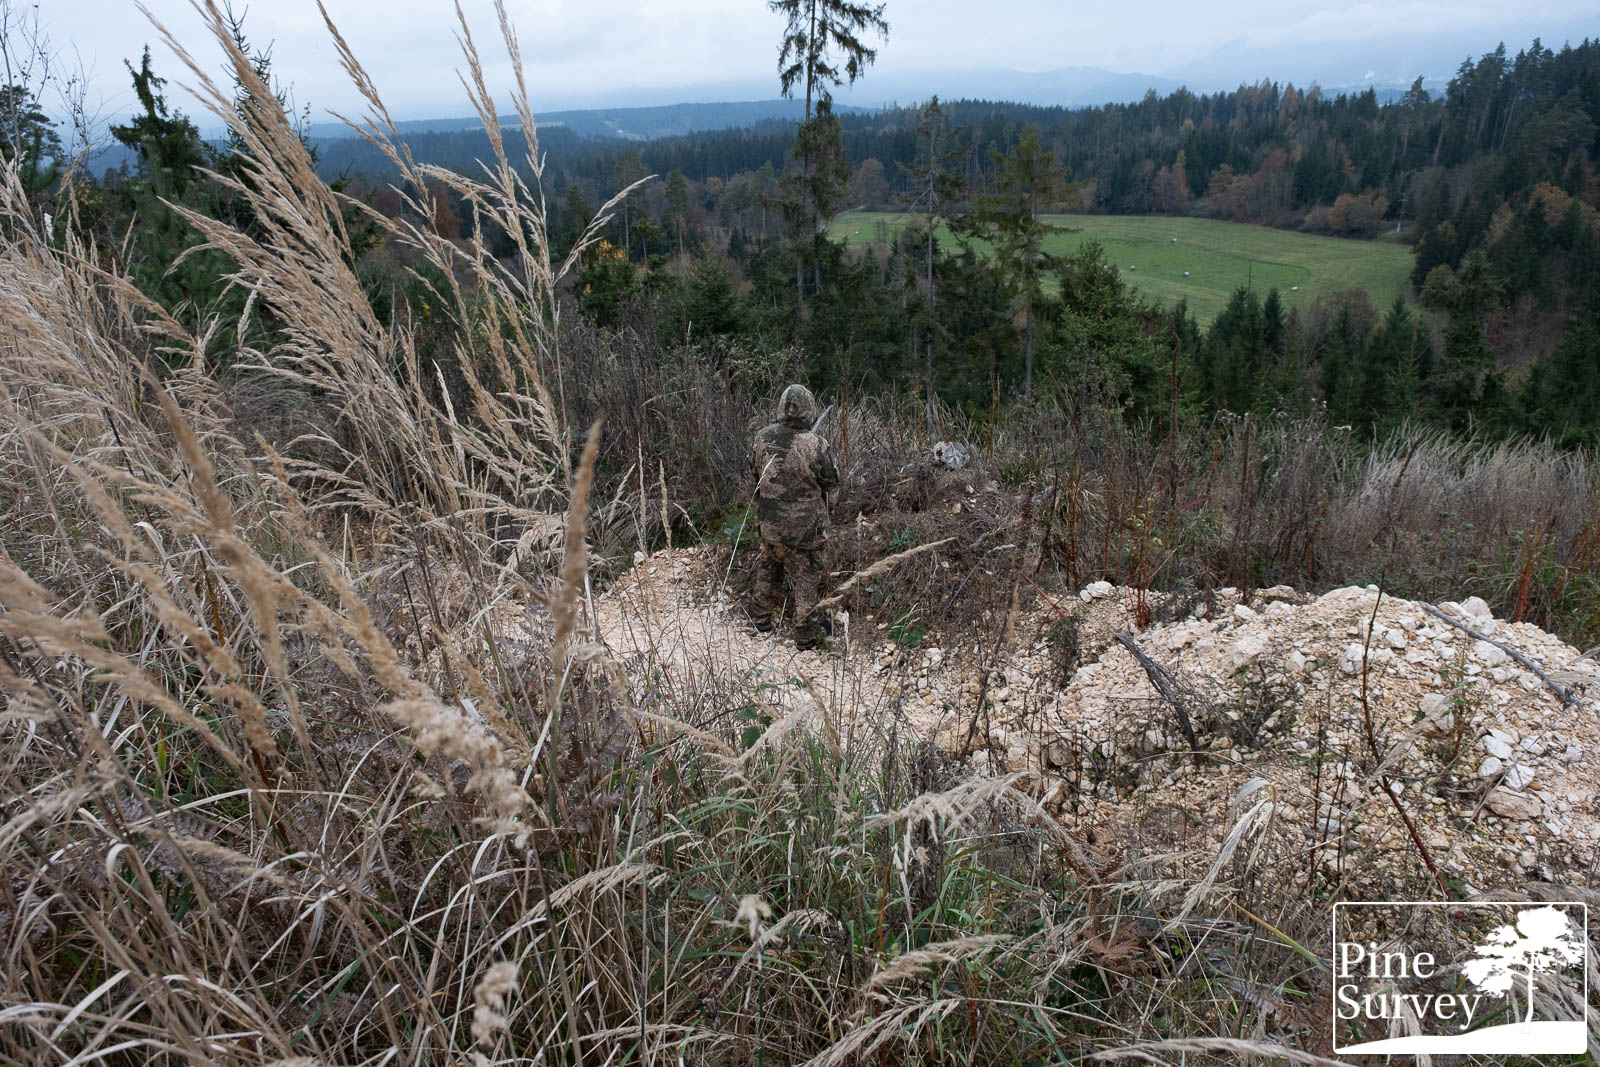
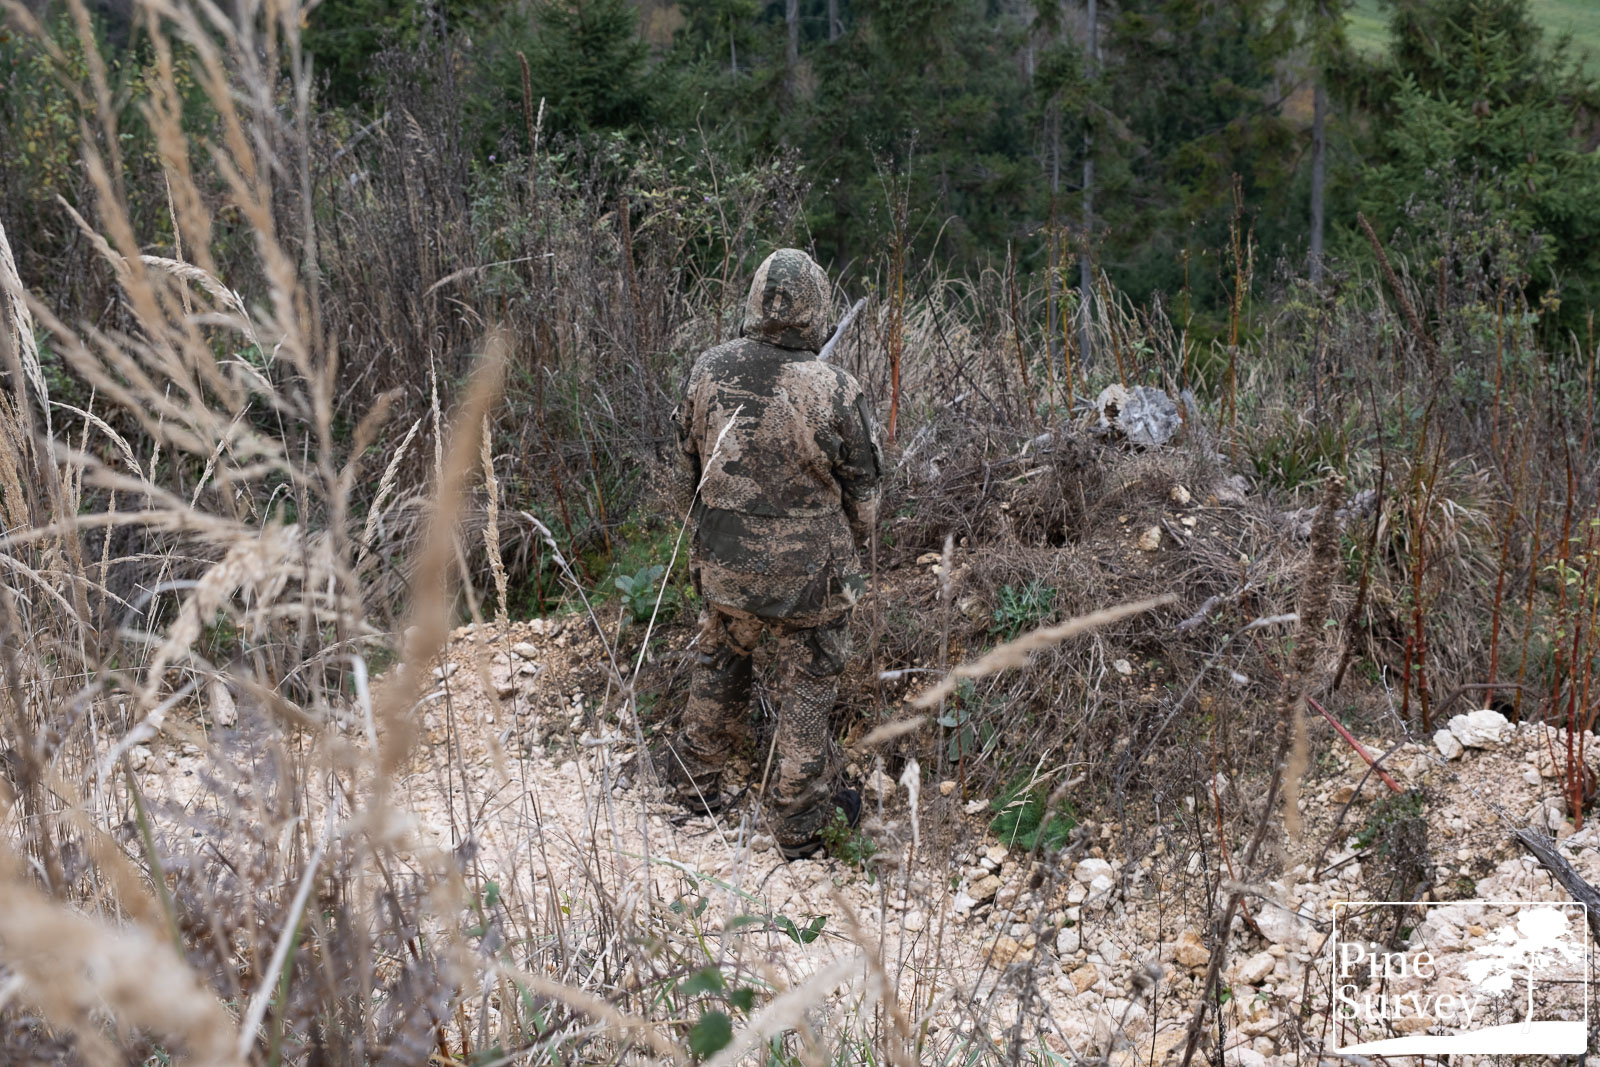
Location 4
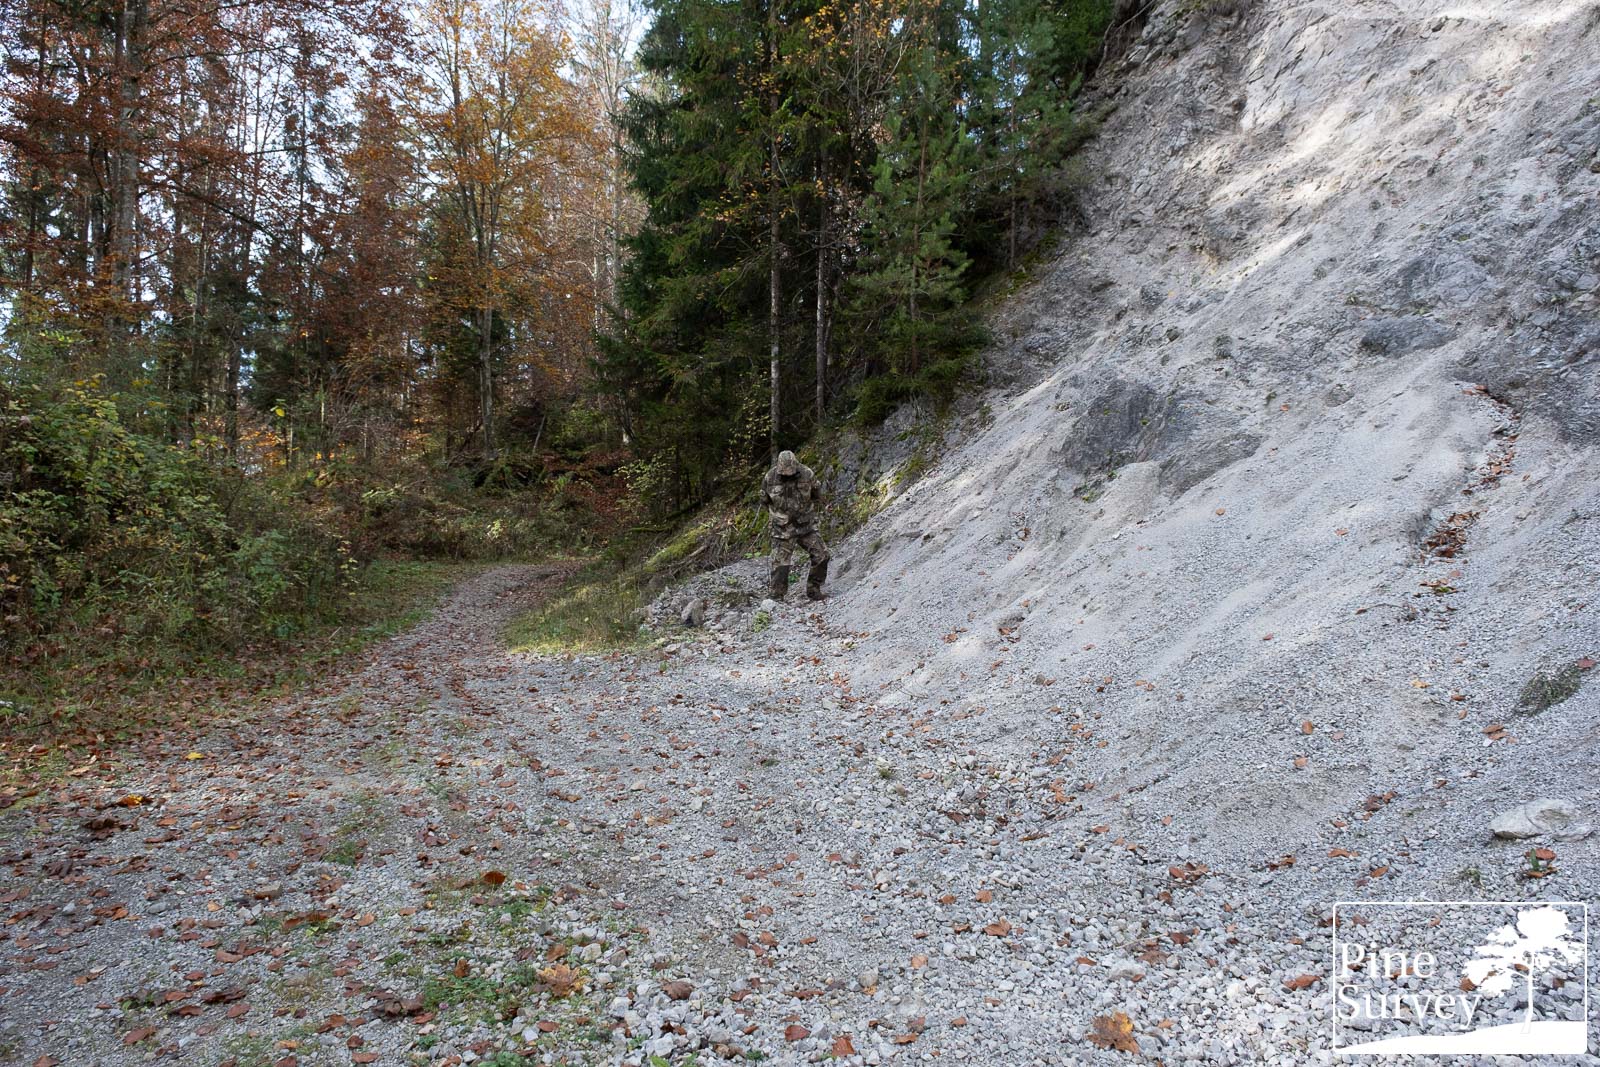
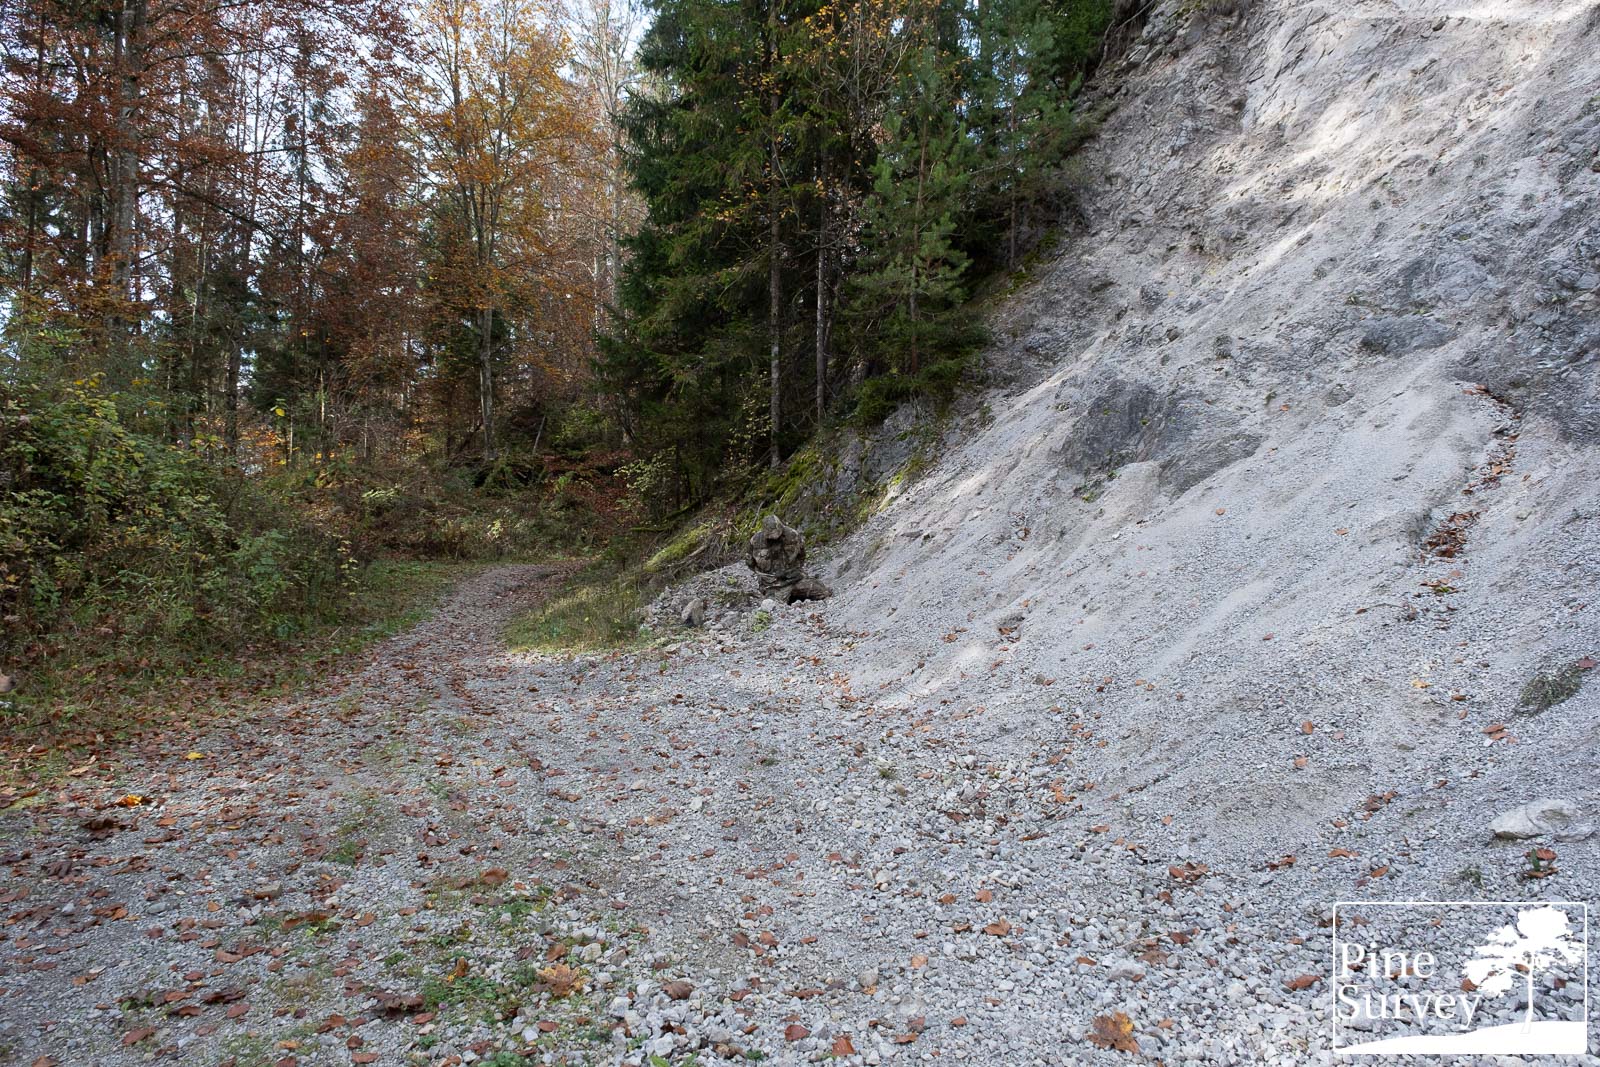
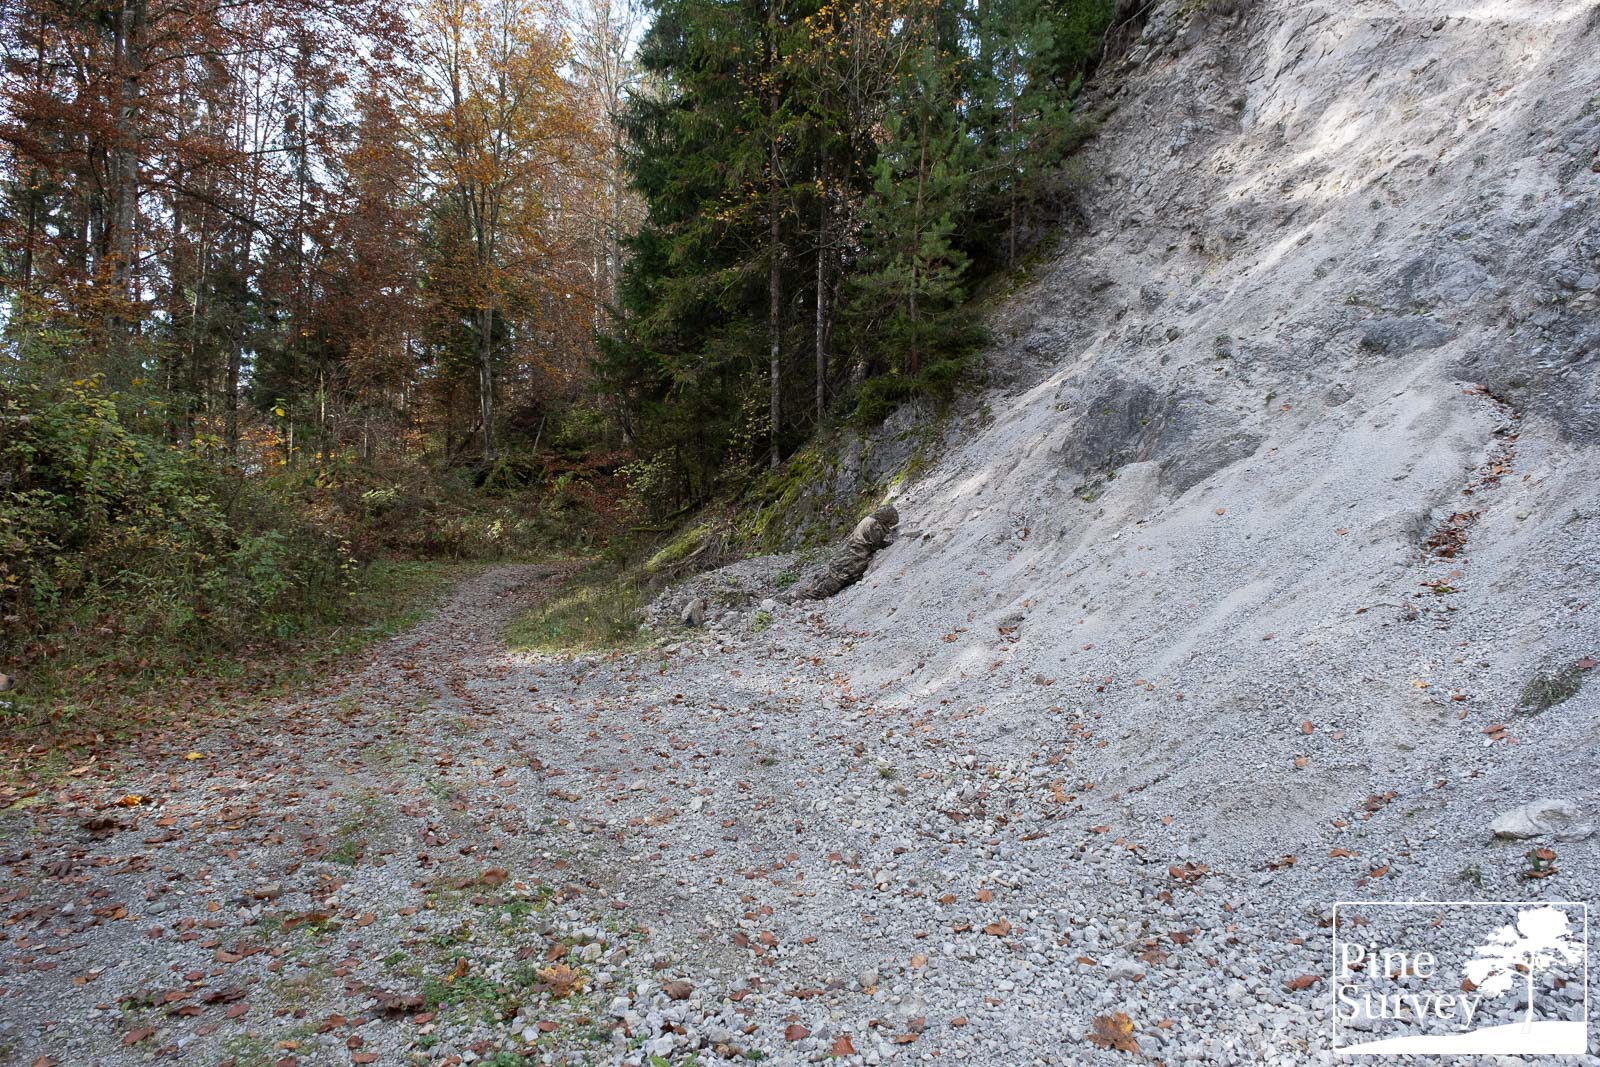
The last location is the already known gravel pit. This location can give somewhat of an impression of how Phantomleaf WASP II Z1B would perform in a rock environment – having in mind that rock deserts, alpine environments and other stone formations can be of various colors, given their geological properties.
The pictures were taken in autumn, with a lush green environment in the back, disrupted by red and yellow leaves in the far background. The gravel pit is representative of the dolomite properties of the region, showing more greyish and white colors. The sun was partially clouded in the morning, with the occasional sun rays. Distance to the camera was 10-15m.
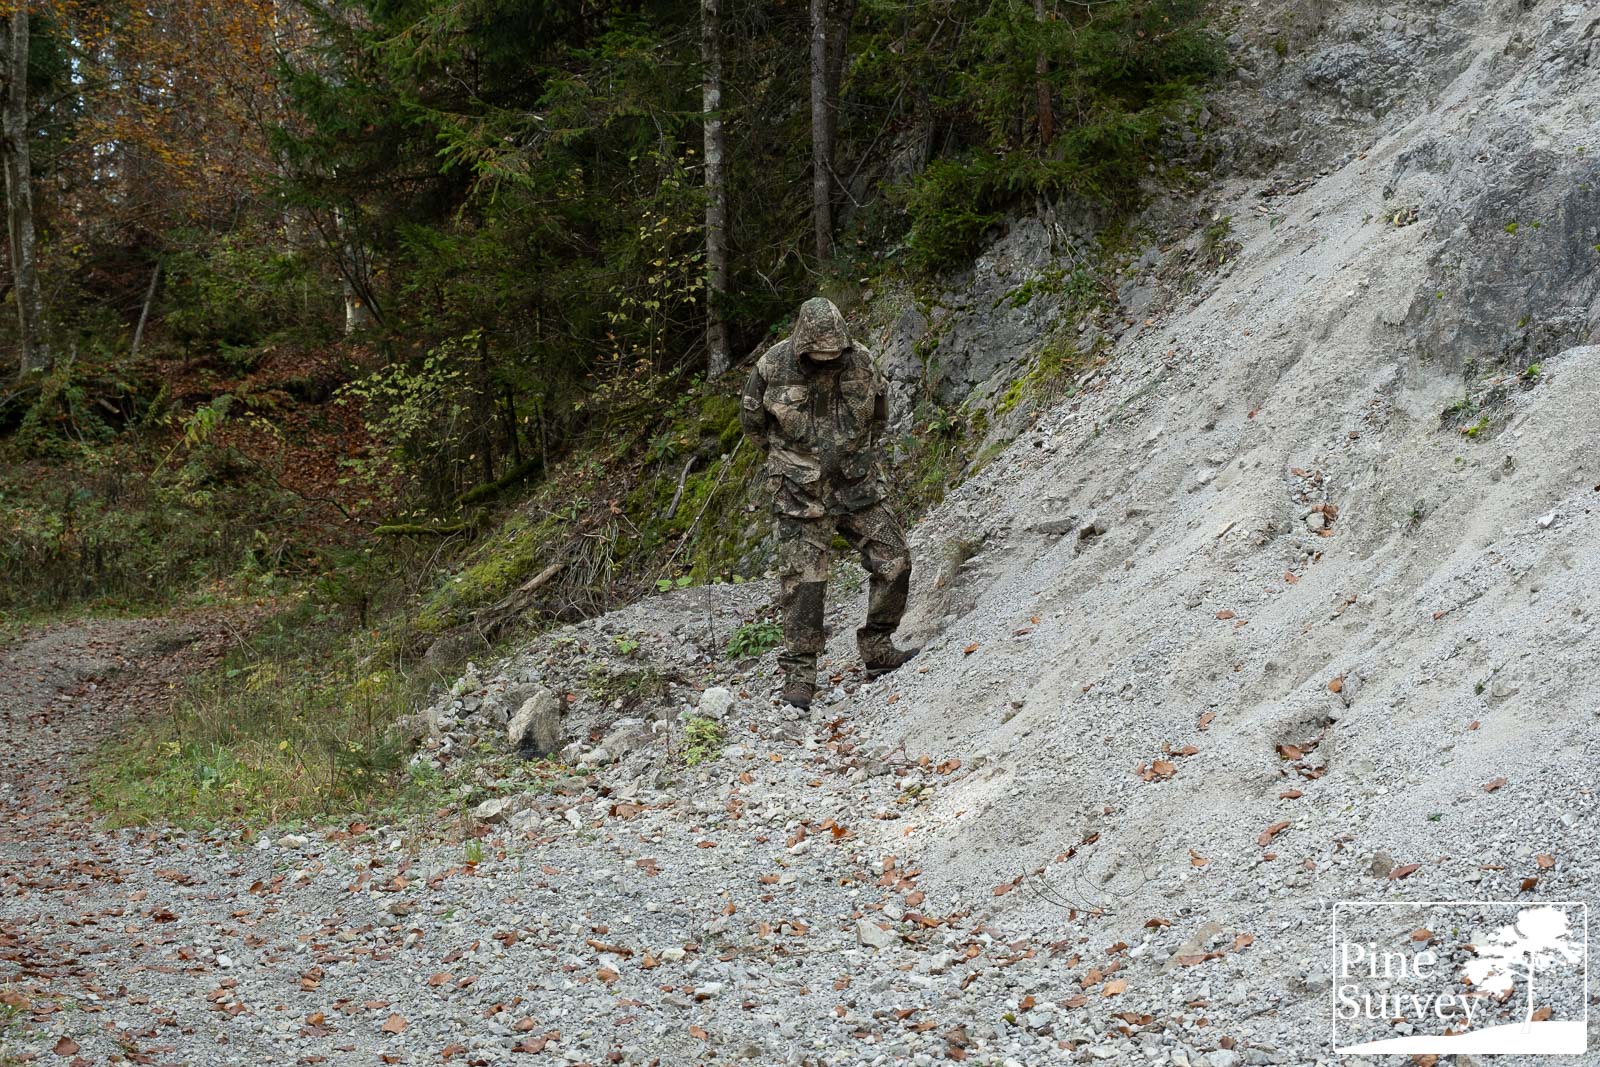
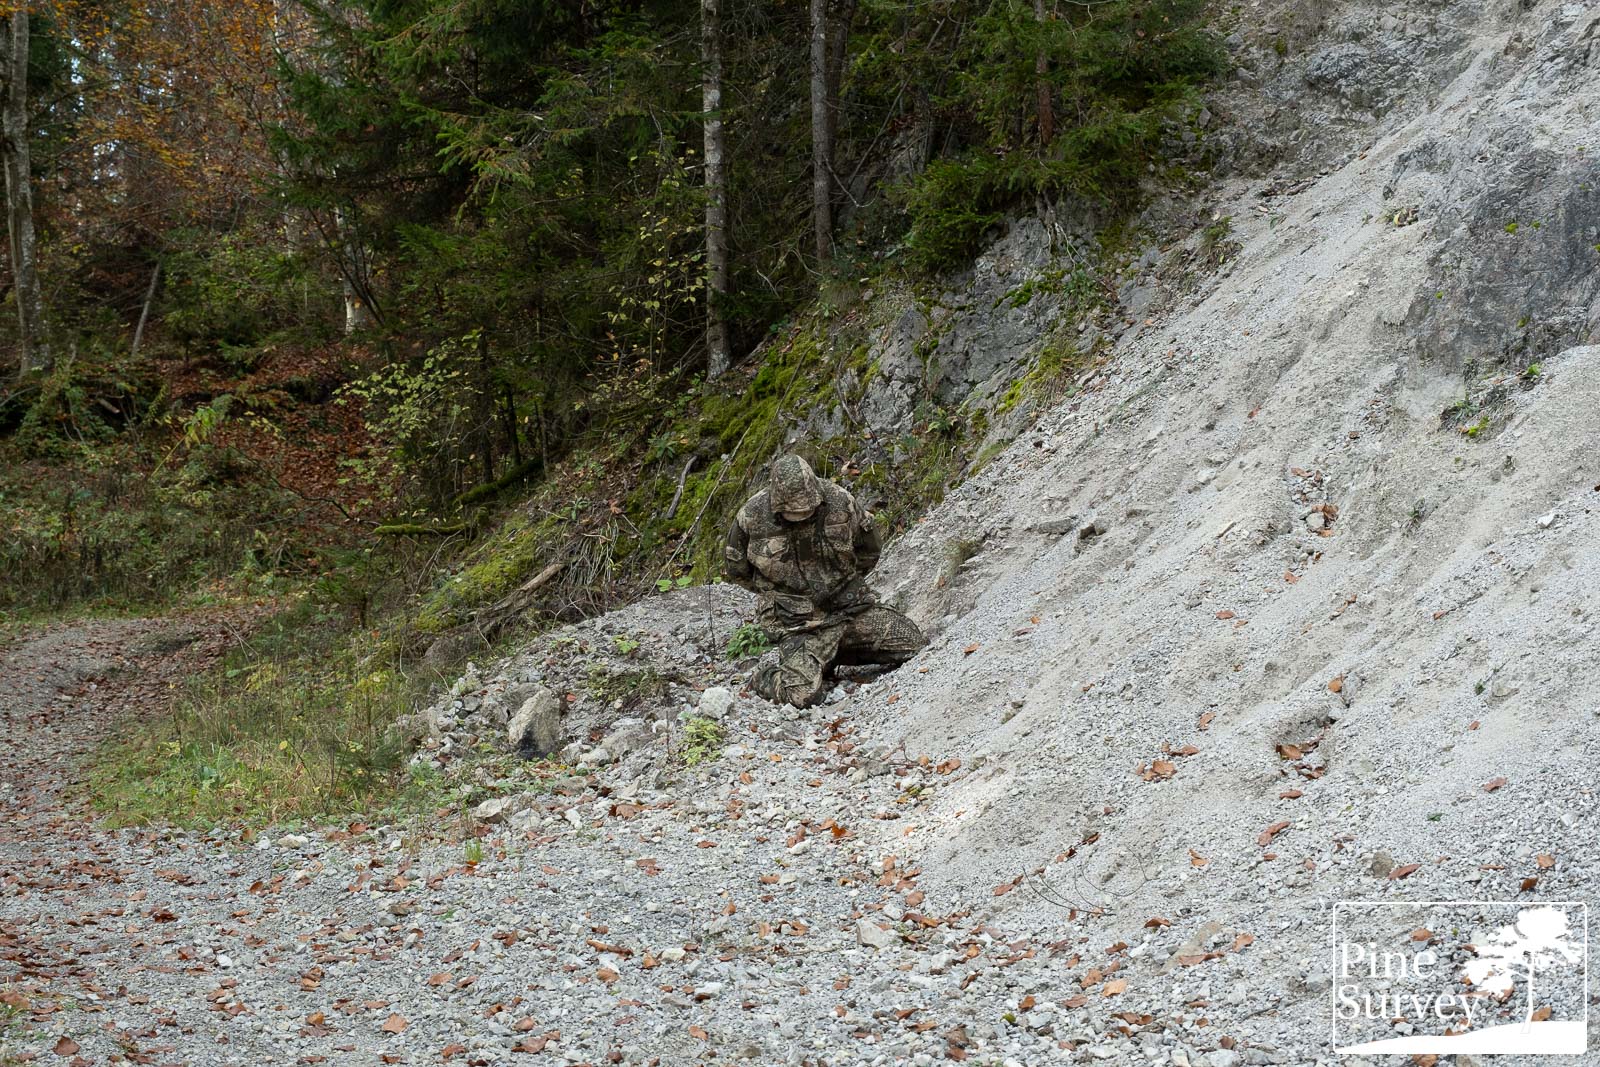
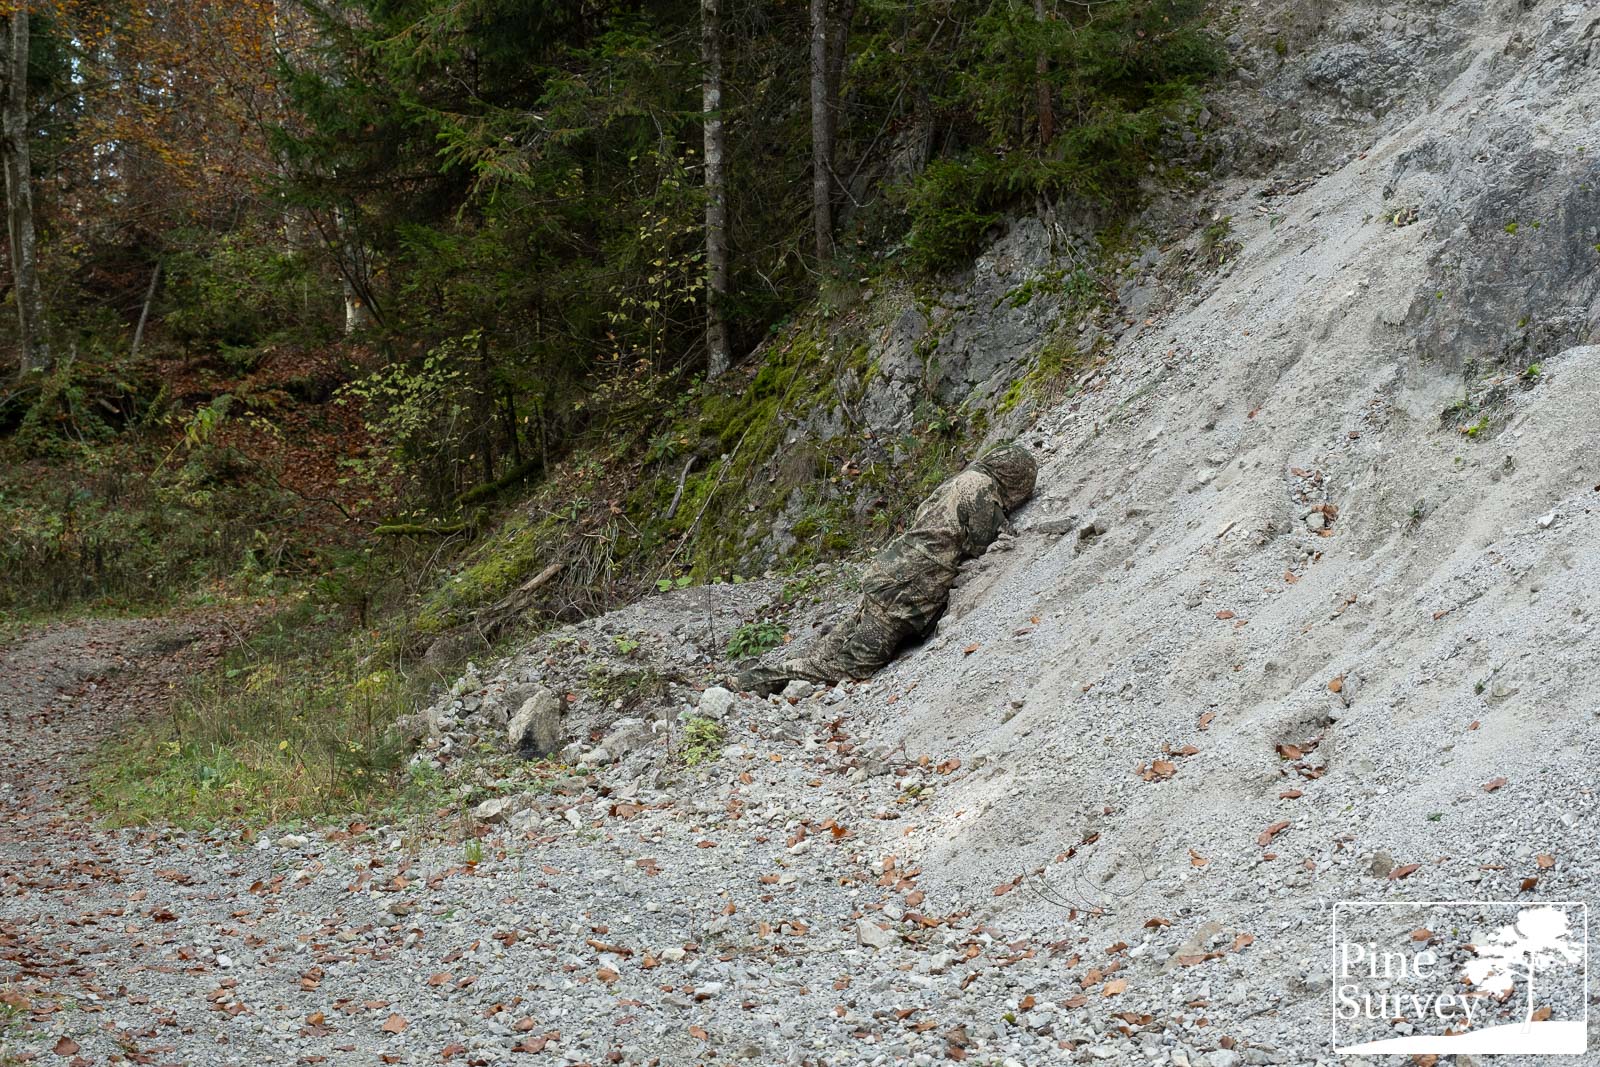
Observations – Location 4
Being completely in the open in the gravel pit is always more of a check if the colors of the particular camouflage pattern are blending there. That being said, Phantomleaf WASP II Z1B is more on the tan/khaki and green side than Z4 for example, which is more greyish. So in this particular setting, the pattern does blend into its environment, but is not a perfect fit. Looking at the wide angle lens and the standing position, the torso does blend with the green background, but the legs do stand out because of the bright gravel on the floor. Kneeling down, the overall impression improves, as the human shape is changed and the colors are reflected in a different light. This can also be seen in the prone position, in which the ivory colors of WASP II Z1B match up with the bright gravel, while the dark green macro elements disrupt the silhouette.
The 35mm pictures do show the micro elements of WASP II Z1B and how they create different transitions within the pattern. This gives the pattern a very organic look that works with the disruptions on the floor, caused by the stones and sand. Everyone can make up their own mind, how good the pattern works in this particular setting, but do have in mind that rock environments are as varied as urban or forest environments.
Addendum
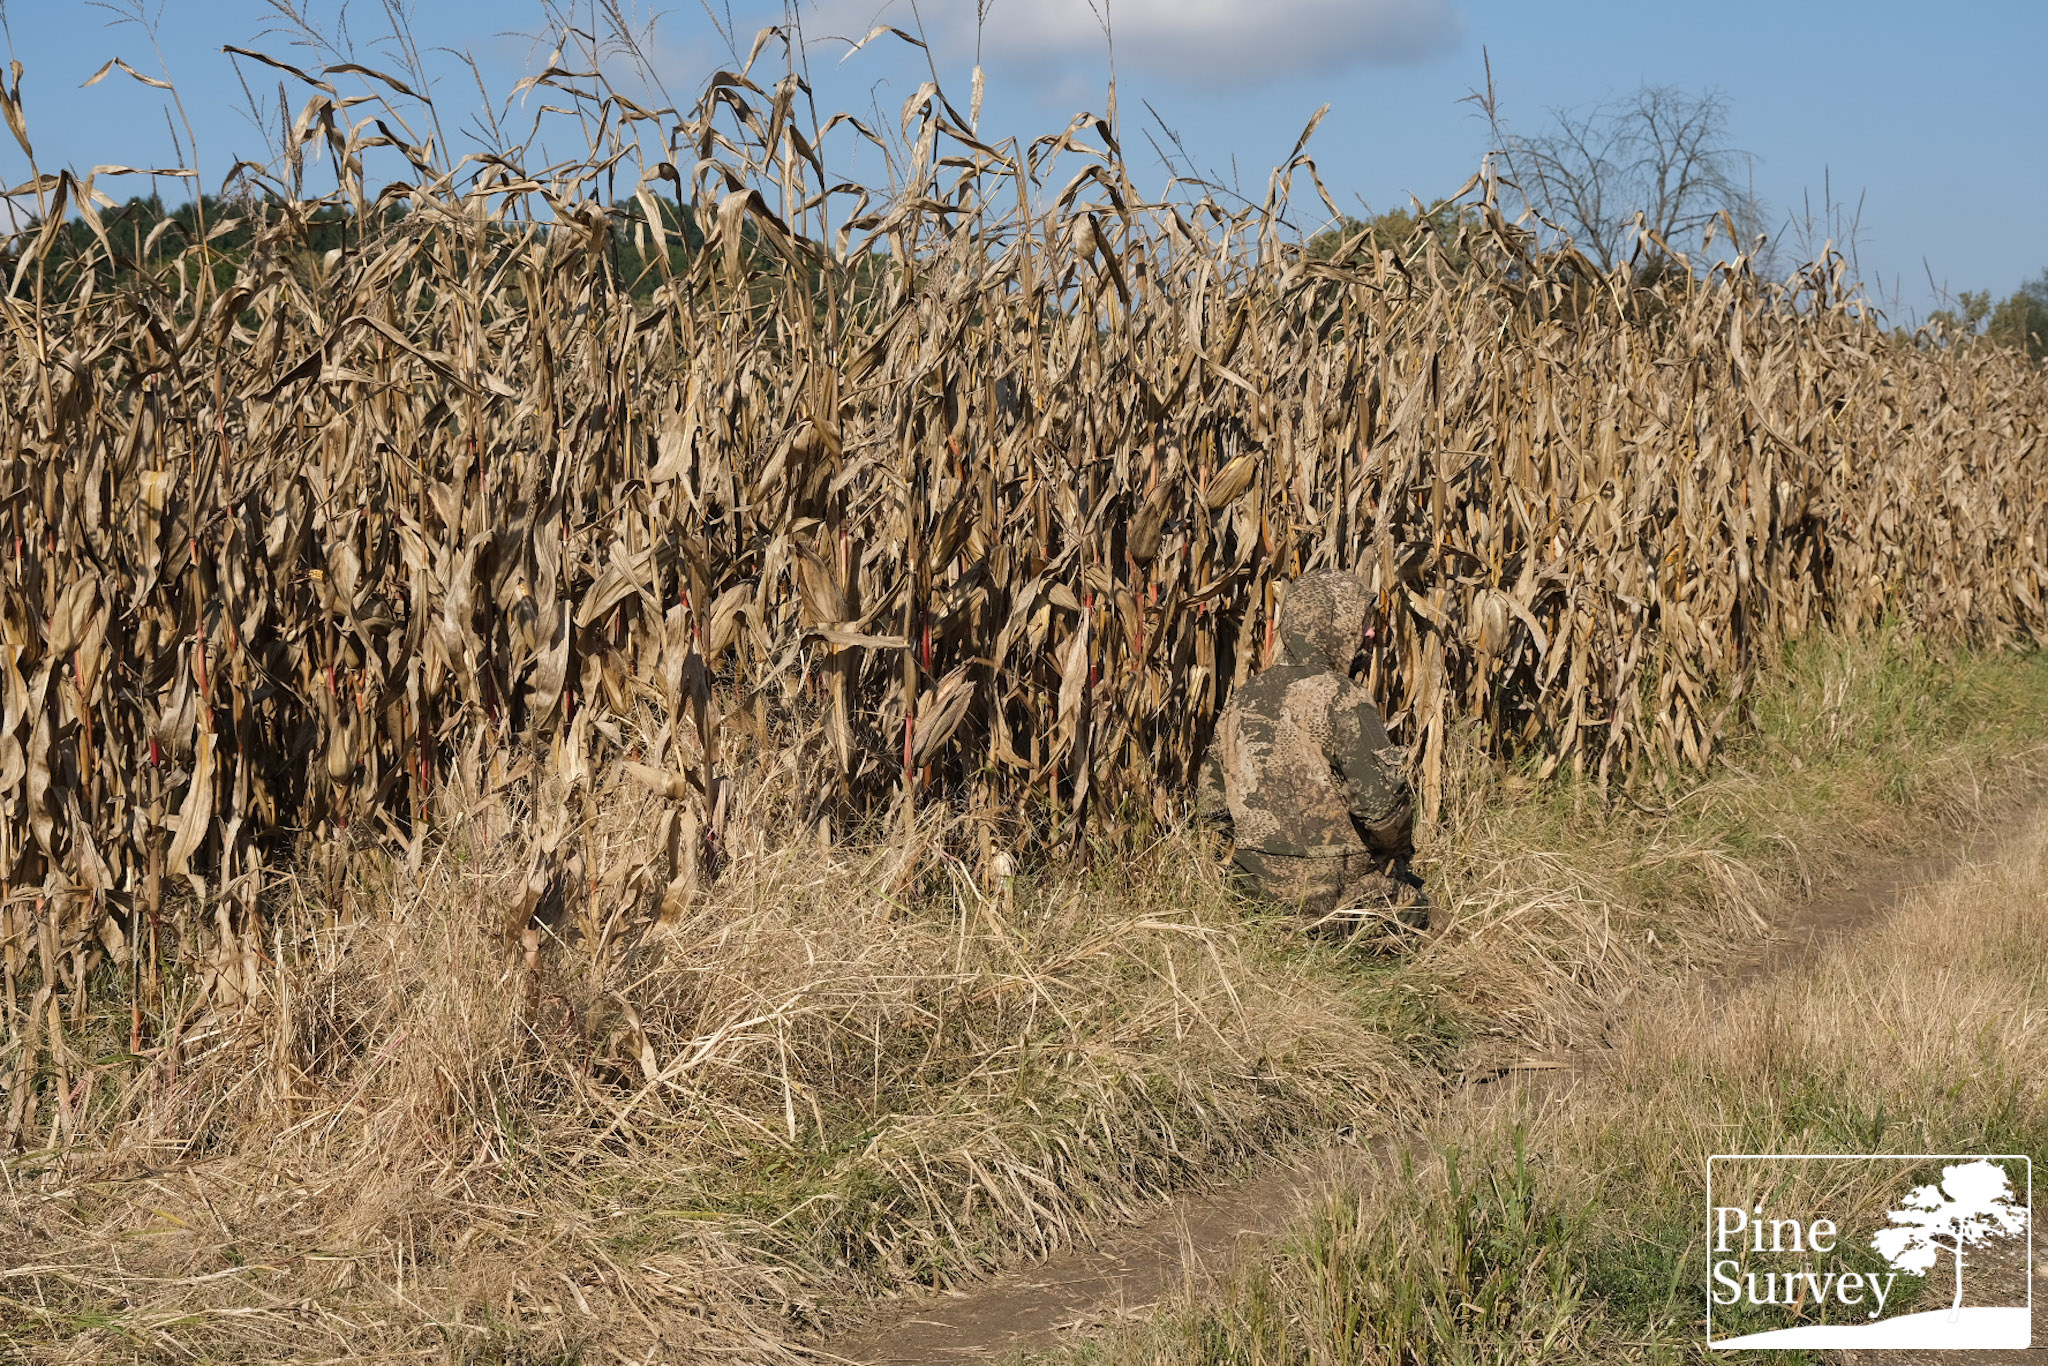
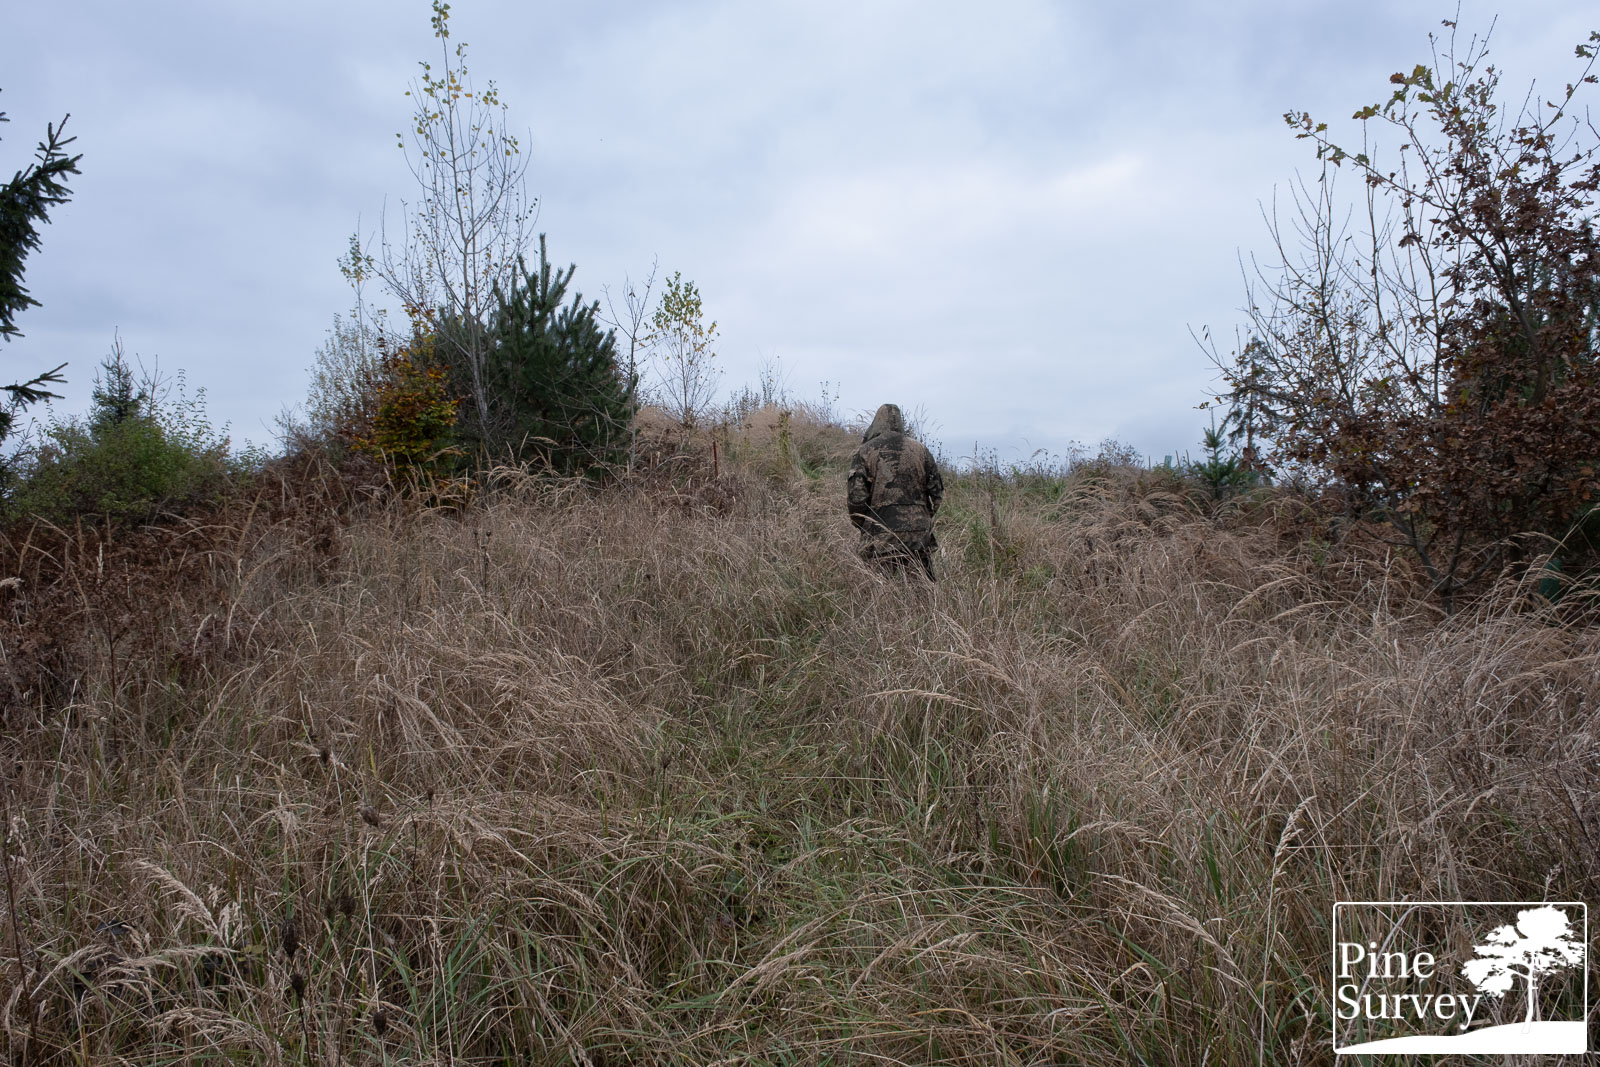
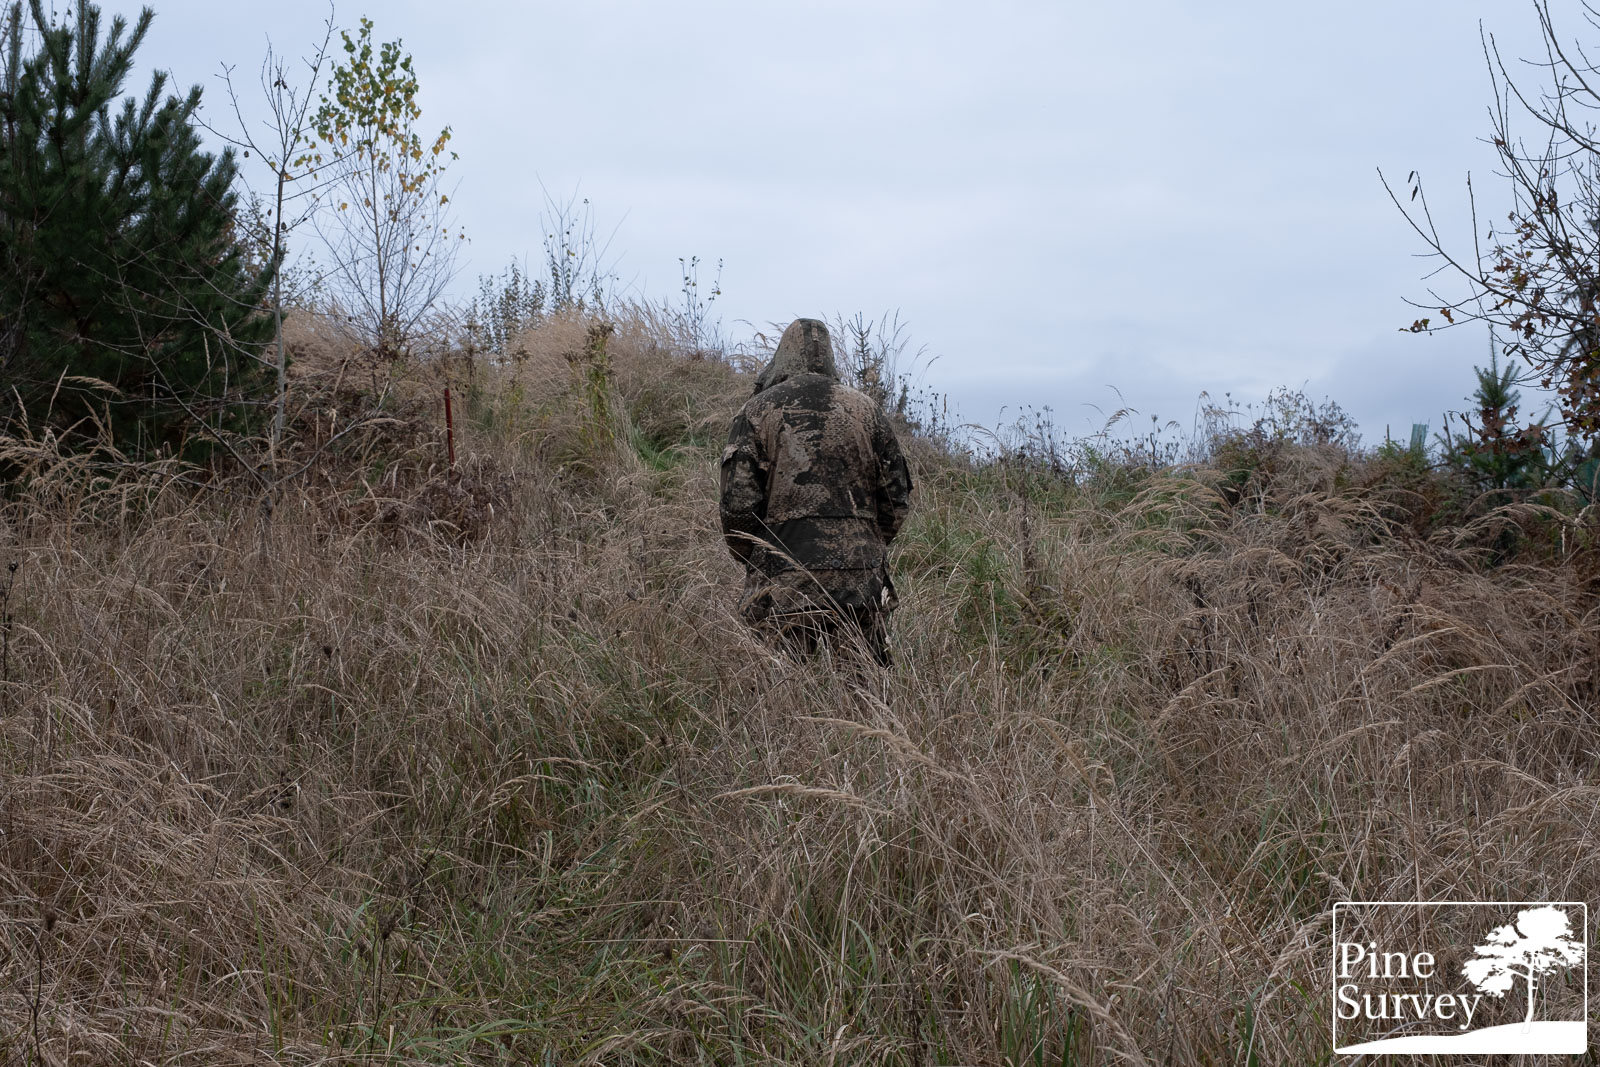
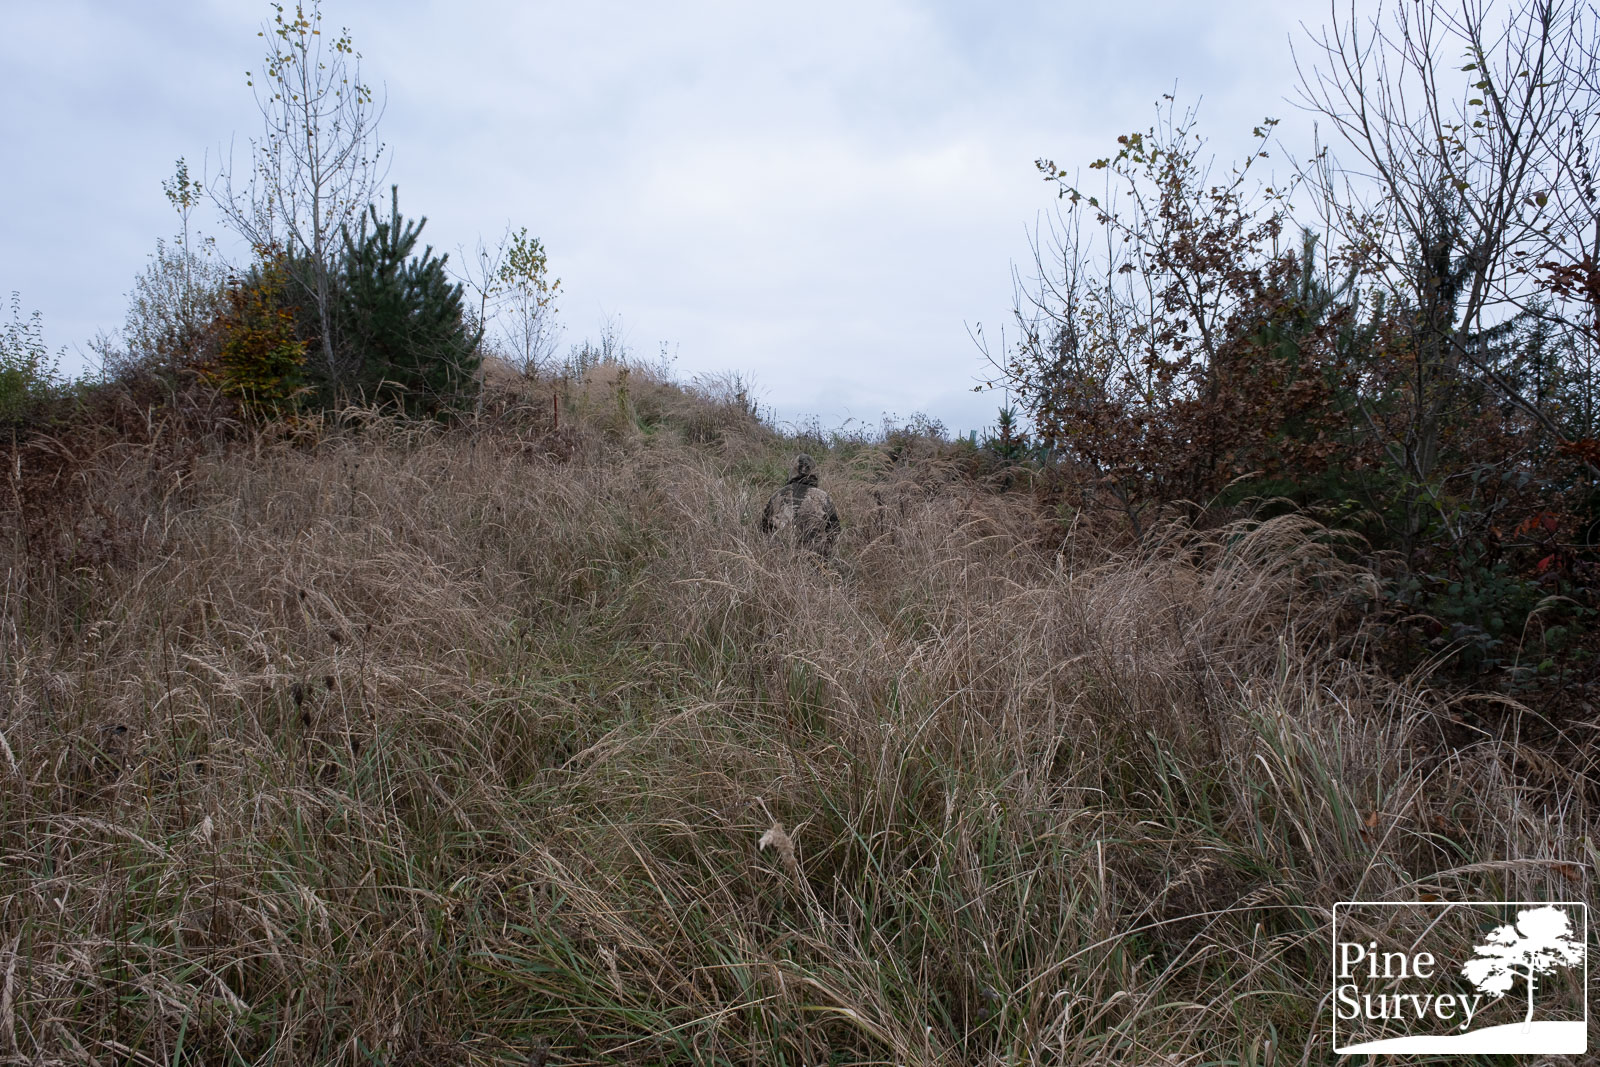
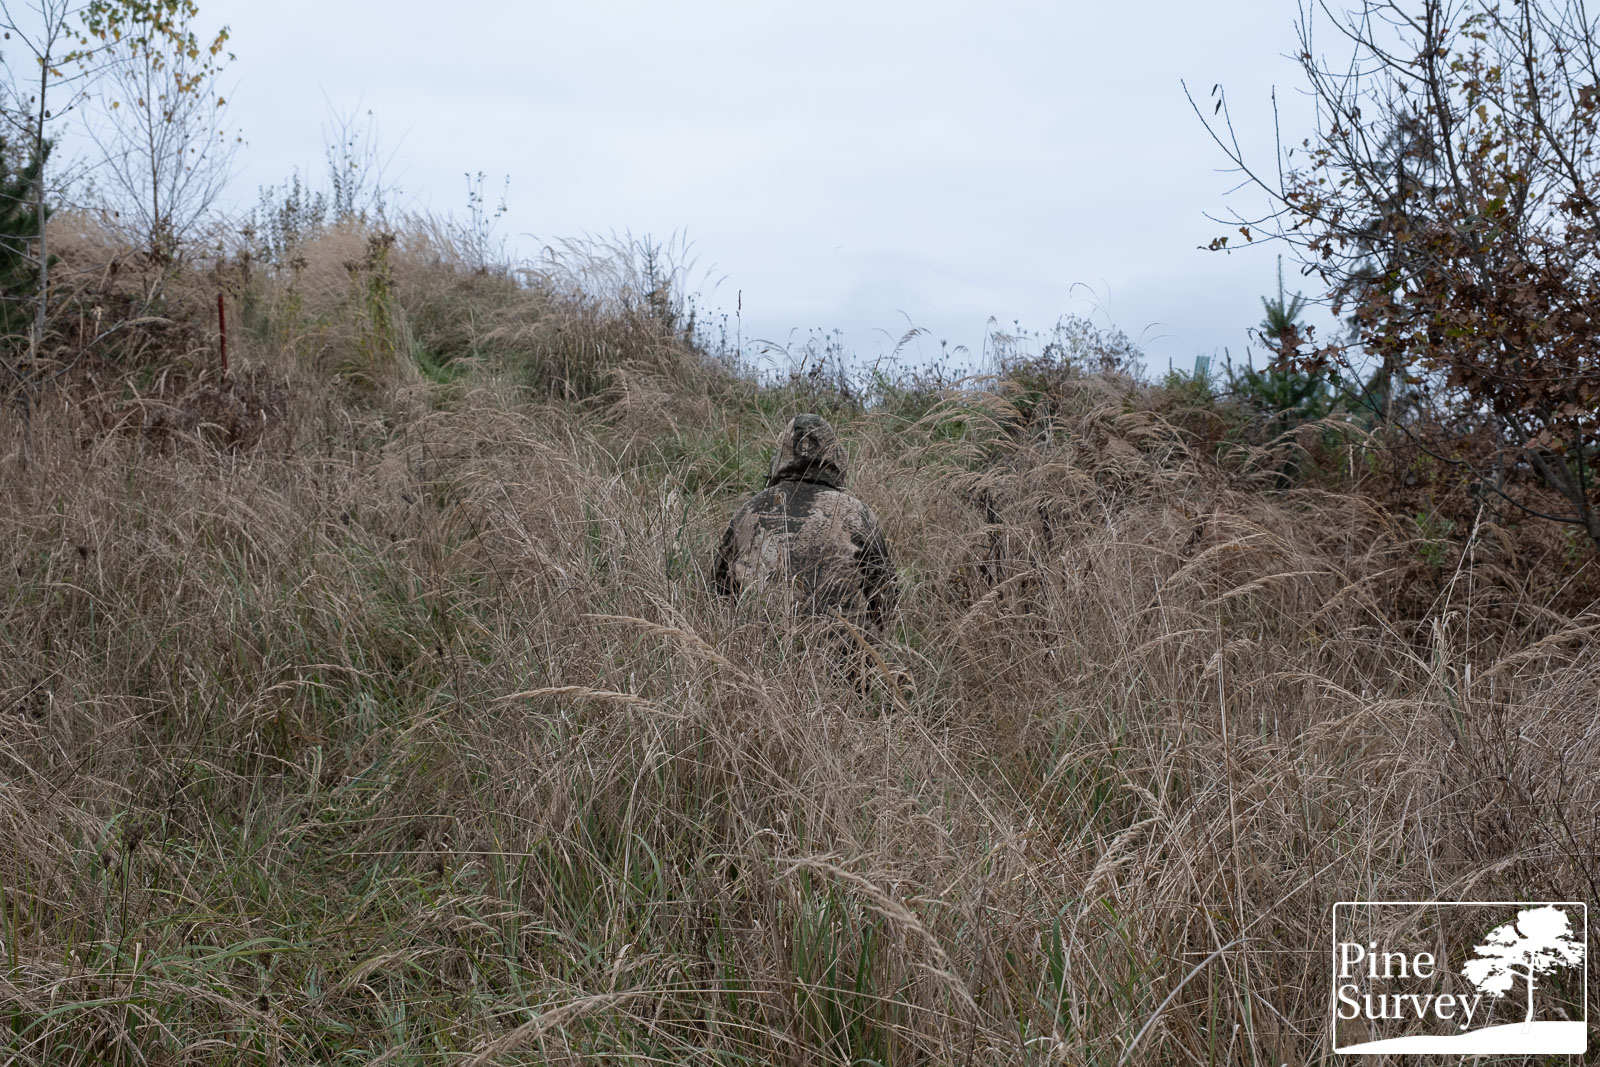
As I was able to try out the garment by Leo Köhler for several months, I had the opportunity to take pictures in various settings to give you a better idea of the performance of Phantomleaf WASP II Z1b. The locations varied from corn fields at the end of summer, to dry grass hills in autumn. You can see the excellent disruptive and blending properties of the pattern. I also had the chance to find different rock and sand environments to round up the impression of the performance.
Conclusion
While Phantomleaf WASP II Z1B is a very specific camouflage pattern, aimed at rock desert at a certain height, aimed at working effectively in its intended area as the other WASP II pattern variations, it also resulted in being in somewhat of a more universal camouflage pattern, just like Multicam. The choice of colors make it work to a certain extent in a much wider area than it was primarily intended for. In comparison with Multicam it does come with a much bigger contrast, thus making its disruptive properties perform much better than other “multi” camouflage patterns.
Phantomleaf WASP II Z1B does perform very well in dry grassland, pine forests and/or mixed forests. Deciduous forests are a bigger challenge, as these tend to create dead leaves that are primarily red and blue. With that in mind, one must not mistake WASP II Z1B for an “autumn” camouflage pattern – for these settings, WASP II Z2 is a much better choice.
Personally I find WASP II Z1B the best looking of all the WASP II patterns, just when it comes to an aesthetical aspect. When it comes to performance the overall conclusion is that it performs very well, as long as one is aware of its intended environment. As the pictures in this article show, it can perform extremely well, when used considerately.
With that being said I want to thank Leo Köhler for providing the set to make this field test possible. Many thanks for reading!
Take care!