This year Tasmanian Tiger released its Tac Pack series to the general public, a line up of packs and bags that incorporate features of both the civilian and the military world. I was privileged to receive the Tac Pack 45 as well as other items from the series and have been using them ever since early 2016.
Below I want to give you my very first observations about the Tac Pack 45: A general overview of the pack and its features as well as a first assessment. In an upcoming second review I will go more into detail regarding the load distribution system and my mid-term experiences with the pack.
Let us start with some basic facts:
Specs
HxWxD: 70x34x22 cm
Volume: 45l
Weight: 2,55 kg
Materials: 700den Cordura, T-Square Rip fabric
Overview
The Tac Pack 45 is designed as an outdoor- and survival backpack for tours of several days. It features Tasmanian Tigers new V2-Plus load distribution system and a waist belt which is detachable and can be used as a Survival- or Warrior Belt.
The pack features civil and military features like MOLLE/PALS webbing or material loops. Other features include elastic side pouches, an integrated, waterproof pouch and an enlargeable, elastic front pouch. There are also various alpine elements such as a snow guard and attachment points for ice axes, skis and the like.
The main compartment can be divided in a main and bottom compartment and can be closed by a standard top lid with a large upper pouch as well as an internal zippered panel.
Top lid
The top lid features four webbing loops on top, two on each side. Possible applications with optional shock cord or straps are left to you imagination.
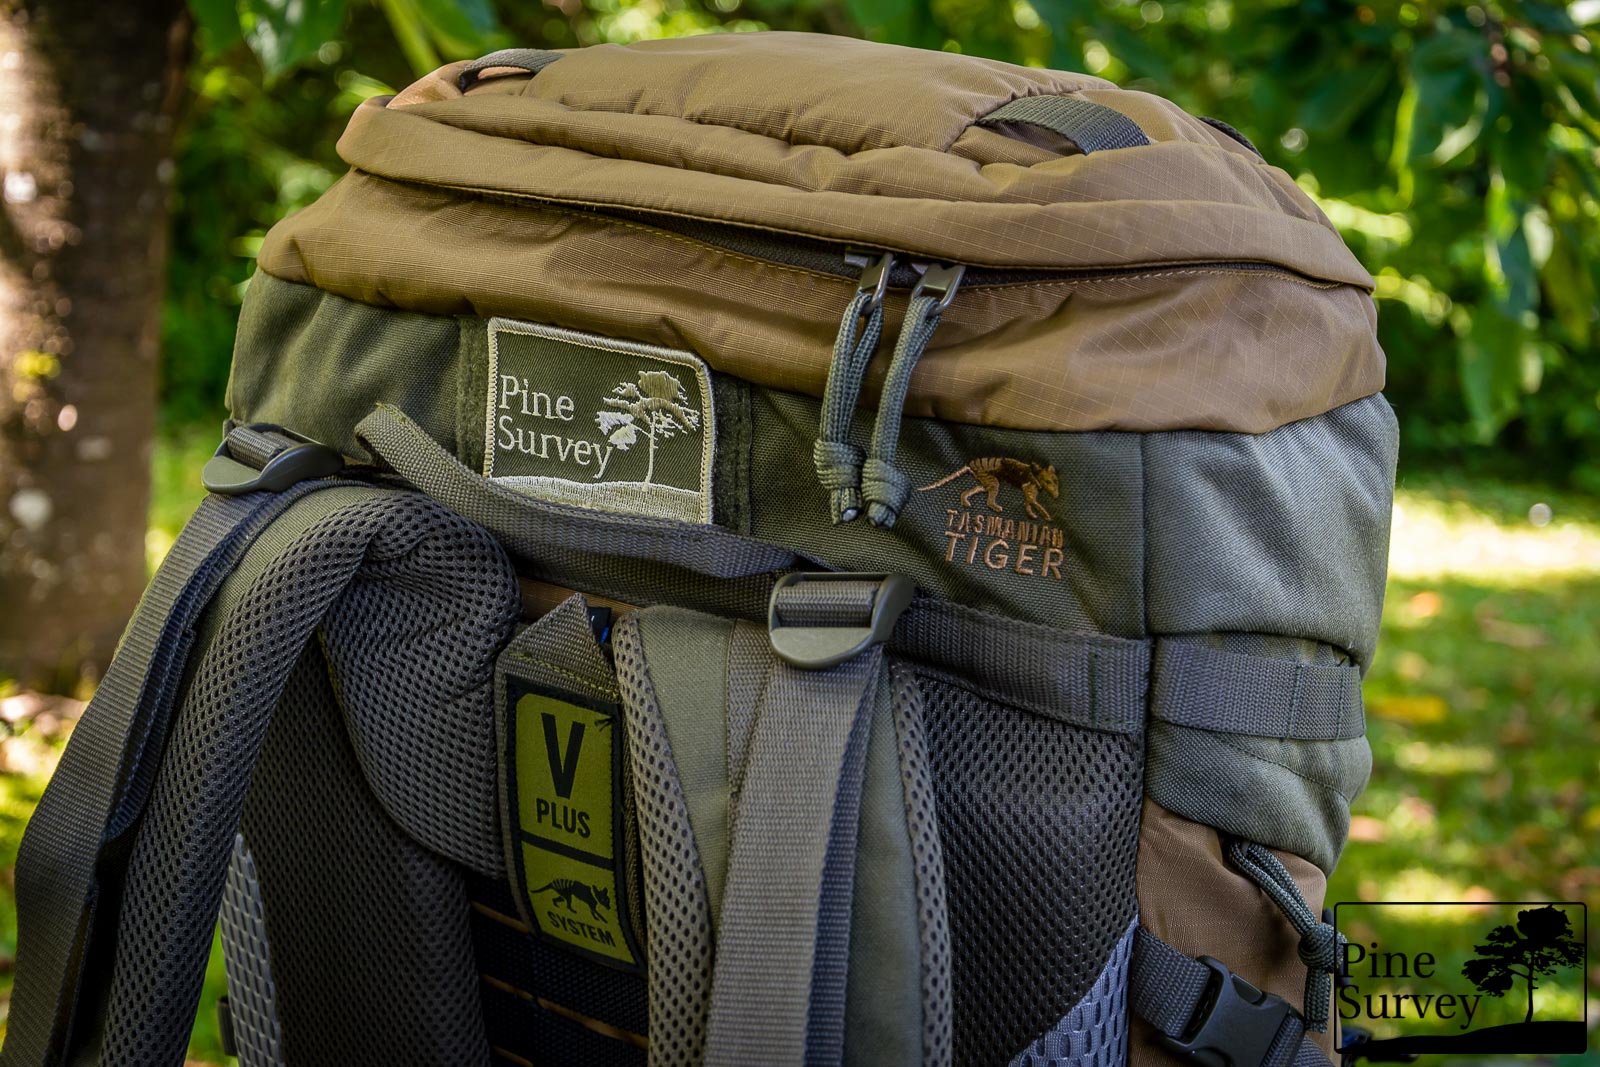
Top lid with voluminous compartment
The compartment in the top lid is quite voluminous and only offers one keyholder snap hook for organisation. At the underside you will find a zippered panel, marked with a first-aid sign. It covers the area of the whole top lid, bit is not as voluminous as the upper compartment.
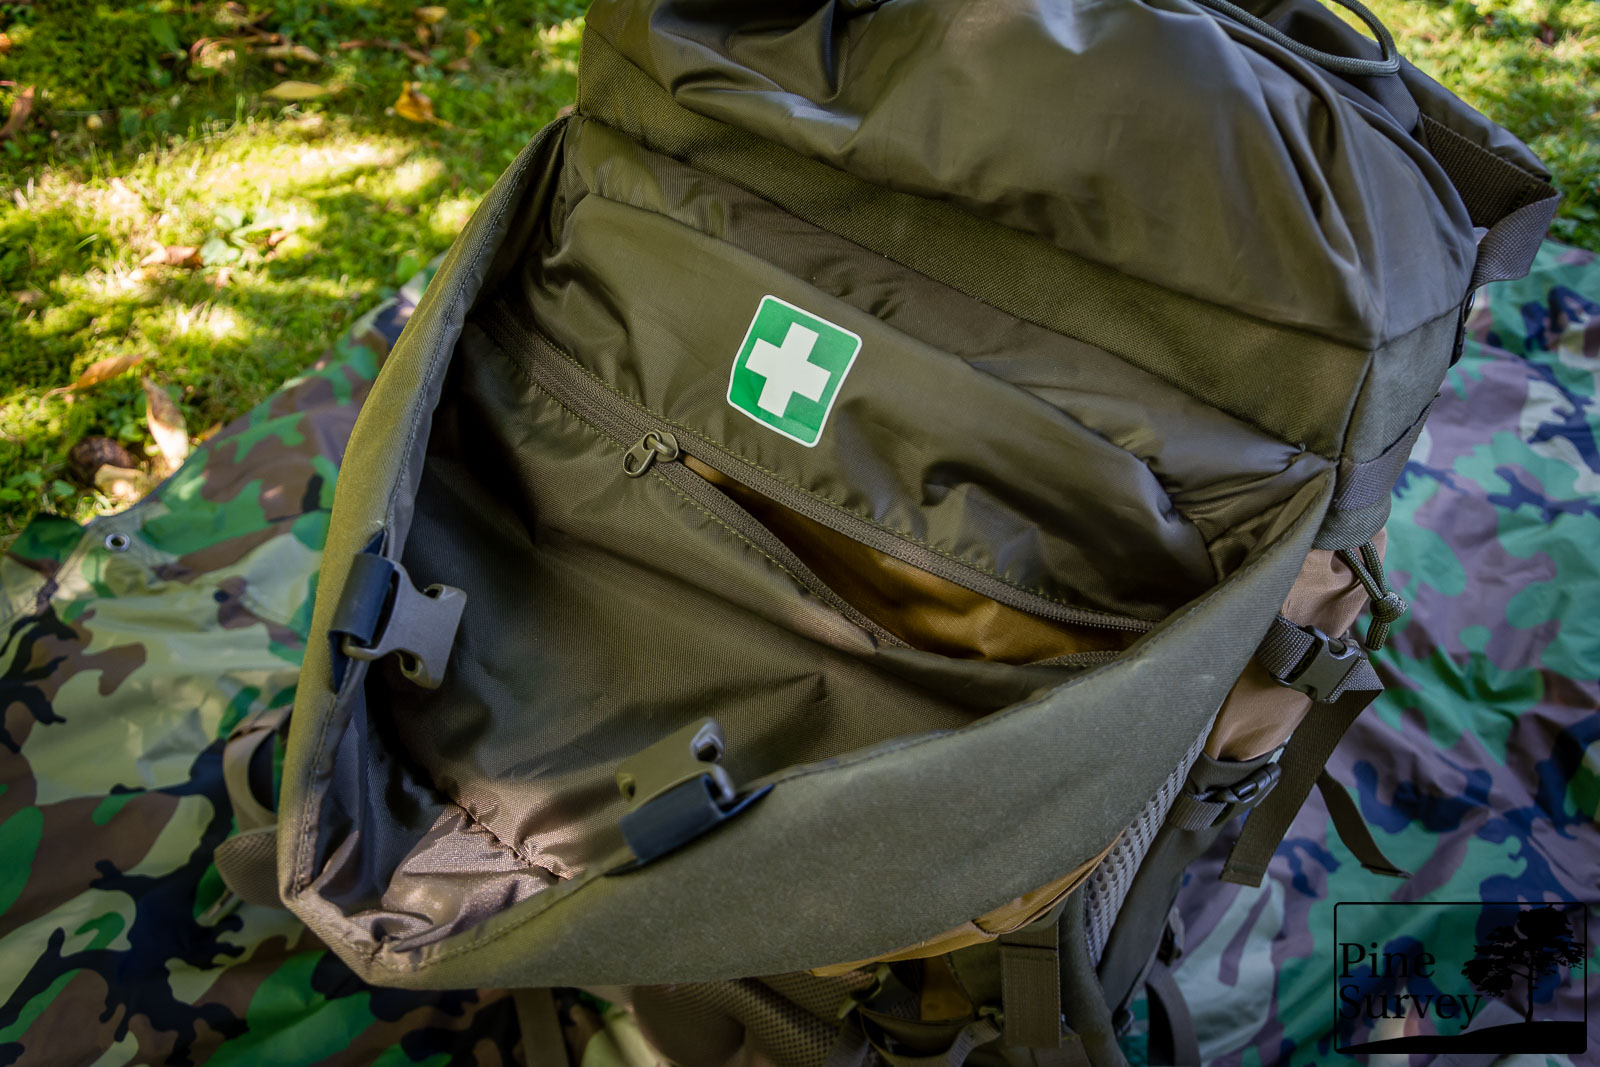
First aid compartment underneath the top lid
Outside
There is a lot going on on the outside of this pack regarding features, little details worth mentioning or just regarding the general build up.
Let us start with all the webbing, loops and handles, because there are plenty and they catch the eye.
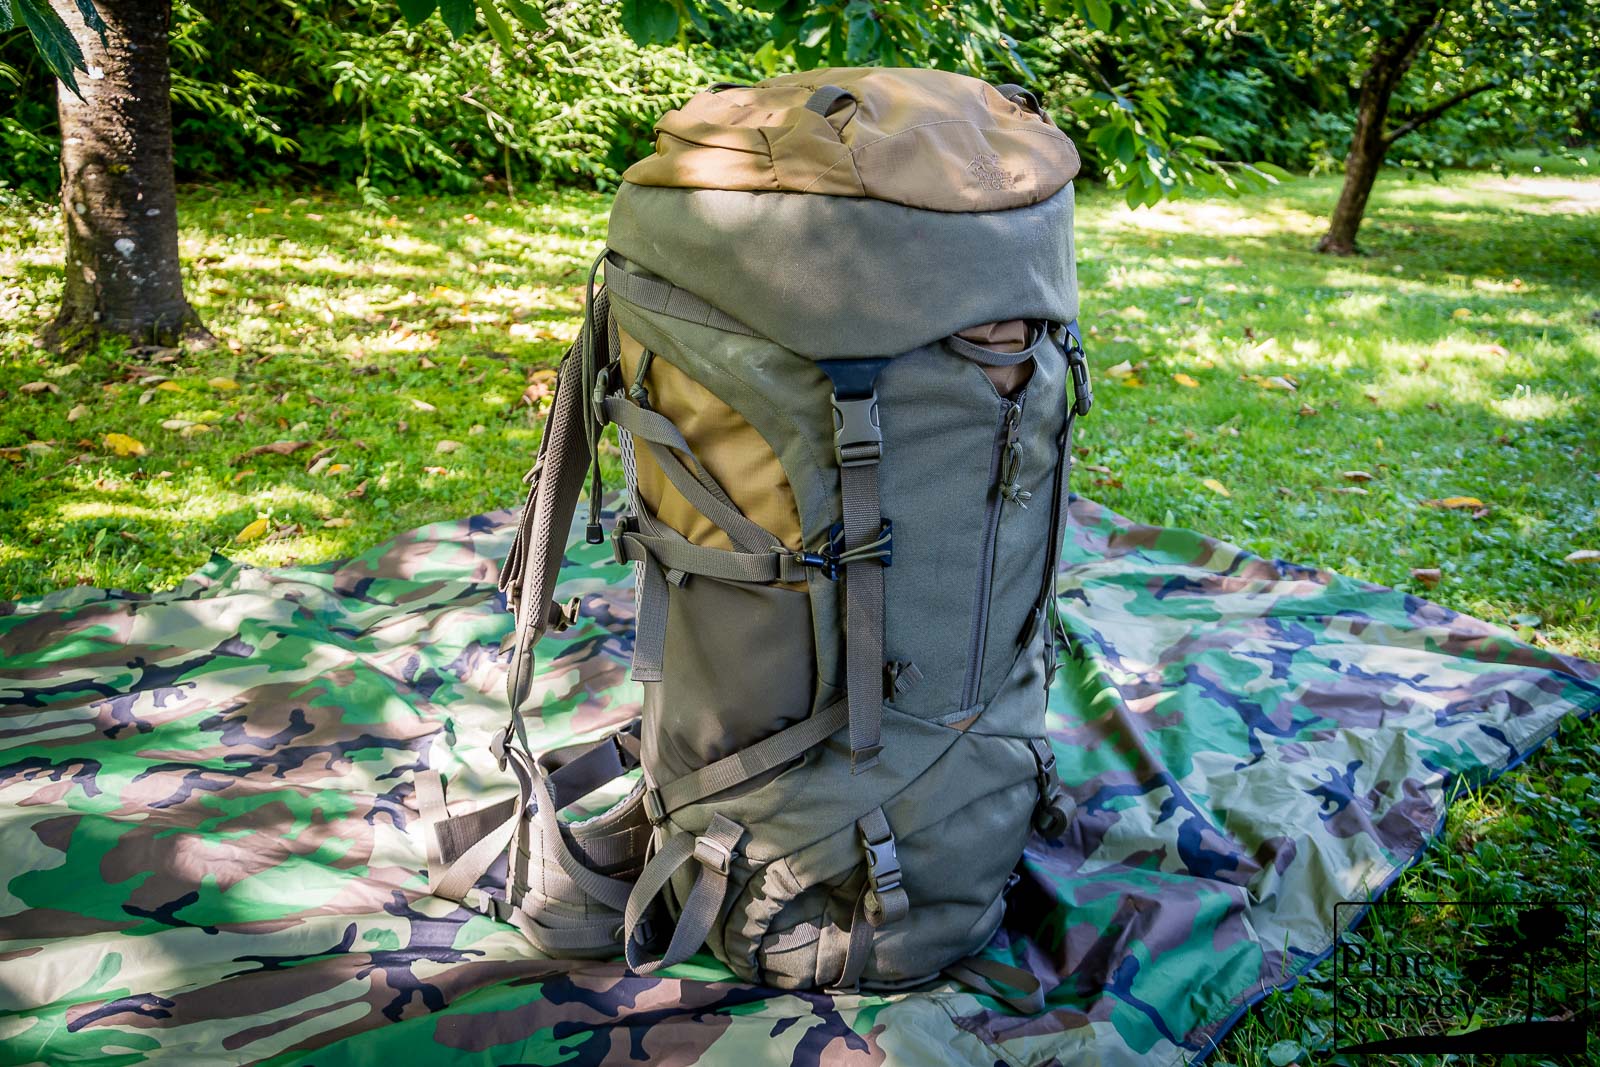
The outside of the pack with plenty of features and details
There are three carrying/dragging handles on the pack. Four if you count the adjustable loop on one side, designed to fasten skis.
One handle is on the backside behind the top lid; another one on the upper front side between the main compartment and the outer, enlargeable pouch. And the last one is on the front side of the bottom area of the pack. So it will be easy for you to grab the pack, when it is stored away in an compartment or trunk and even carry it together with other people.
Next to the opening of the main compartment there is one row of MOLLE with 6 channels each on the left and right side of the pack. Obviously you can attach additional pouches with this webbing, but there is also another little detail. Both rows reach to the front to the pack and end in a hardware glide buckle. If you connect both buckles with an optional strap, you are able to create yet another compression strap or just another way of attaching gear to the outside of the pack.
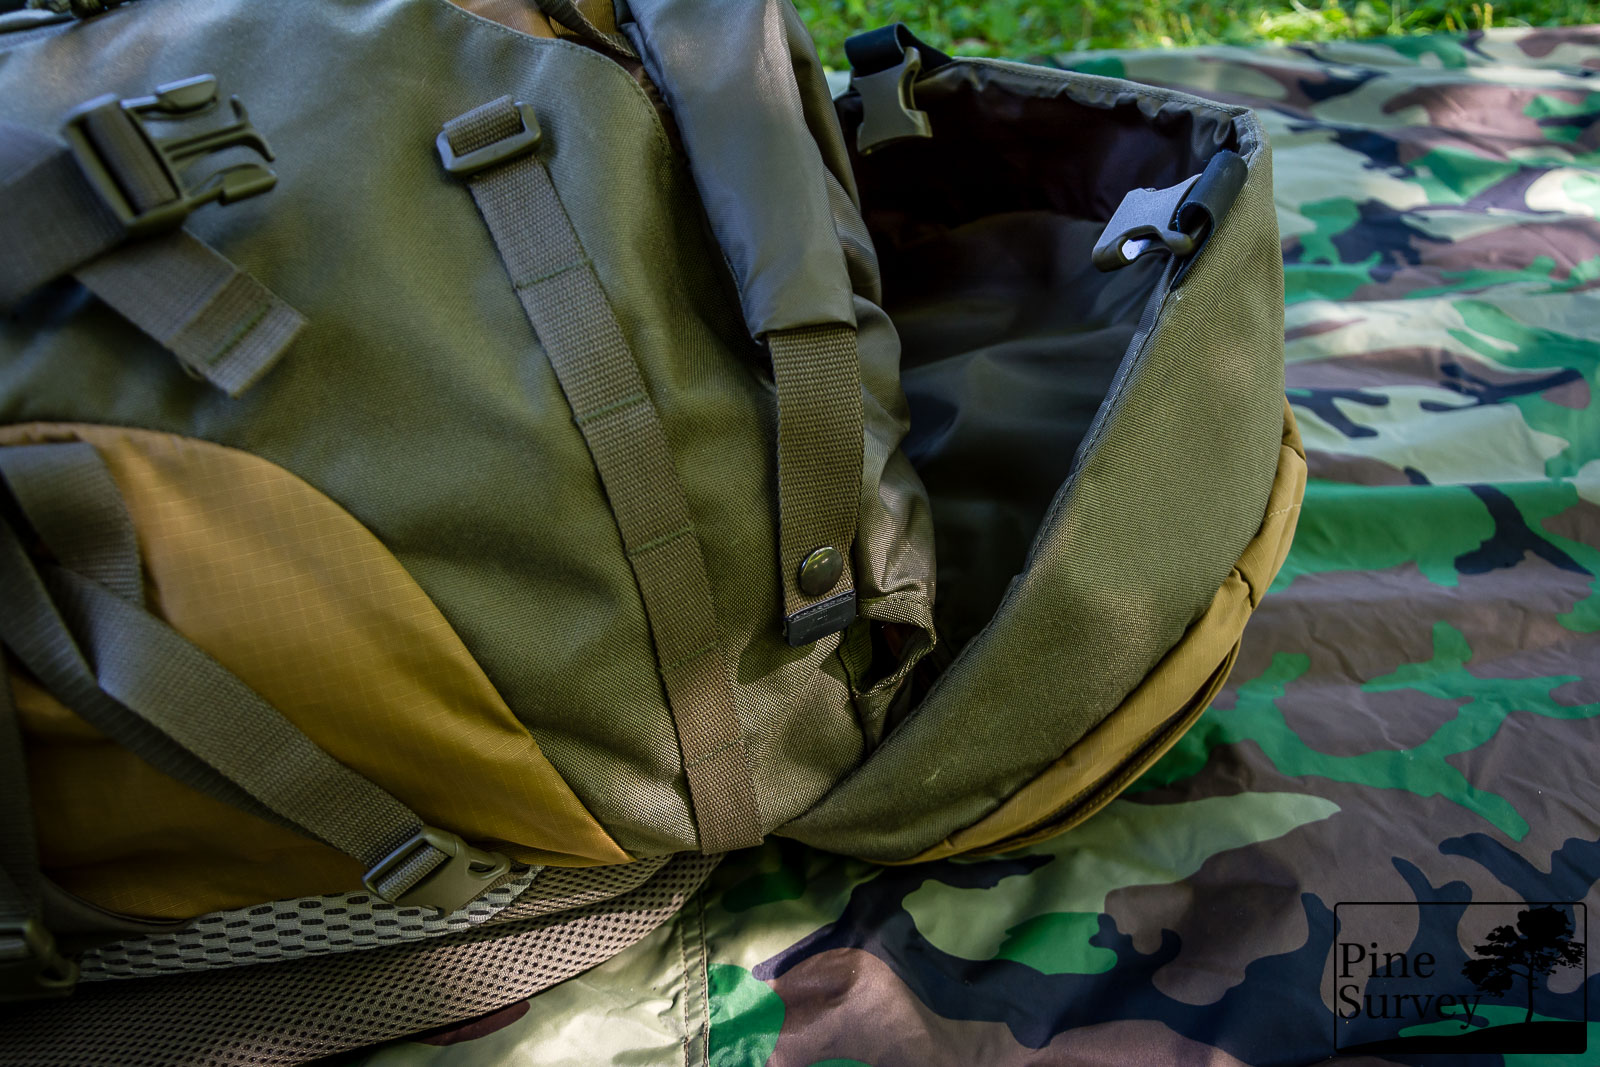
Webbing on the side of the pack
You will find something similar directly at the front. You will recognize the straps that connect and fasten the top lid. The strap holding the hardware buckles is however attached in a way that creates three material loops on each side, for attaching snap hooks and the like. One one side you will find a Hypalon tab with shock cord and a cord lock to attach an Ice axe.
On the bottom of each material loop webbing you will find another pair of the above mentioned glides. That way you have four glides in total at the front, offering you the option to run additional webbing through them.
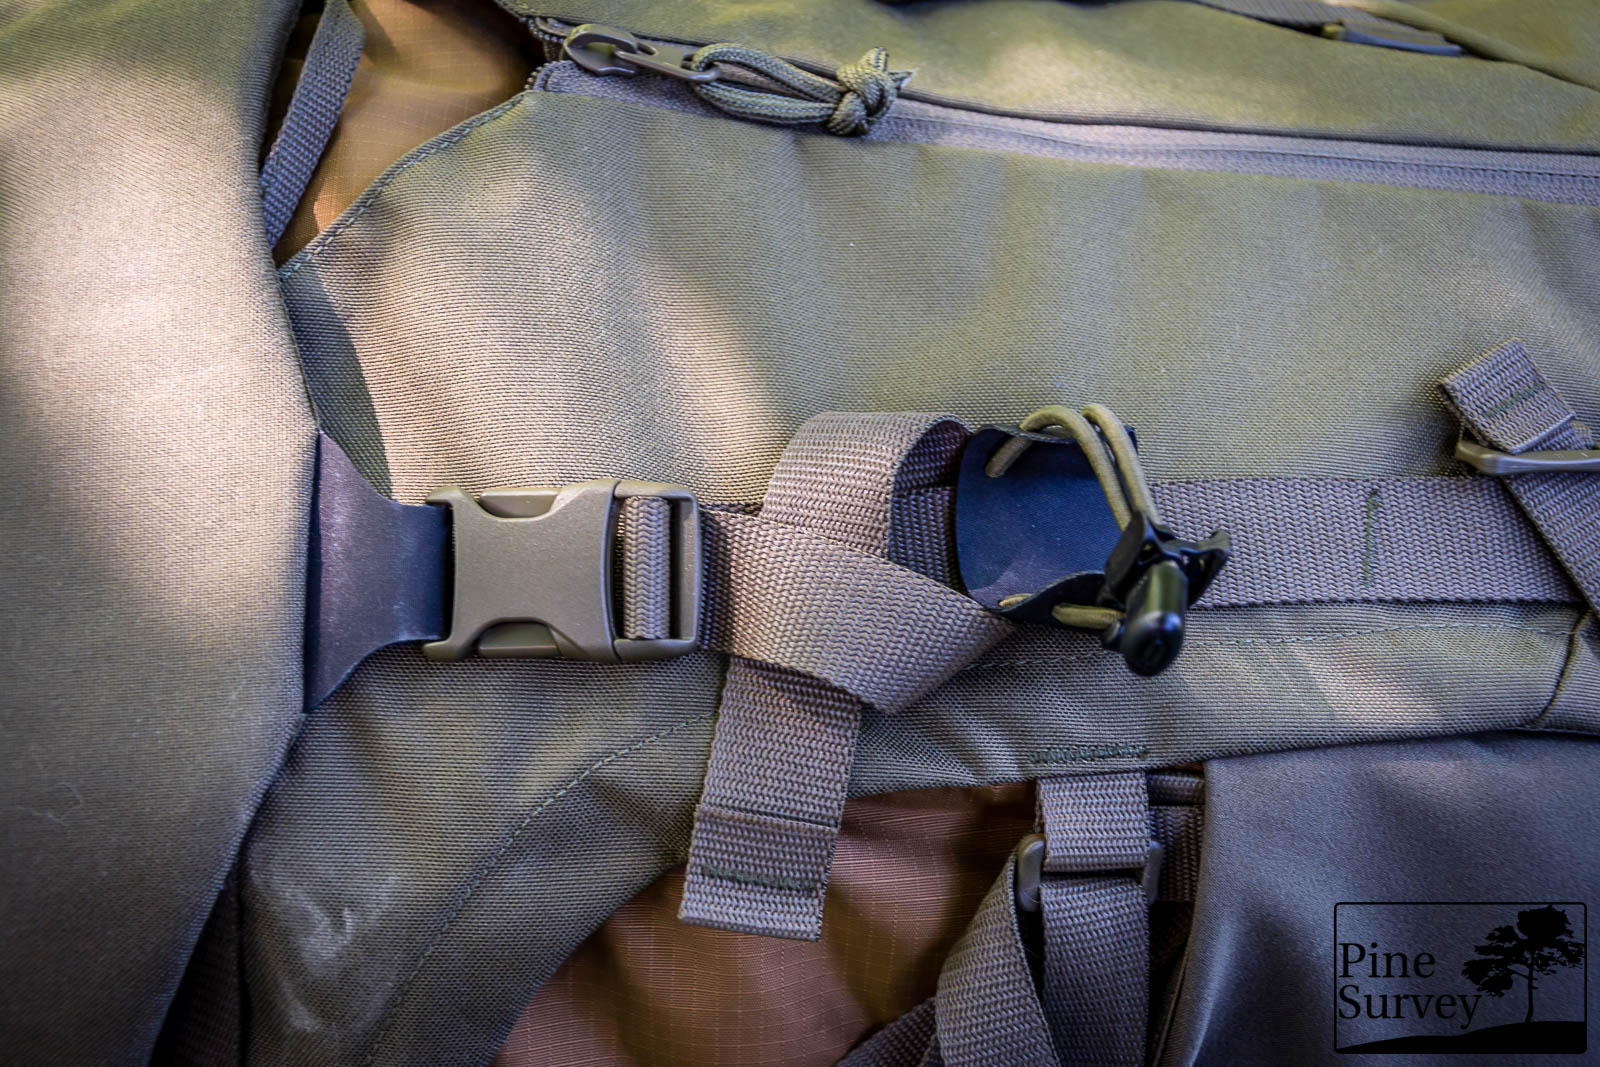
Attachment buckles for the top lid, material loops with ice axe holder
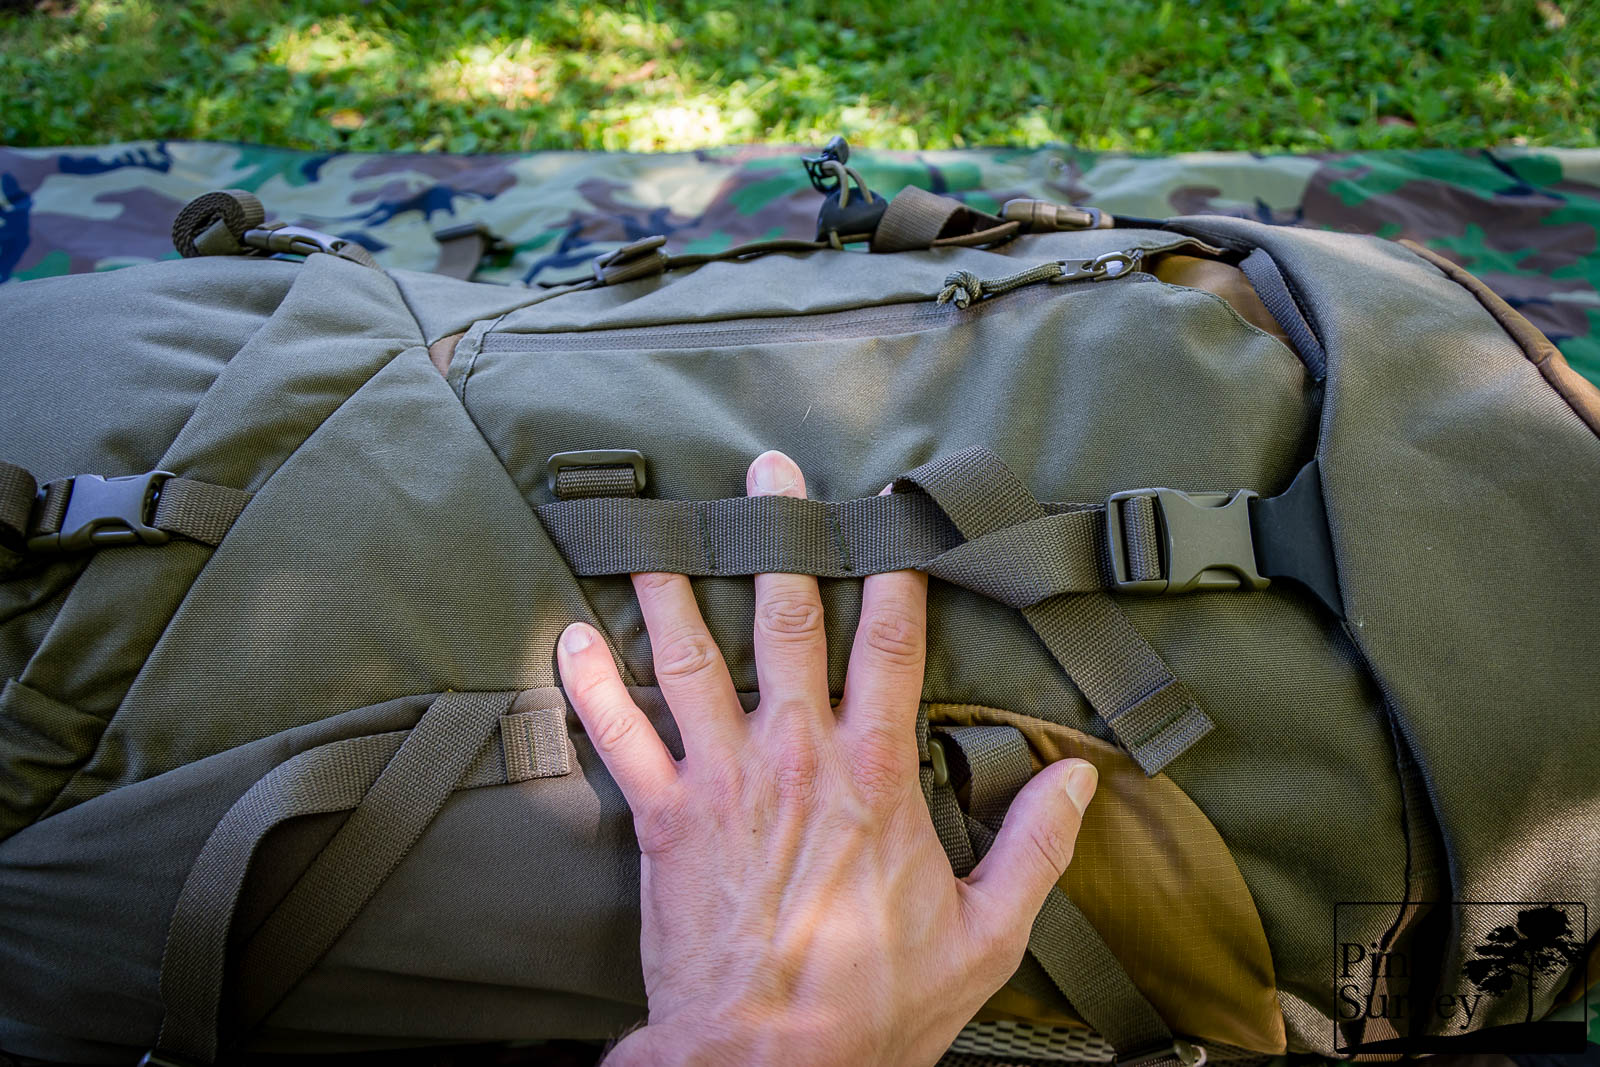
Material loops with glide buckle for further options
Underneath this just mentioned features you will find an enlargeable pouch. The sides are made of cordura, and the middle is made of an elastic, highly sturdy material. A zipper runs vertically and closes the cordura parts. If you open it, the elastic part comes to play, enlarging the pouch.
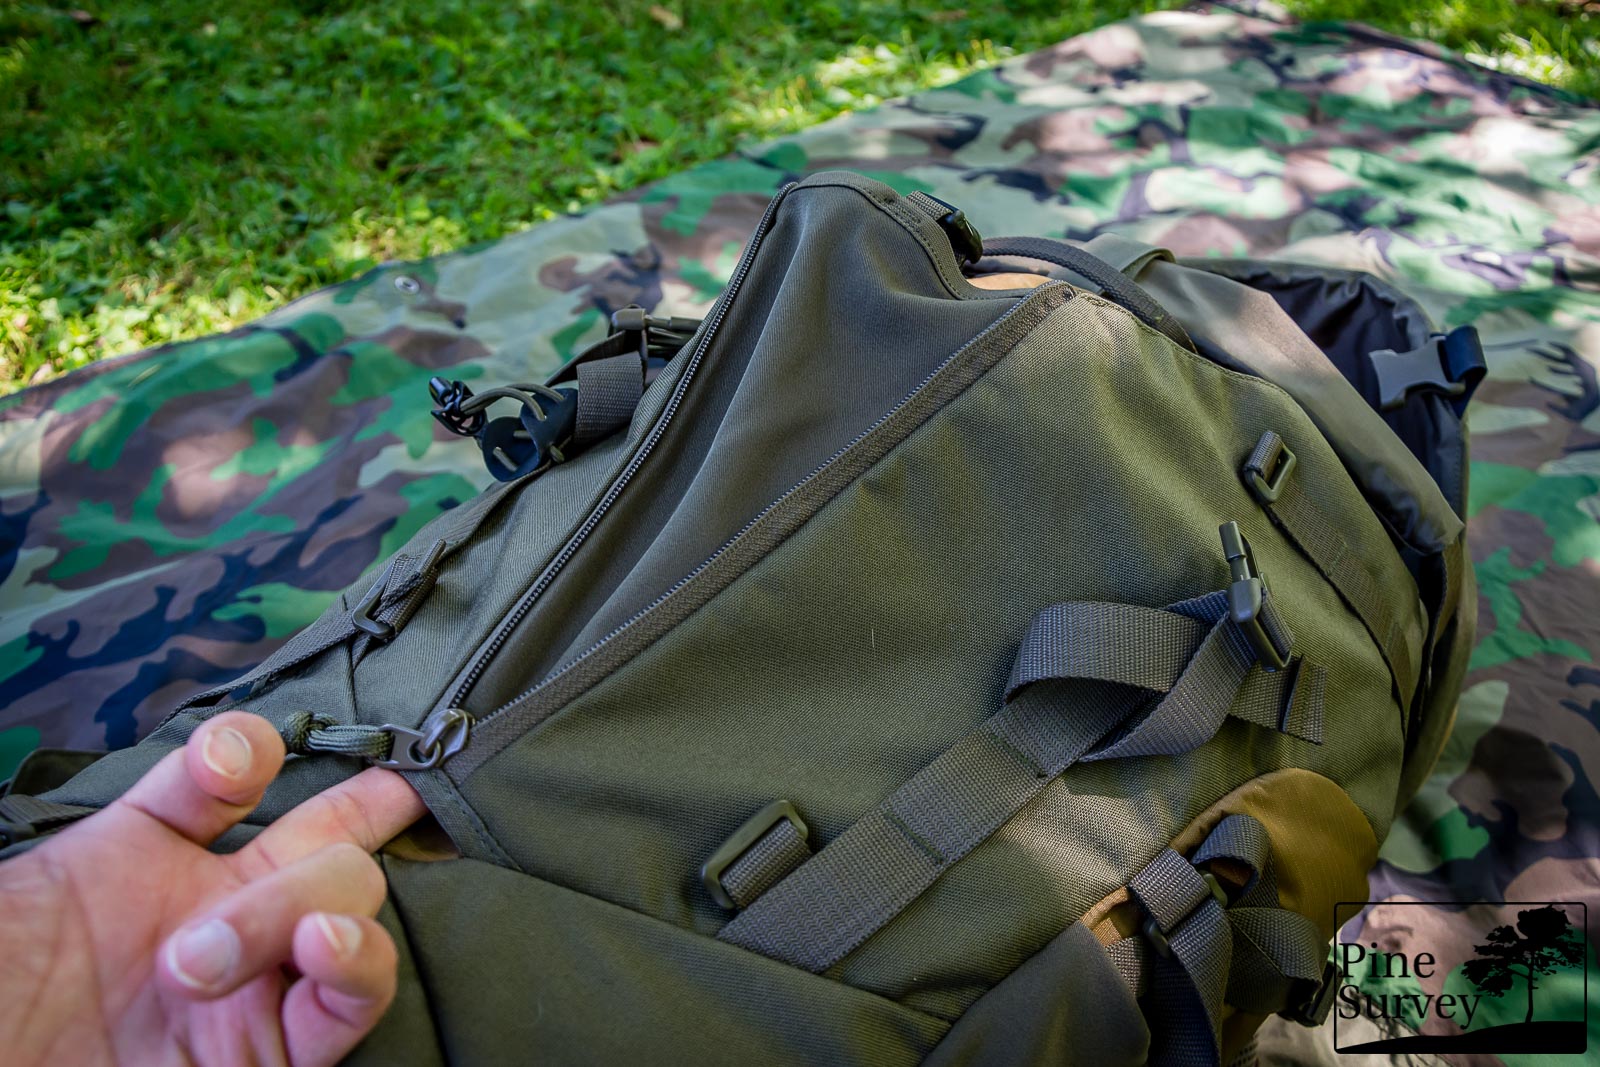
Outer pouch with elastic elements for enlargement
The opening is only secured by a thin strap with a buckle. This pouch is ideal for carrying items you need quick access to or that need to dry. A climbing helmet has enough room in it, as do various jackets. At the bottom of this pouch you will find a drainage hole.
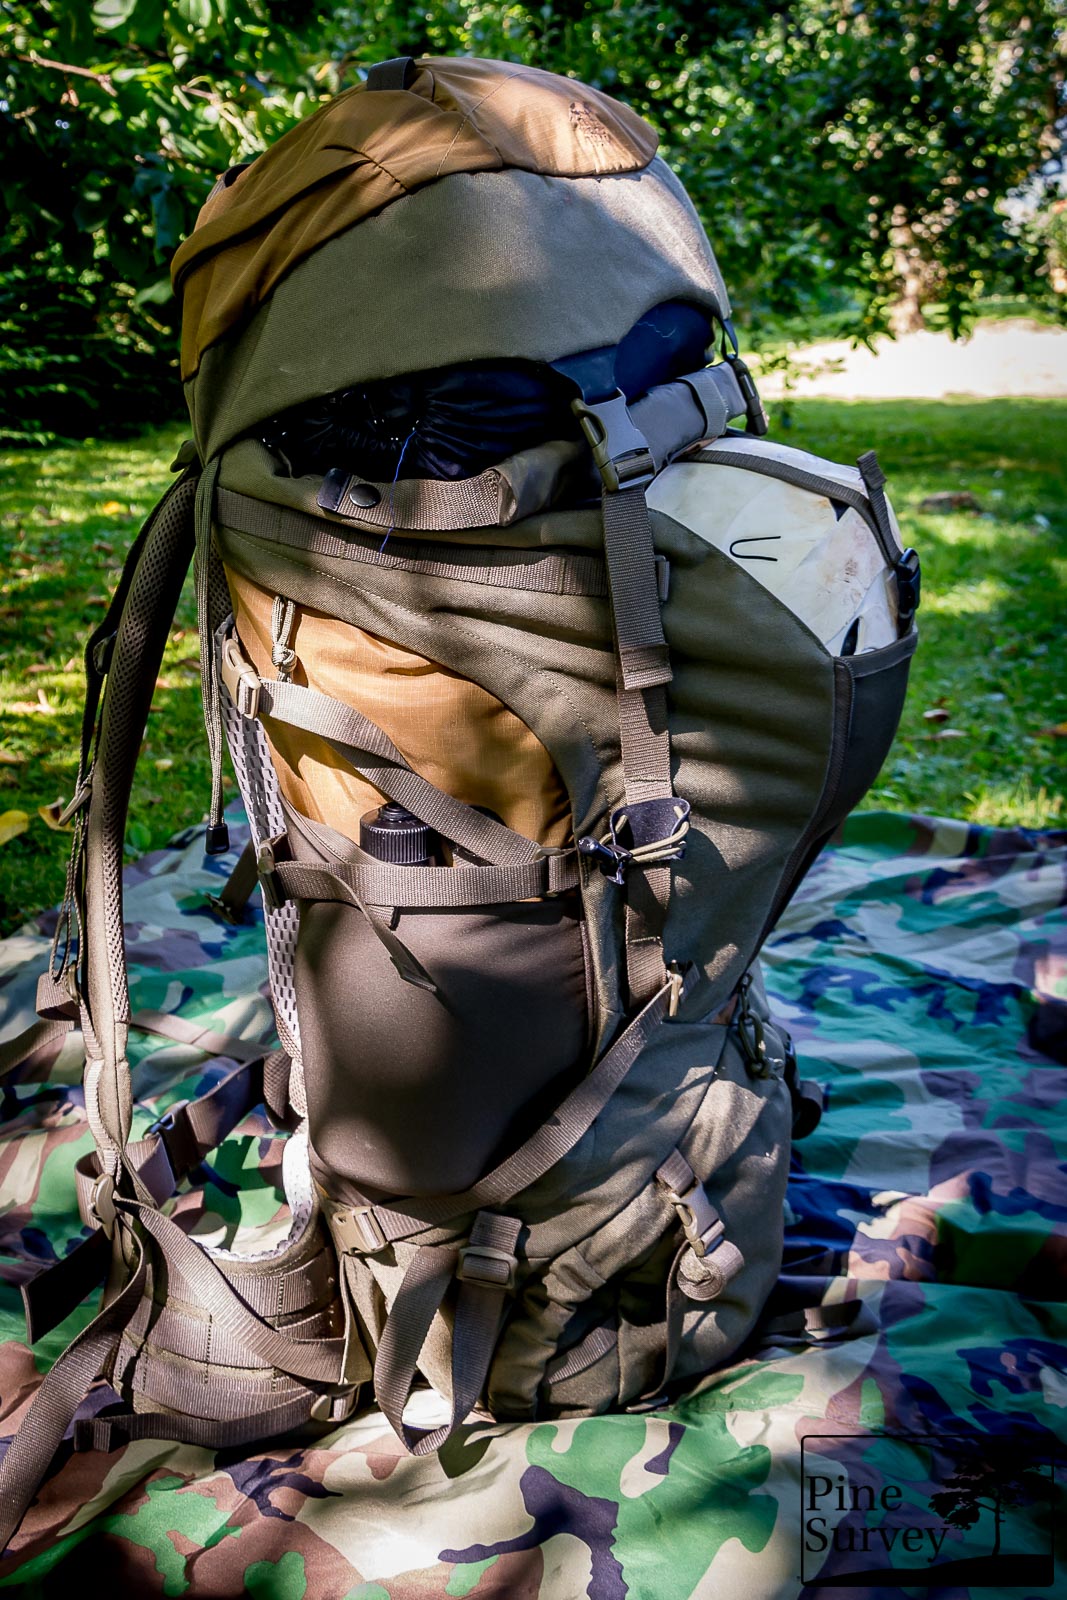
Fully packed pack with climbing helmet in the elastic outer front pouch
On both sides you can find one elastic side pouch each. One being bigger than the other, meaning that the left is covering roughly a quarter of the height of the pack, while the other is about half of it.
Right above them, thin webbing is attached. This is done in a zigzag pattern, so it can catch as much surface of the item strapped down with it.
On one side you can find an adjustable loop, as previously mentioned. Attaching skis should be no problem with this pack.
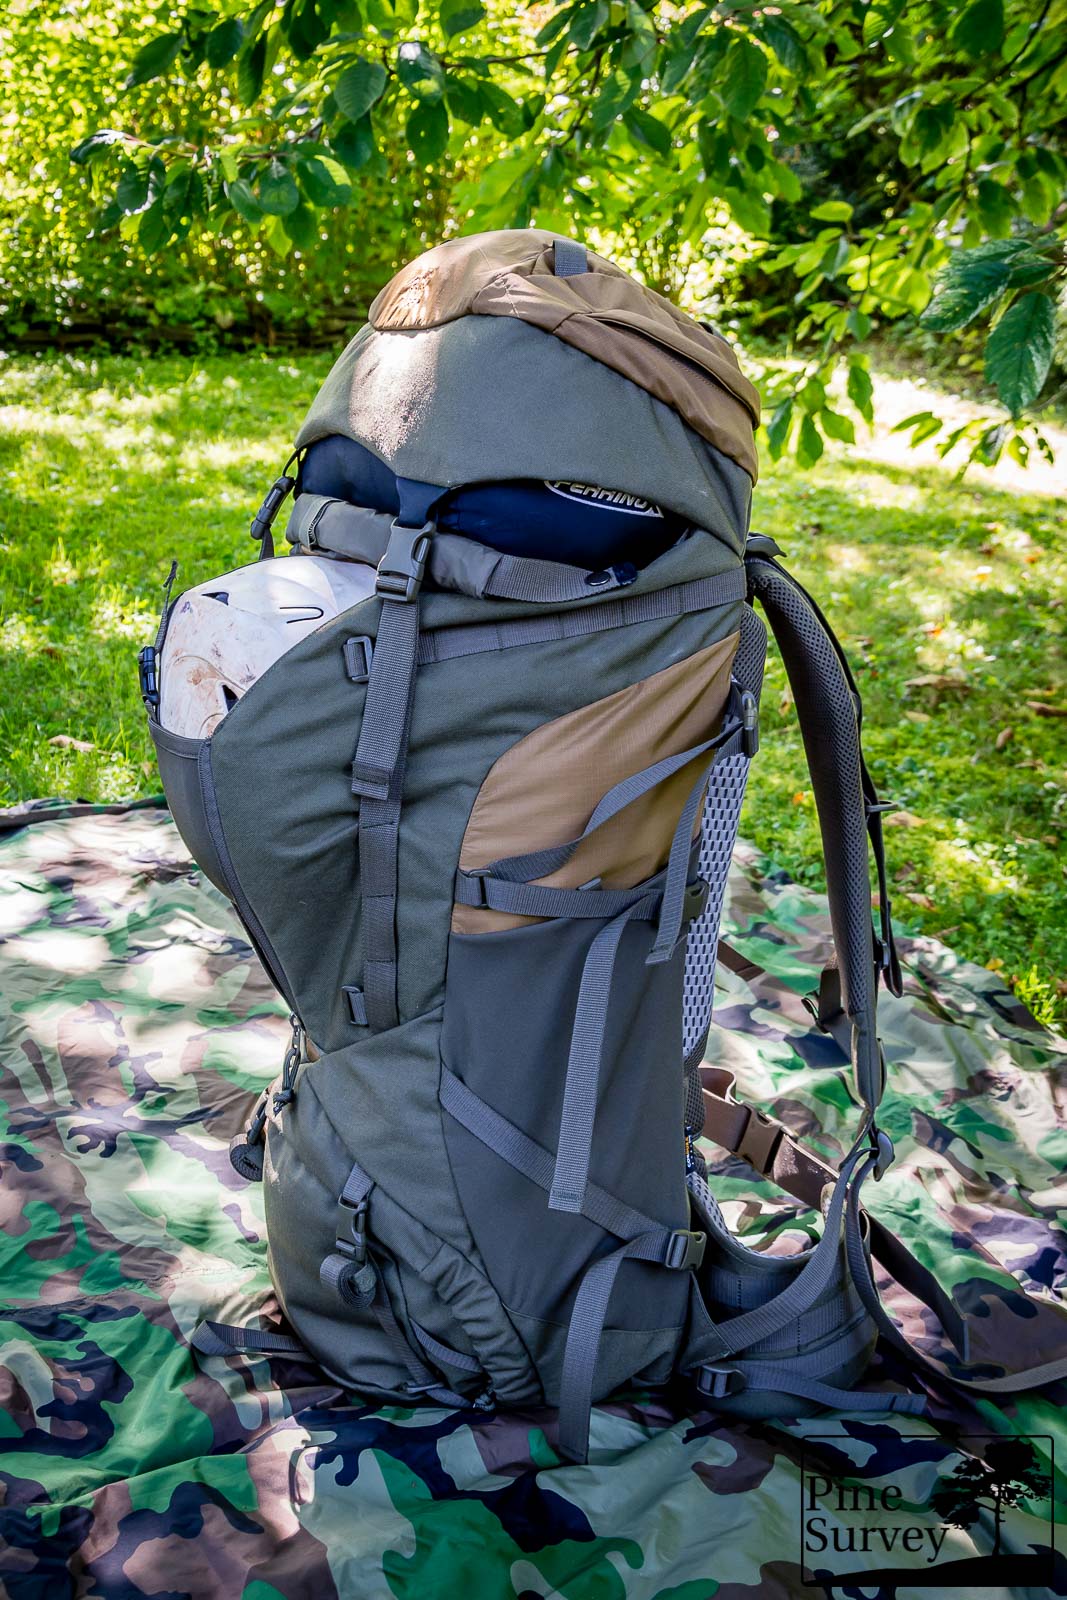
Fully packed pack from the other side with the larger elastic side pocket in sight.
On the same side you have access to the inside of the main compartment by a zippered opening near the elastic side pouch.
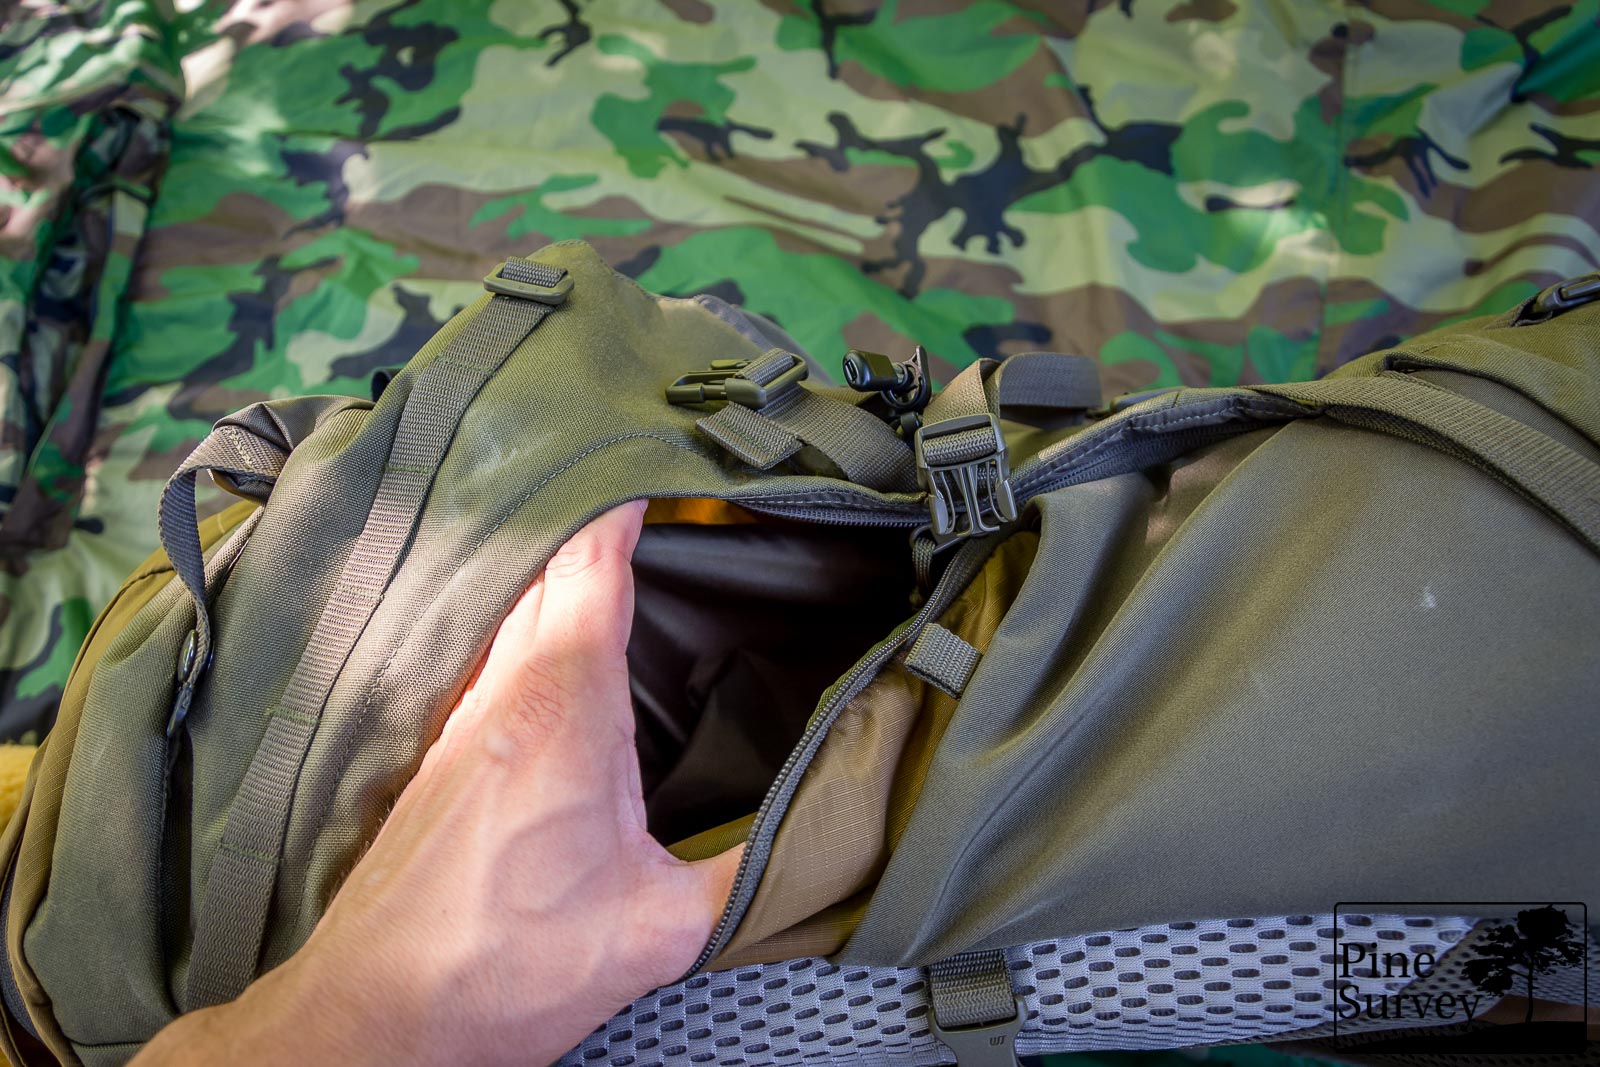
Access to the main compartment from the side
The bottom area of the pack features two compression straps and the opening to the lower compartment of the pack. Here you will find two webbing loops for snap hooks, if you choose to attach climbing shoes and the like on the outside of your pack.
The compression straps run all around the bottom through glides, so it is possible to attach something underneath the pack, like a mat.
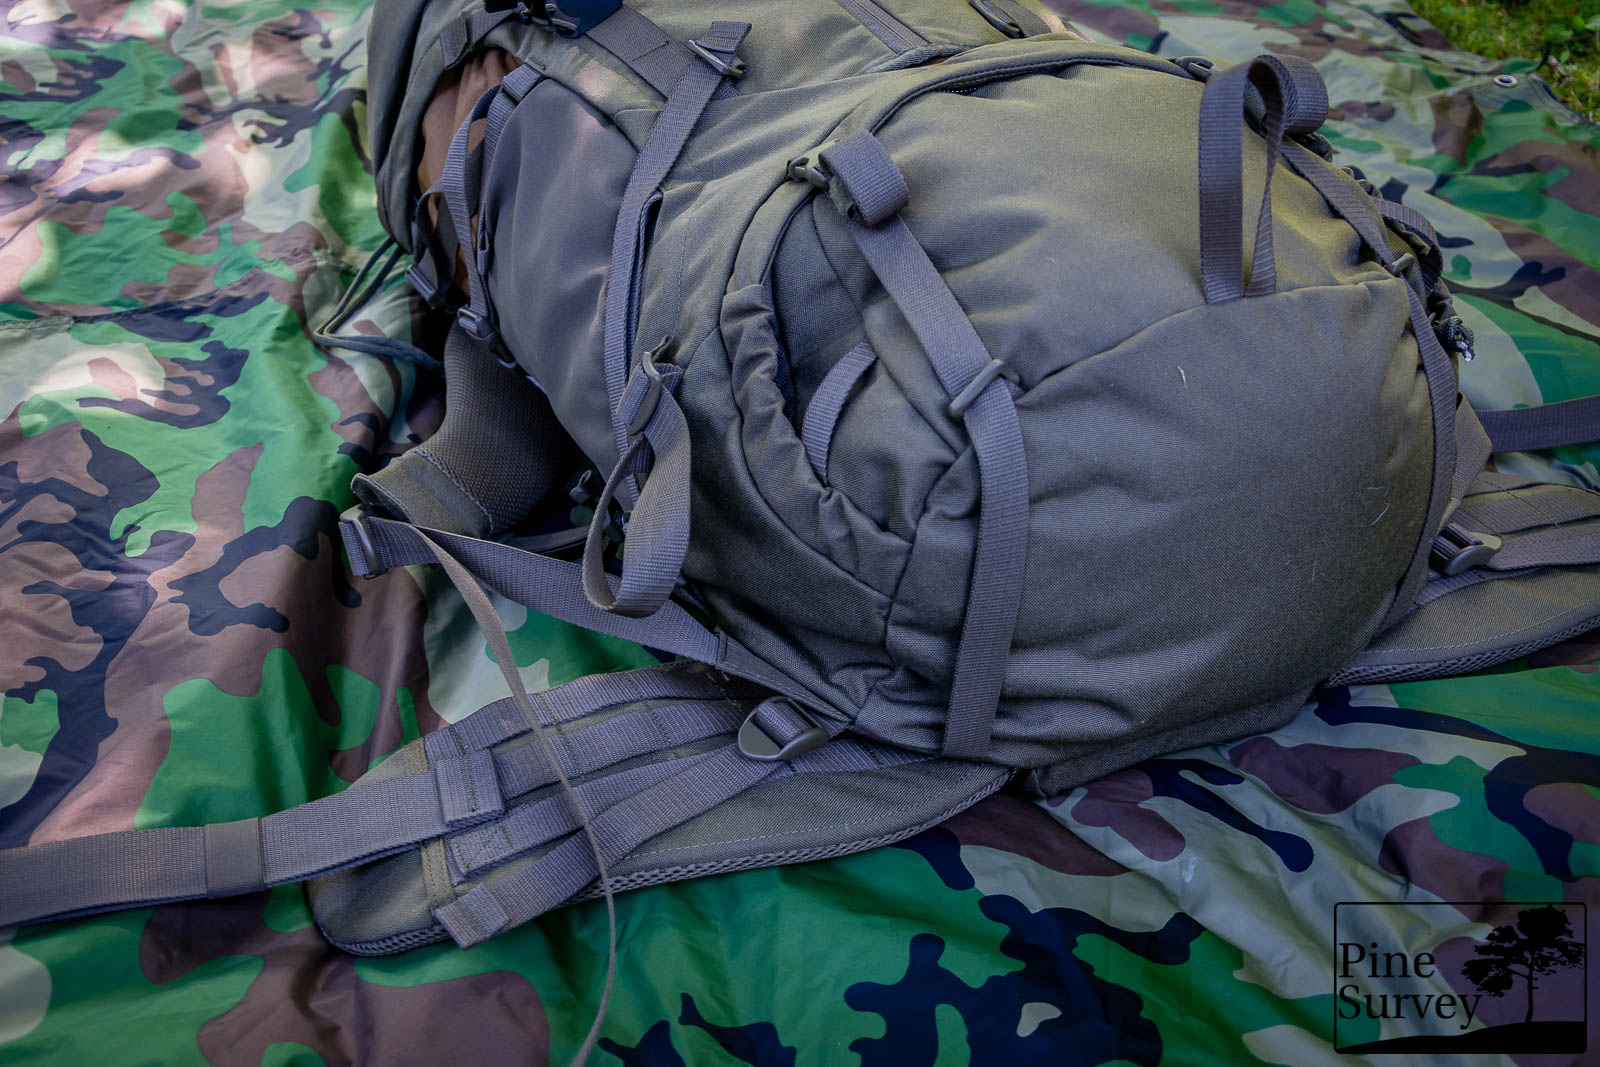
Bottom of the pack with compression straps and opening for the lower part of the pack
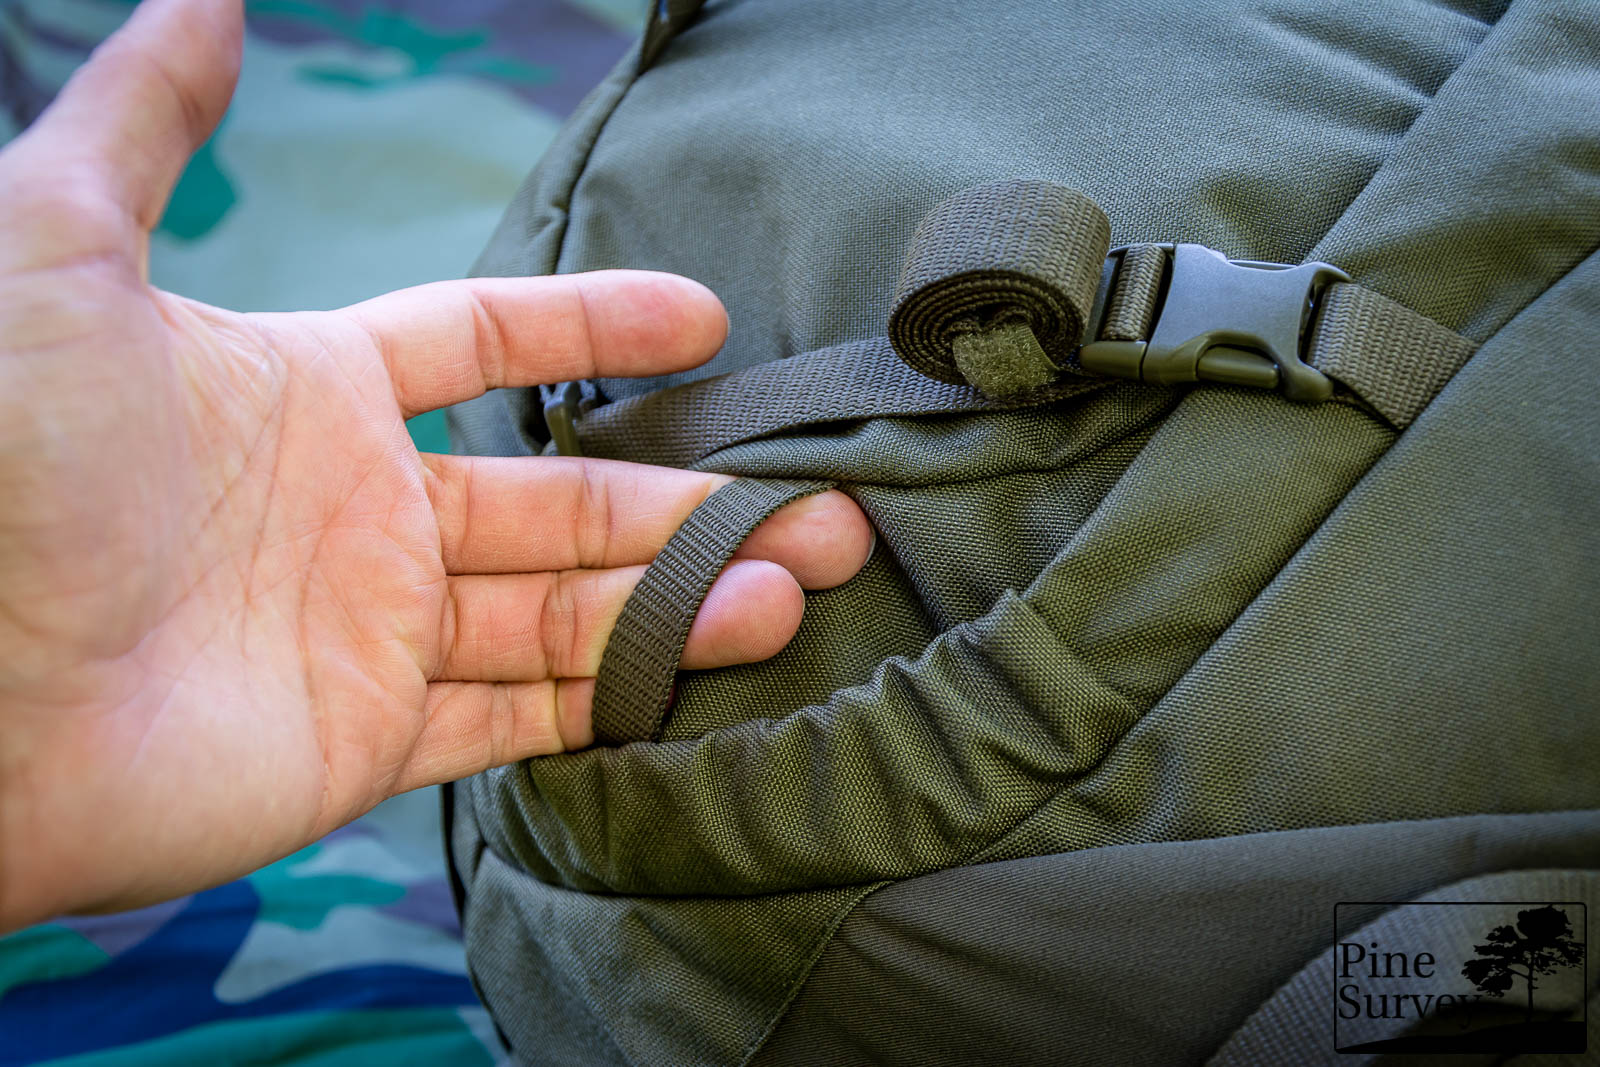
Loops on the bottom for snap hooks and the like
Inside
The inside features a main compartment with an elastic panel in the back and an access panel for the frame sheet. There is a velcro loop and a cord loop for attaching a water bladder and an opening for the drinking tube under the snow guard.
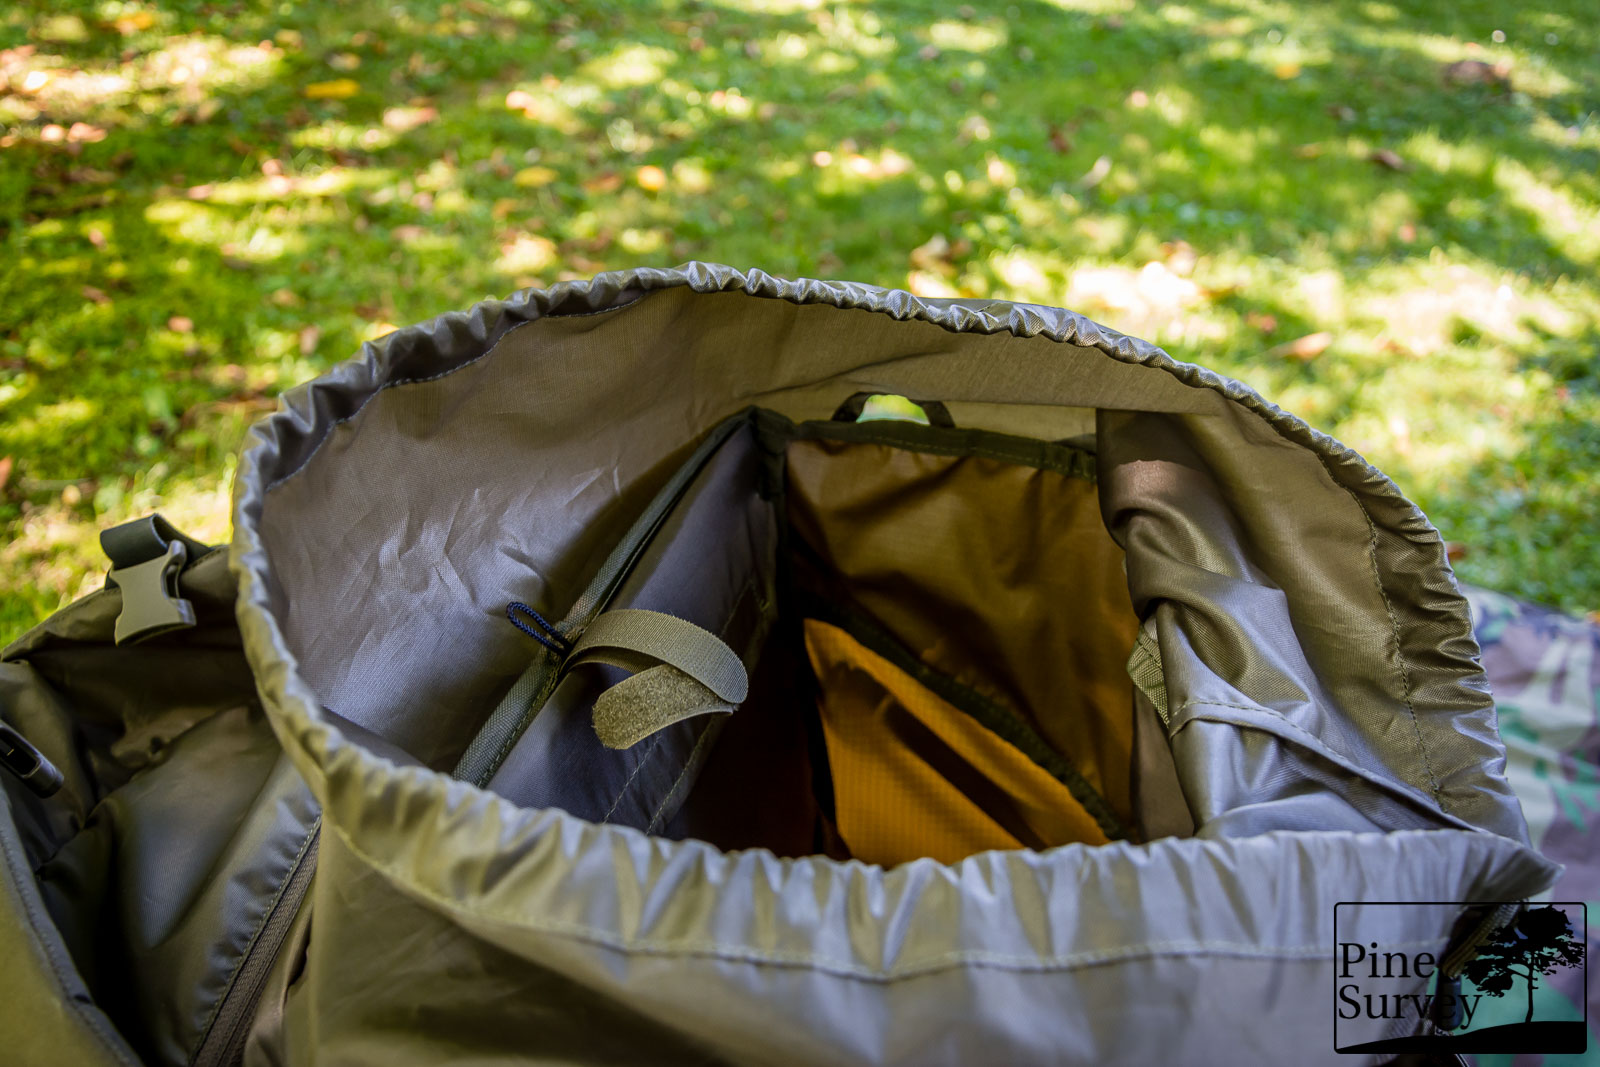
Opening to the main compartment. Snowguard, opening for the tube of the water bladder and attachment elements for it.
You can divide the main compartment with a zippered flap into two parts, as everyone might know from outdoor packs of this design. In doing so, you are able to create a bottom compartment for shoes or other equipment you choose to store separately. There is a way to open the bottom compartment from the lower outside; again, just like with other packs of this kind.
Next to the main compartment there is a special waterproof sack/pouch mounted to the opening of the main compartment. The buildup is just like a regular drybag with an opening that has to be rolled up to ensure the functionality. This can be fastened with push buttons on each side and a velcro tab in the middle.
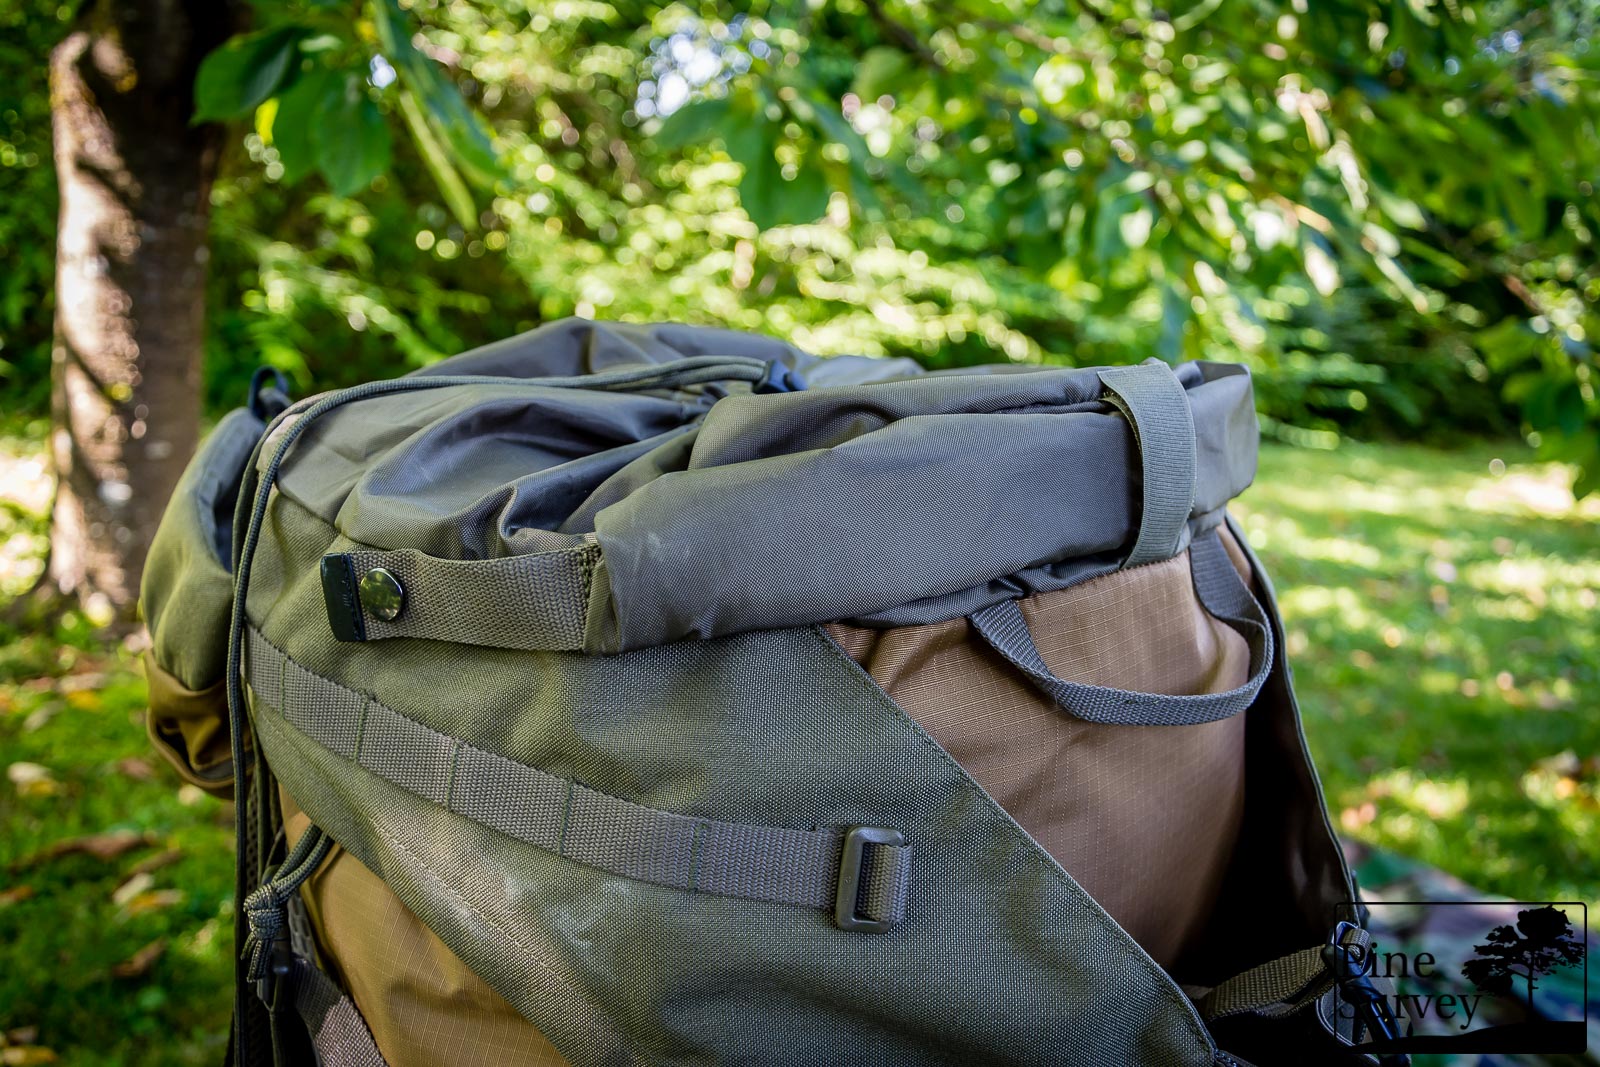
The drybag closed with push buttons and velcro loop
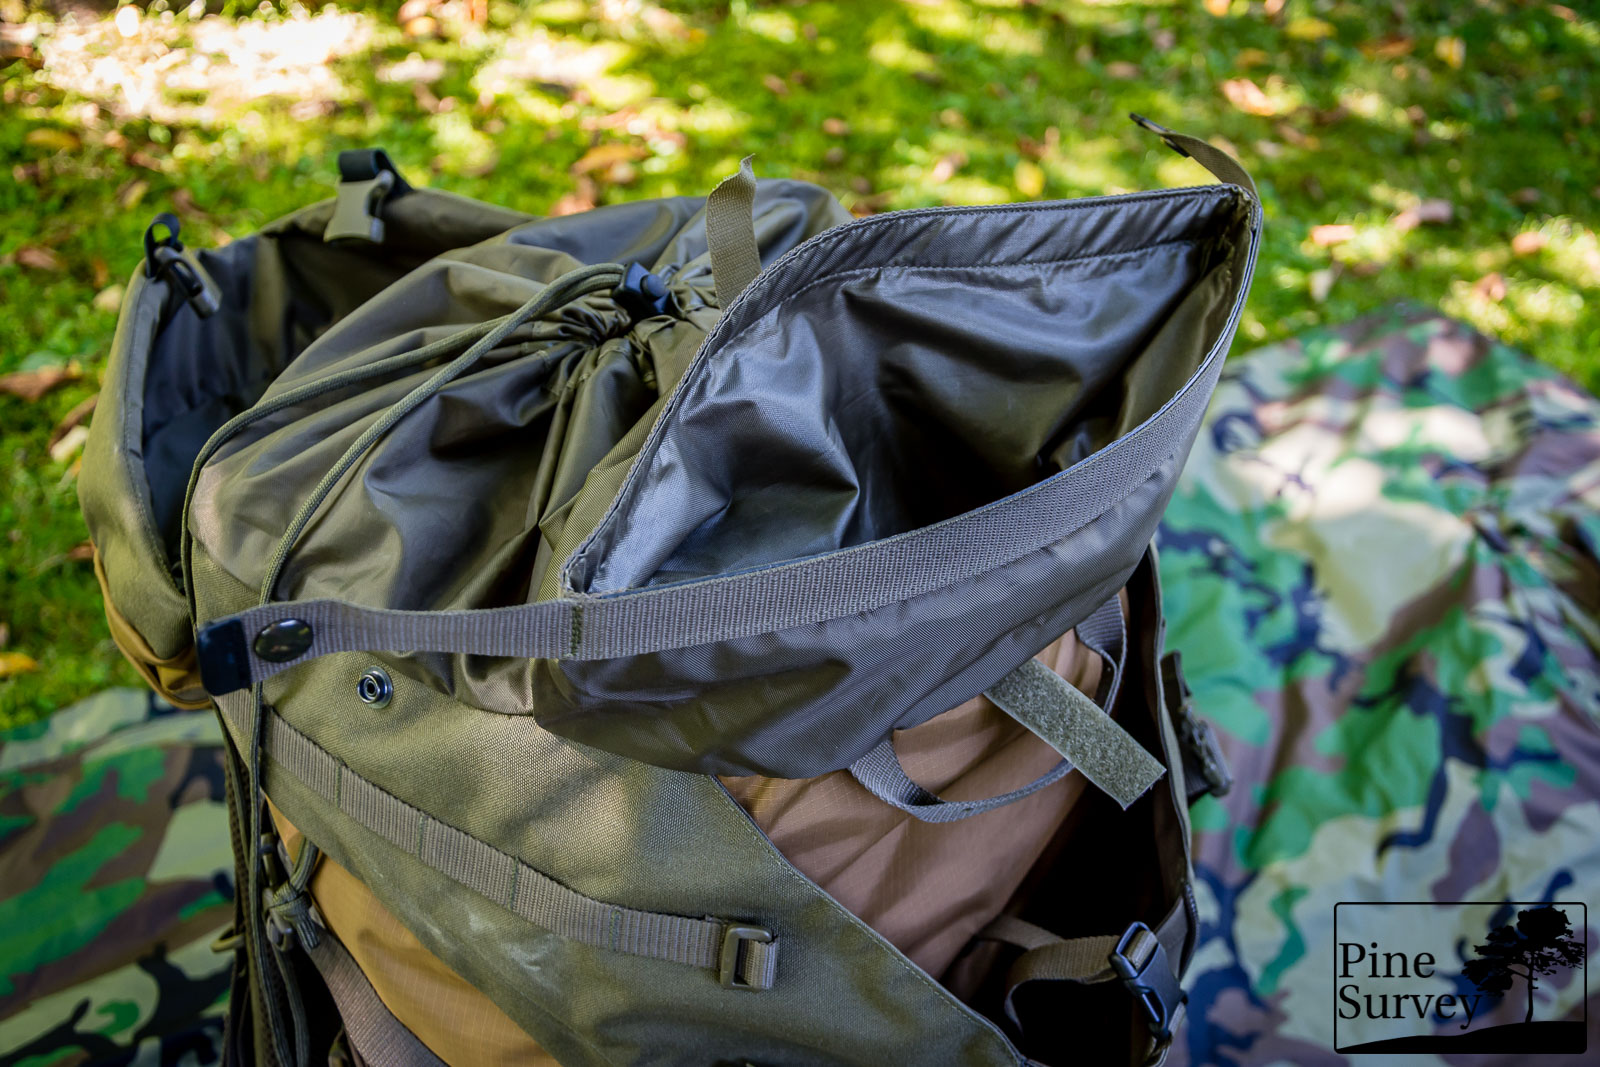
Open drybag
Load distribution system
Only to give you a first hint, before I will go into more detail in the second part of this review: The V2-Plus System is an upgraded System by Tasmanian Tiger. I noticed you have one row of webbing more in addition, thus enabling the user to better adjust the height of the shoulder straps.
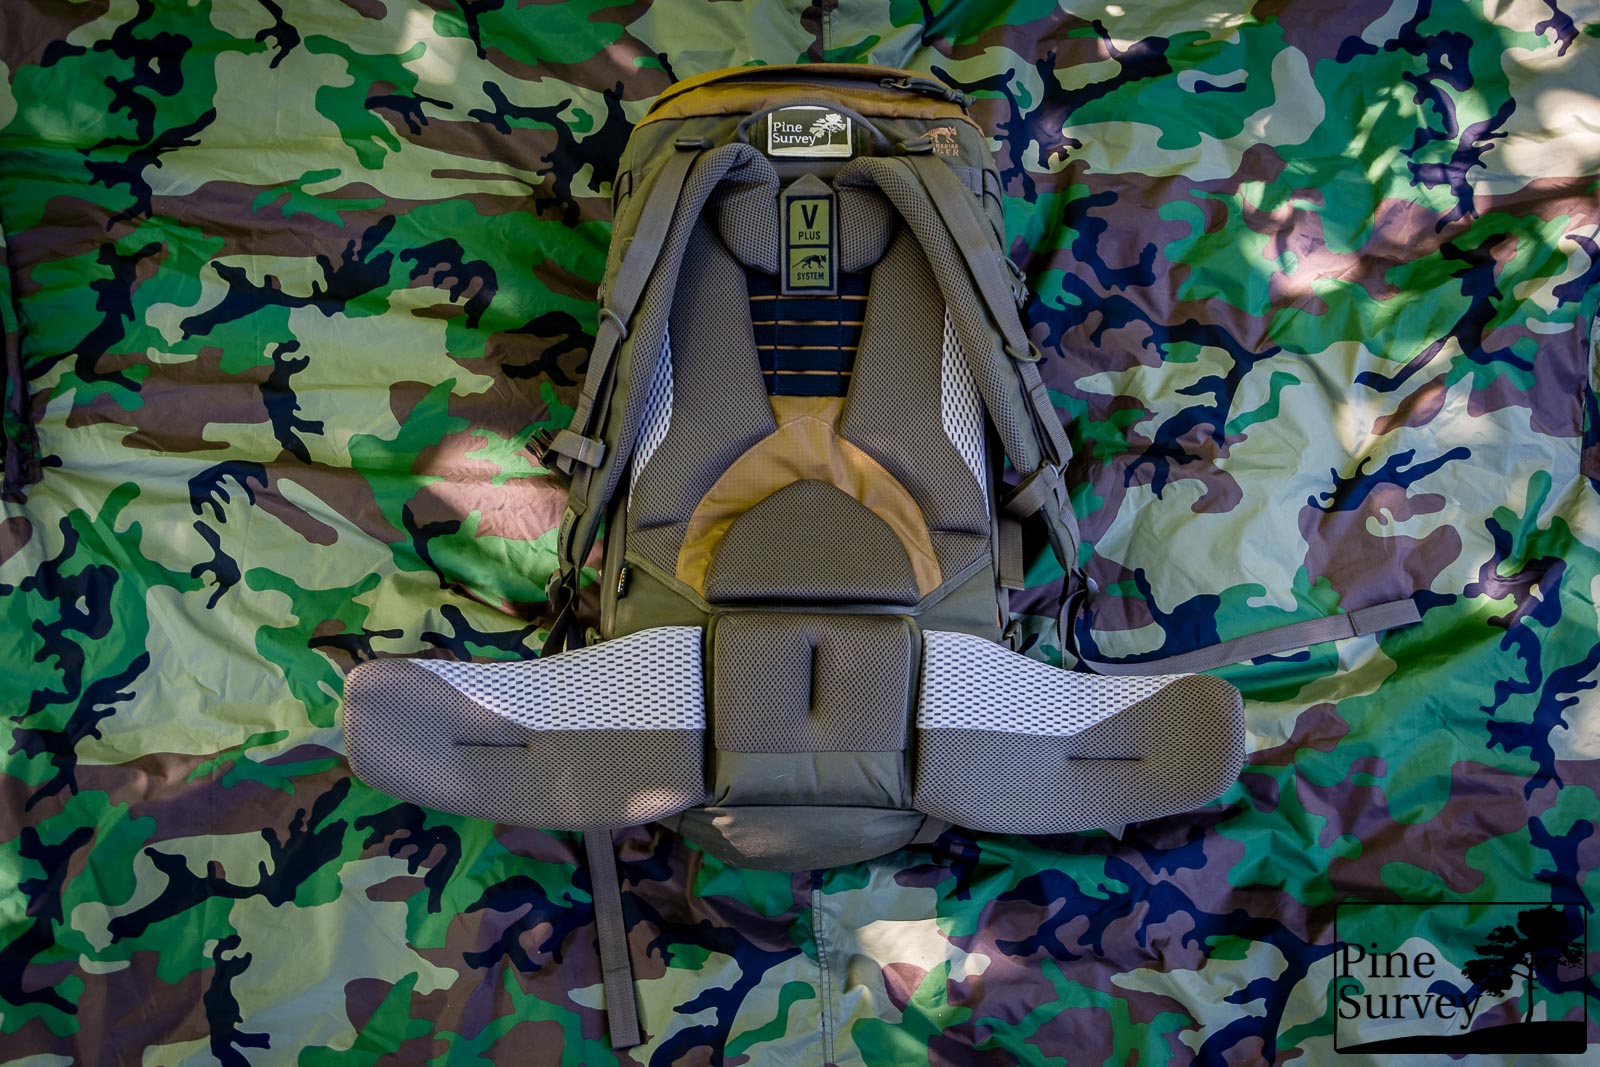
padded back with the V2 load carrying system
The straps are comfortably padded and feature a body contoured profile. As expected there is also a sternum strap to keep the shoulder straps in place. The whole backside is thickly padded with plenty room for air circulation
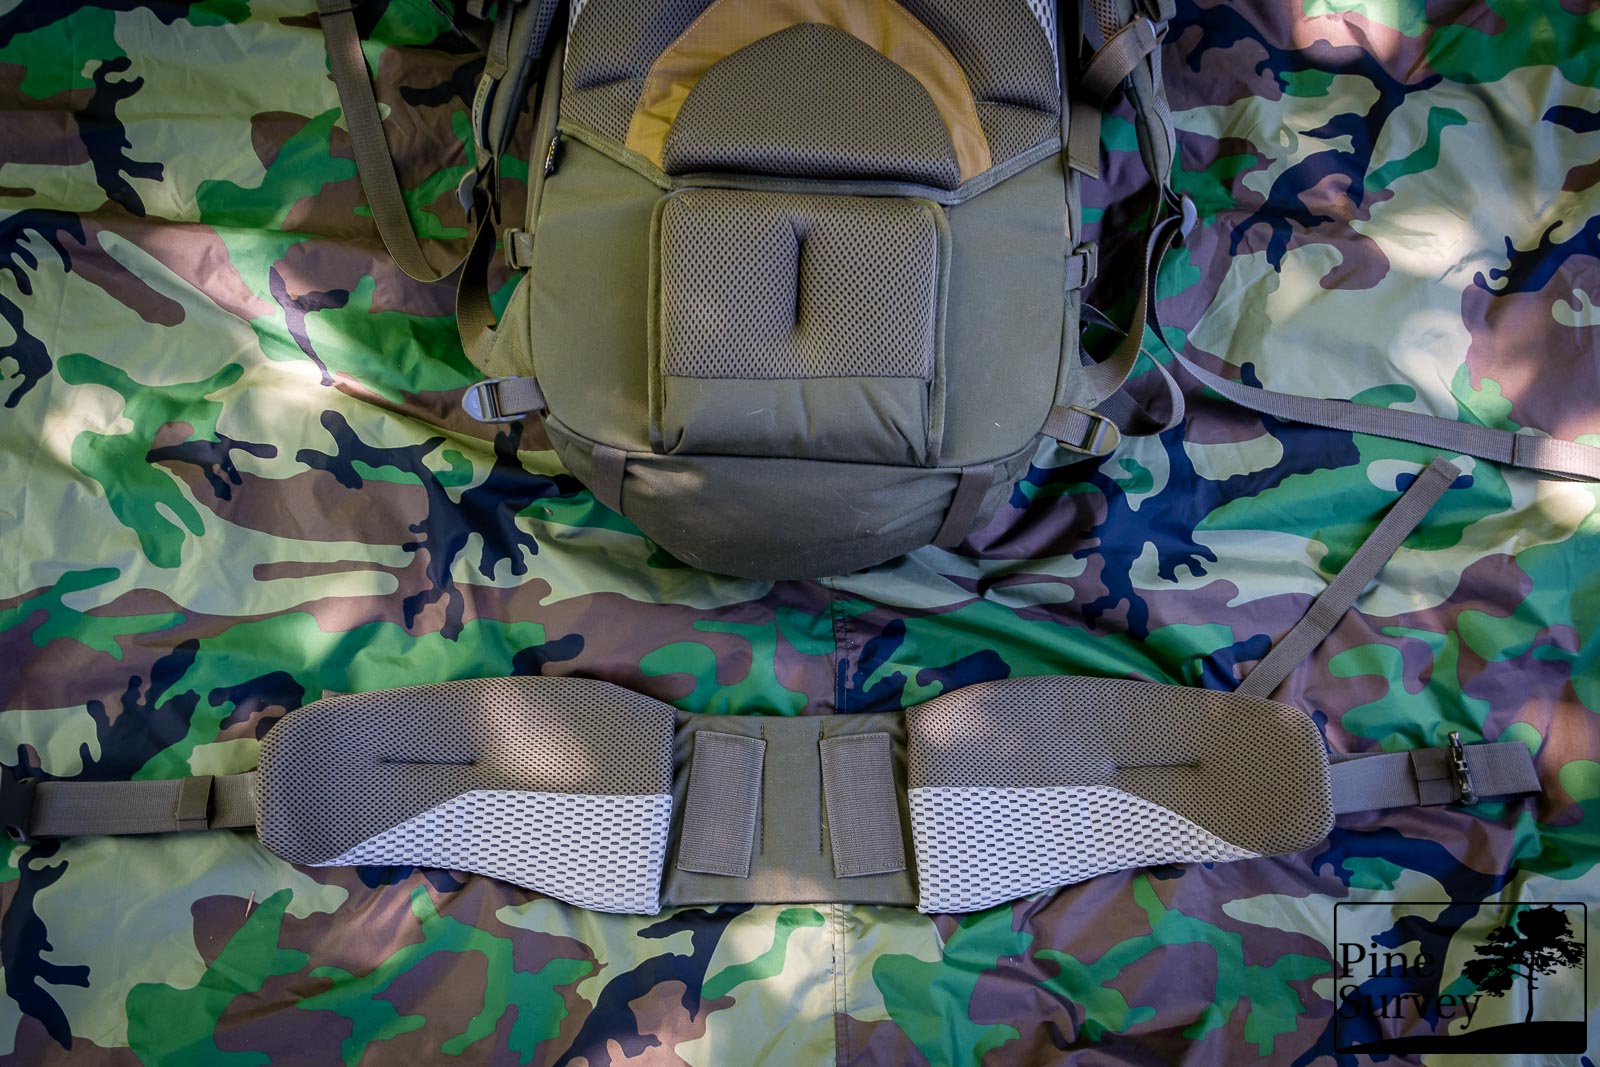
Detachable „Warrior Belt“
The Waist belt is thickly padded and can be detached – although not as fast as I would like to. More on that next time. In any case you can use it as a Warrior Belt independently from the pack.
First impression
So far I have experienced the Tac Pack 45 as a well balanced and thought through backpack, which has quickly become one of my favorites in this range of pack sizes. What strikes me the most is the build up which results in a wide profile that covers most of your back, thus transferring the weight evenly on your shoulders and hips. At the same time it is not deep in size, offering you a very streamlined profile close to your body, which is very practical in narrow spaces – be it the aisle in a train wagon or dense forest areas.
Manufacture is exquisite as expected from Tasmanian Tiger. I have no need to sugar coat this – they know how to maintain an excellent quality control.
So far I really enjoy this pack for its details, one being the colorway. The OD-Coyote mashup really got to me and I am looking forward to more products with this combination, which is practical and good looking at the same time.
I hope I was able to give you a first Impression of the pack. I will see to it that I will return with part two in a timely fashion, focusing more on the Load Distribution, the Warrior Belt as well as Manufacture.
Until then, thank you for reading, take care!

2 Response Comments