
For some time now I am getting more and more interested in body armor related topics and as a result I have decided to take a look at plate carriers now and then, if I get the chance.
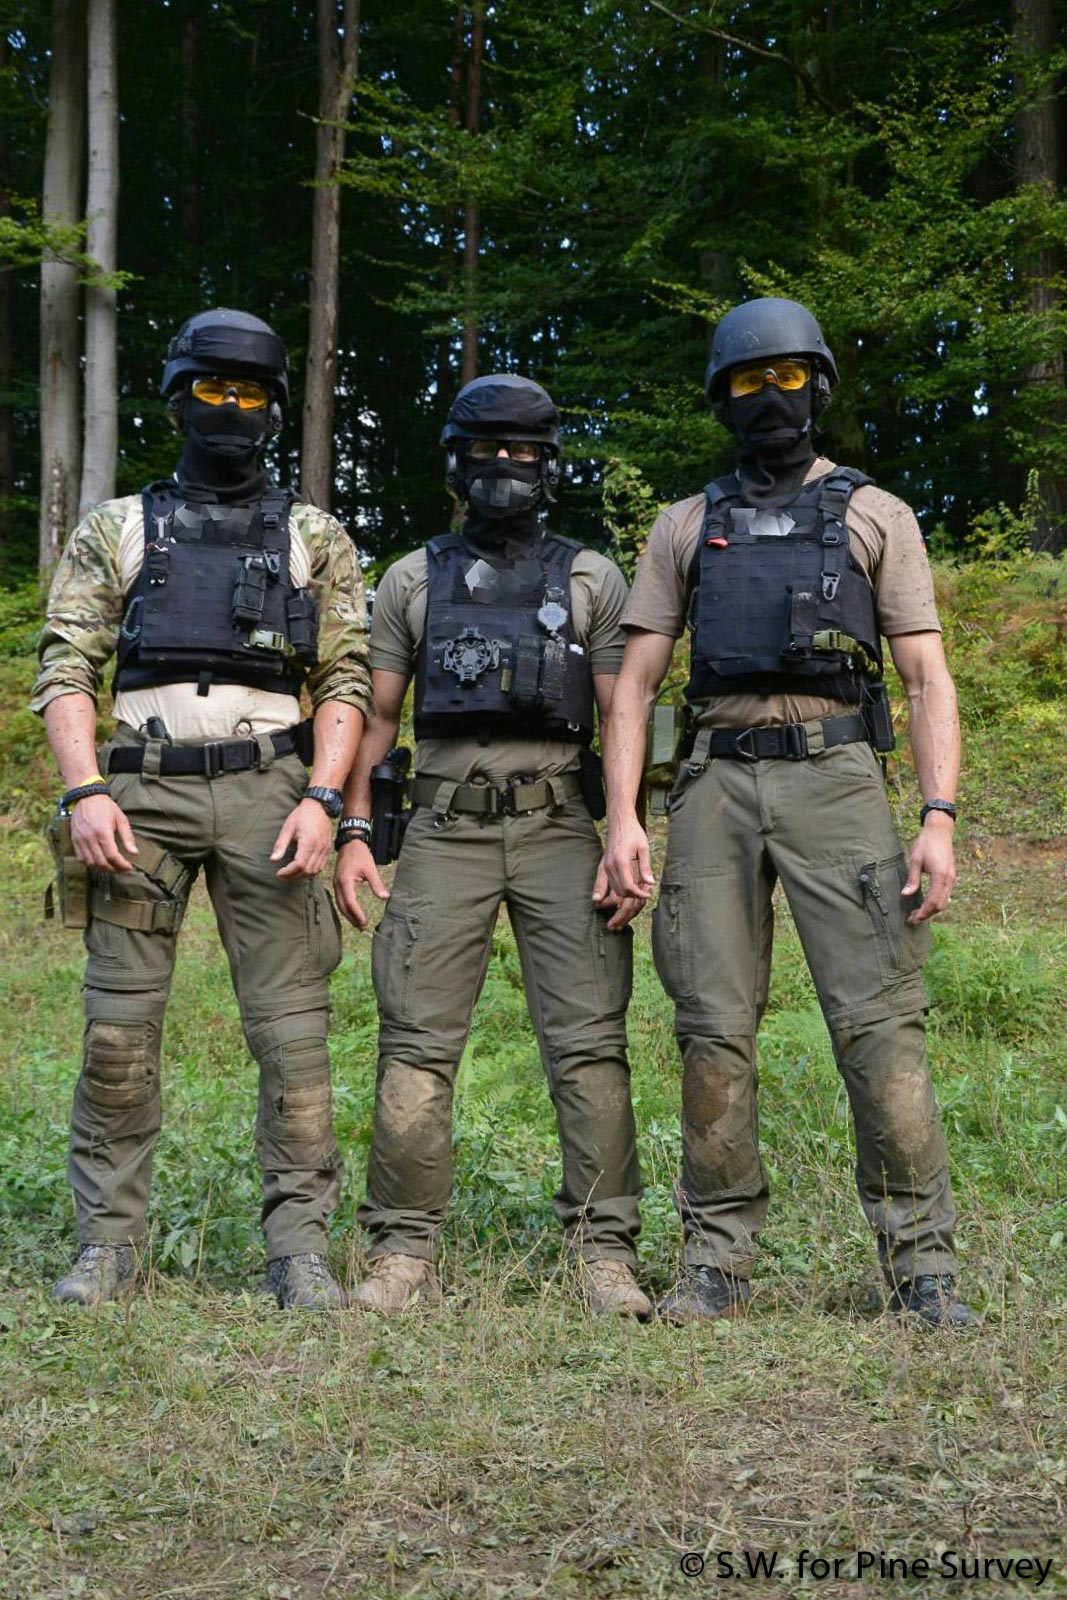
As you might know, Tasmanian Tiger is not only doing backpacks, they are also producing pouches, chest rigs aaaand, yes: plate carriers. So today I will take a look at the TT Plate Carrier LC (laser cut). I was able to do some nice pictures with my dear friend Alzwolf and of course picked his brain on this plate carrier, having his profession in mind. Additionally I will incorporate the experiences of another dear friend, who contributed to Pine Survey before and who is carrying the plate carrier on a daily basis.
Overview
The Tasmanian Tiger Plate Carrier LC is designed to be a light plate carrier, being able to carry SK-4 type plates (30 x 25 cm). The side panels are elastic and offer a MOLLE, and a simple webbing type carrying method, in case the user does not need to attach equipment at his sides.
The MOLLE front panel can be detached and the plate carrier is also compatible with Tasmanian Tigers FL chest rig. The carrier comes with an additional radio pouch.
Specs
- Weight: 850g
- Materials: 700 den Cordura, Mesh, Hypalon
Build up
Tasmanian Tiger PC LC
The whole build up is very streamlined and minimalistic. One can tell that saving weight was a priority. The laser cut MOLLE gives the plate carrier a slick look.
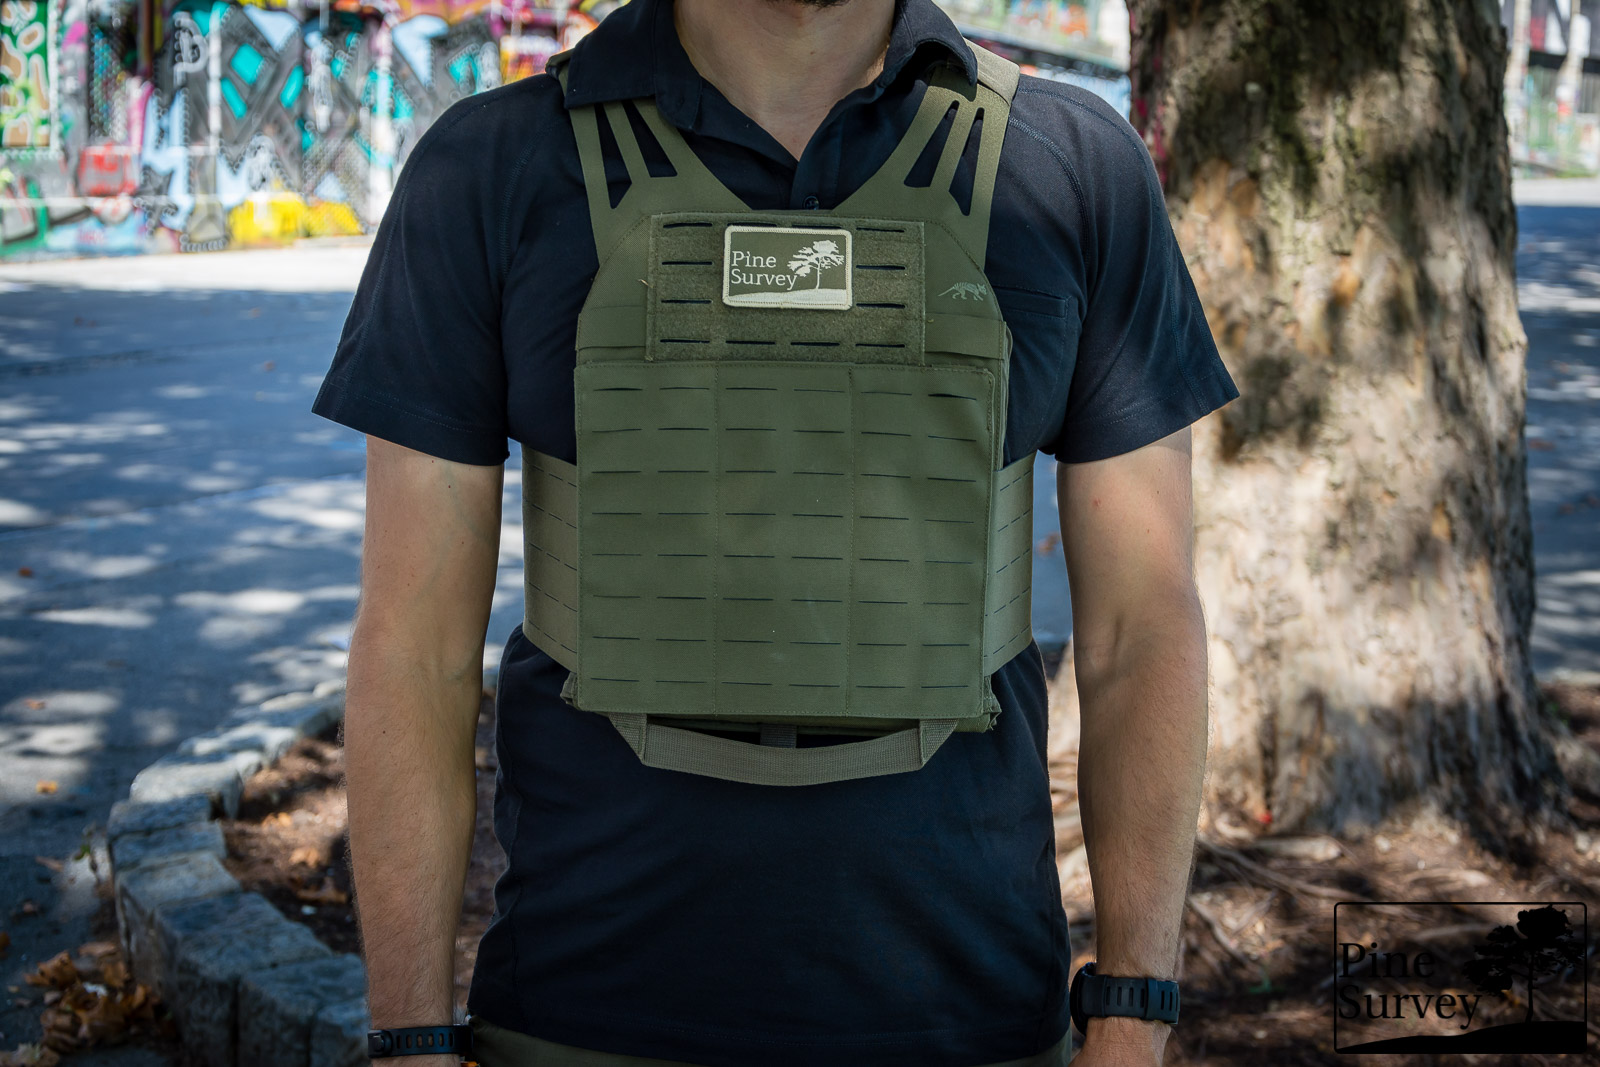
Front
The front element features two large loop velcro areas. One on top, which is laser cut to mount admin pouches and the like, if you are not using it for insignia or identification patches, and one on the bottom, which serves as attachment point for your side panels.
The front element of the PC with the MOLLE front panel attached.
The upper velcro area is offering 4 horizontal lines of MOLLE, although the fourth row on the bottom is provided by a webbing strap. Vertically there are 4 channels. As mentioned before, the fourth row is made of webbing, since it is being used to mount the MOLLE front panel of the plate carrier. This is being done by 4 straps on the panel and a velcro area on the webbing.
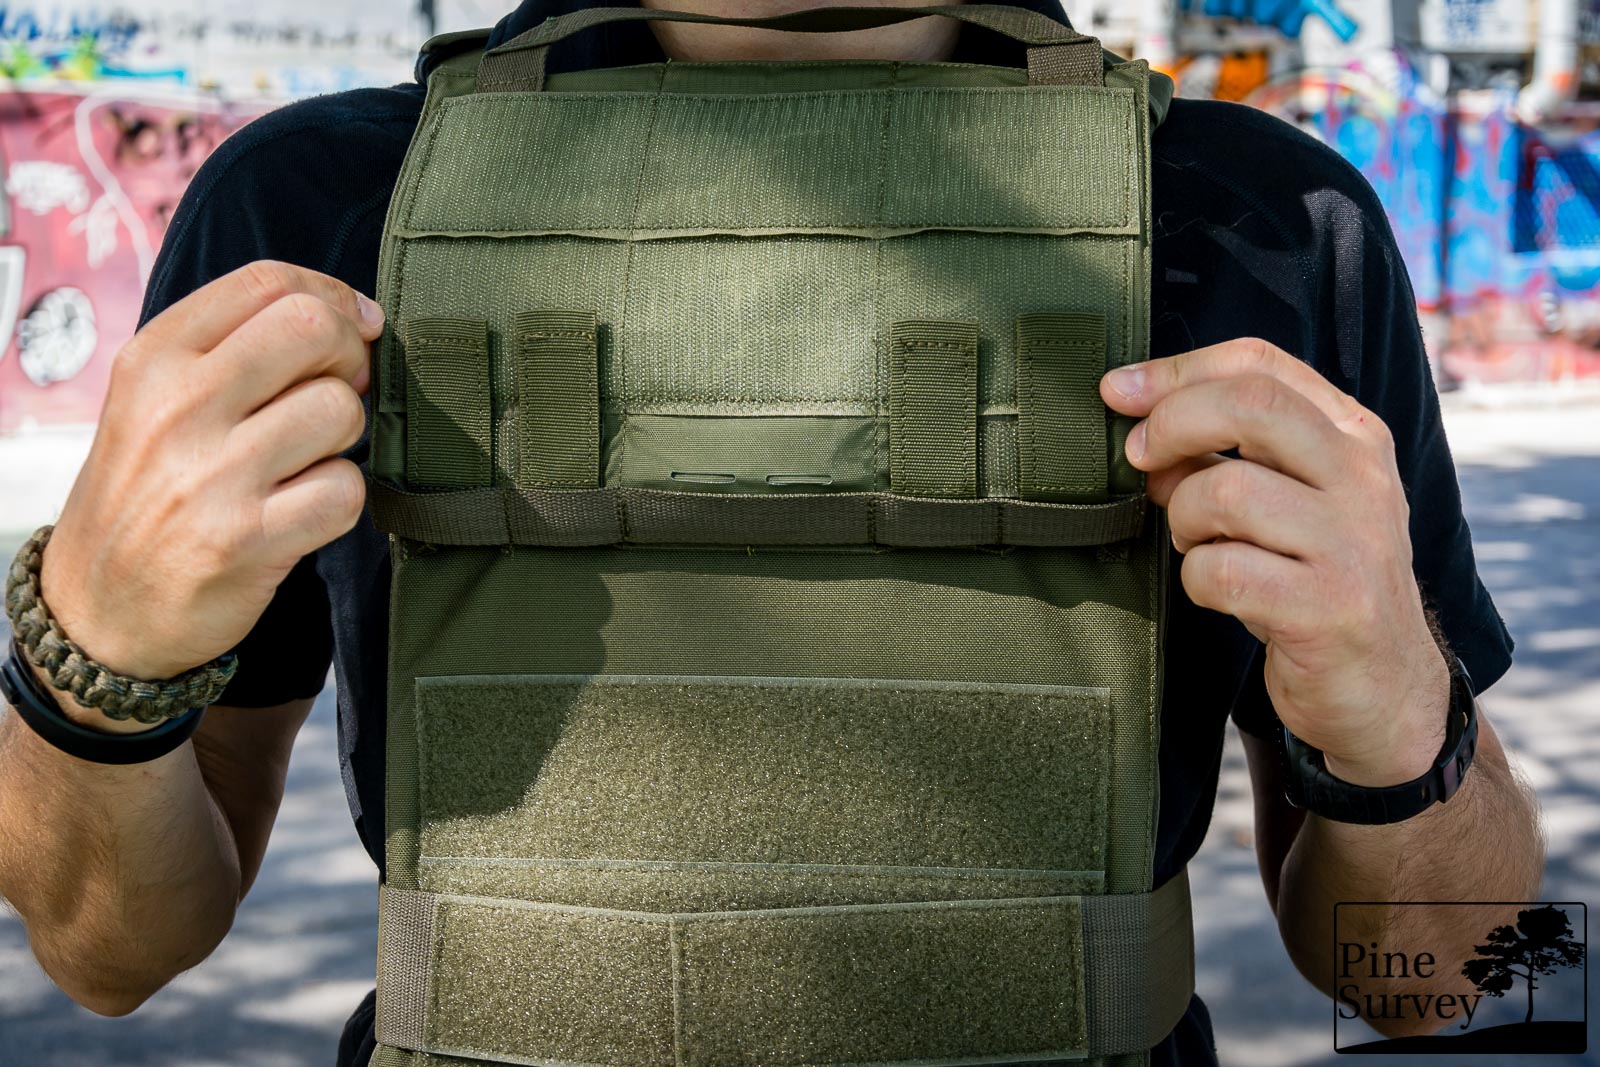
The MOLLE front panel lifted up, showing its attachment
The MOLLE front panel itself is made up of laser cut Cordura and hook velcro to attach it to the front side of the plate carrier.
When attached, the MOLLE front panel provides 4 lines of MOLLE (or 7, depending on how you count – the laser cut manufacturing has this positive side effect after all, that all the lines are usable, while you have the traditional MOLLE restricts you with the MOLLE lines and its gaps.).
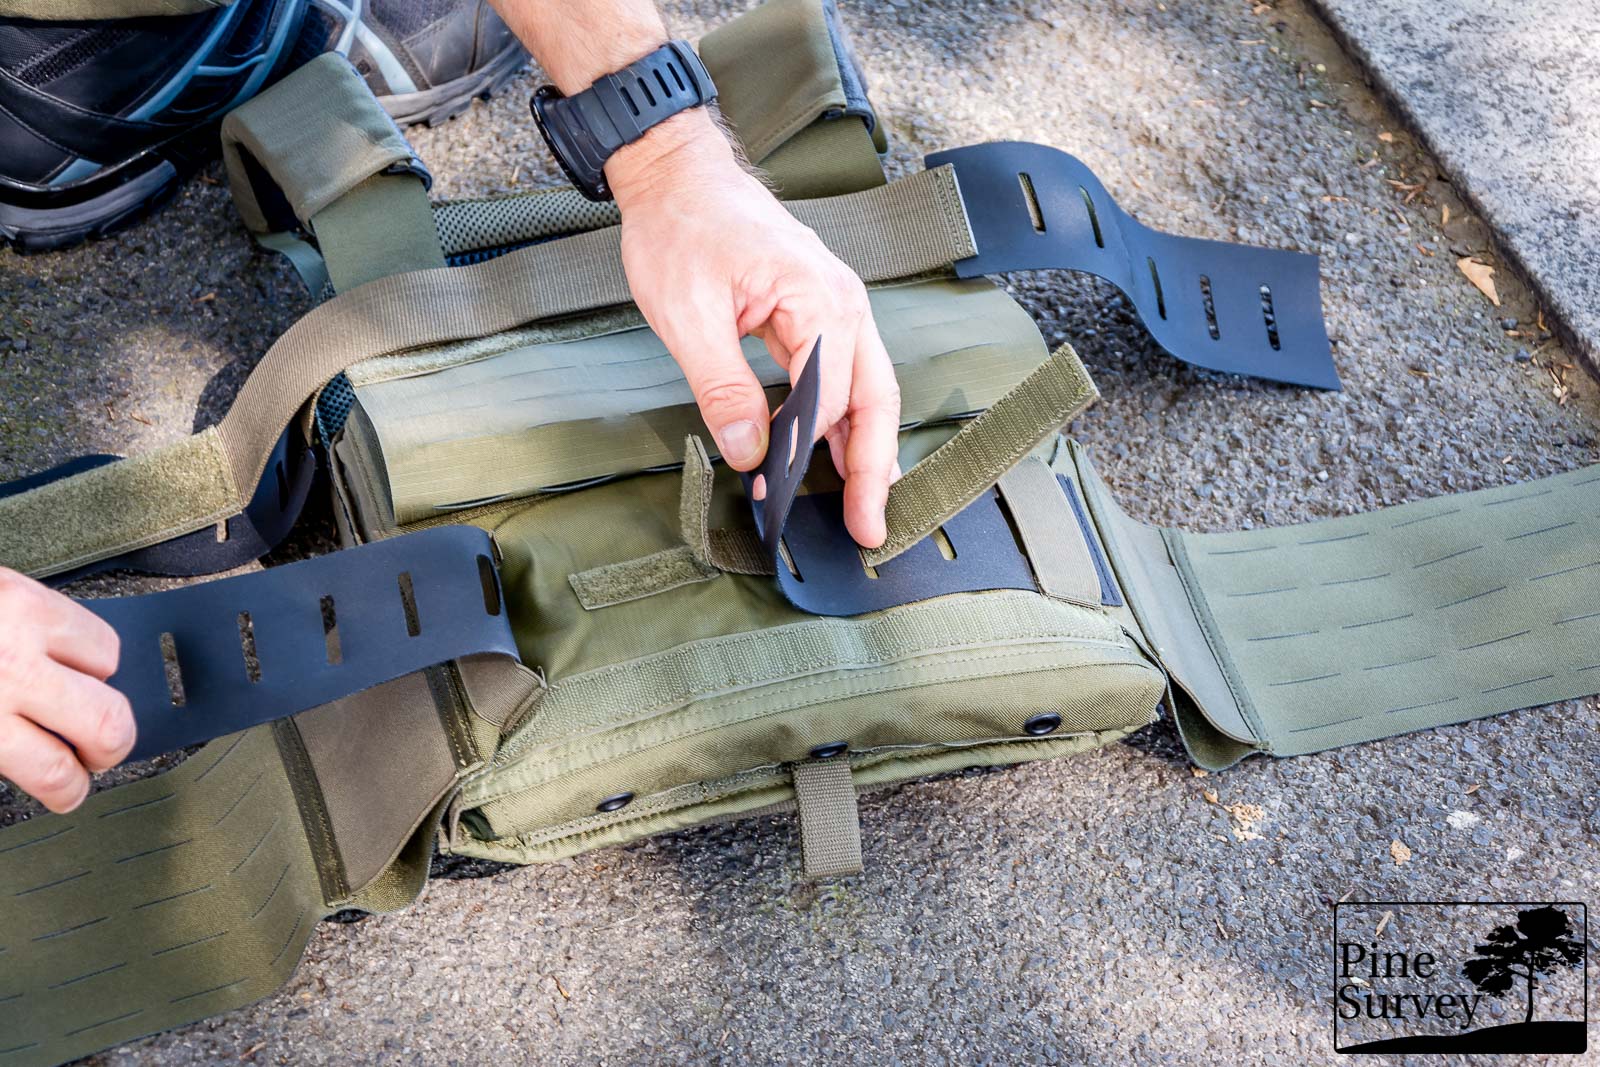
In total there are 6 MOLLE channels, which run vertically across the front panel. So in the end there is plenty of room to mount pouches and holster systems.
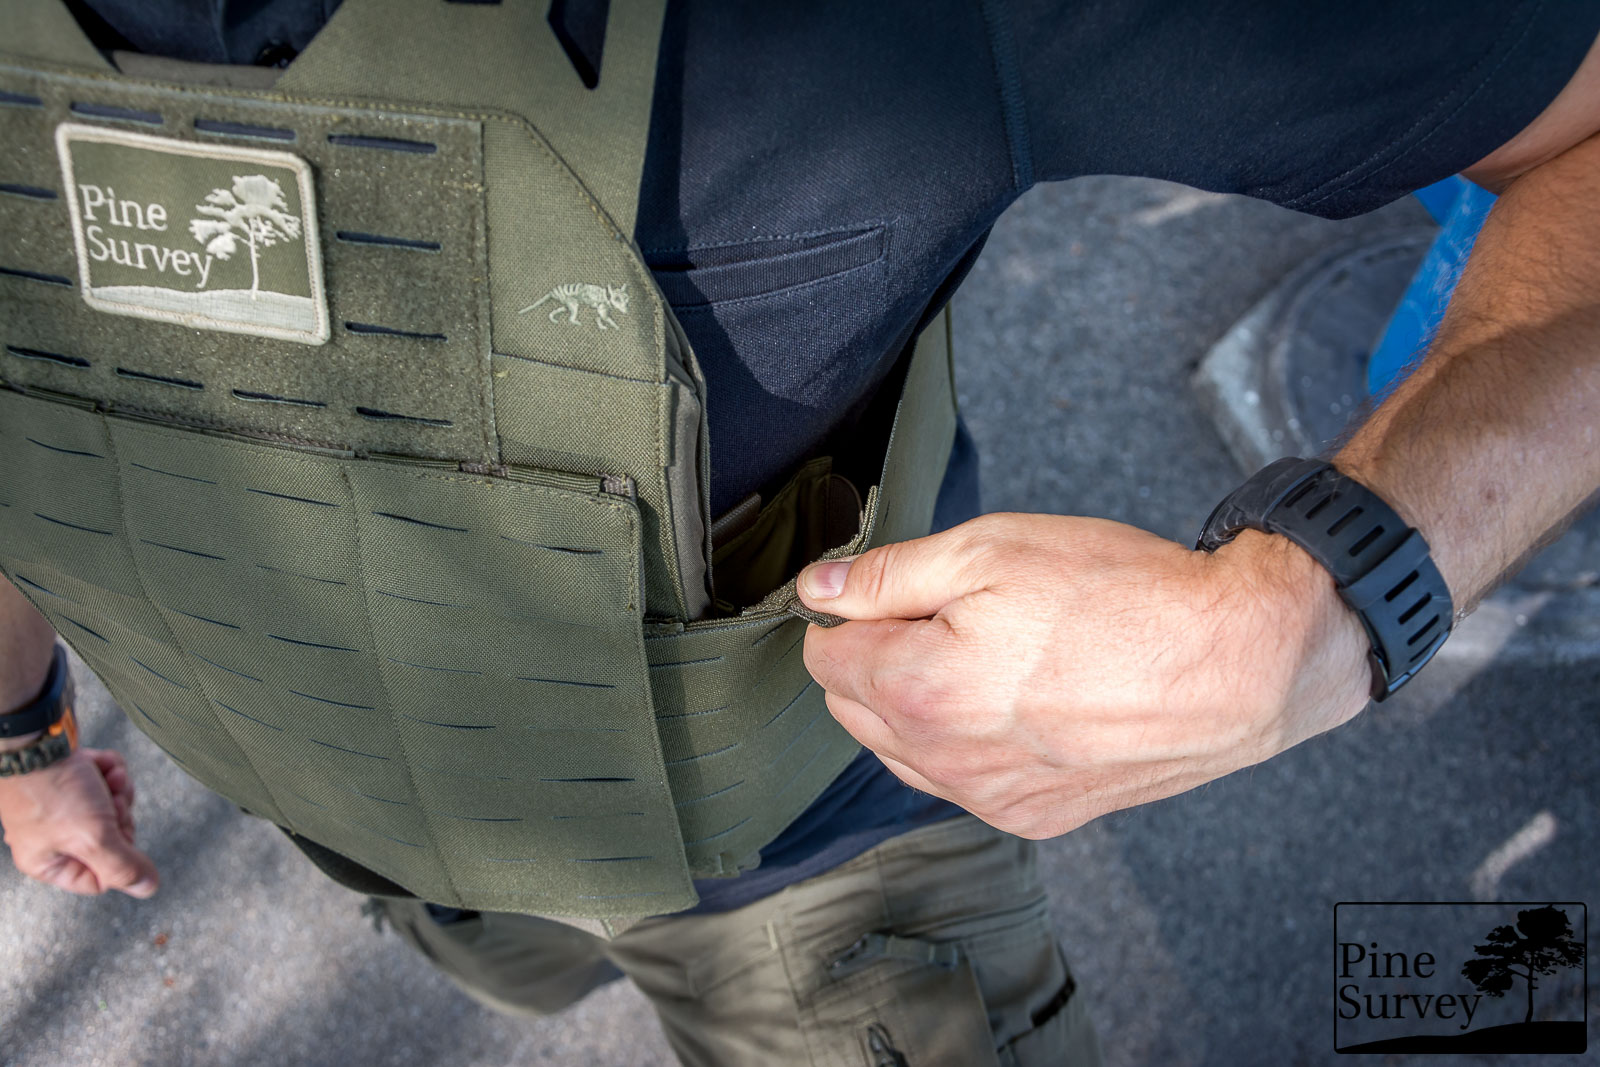
You can find a large pull handle made of webbing on the bottom of the front panel. Using this, you can effectively detach the front panel from the velcro on the carrier and access the attachment parts of the side panels.
Additionally, there is one loop each left and right of the top velcro panel, to route tubes, cables and antennas. This is not made of stretch material or webbing, but of laser cut 700den Cordura as well.
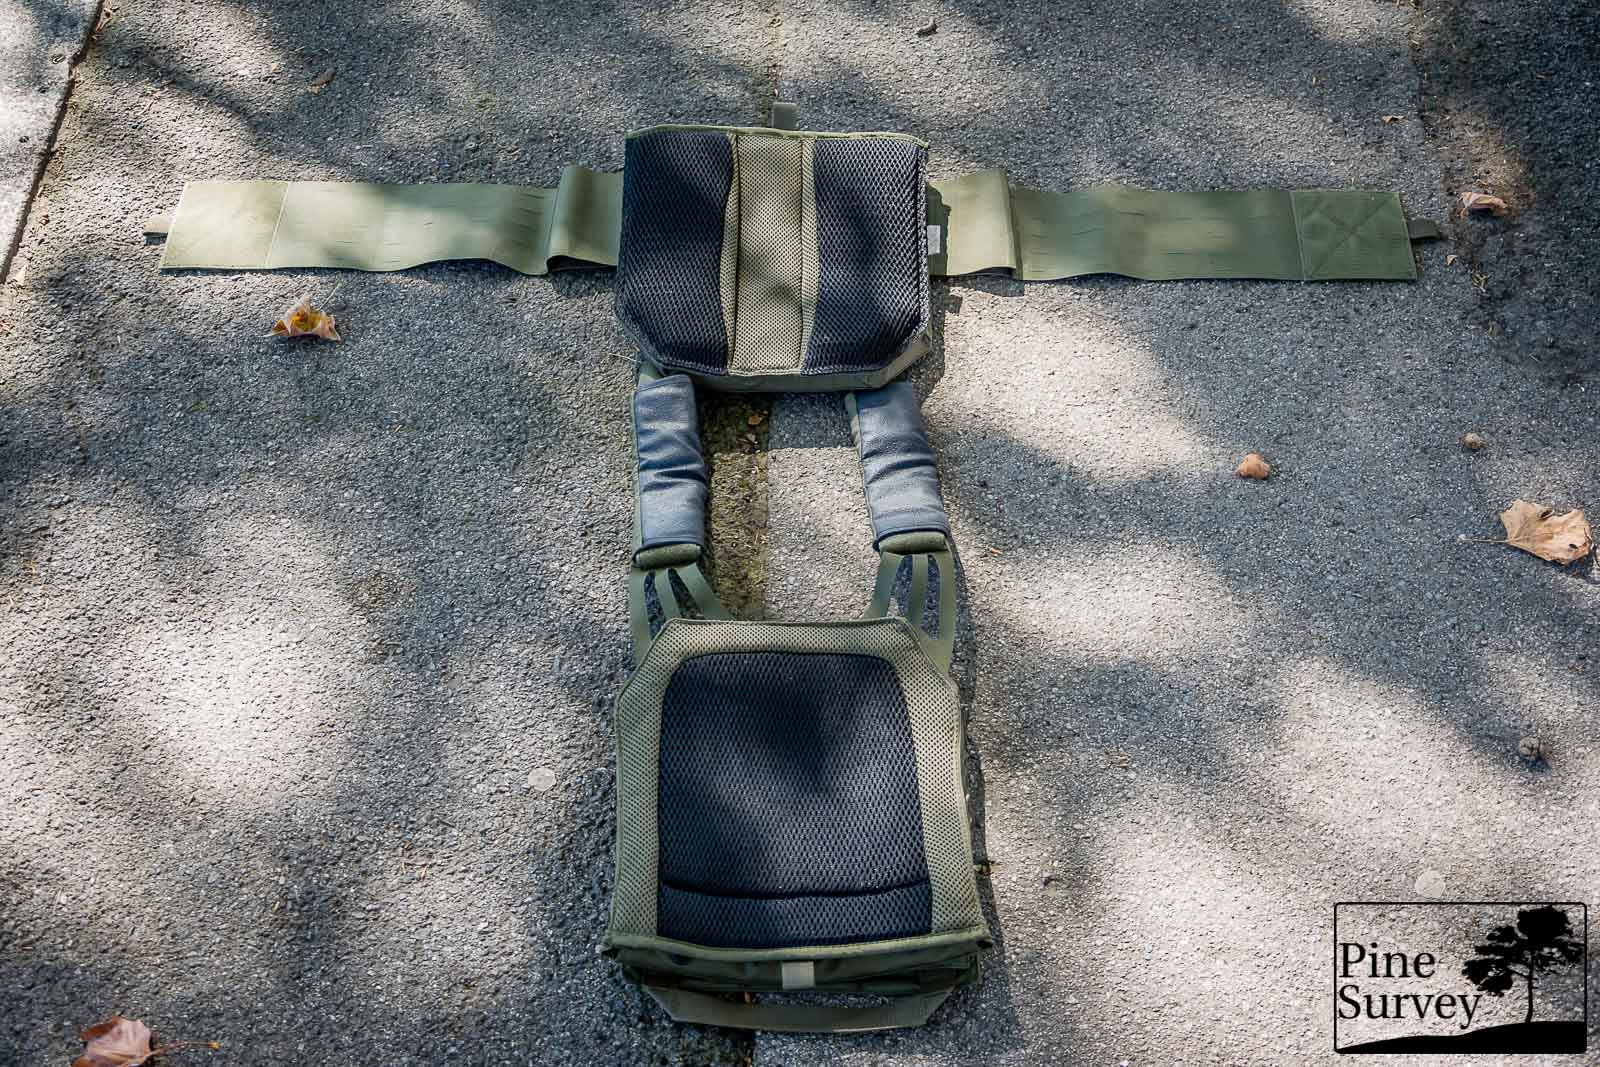
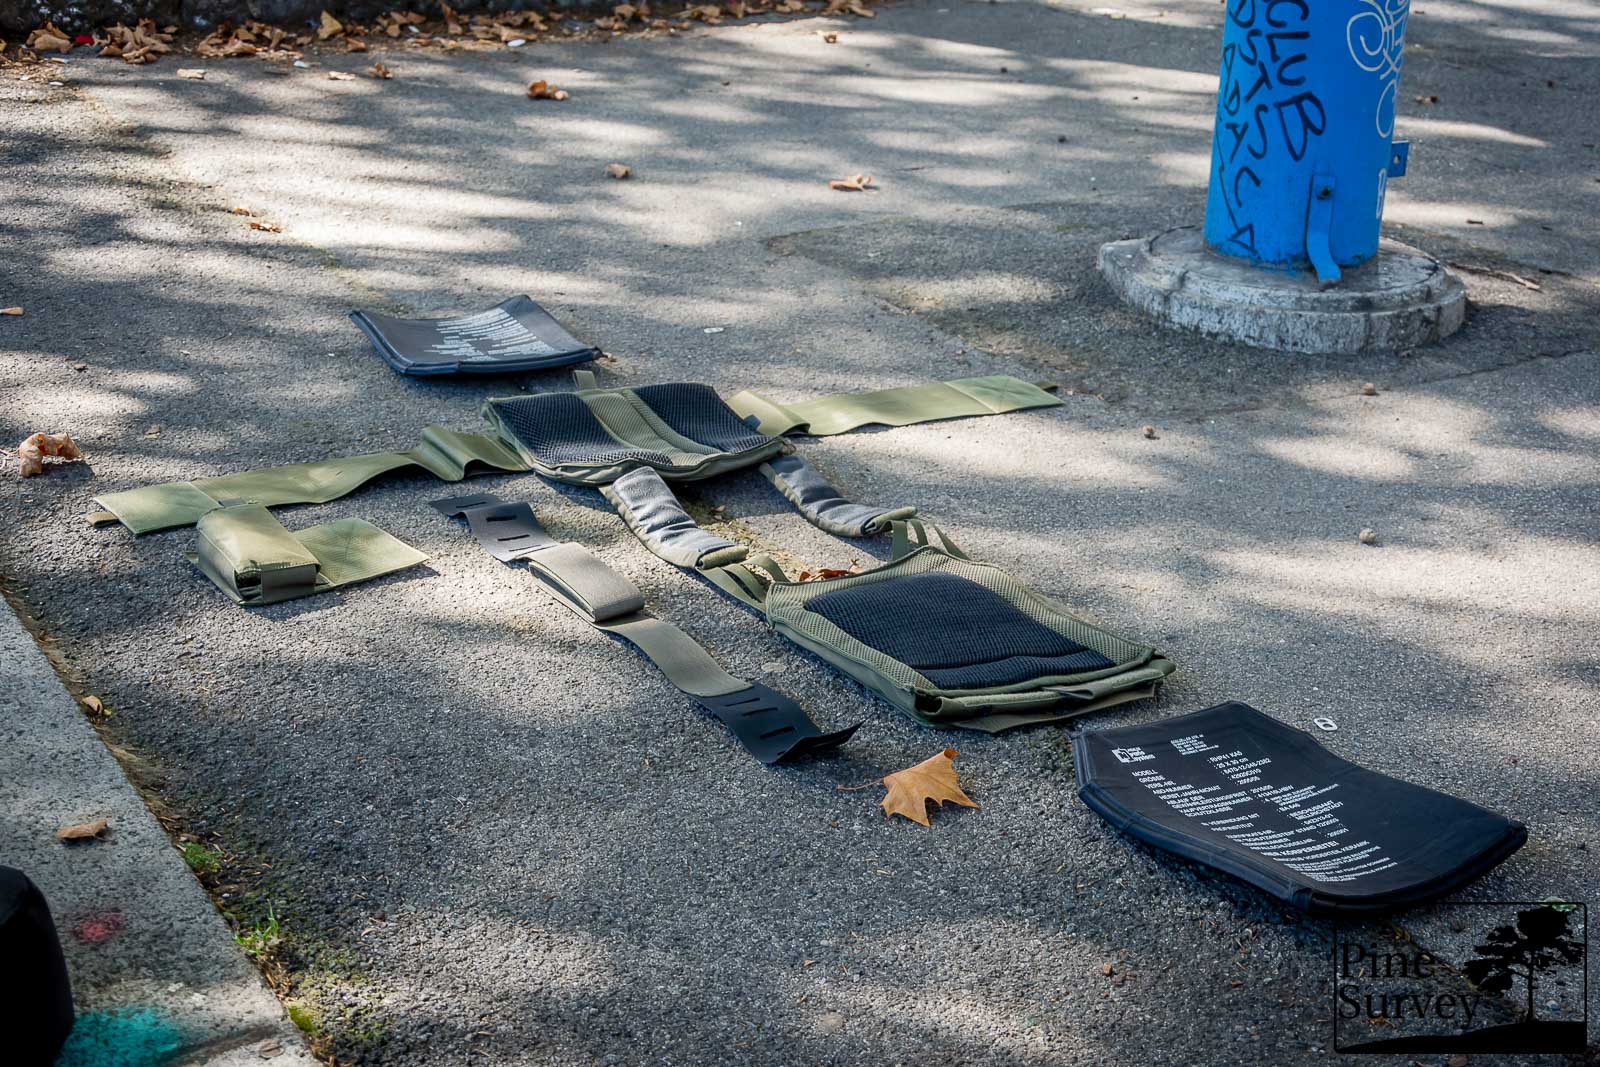
The mesh padding: front (below) and backside element (above, with side elements attached)
The backside of the front side is heavily padded with mesh. As you can see on the pictures, there is black and olive drab mesh. The OD mesh is finer and softer, while the black mesh is more sturdy and durable, as well as larger in its openings. Therefore padding and ventilation are well balanced.
The sides of the carrier elements are made of elastic material, in order to adapt to the plates in use. To insert the plates you pull a webbing tab, which releases a 7cm/3inch velcro closure flap. As soon as this flap is pulled out, you can push the plate in and close the carrier. On the bottom of this flap you can find 3 huge drain holes.
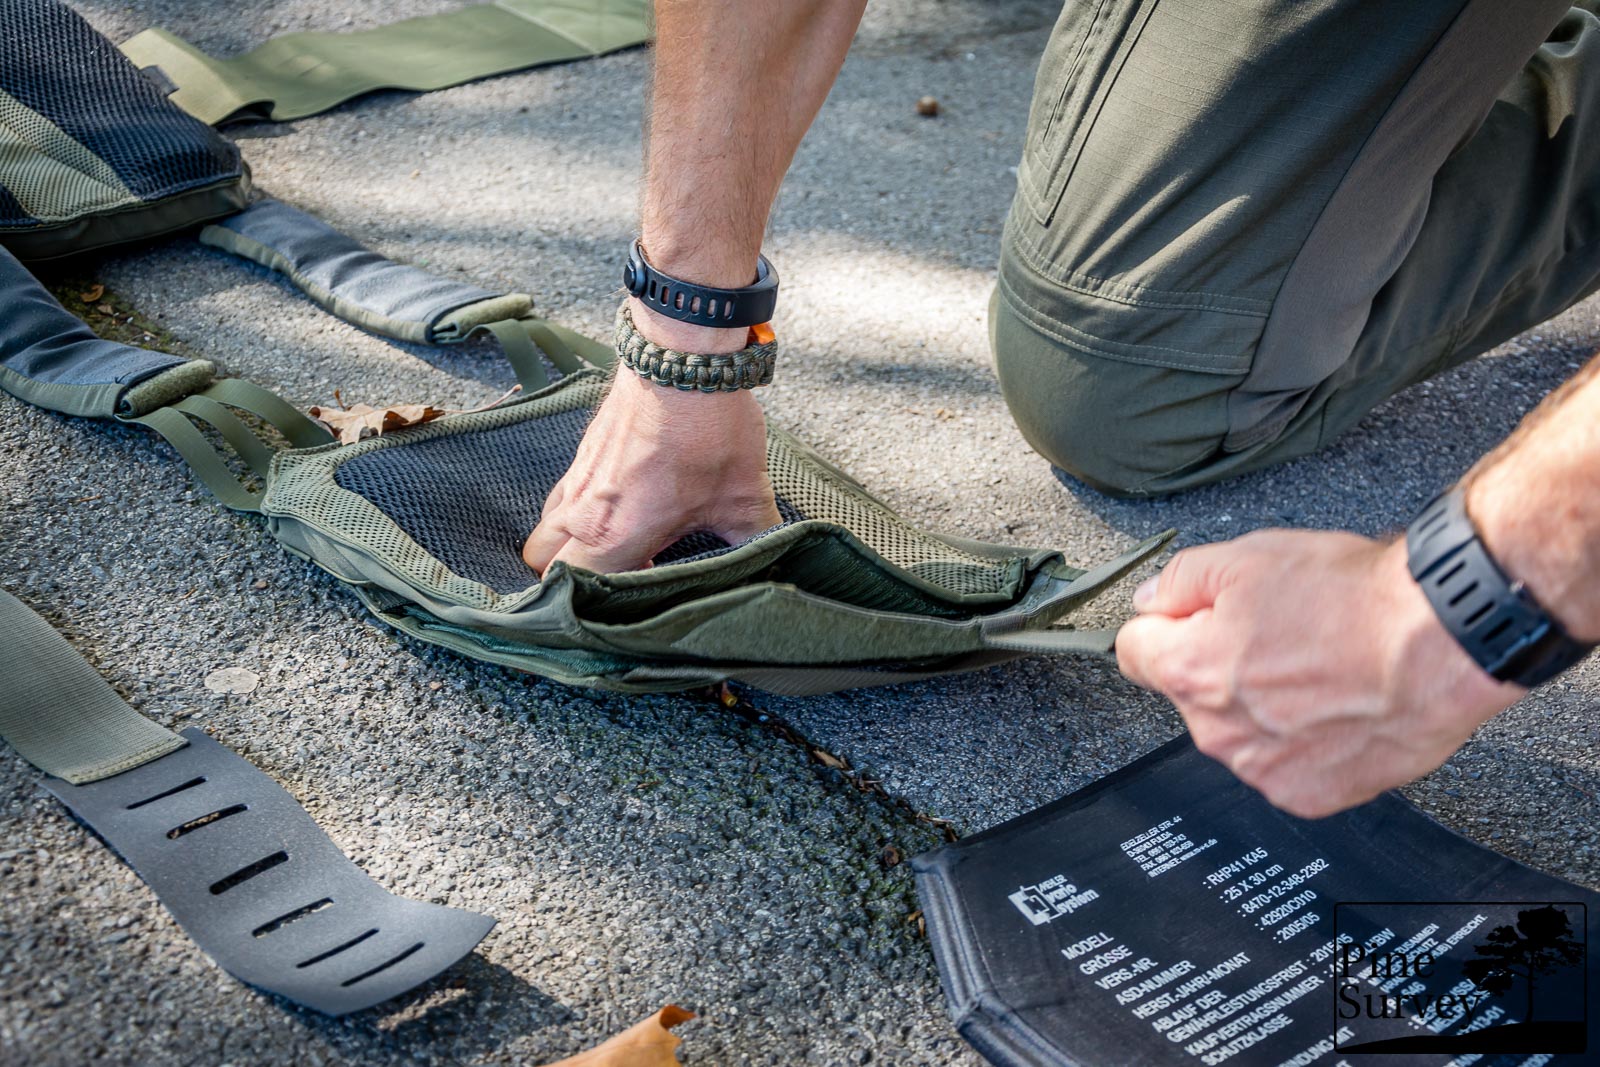
pulling out the flap
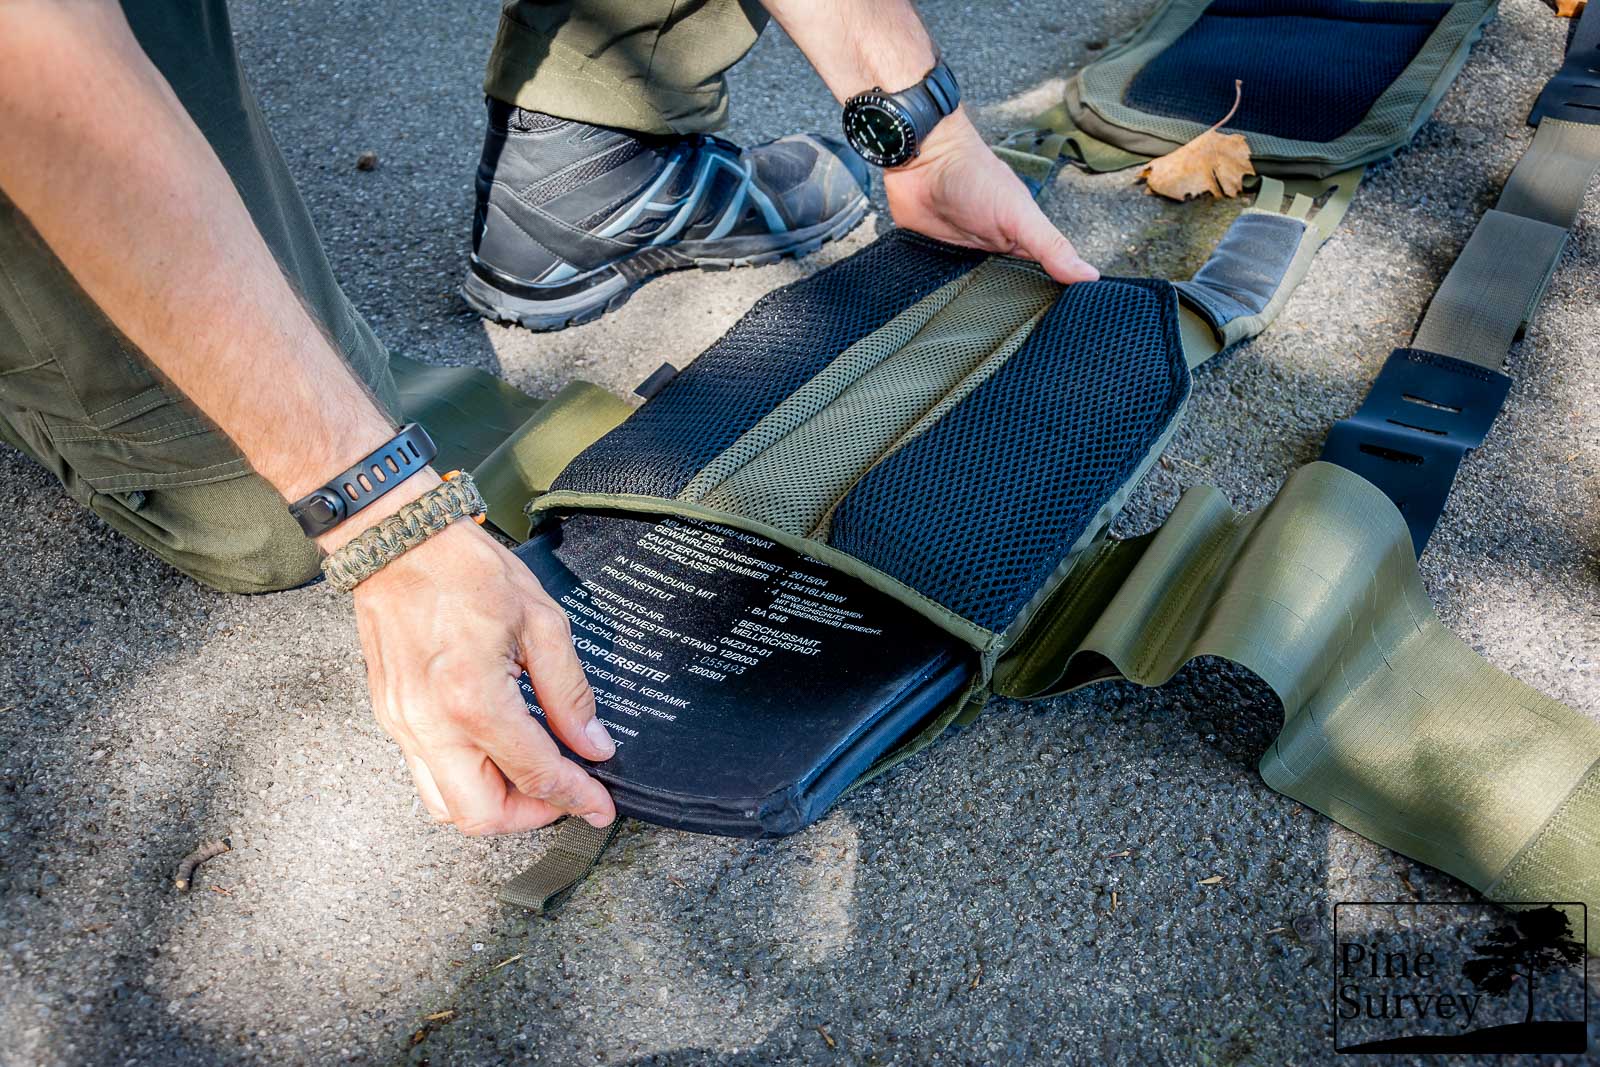
inserting the ballistic plate
Back
The back element of the plate carrier features a complete MOLLE back. 6 channels of MOLLE running vertically and 5 lines (or 9 – again with the counting…) of horizontal rows to mount pouches and the like.

Backside of the PC LC (plz take note of the elastic element on the side)
Half of this MOLLE area can be opened via velcro and folded back to get access to the attachment points for the side panels/straps.
Backside folded up to attach side elements
These are rooted through an elastic loop on each side and adjusted with a strap in the middle.
The attachment of the side elements
Other than that the back element features the same buildup on the sides with the elastic material and on the bottom opening with the velcro closure and draining holes.
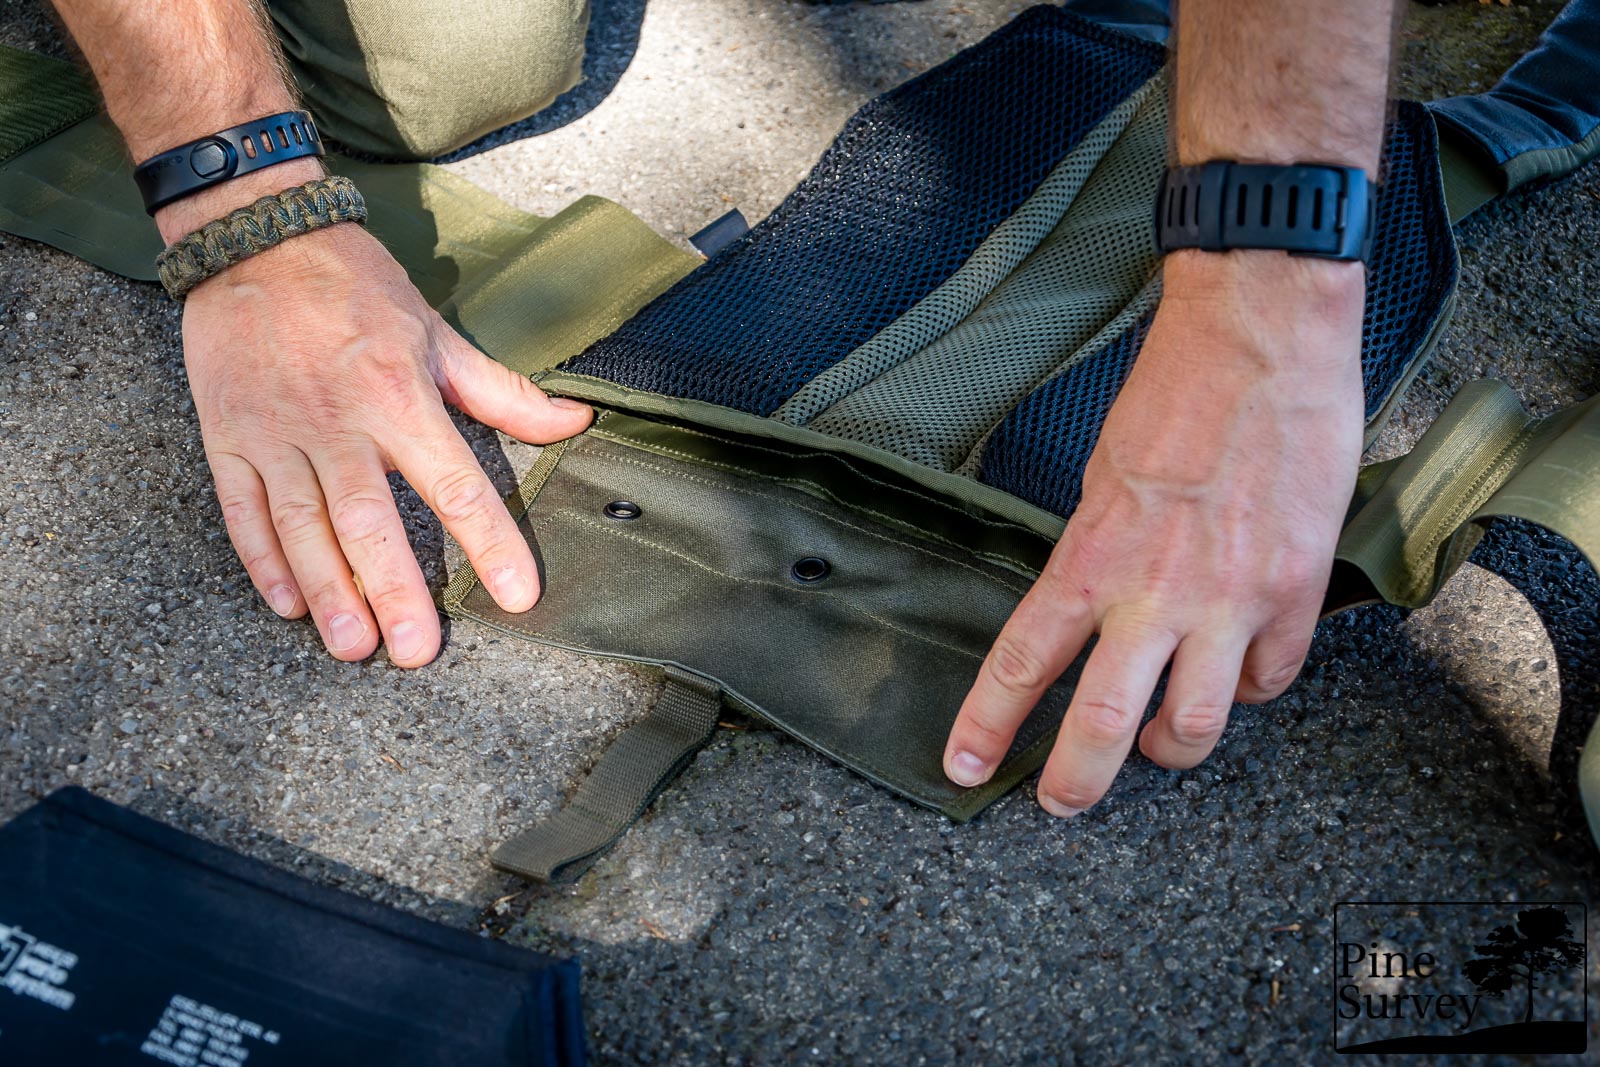
Flap closure with the drainholes. Take a look at the different mesh padding
One detail that is different, is the mesh padding of the backside. Although there is the same mixture of black and OD mesh (or better said light and heavy duty mesh), it is sewn in a different way, creating a ventilation channel in the middle. This will transfer the weight while creating an air channel above your spine.
Shoulder Straps
The shoulder straps are made of laser cut 700 den Cordura as well and are of course adjustable to the height of the user. In order to do so you have to slide the shoulder pads back. This means that they can’t be detached by velcro. They are made of a rubberized, anti-slip – Hypalon like material on the bottom and an elastic material on top.
pulling back the shoulder pads
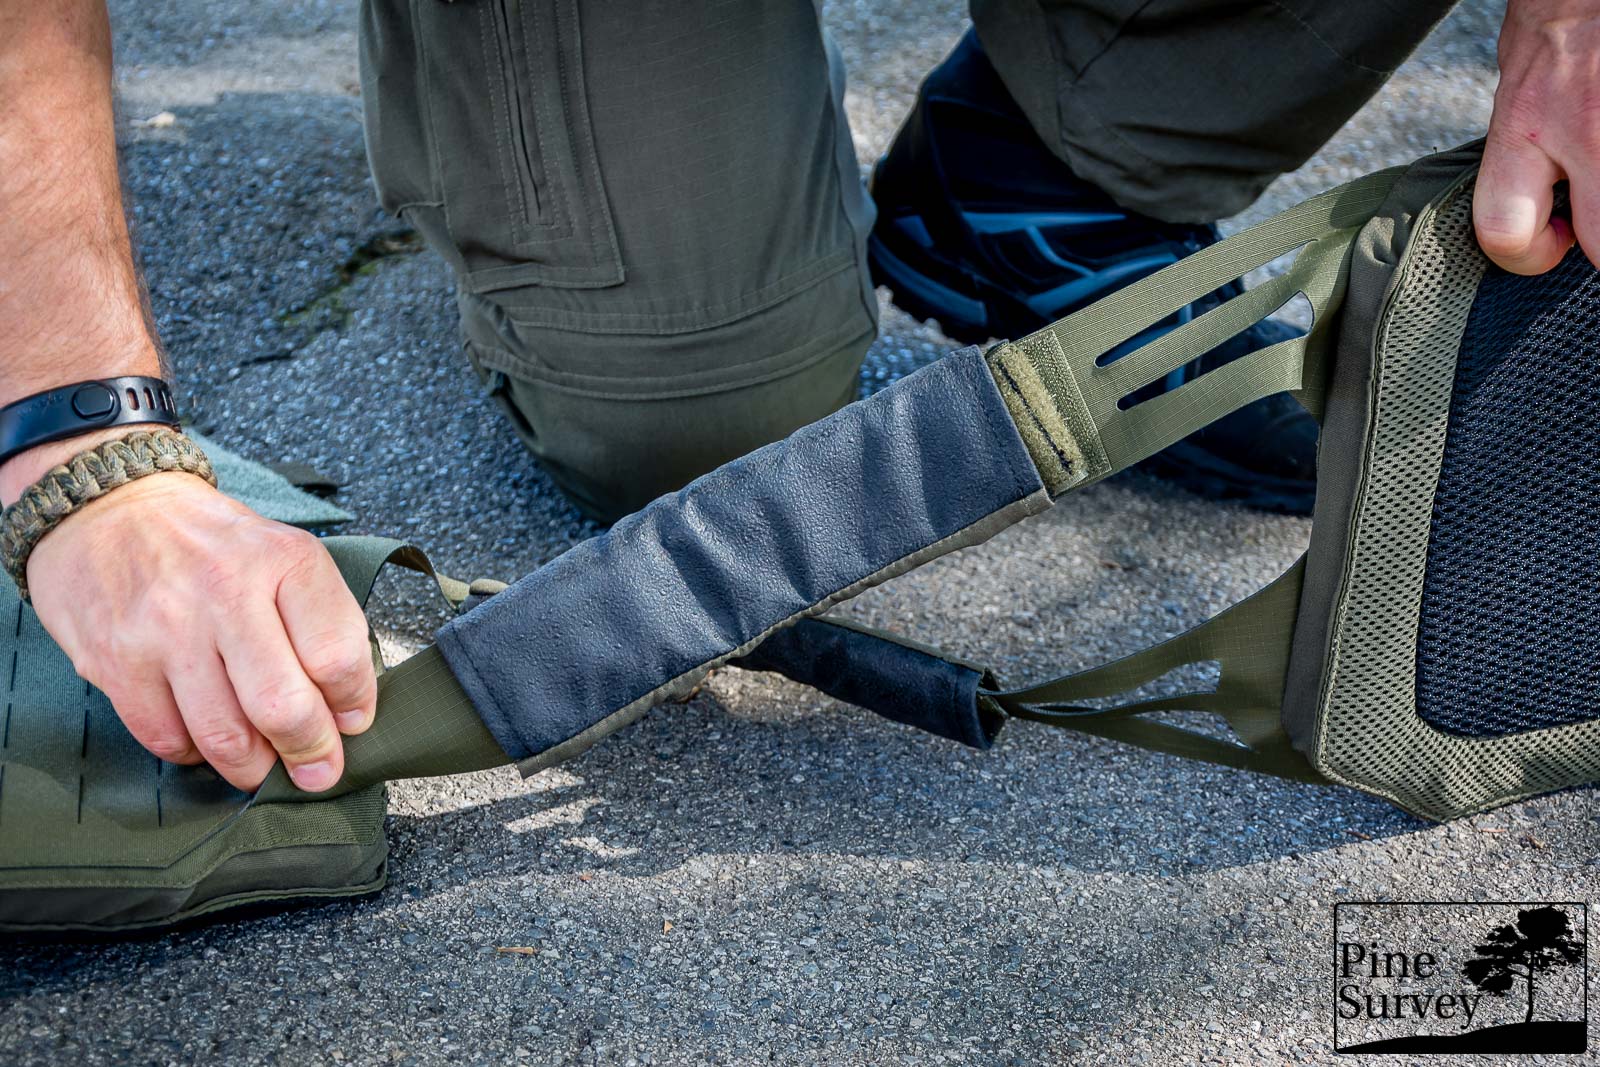
the rubberized padding of the shoulder straps
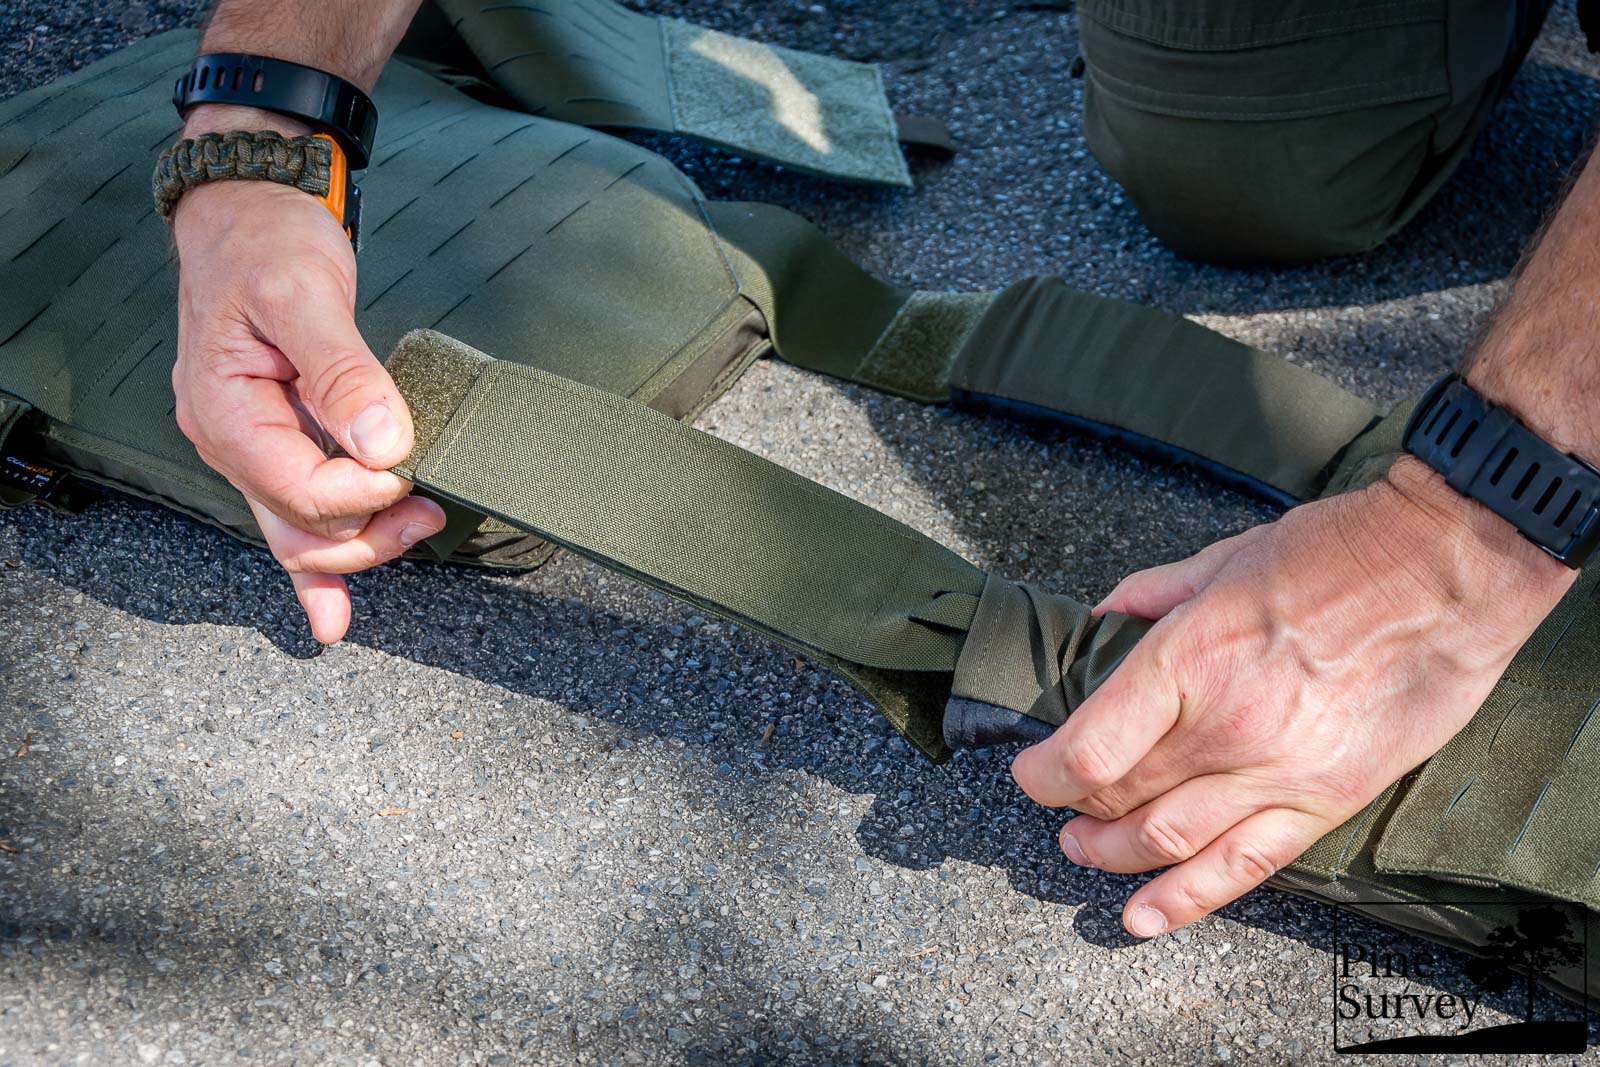
As soon as you have found your preferable setting, you can cut the spare material. In order to help the user and increase the longevity of the material, Tasmanian Tiger marked areas where you can cut the strap.

Length adjustment of the straps and the markings for cutting.
If you cut in between the black and OD seam you will find the rest of the seams reinforced and secured by a bartack stitch. Or you just do it the way I did and fold the excess strap under the should pad. Same result – your decision.
One thing, which concerns me personally is the attachment point of the shoulder straps to the front- and back element of the carrier. Although it is reinforced with additional seams and stitches, I would have liked to see the straps go deeper into the interior and be reinforced there as well.
Side panels
Two side panels come with the Plate Carrier LC:
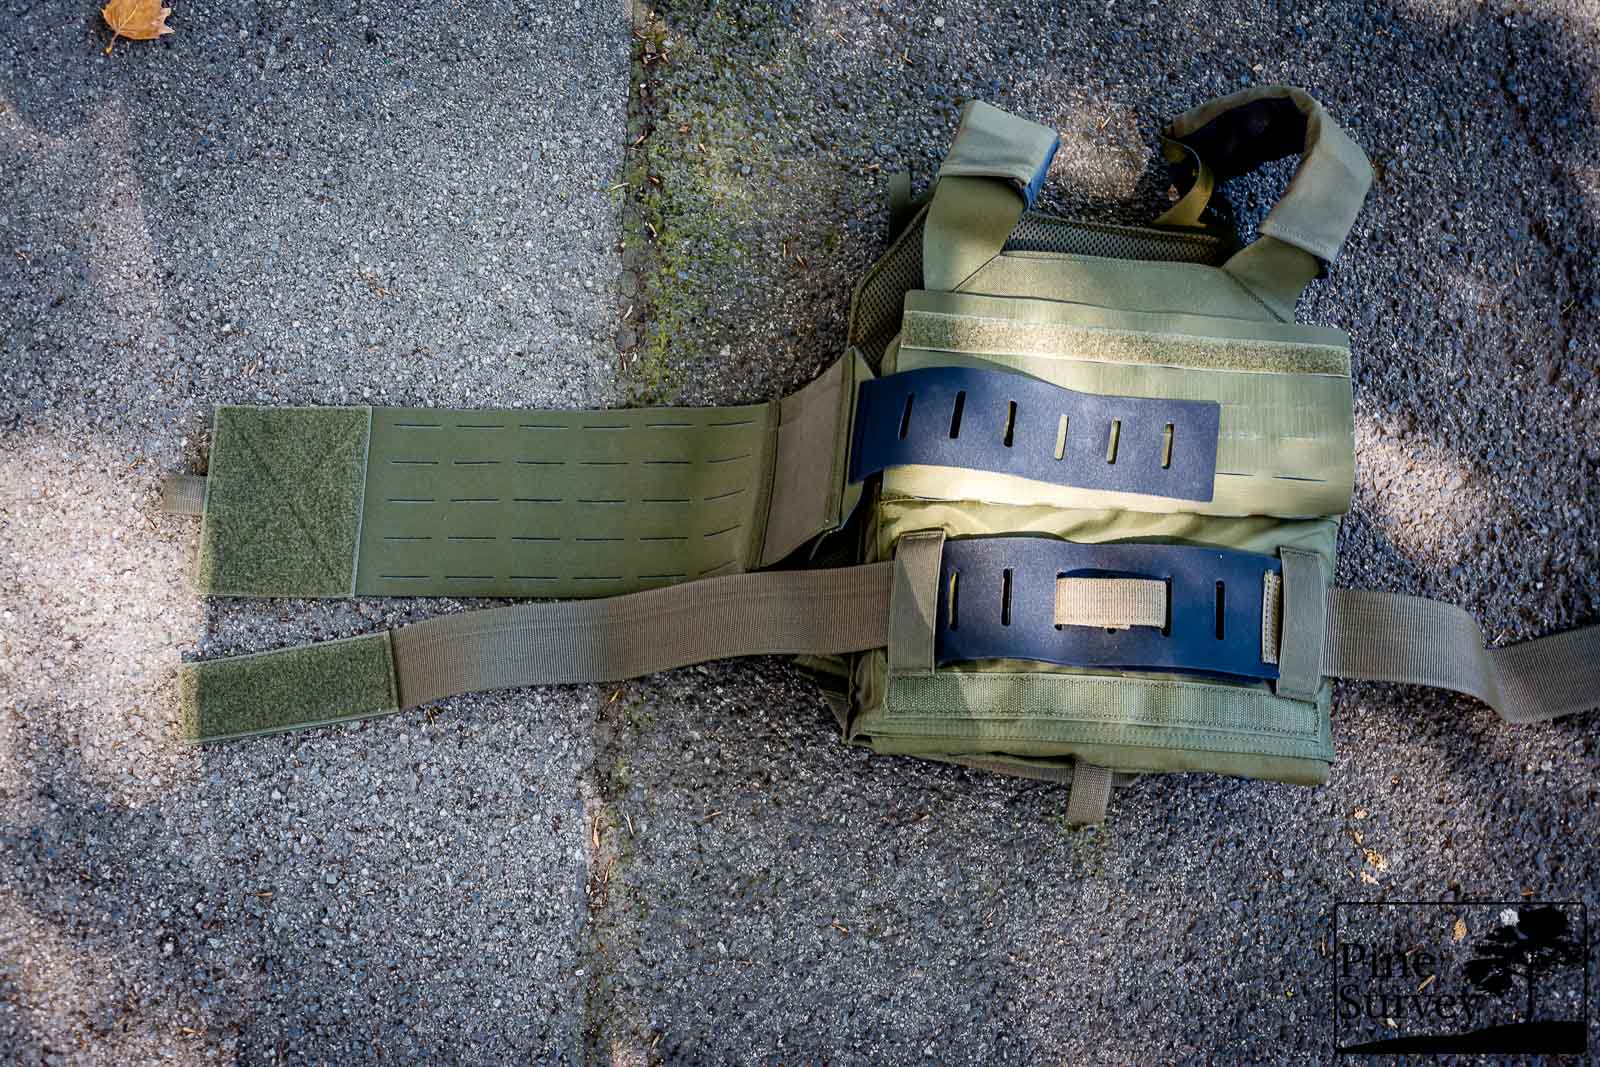
Two options to mount the plate carrier
A simple strap based attachment, which can be adjusted to length via the already mentioned system on the back element of the plate carrier. Using the slits in the Hypalon flap you can choose the length needed and close the carrier with the velcro ends in the front.

The simple strap attachment
This setup gives you much easier access to equipment carried on a duty belt, since it does not restrict your movement on the sides:
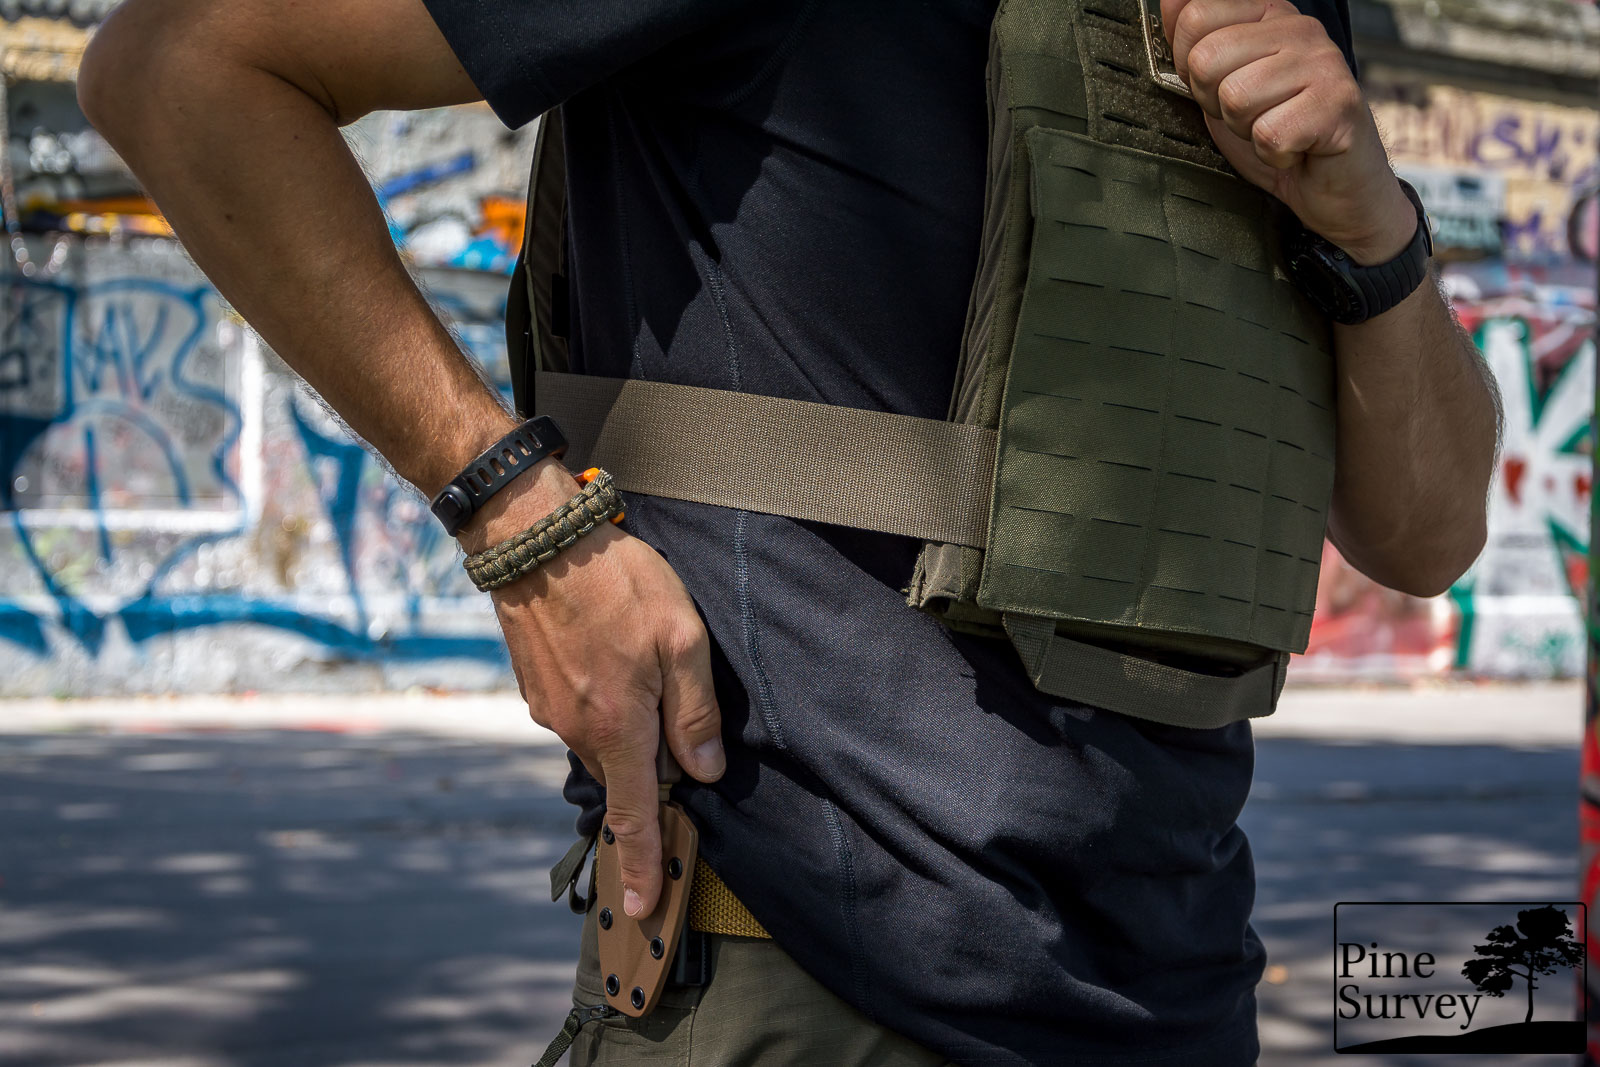
setup with the strap based attachment for easier movement and access to belt based gear
The second panel is a MOLLE panel with an elastic element on the side for ease of movement. You have 6 channels and 2 (or 4) rows of MOLLE at your disposal. This panel can be just as easily adjusted to the user as the other strap mentioned.
Radio Pouch
With the Plate Carrier LC comes a radio pouch, which can be used in combination with the MOLLE side panel. It features a large velcro area on two sides and can be easily attached (only!) to the left side panels velcro closure at the front element of the plate carrier.
The radiopouch mounted – also note the previous mentioned attachment point of the shoulder strap!
The pouch itself has a loop velcro area on the inside to fix you radio as well as elastic straps on the side and bottom. On the backside of the pouch you will find two rows of elastic webbing with three channels each.
Manufacture
The choice of materials and the manufacture is top notch as you would expect from Tasmanian Tiger. The laser cut Cordura makes a very decent and streamlined look. The stitches and seams are neat and tidy and the stitch length is very close with as much as 9 stitches per inch/4 stitches per cm.
Stress points are reinforced with second and third lines of stitching. There are no loose threads and I think the pictures speak for themselves.
In Use
As mentioned before, I want to incorporate the experiences of my dear friend S.W. to this review. He has not only contributed to this blog with a review before, but he also had the plate carrier in use for some time now, while on duty.

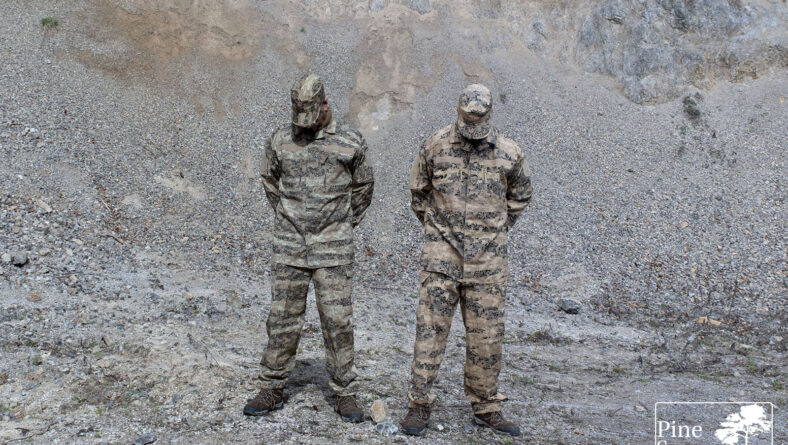
The TT Plate Carrier LC in use
He mentioned several point, positive as well as negative, which are the following:
Pro:
- The plate carrier is very comfortable to wear, because of the mesh padding on the inside and the rubberized shoulder pads.
- During dynamic movement (climbing, running, jumping), but also in kneeling and prone positions, the plate carrier does not shift out of place.
- The manufacture is absolutely high grade and there is no tearing or fraying of the laser cut material.
- By now S.W. prefers the LC MOLLE over the standard MOLLE. There are no issues with dirt, dust or lacking stability/durability. [We had several discussions on this topic and it is interesting for me to get such an input/feedback, because my main concern with laser cut MOLLE was always the dirt accumulation behind the laser cut slits – although I have to admit that in relation to my friends I am by far not that exposed to dirt 😀 ]
- The Plate Carrier has a very slim appearance and is much closer to the body than regular MOLLE Plate Carriers. Therefore it is ideal to wear under a hoodie or jacket, if you use a minimal load out.
Putting the PC LC to good use
- The possibility to use the simple strap on the side, if the MOLLE panels on the side are not needed, is another positive point.
- The weight saving with the laser cut MOLLE is not that high, but everyone knows the saying “ounces make pounds”, so wherever you can save weight it is most welcome by the user. Especially with the slick appearance of the PC, this is a nice combo.
- Last but not least is the size adjustment: According to S.W. all of his colleagues were able to adjust the PC to their height, ranging from people between 1,70m to 1,90m.
Having this pro arguments in mind, let us take a look at the contras:
Contra:
- The missing drag handle. This caught my eye as well and I was reaffirmed by S.W. that this is a component, which should be there. When it comes to keeping to the slim appearance there would be plenty of possibilities to hide the handle or keep it close to the PC with velcro etc.
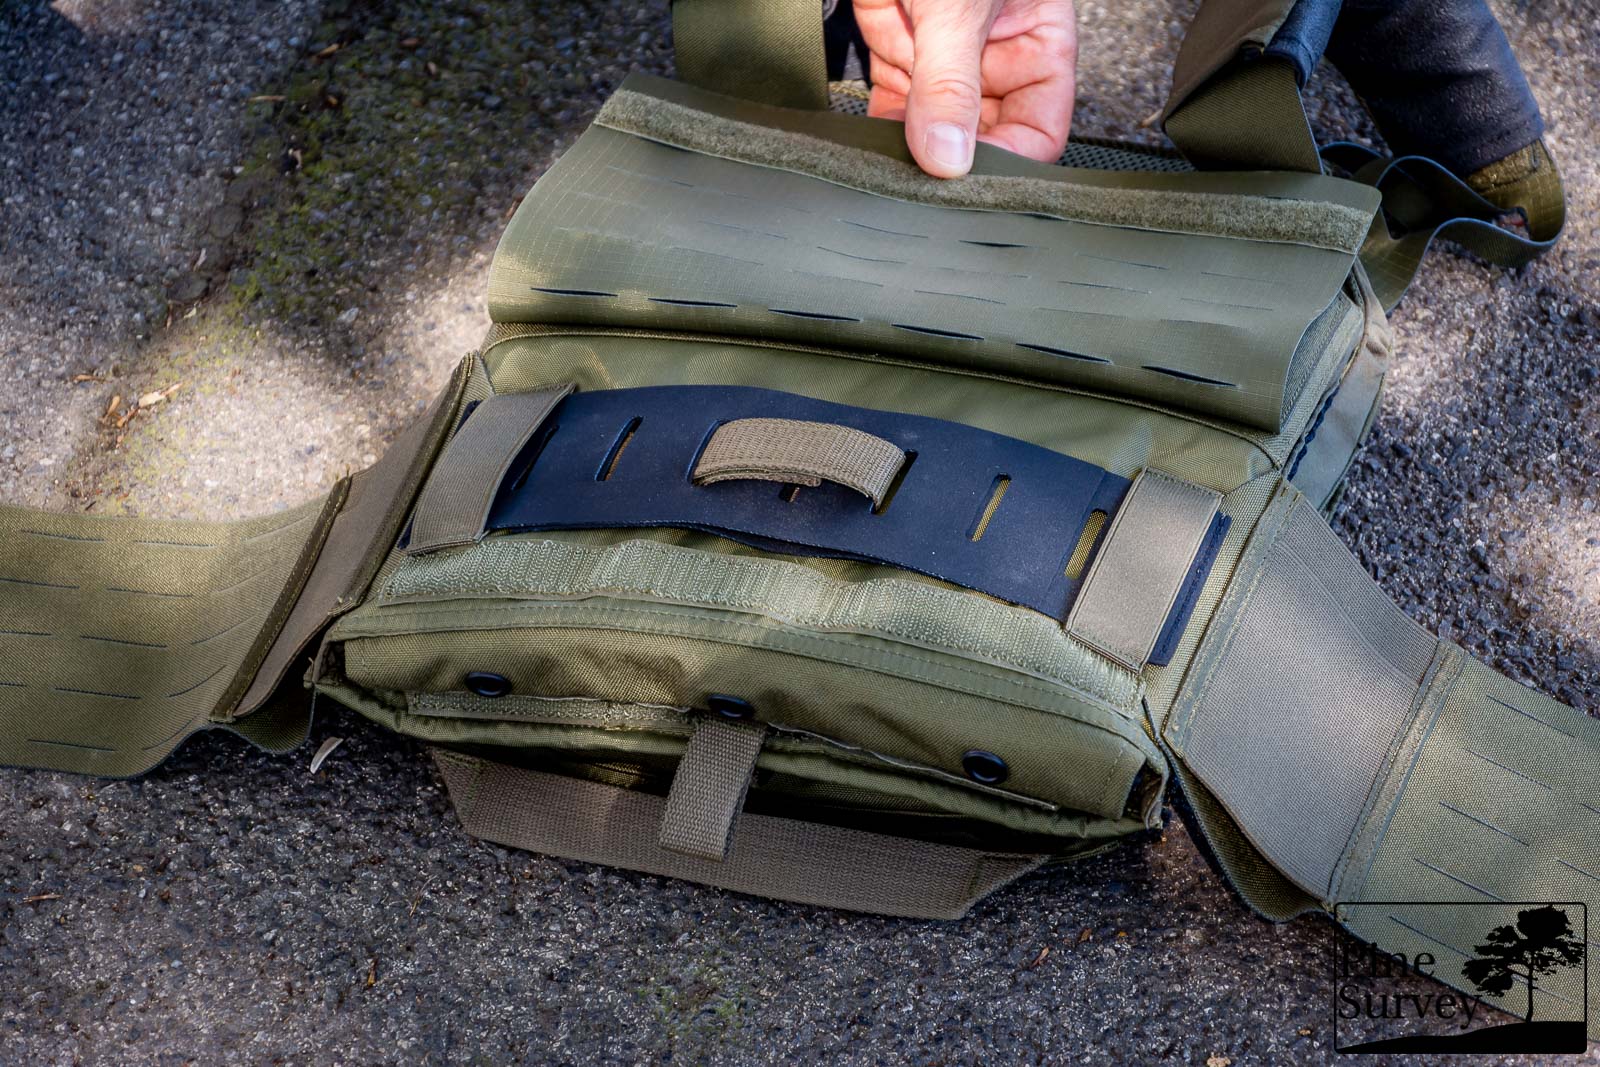
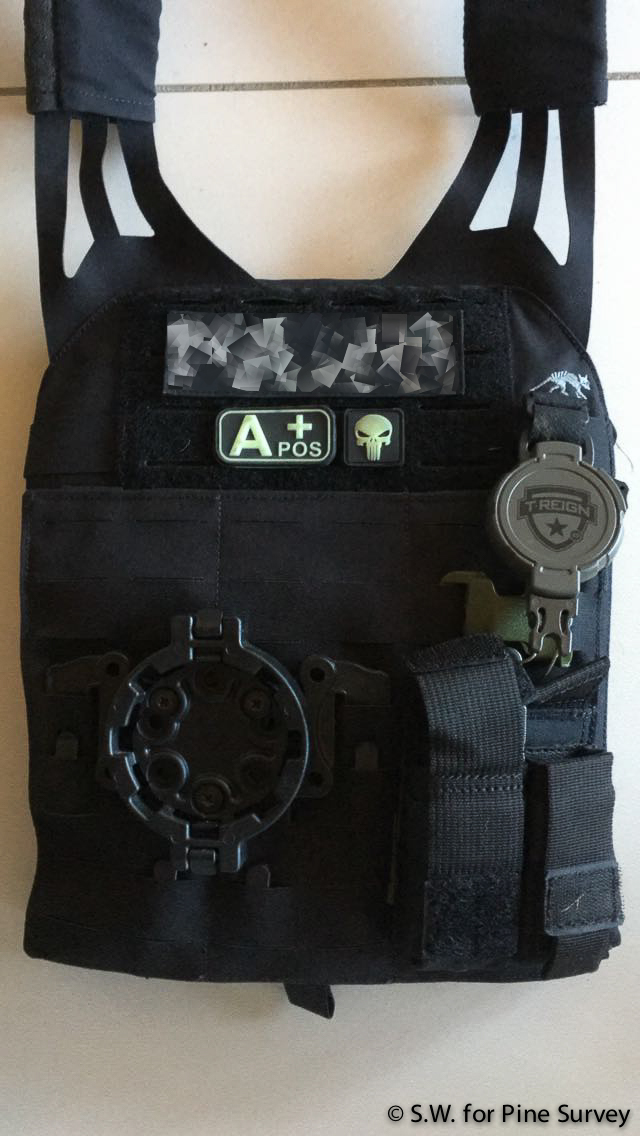
- Missing velcro area on the backside: S.W. helped himself a velcro panel by Tasmanian Tiger.
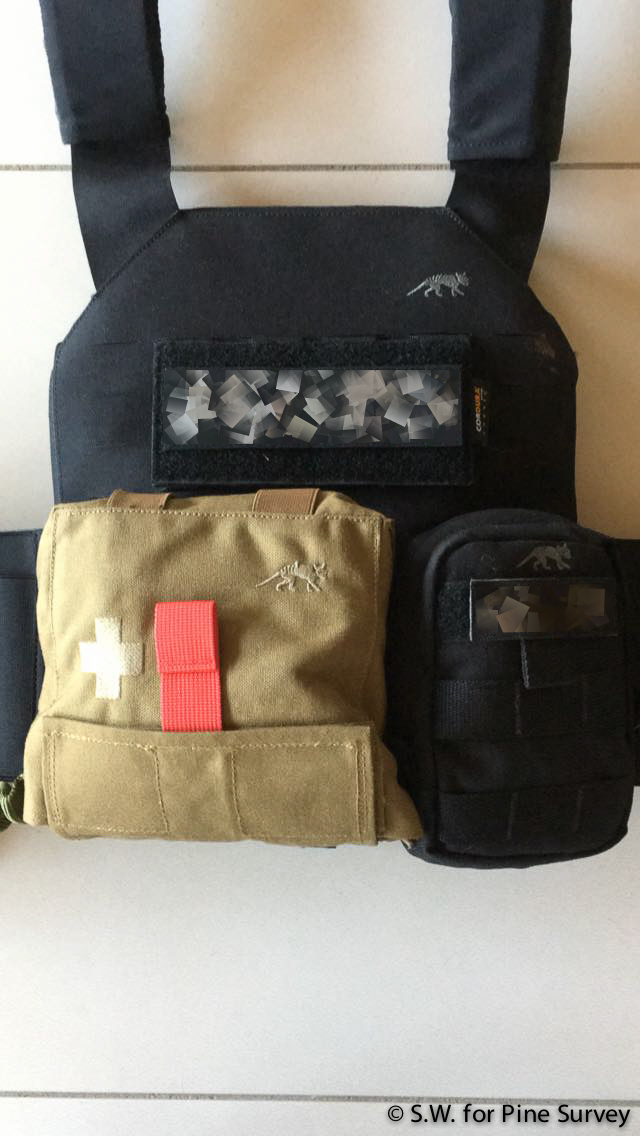
Backside of the PC with added velcro panel, IFAK & GP pouch
- The velcro closure on the backside: Even if this is only a small concern for S.W. he told me that the velcro does not hold perfectly when the backside of the PC is fully loaded with pouches etc.
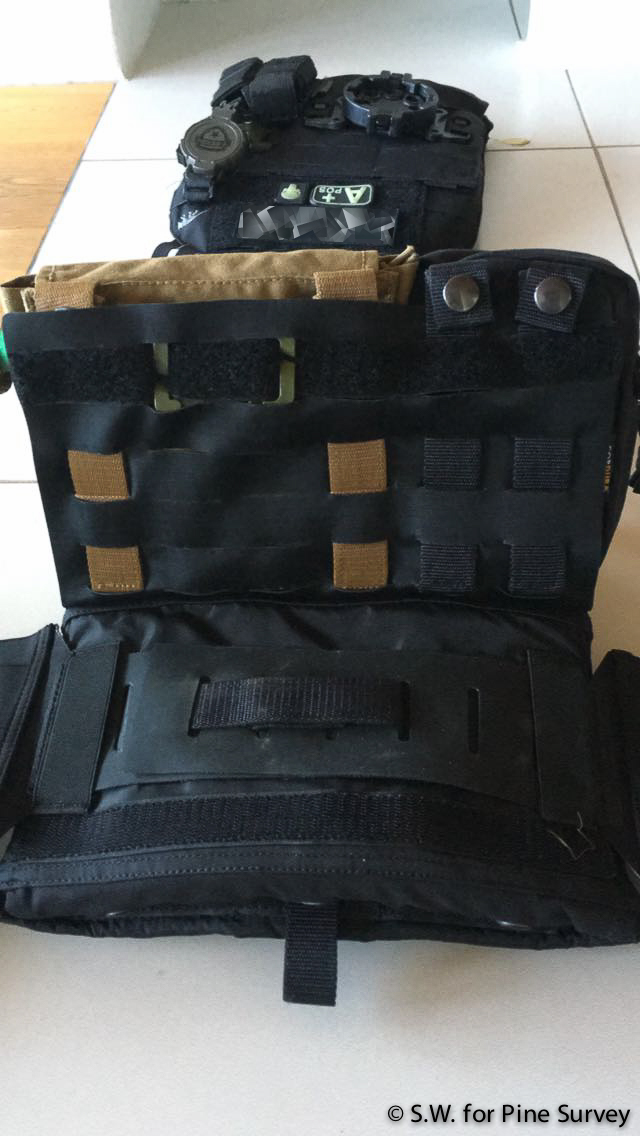
The backside folded up, with full setup
Conclusion
Coming to an conclusion, it is fair to say that Tasmanian Tiger did a decent job on the Plate Carrier LC. The slim appearance and the streamlined profile make it a low profile carrier, with quite some versatility.
The lacking drag handle is one point to consider, although one has to mention that you do not necessarily need it. My dear friend Alzwolf, who looks back on a very long career in specialized LE and who was kind enough to help me with the pictures, mentioned, that in a worst case scenario you can still use the shoulder straps to drag a person out obviously.
All of my LE friends were satisfied with the PC and have it in use, or are planning to in the near future.
Having said that, it seems like the first steps of Tasmanian Tiger to commit to the laser cut innovations on the gear market were successful. It will be interesting to see where this will lead the company and what else we might expect.
I hope this review was of use for you, thank you for reading! Many thanks to Tasmanian Tiger and my dear friends for helping me out!
Take care!
1 thought on “Review: Tasmanian Tiger Plate Carrier LC (laser cut)”