Please take a second and take a look at this GoFundMe, if you want to support Pine Survey. Thank you!
Introduction
Recently I wrote an extensive report on PenCott Metropolis and presented several pictures of it in an urban environment. At then end of said article, I promised a follow up field test and here it is.
The reason for two parts is as simple as it gets. There are so many environments to show PenCott Metropolis in that one review is just not enough. So for this second test I decided to go further and try out more.
The new locations
Considering that PenCott Metropolis is designed for low light urban environments I tried to take pictures in a parking garage as well as in a construction site. Additionally several comments came up of PenCott Metropolis looking ideal for a mountain environment, so I also tried to take some pictures in a nearby gravel pit to mimic that.
Low light proved to be difficult for me with regard to taking decent pictures, especially since I could not use a flash, because it would have destroyed the whole concept of testing the camouflage under “real life” conditions. Ironically the pictures of my brothers iPhone X turned out way better than those of my DSLR. This is either testament of my lacking photography skills or just today’s technology. In any case you will get to see both.
Some methodological remarks
The obligatory copy and paste text from my camo tests and comparisons: Before I begin I want to point out the following – as always! I did not edit the pictures in any special way, except the following:
- Lens correction
- Watermark
- Blurred my face out if necessary, or any logos, personal or institutional infos you might find in an urban setting for privacy reasons.
- .jpeg compression to make it web compliant
A short explanation to the environment and the procedure.
I tried to find various different settings to give a wide arrange of impressions. The pictures portray two different positions:
- Standing in the open (to get an idea of the pattern in this particular surrounding and if the colors match it)
- Kneeling, to narrow the silhouette and improve the effect.
I decided to stick with a focal length of 35mm (this is close to the human eye’s perception). Therefore I ended up with 2 pictures of each location each. The maximum distance was always 15-20m. So we are talking close proximity! In this review you will also find wide angle shots at 18mm to mimic longer ranges as well as the iPhone X’s 28mm.
Also: This is basic camouflage, no Ghillie suit, no other enhancements and no mythological or Sci-Fi based device like Siegfried’s cap in the Nibelungen Saga, or a Predator cloaking device.
Last but not least: I hold no scientific claim with this field test!
Enough talk, let’s start:
Field Test
Location 1 – Parking Garage
The first location is a common parking garage – one that is fairly new and therefore has bright white walls in stark contrast to the greys of the concrete and the tarmac. So in combination with various cars and their respective colours, you have very strong contrasts and edges. Adding to that you have a very unnatural light by the neon lamps.
Illuminated
At first we took pictures with all the lamps switched on. The garage was brightly lit and several reflections on the cars as well as different shadows on the walls and floor come into play. The distance to the camera is roughly 20m.
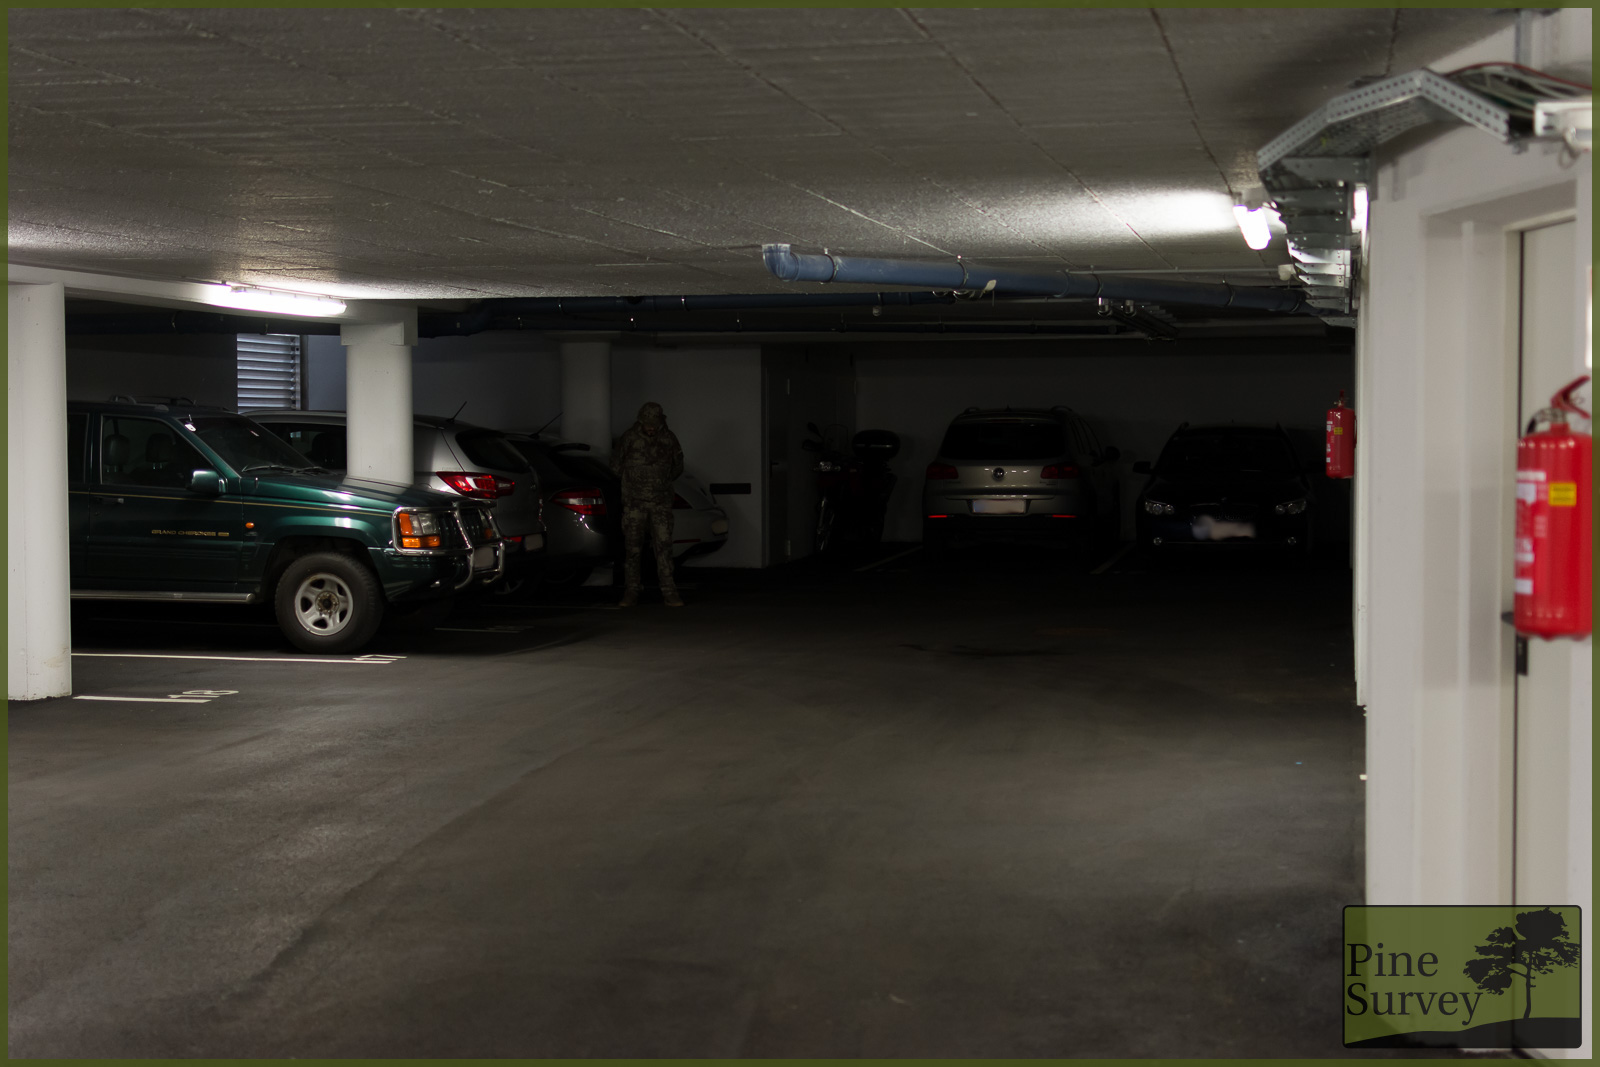
Standing
The first posture is me standing in the middle of the free area of the garage with some cars in the background. There is nothing to blend in, but the colour palette and the Macro, Midi and Micro elements of PenCott Metropolis break up the silhouette just enough to make you look twice. While the top of the torso and the head stand out because of the white background everything below the chest appears diffuse.
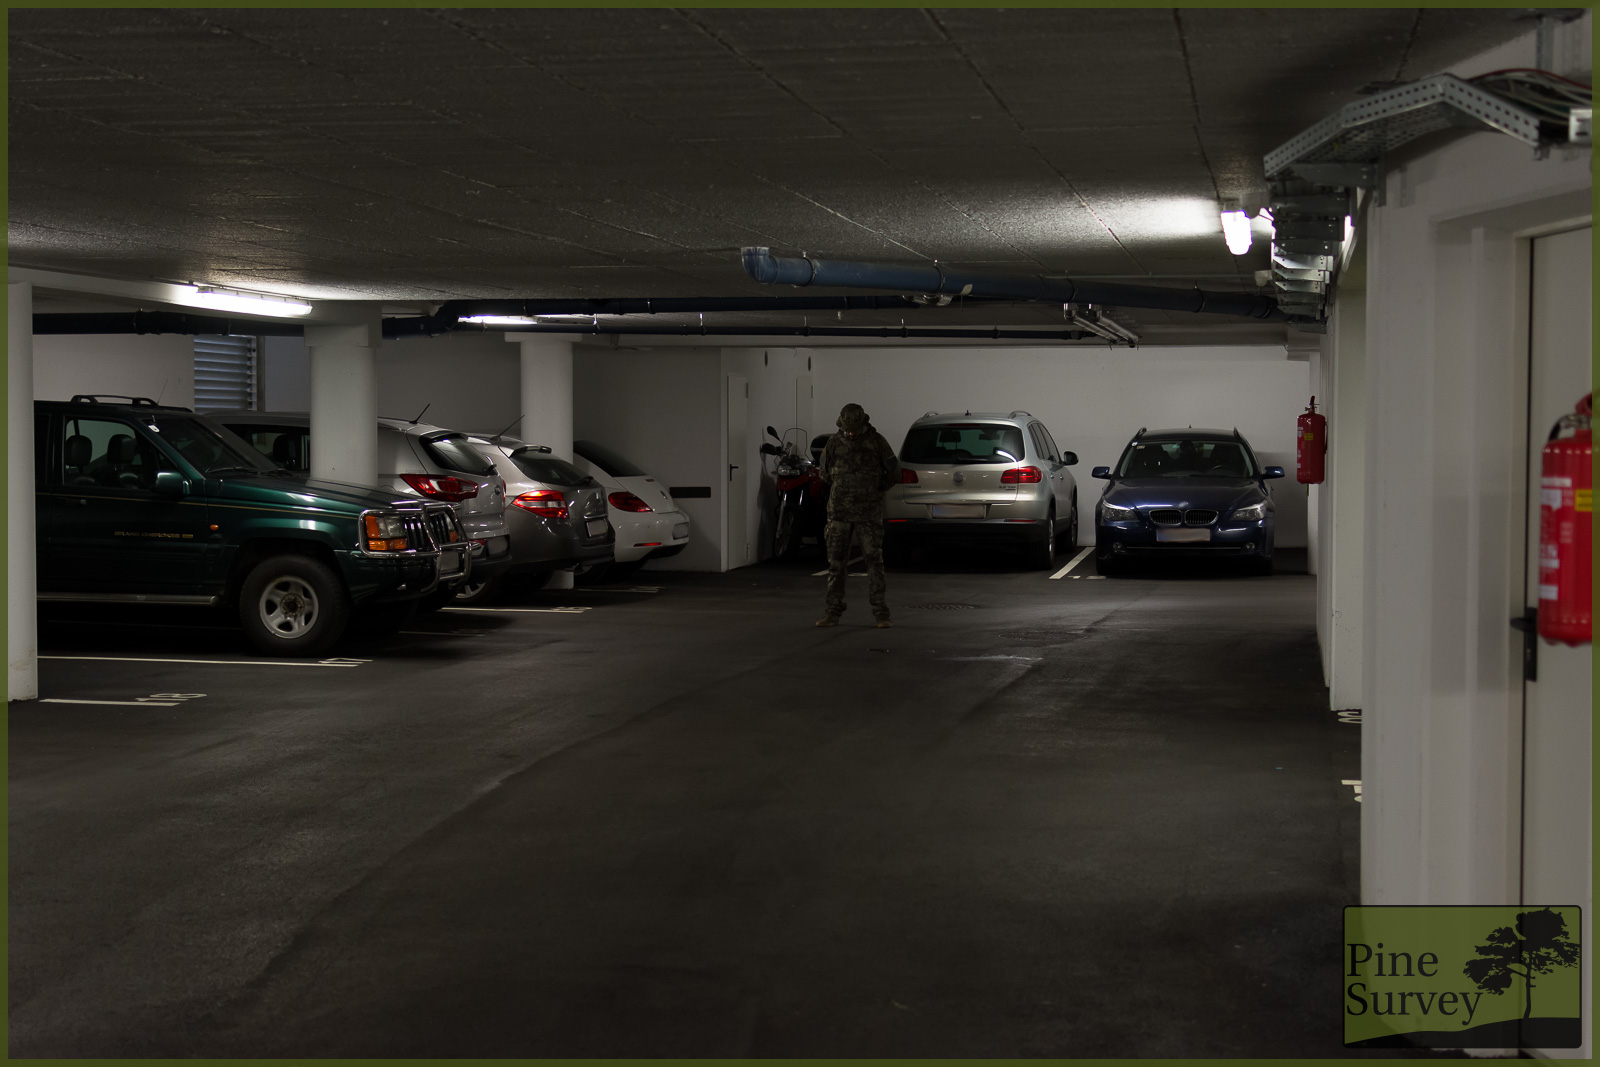
Parking Garage, standing in 20m distance, 35 mm focal length
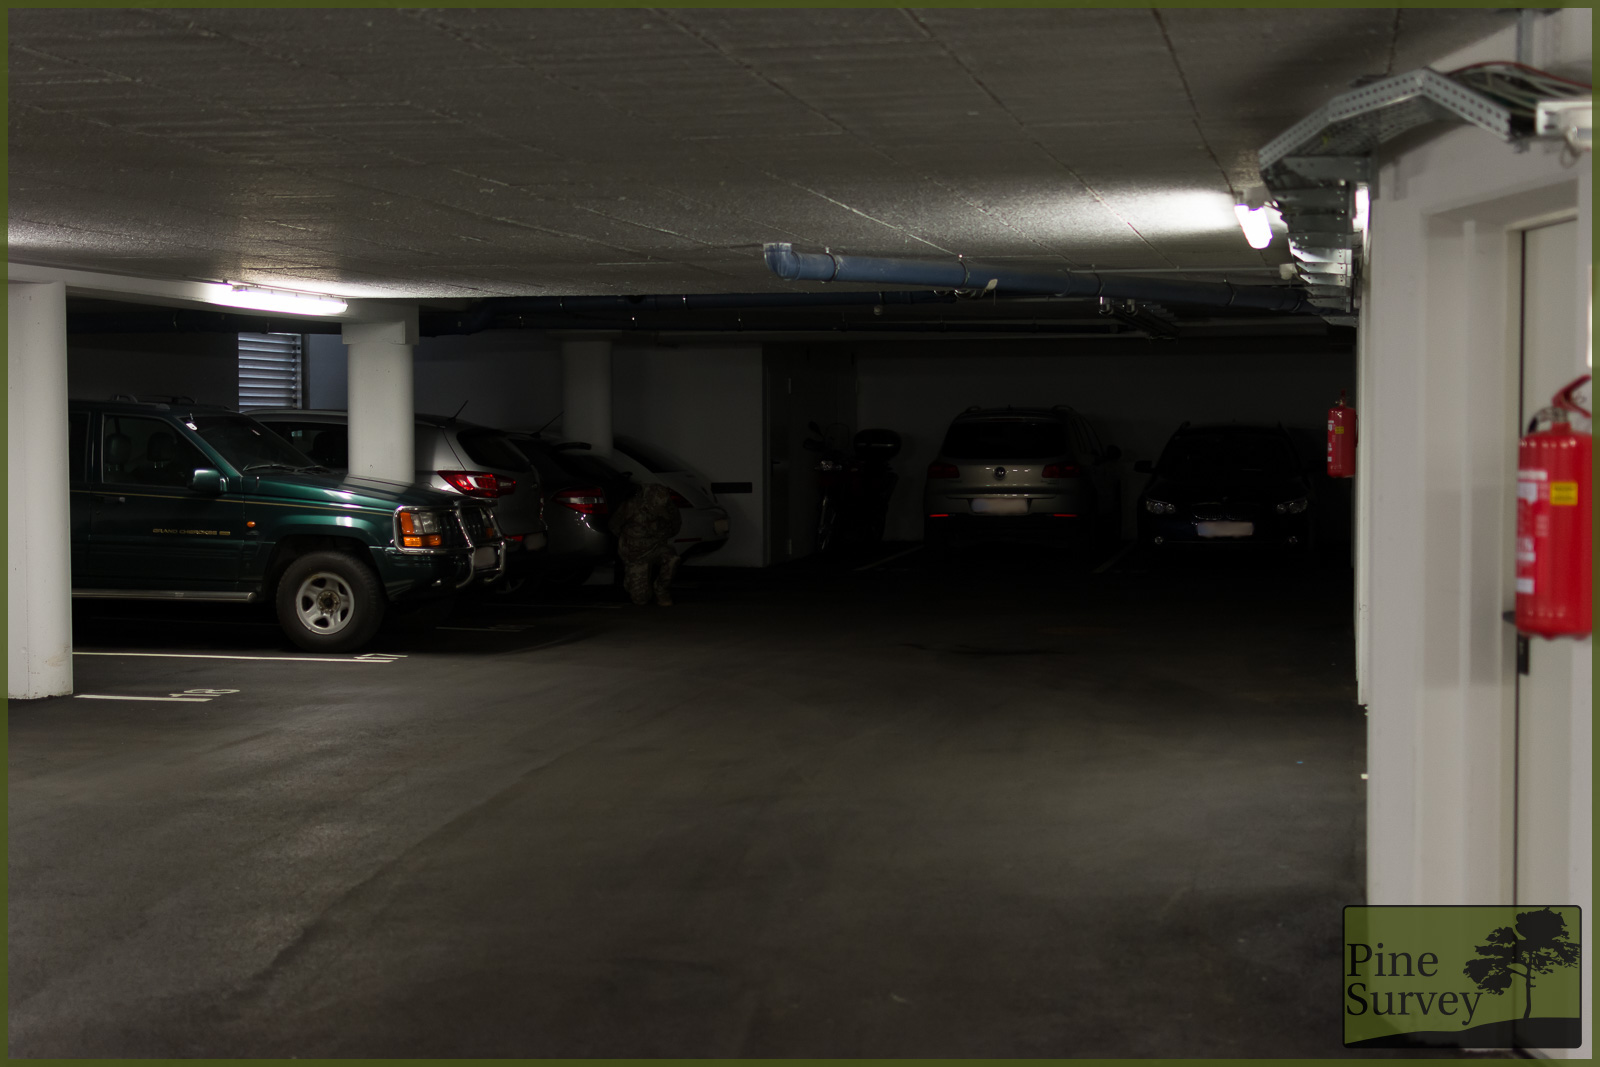
Kneeling
Minimizing the silhouette changes the scene dramatically. Since the colours match the surroundings of the floor now and the Macro, Midi, and Micro elements break up the shape, you could confuse the person for a garbage bag or something similar, when looking quickly.

Parking Garage, kneeling in 20m distance, 35 mm focal length
Half Dark
After waiting a minute for the motion sensors to turn of the light, we were able to also take some pictures in a semi-dark environment in the same spot. To make the situation more realistic (no professional would go through the free area, but stick close to concealment/cover) I decided to position myself next to a car.
Standing
In the semi-dark environment it quickly becomes clear why the colours of PenCott Metropolis were chosen the way they were. Black would stand out immensely in this situation, but since the pattern is composed of several greys and brown, all of those just become a bit darker, blending into the surroundings as a result.
In this situation the Macro elements of the pattern really come into play, displaying beige and grey structures, that break up the silhouette.
Parking Garage, standing in 20m distance, 35 mm focal length
Kneeling
Again, minimizing the human shape changes the picture drastically. The combination of Macro and Midi elements, break up the silhouette while the colours blend into the surrounding.
Parking Garage, kneeling in 20m distance, 35 mm focal length
Location 2 – Construction Site
Changing from the parking garage to the construction site completes the impression of PenCott Metropolis as an urban camouflage pattern. Construction sites are always chaotic environments with various shapes, colours and edges. Mix that with low light conditions and it gets quite interesting.
The distance to the camera is close proximity because of room size – max. 10m! Additional to the DSLR pictures you will find some iPhone snapshots as well.
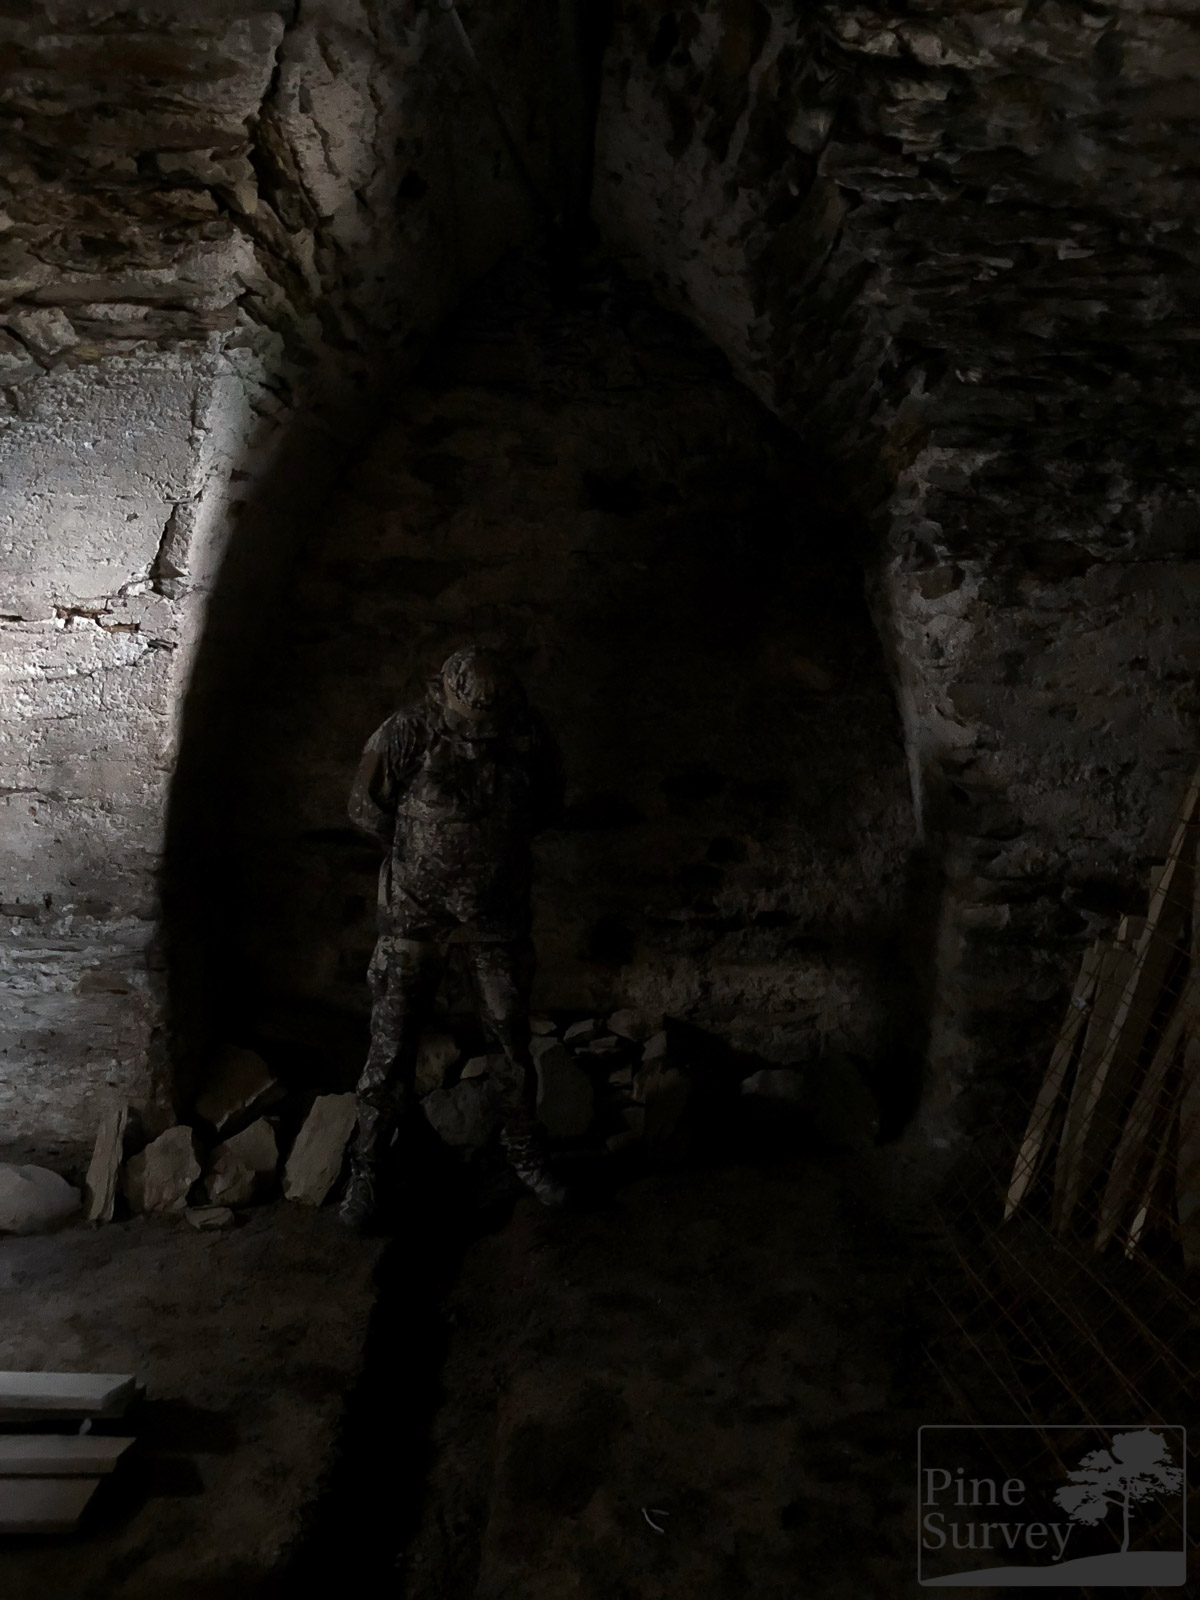
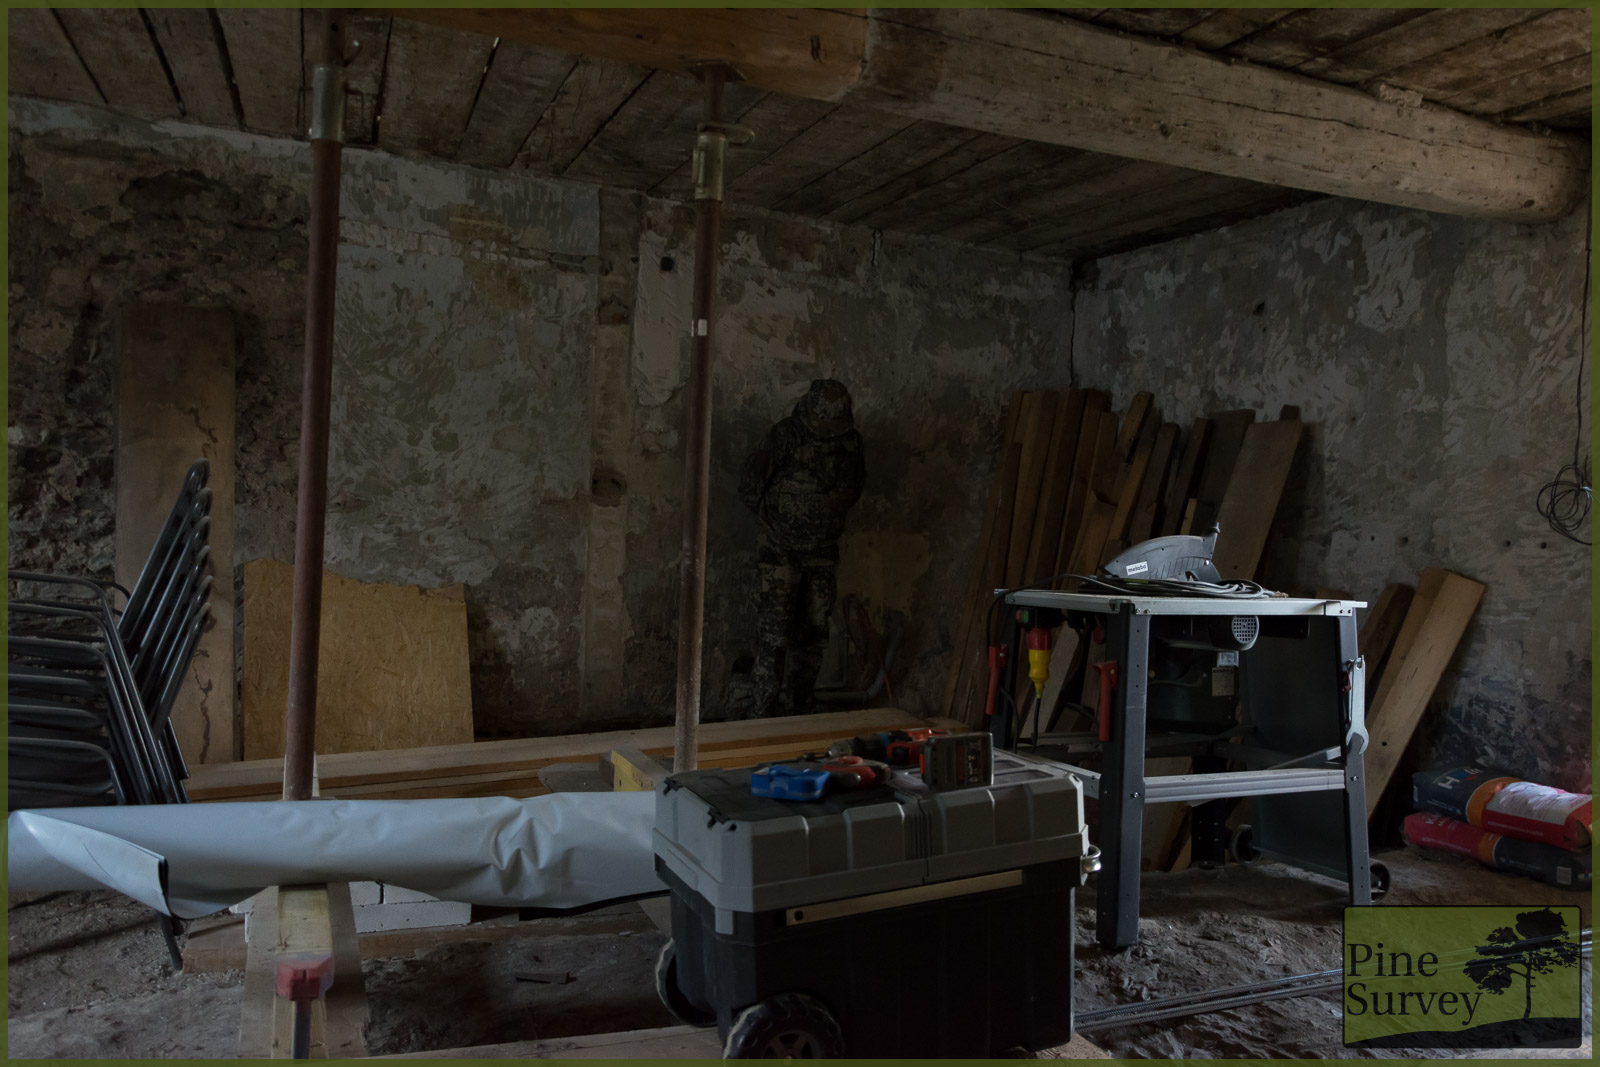
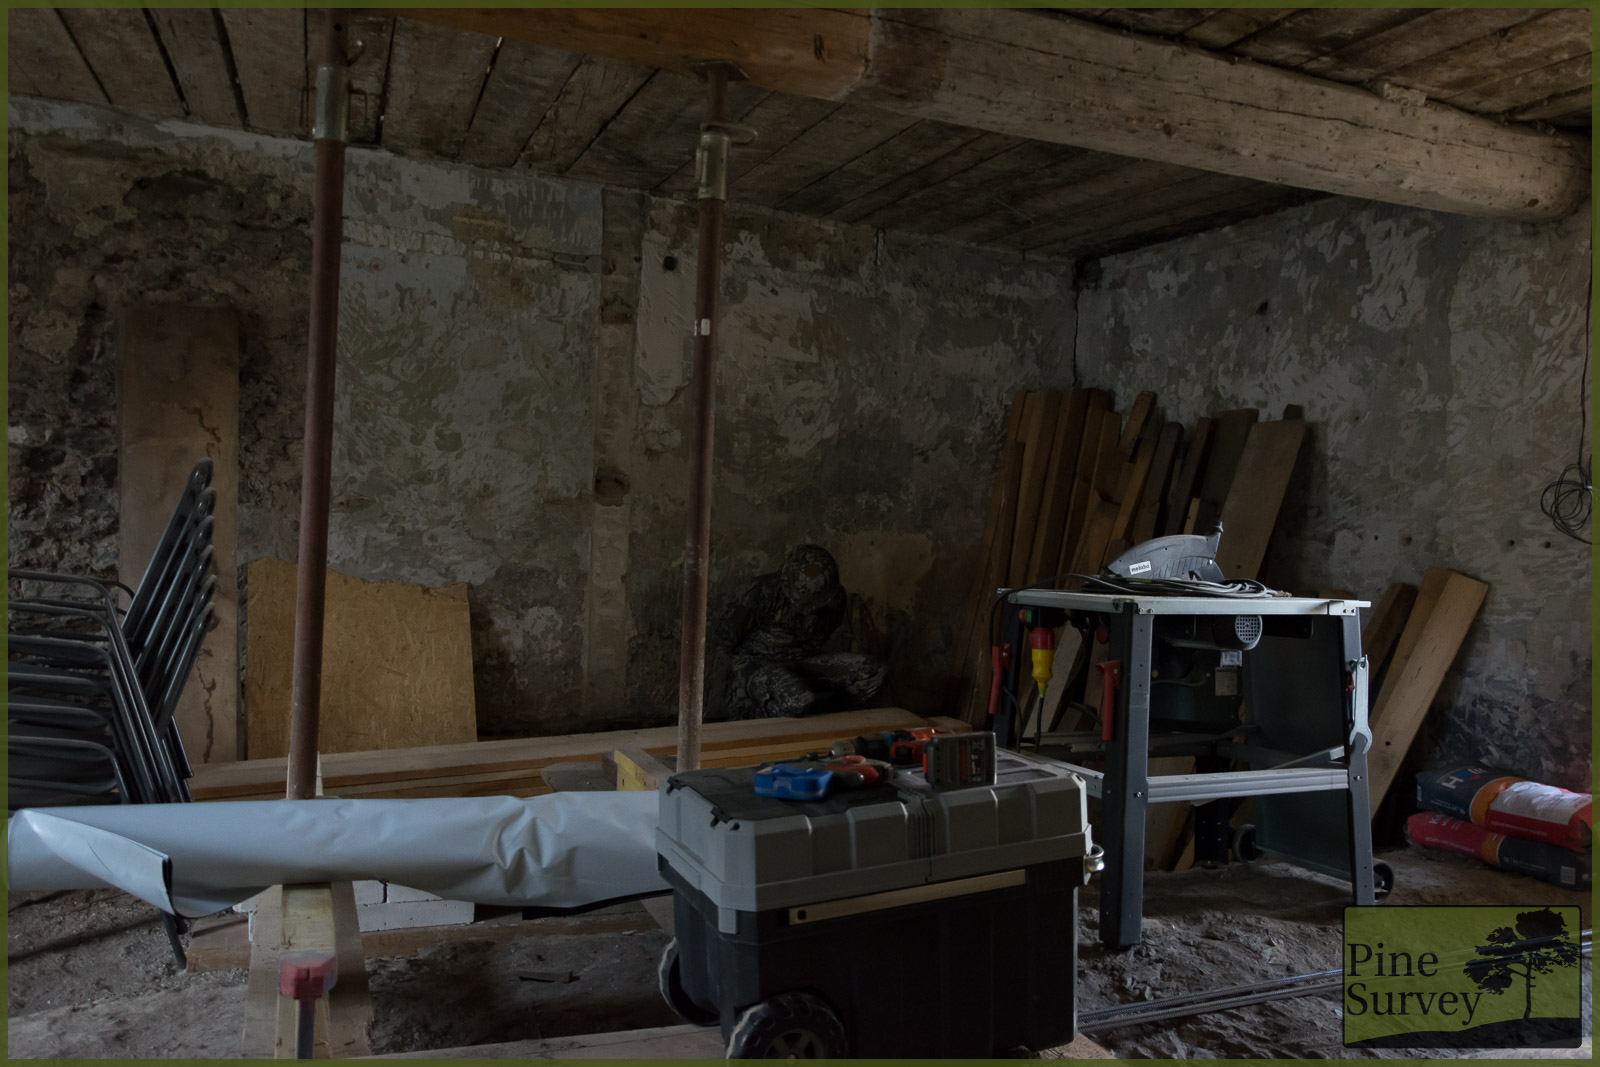
Cellar aka “the dungeon”
The cellar is that of an old building that goes back to the medieval ages, so you have plenty of natural rock, but also modern materials like steel grids because of the renovations. Distance to camera is approximately 5m.
Standing
In this close proximity you are able to see all of the Macro, Midi and Micro elements at work. The Metropolis pattern firstly breaks up the silhouette completely in this environment, while the colour palette blends in perfectly. Two aspects will be discovered by the schooled eye: my neck with the white inner lining of the Anorak and my shadow caused by the neon lamp, which I tried to minimize.
I think the picture speaks for itself.
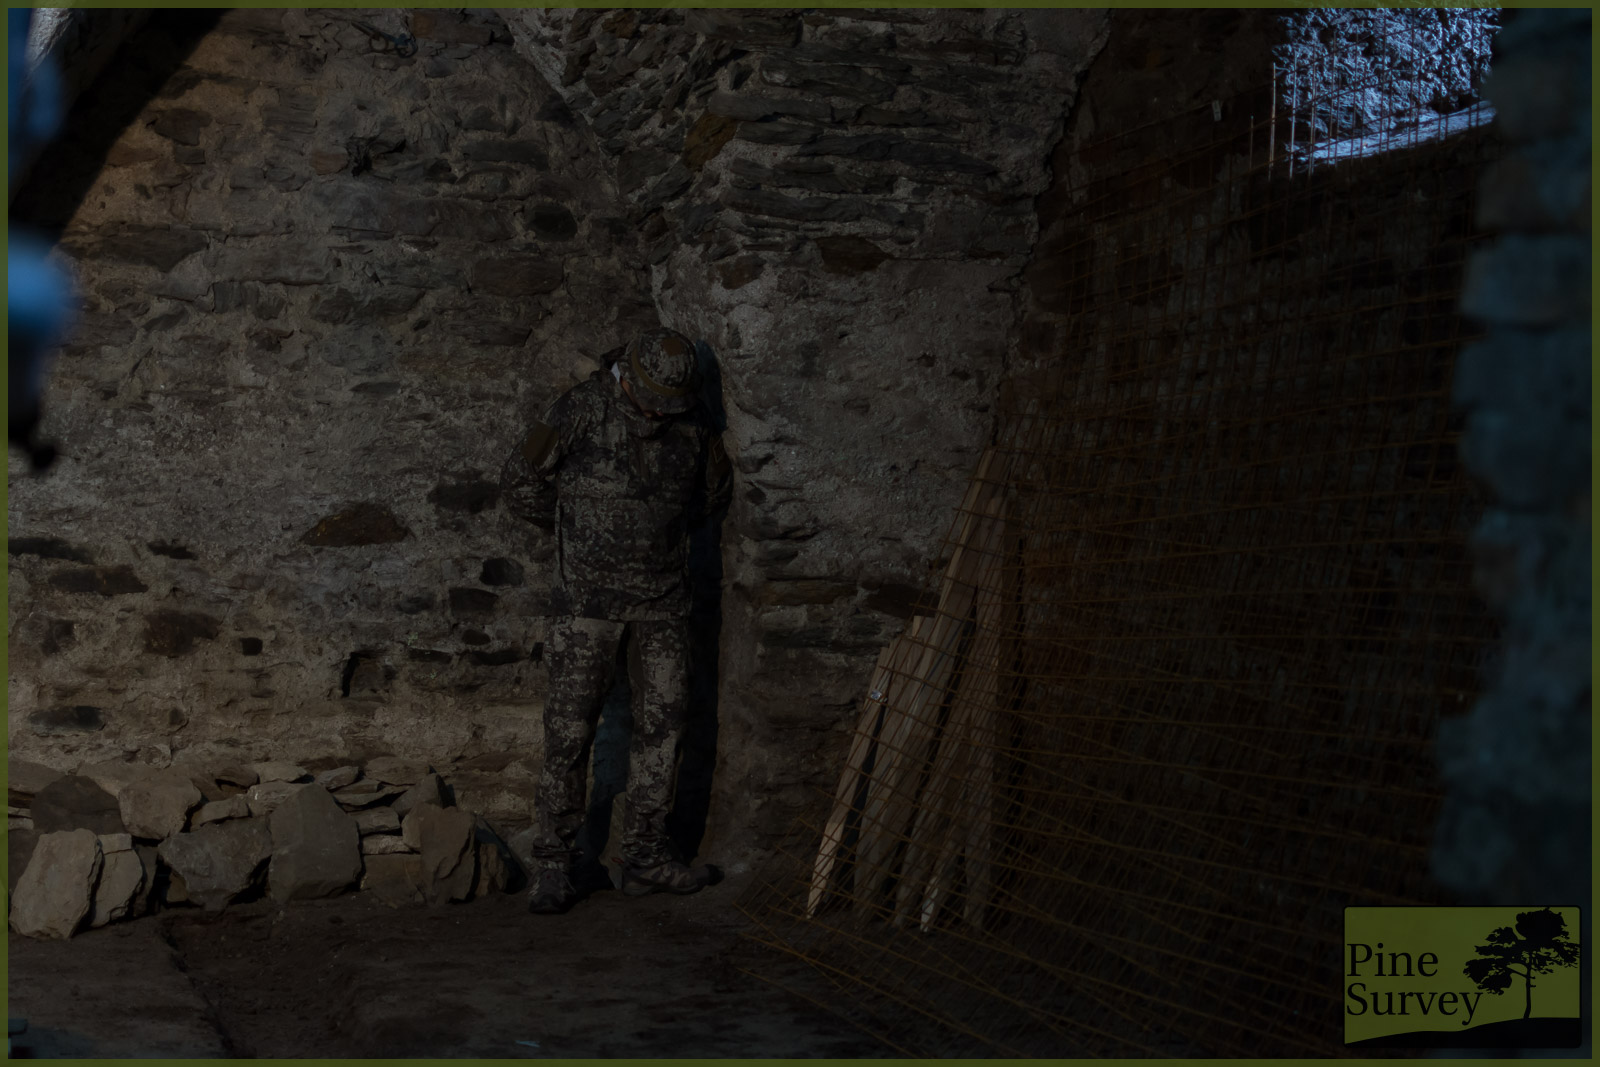
Cellar, standing in 5m distance, 35mm focal length
Kneeling
A little disclaimer: I tried to turn the neon lamp a little away, to make the shadow less visible (if you can control the environment, do so!)
Again, PenCott Metropolis blends in because of the colours, and the human shape is broken apart by the various elements. Minimizing the silhouette reinforces the effect.
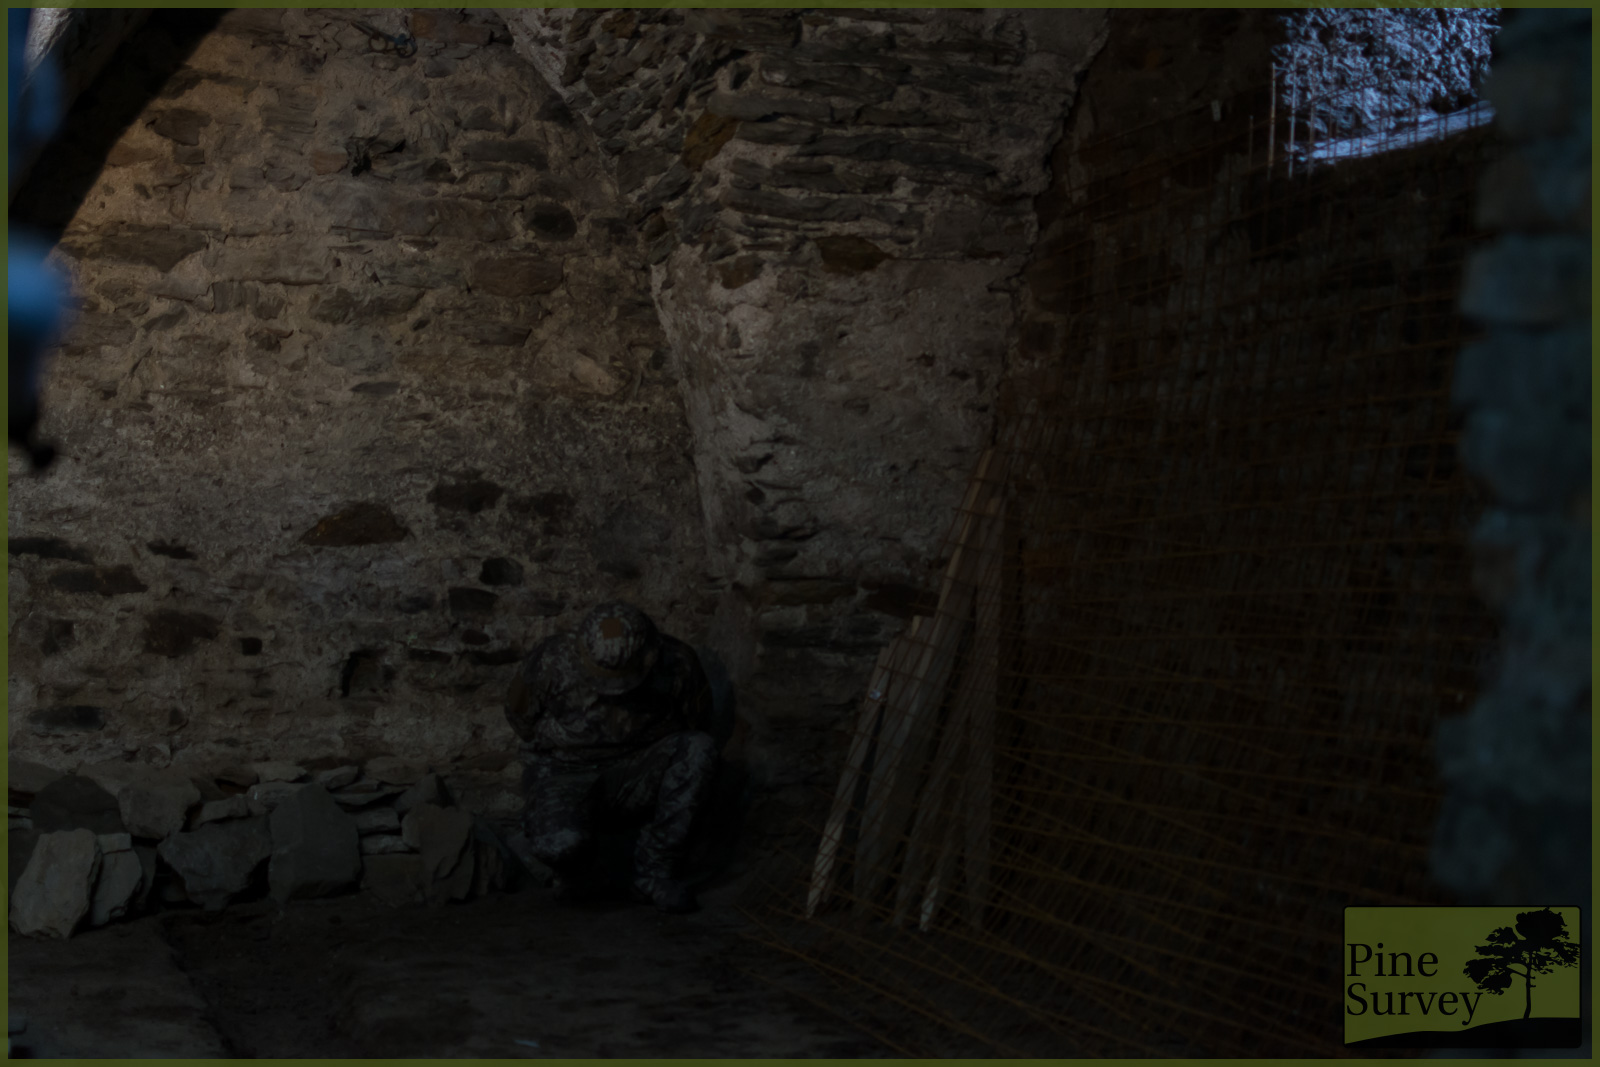
Cellar, kneeling in 5m distance, 35mm focal length
iPhone X
Here you will find the pictures my brother took with his eyephone – we completely turned off the light to get a low light effect. All the above mentioned observations apply. Pattern elements plus colour palette result in an astounding performance in close quarters.

iPhoneX picture: Cellar, standing in 5m distance, 28mm focal length

iPhoneX picture: Cellar, kneling in 5m distance, 28mm focal length
Ground Floor
Next was the ground floor of the construction site, with plenty of materials and tools standing around. Distance again: max. 10m.
Standing
In this environment, with all sorts of different colours and shapes, and a wall that could be a camouflage pattern by itself because of the reconstruction, PenCott Metropolis excels again. Because of the organic look of the Macro and Midi elements the silhouette is melting into the wall. The Micro elements multiply this effect by creating shades.
Ground floor, standing in 10m distance, 35mm focal length
Kneeling
As always, the effect gets maximised by kneeling down. The human shape is minimized and and the camouflage effect in close quarters improves. The various elements plus the colours do the rest of the work.
Ground floor, kneeling in 10m distance, 35mm focal length
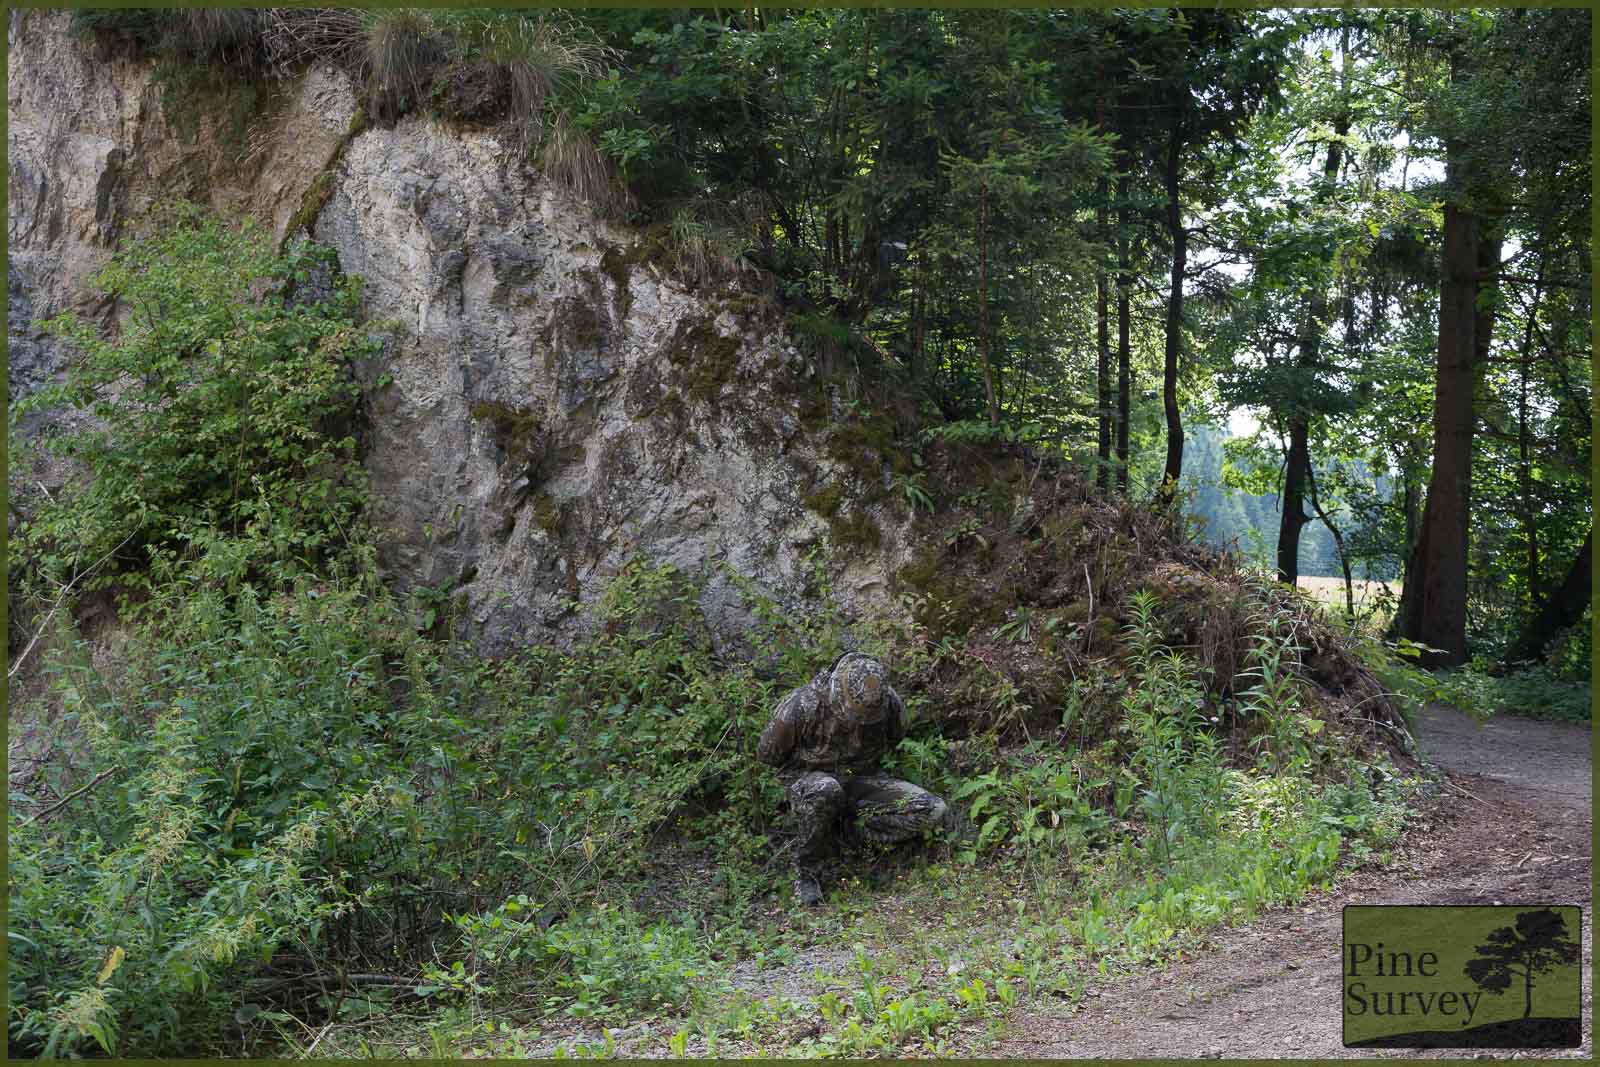
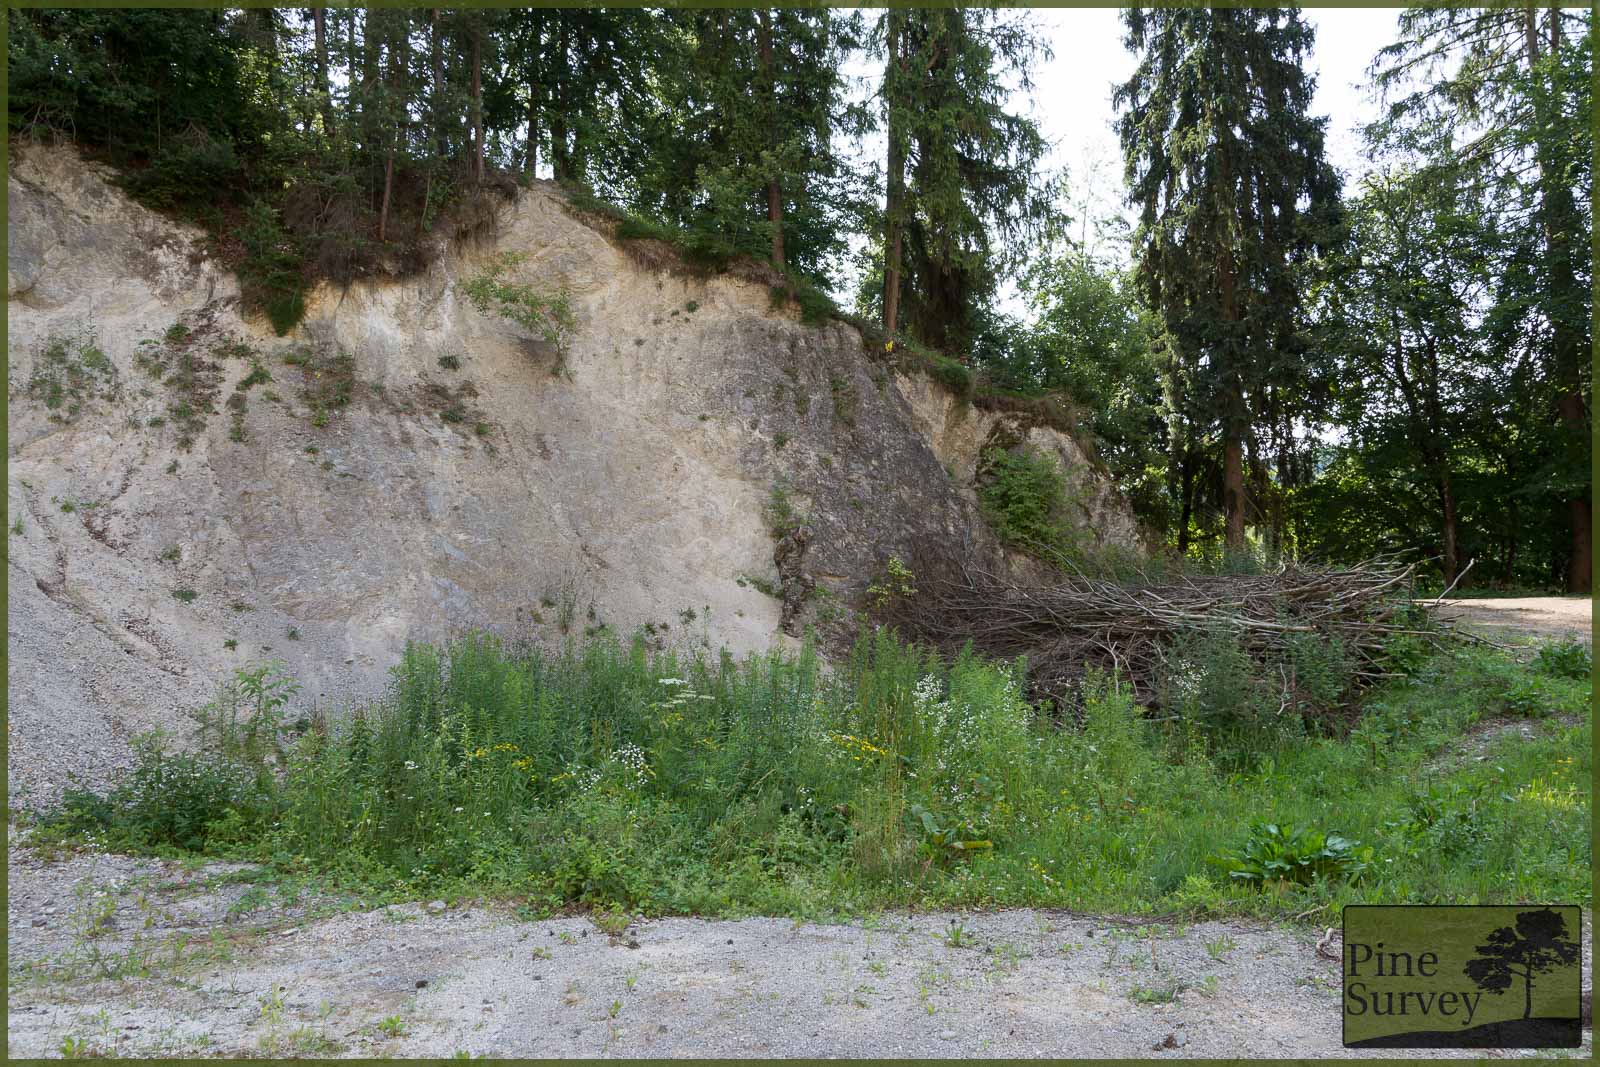
Location 3 – Gravel Pit
With patterns like Metropolis there is always the second thought in mind of using it as a camouflage for mountainous environments. The various grey variants in combination with brown make this an obvious candidate to try it out.
I took the following pictures in a gravel pit that features both rock formations as well as green vegetation and dead wood. It is a wonderful example of a rocky environment.
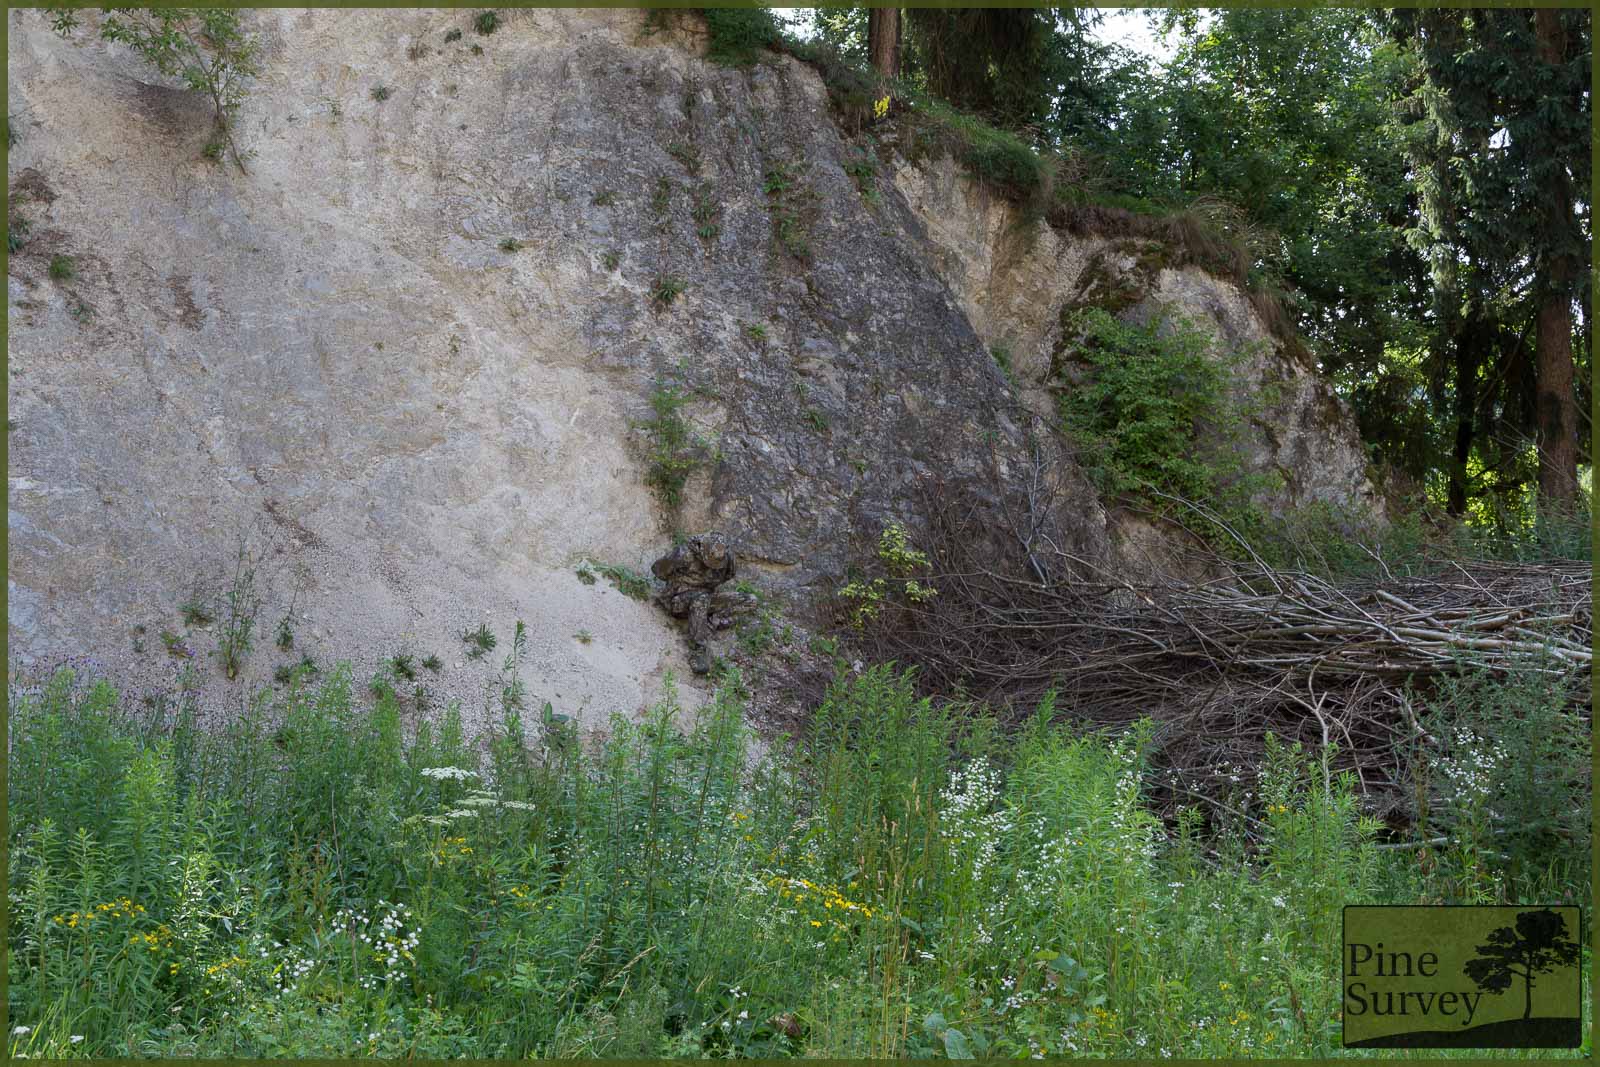
Rock wall with vegetation
First off is a rock wall with plenty of green vegetation at the bottom. Everything is as close as it gets: 5m
Standing
Against the greyish background of the rock PenCott Metropolis blends astoundingly well at this close distance. The colours are spot on and the Macro, Midi and Micro elements create an organic look that closely resembles this environment.
Interestingly the green contrast of the vegetation does not make the pattern stand out. Since the colour palette is that of the surrounding rocks, the various elements of Metropolis break up the shape of the legs and blend right in.

Rock wall with vegetation, distance 5m, focal length 35mm
Kneeling
The last statements become more apparent when kneeling down in this situation. In this instance, the green vegetation is now completely in the back of the human silhouette and there is no grey background to blend in.
Nevertheless, because of the colours and the organic elements of the pattern, the human shape is broken apart and the perception is created that the rock can be seen all the way to the floor.
Rock wall with vegetation, distance 5m, focal length 35mm
Rock wall above the vegetation
The next example shows me standing in the rock formation higher up the vegetation. The distance to the camera was roughly 25m. Two sets of pictures were taken: one with 35mm, mimicking human vision, and one with 18mm to create the illusion of a longer distance.
Standing
Standing in the wall, basically in the open, shows the effectiveness of PenCott Metropolis. At 25m distance, all the observation from above apply and become more apparent. The colours of the pattern, as well as the elements completely blend into the background of the rock formation. The human silhouette is barely visible.

Rock wall above vegetation, distance 25m, focal length 35mm
Looking at the second picture standing up, with 18mm focal length, the impression is even more evident. (schooled eyes might notice my bare neck though)
Rock wall above vegetation, distance 25m, focal length 18mm
Kneeling
By now the observations might sound repetitive. Several times now I have described on how the pattern works while minimizing the human shape. In this particular environment the effectiveness is astounding.
Rock wall above vegetation, distance 25m, focal length 35mm
It gets even more evident when looking at the same scene with 18mm focal length. The picture speaks for itself.

Rock wall above vegetation, distance 25m, focal length 18mm
Conclusion
Coming to an end of part 2 of this field test of PenCott Metropolis, I hope I was not only able to show you the effectiveness of this pattern in urban low light conditions, but also in mountainous environments.
I am using PenCott Metropolis in various settings now during the last few weeks. While doing so I was amazed by the immense versatility of the pattern and even more so about its effectiveness.
One can really tell, that Dominic Hyde put lots of research and external input into this. Professional users in urban environments will find this pattern very useful. Currently the only question is which company will be first in offering this camouflage pattern in its line up.
With that being said I do hope I was able to give you a decent impression and information about PenCott Metropolis.
Lots of Thanks to Helikon-Tex, for providing me with the set of PenCott Metropolis. Also many thanks to Dom for his help.
Last but not least I want to thank the people who helped me in doing the review itself and giving me access to certain locations. Much appreciated!
Take care!