
Introduction
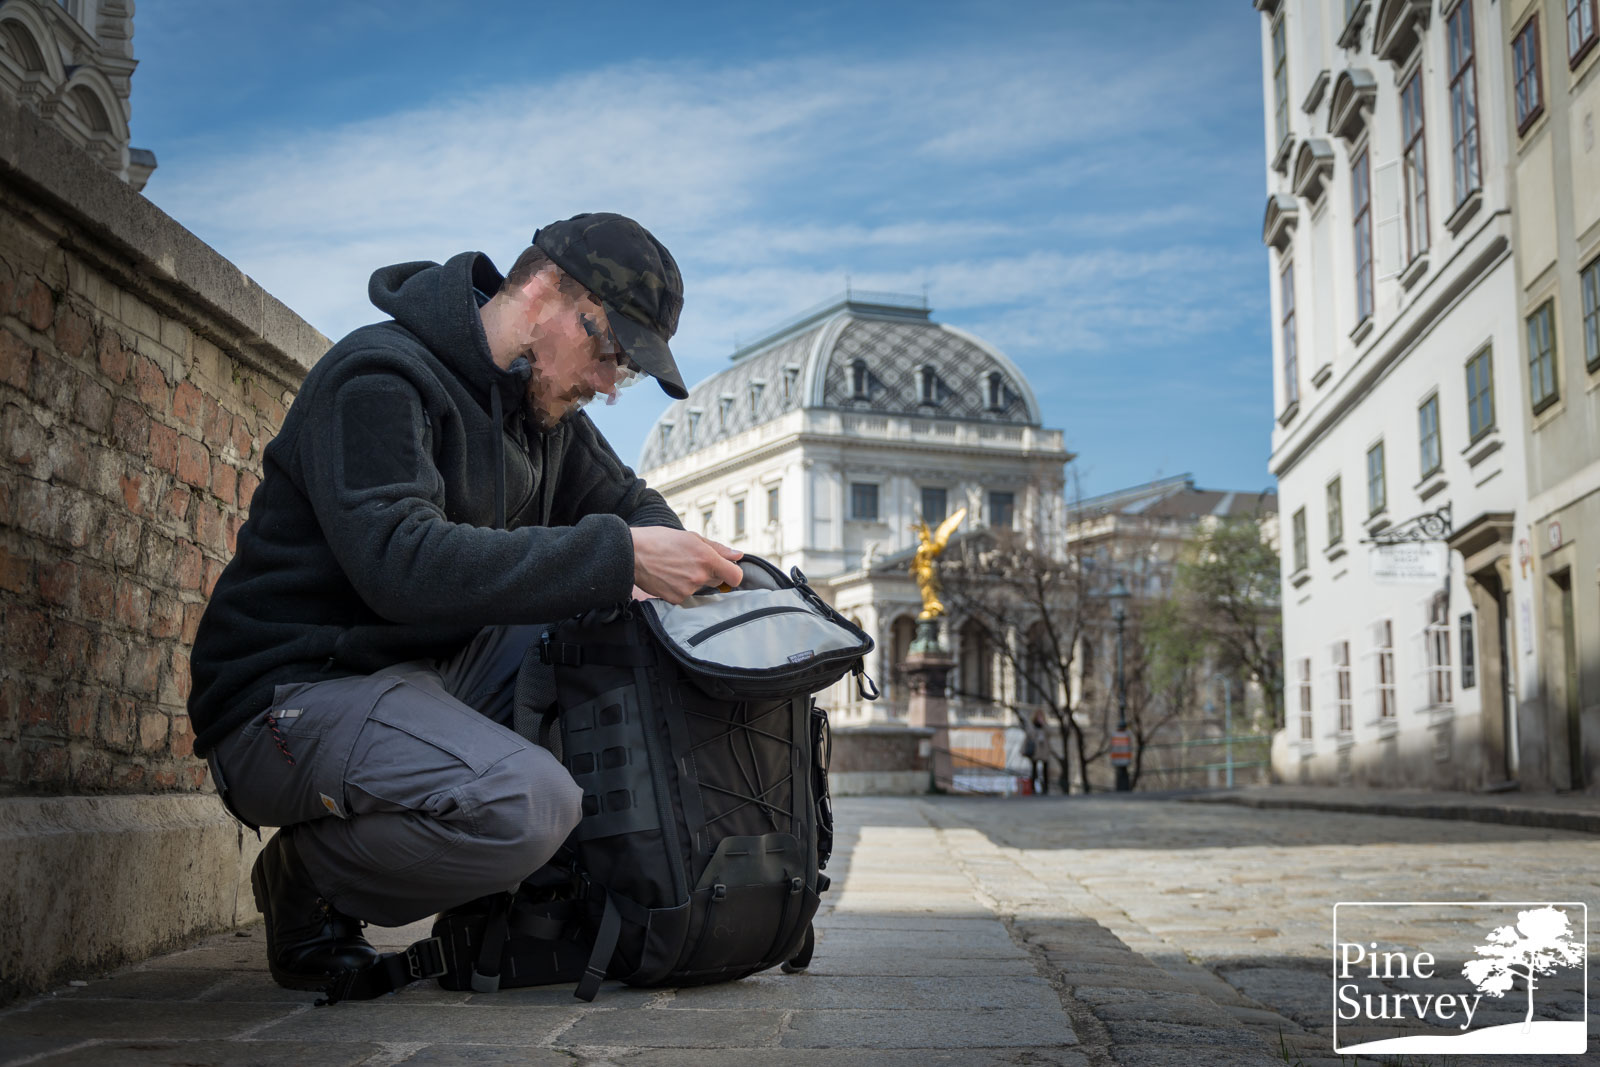
Earlier this year I was able to get an IBEX-26 backpack for review. After already talking last year with Michael and Alex about the Vanquest backpack lineup, I was eager to take a closer look at one of the Ibex models. The reason for this is quite simple: even though the design might look similar to the Arcteryx Khard backpack series, the IBEX is a complete different approach to modern clamshell designs and offers various details, which I have not seen before in packs. It is safe to say that Vanquest’s design department took it so far that some details will be probably overlooked by the average user.
The Vanquest IBEX 26
But enough of the chit chat – let’s take a closer look at the pack itself. As always I will start with an overview and the specs for those in a hurry and go into more detail afterwards.
Overview
The IBEX-26 is designed as a multi-role clamshell backpack, offering 26l of volume, while providing additional MOLLE options to attach pouches. It features a top pouch and two expandable side pockets. The inside offers additional pockets and velcro areas for optional inserts.
The back is padded and features a high quality load distribution system. Quality and workmanship is on the highest level, with several hidden features and details.
Specs
- Volume: 26l
- Weight: 3.95lb or 1792g
- Dimensions: 23” (H) x 13.5” (W) x 6.5” (D) or 58cm (H) x 34cm (W) x 16cm (D)
- Material: 1000D & 500D Cordura, Hypalon, YKK Zippers, ITW and UTX-Duraflex Hardware
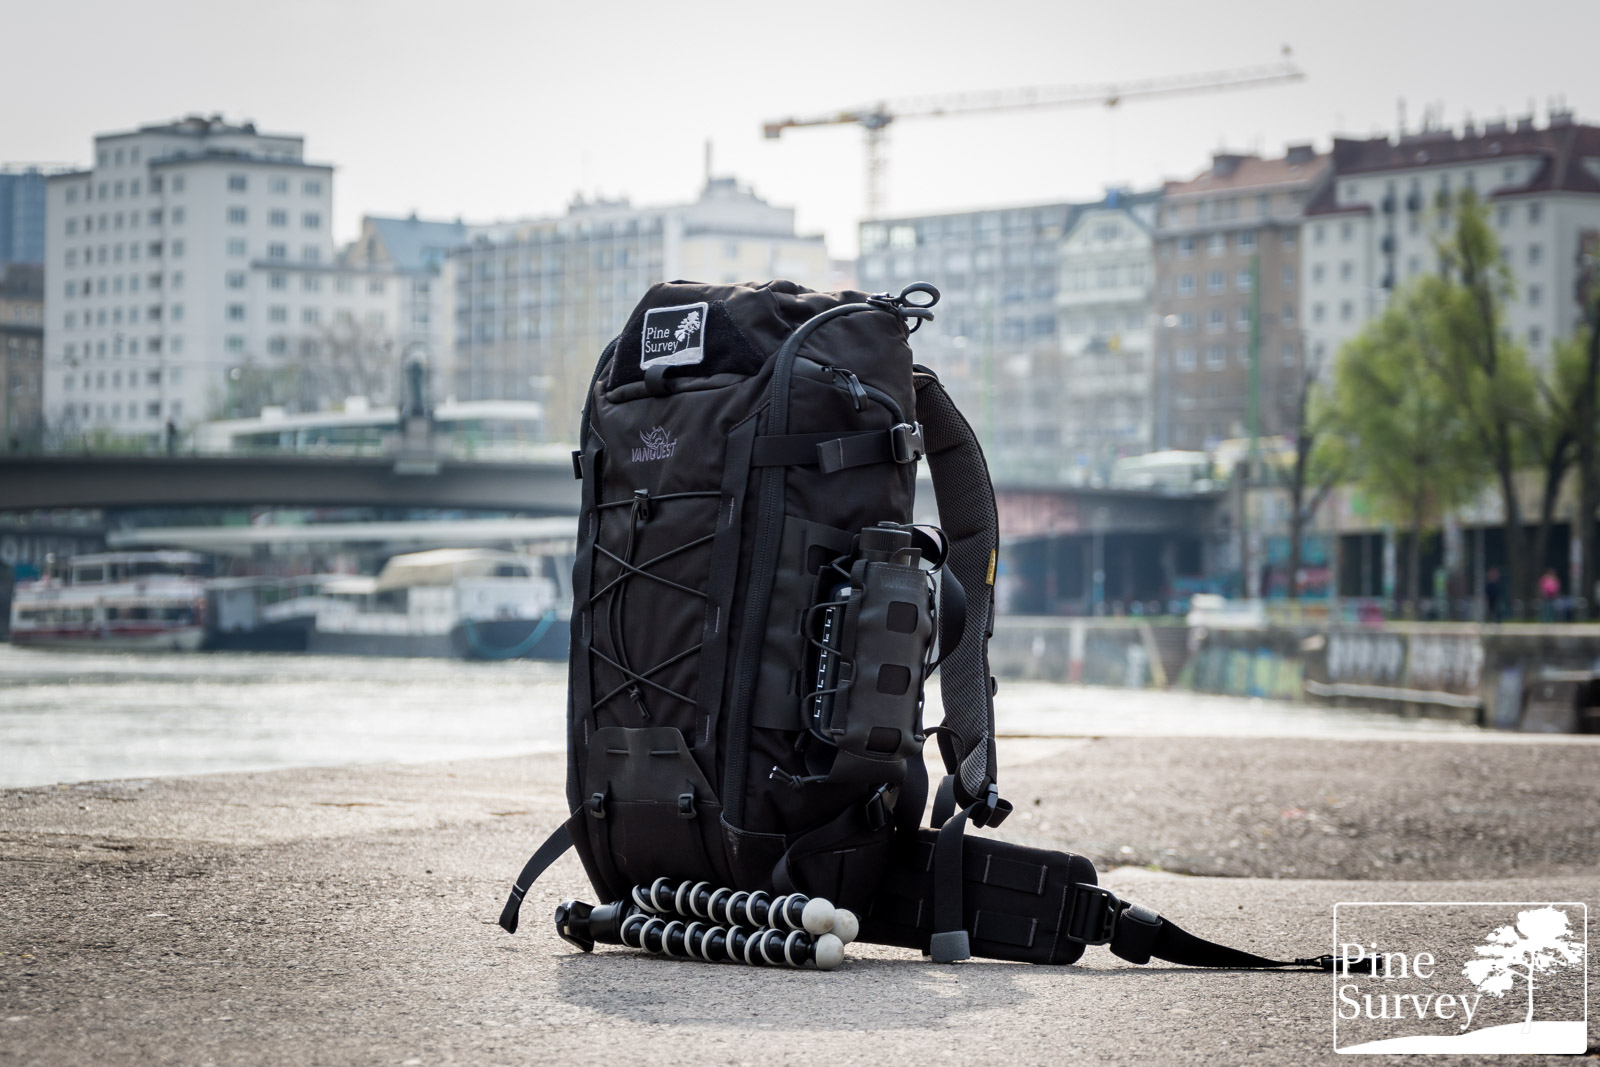
The IBEX-26 backpack
With a volume of 26l, the Ibex 26 is a medium sized backpack for a variety of uses. It is a full clamshell design, meaning that there is a continuous zipper (which is lockable btw) around the front of the pack. That way you can fully open the pack and get full access to the inside. The zipper pulls are Zipline Orbit pulls by ITW Nexus, giving you a firm grab.
The clamshell design opens fully
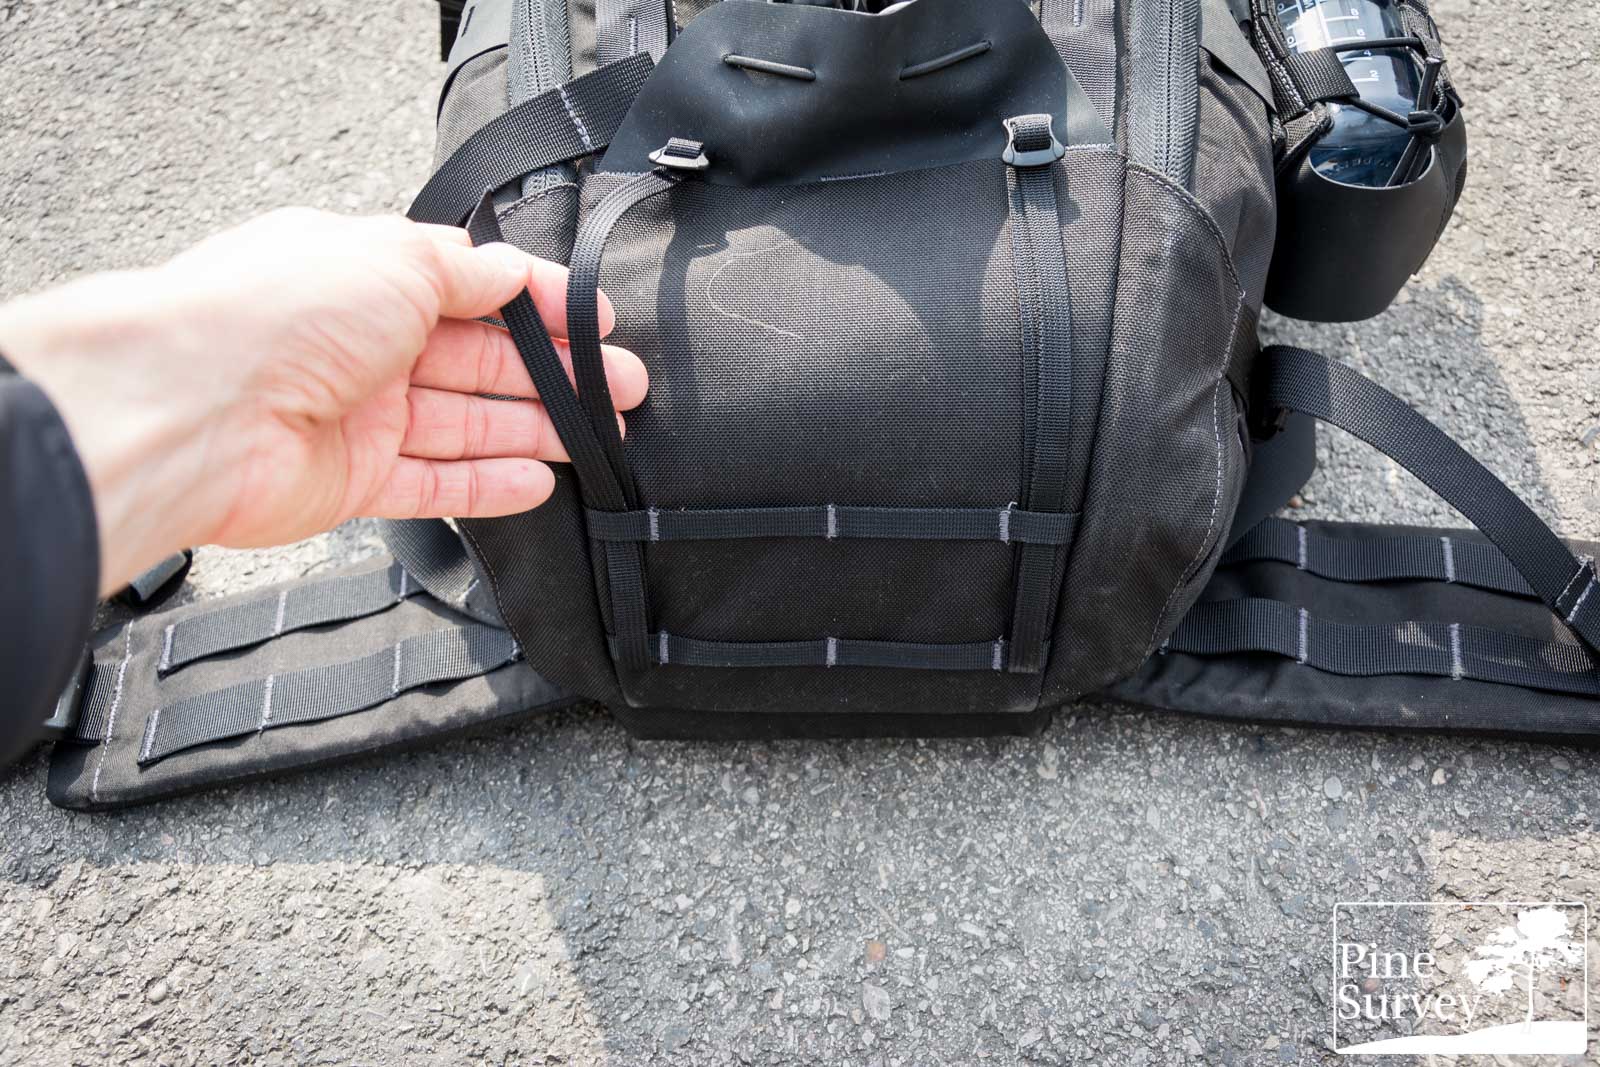
To the front you will find two vertical straps providing material loops to fasten carabiners and the like. Through these loops a shock cord is laced to pack jackets or other lightweight items. To prohibit the stored equipment from falling through, you will find a Hypalon flap at the bottom, acting as a stop.
Material loops, shock cord and Hypalon flap
Right there you will also find several loops and webbing to offer more attachment options. If not in use, they can be easily laced away.
more attachment points to the bottom
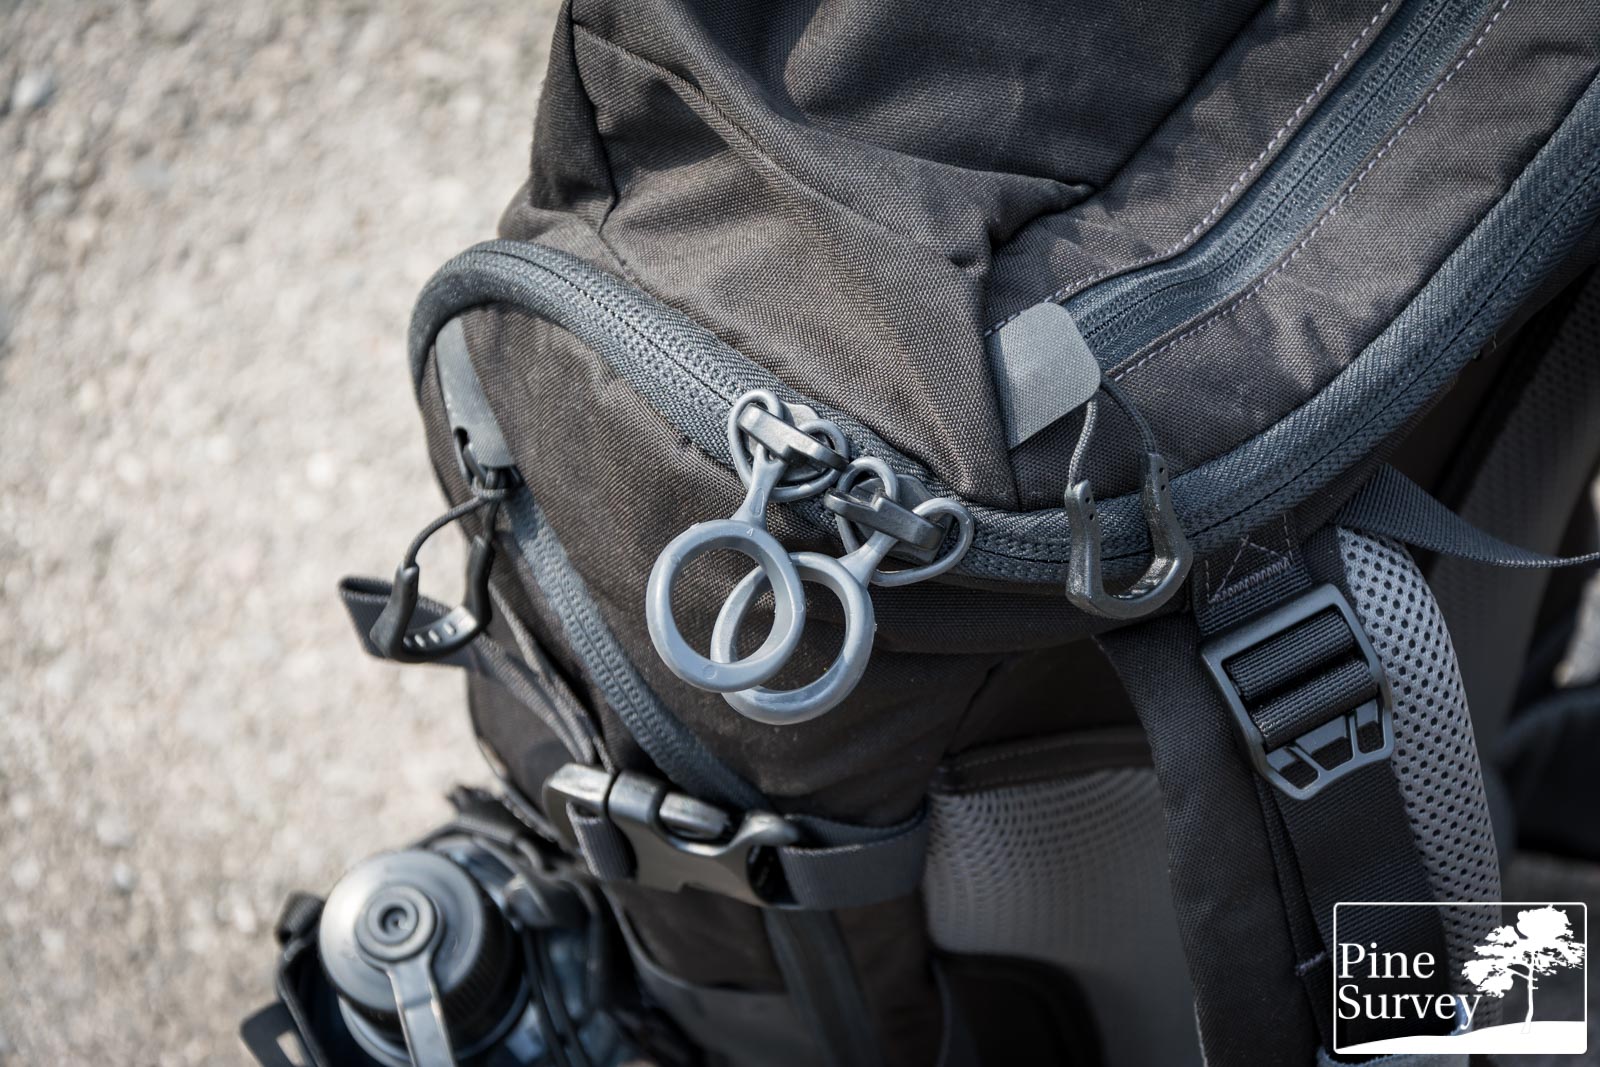
To the top you will find a generous top compartment. It can be accessed by zipper from the outside AND the inside – a very nice touch/detail, which gives you easy access in all kinds of situations. The outside zipper features handy pull tabs made of Hypalon, while the inner zipper has a large zipper pull (Vanquest’s Spartan Pulls) which gives your fingers a firm grab.
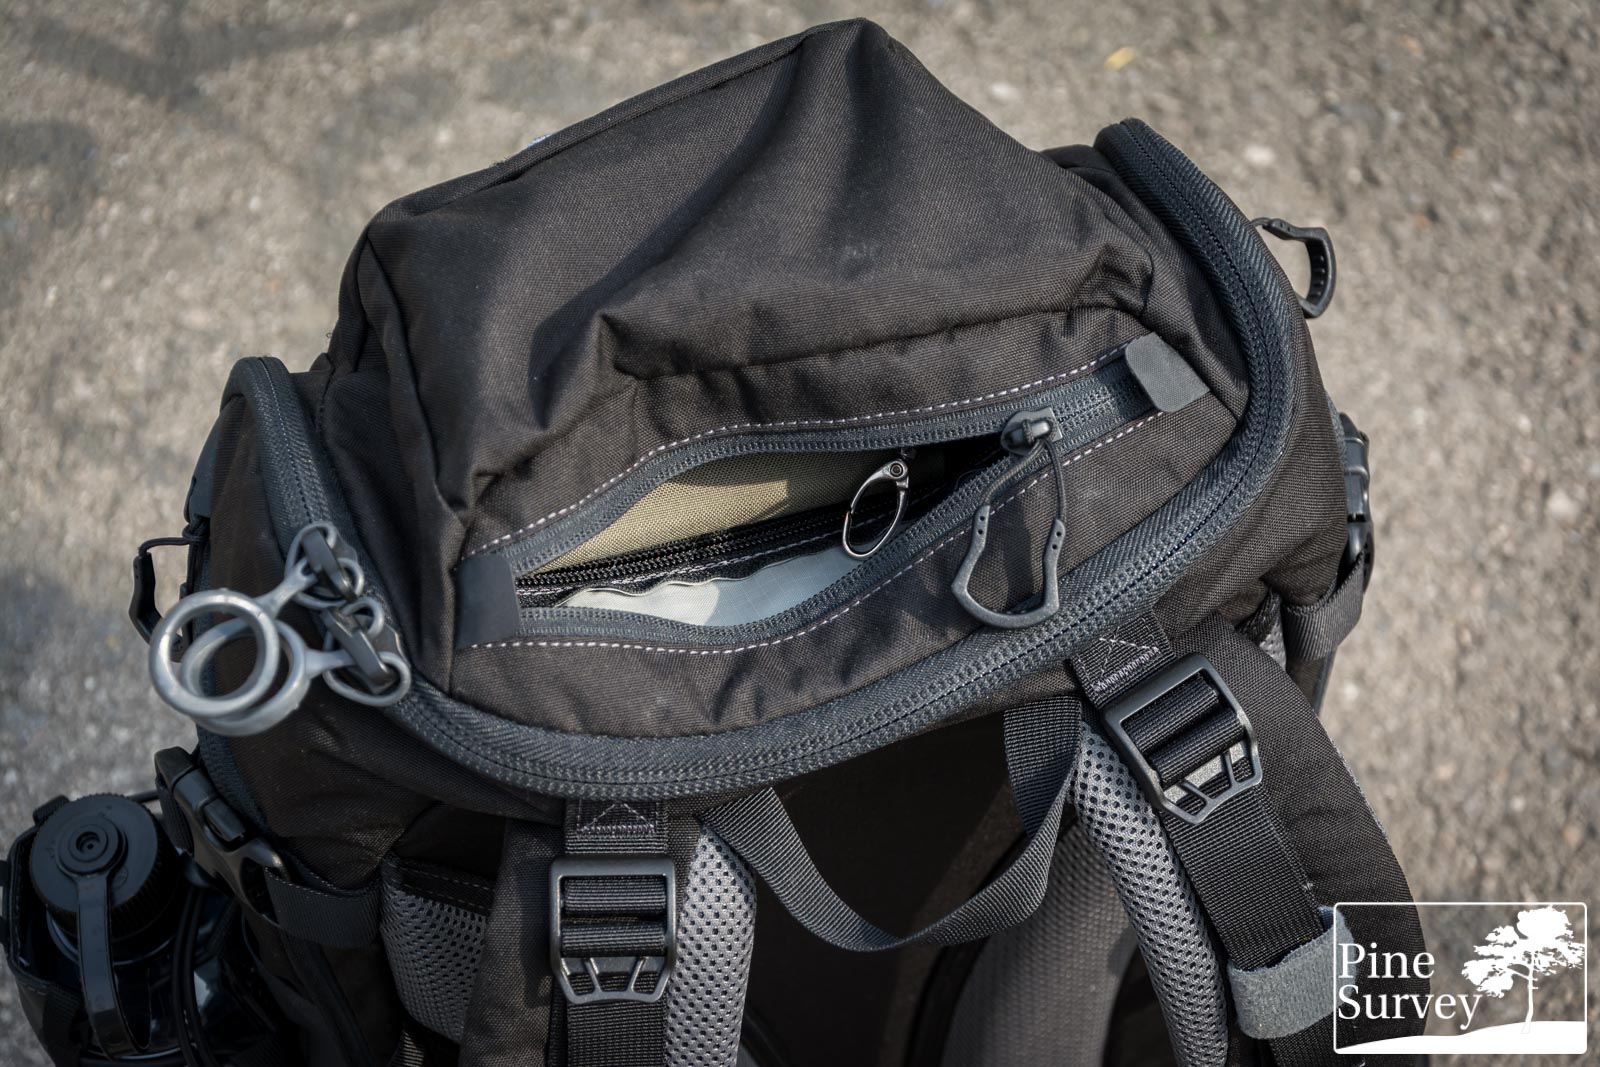
top compartment (also note the ITW Zipline Orbit pulls on the main zipper)
Last but not least, a large velcro panel gives you the option to put morale patches, group insignia or other identification patches on the pack. And if you thought there are not enough attachment points on this pack already: right underneath the velcro panel is another loop to attach your gear.

closer look at the front: velcro panel, loop and the webbing with shockcord
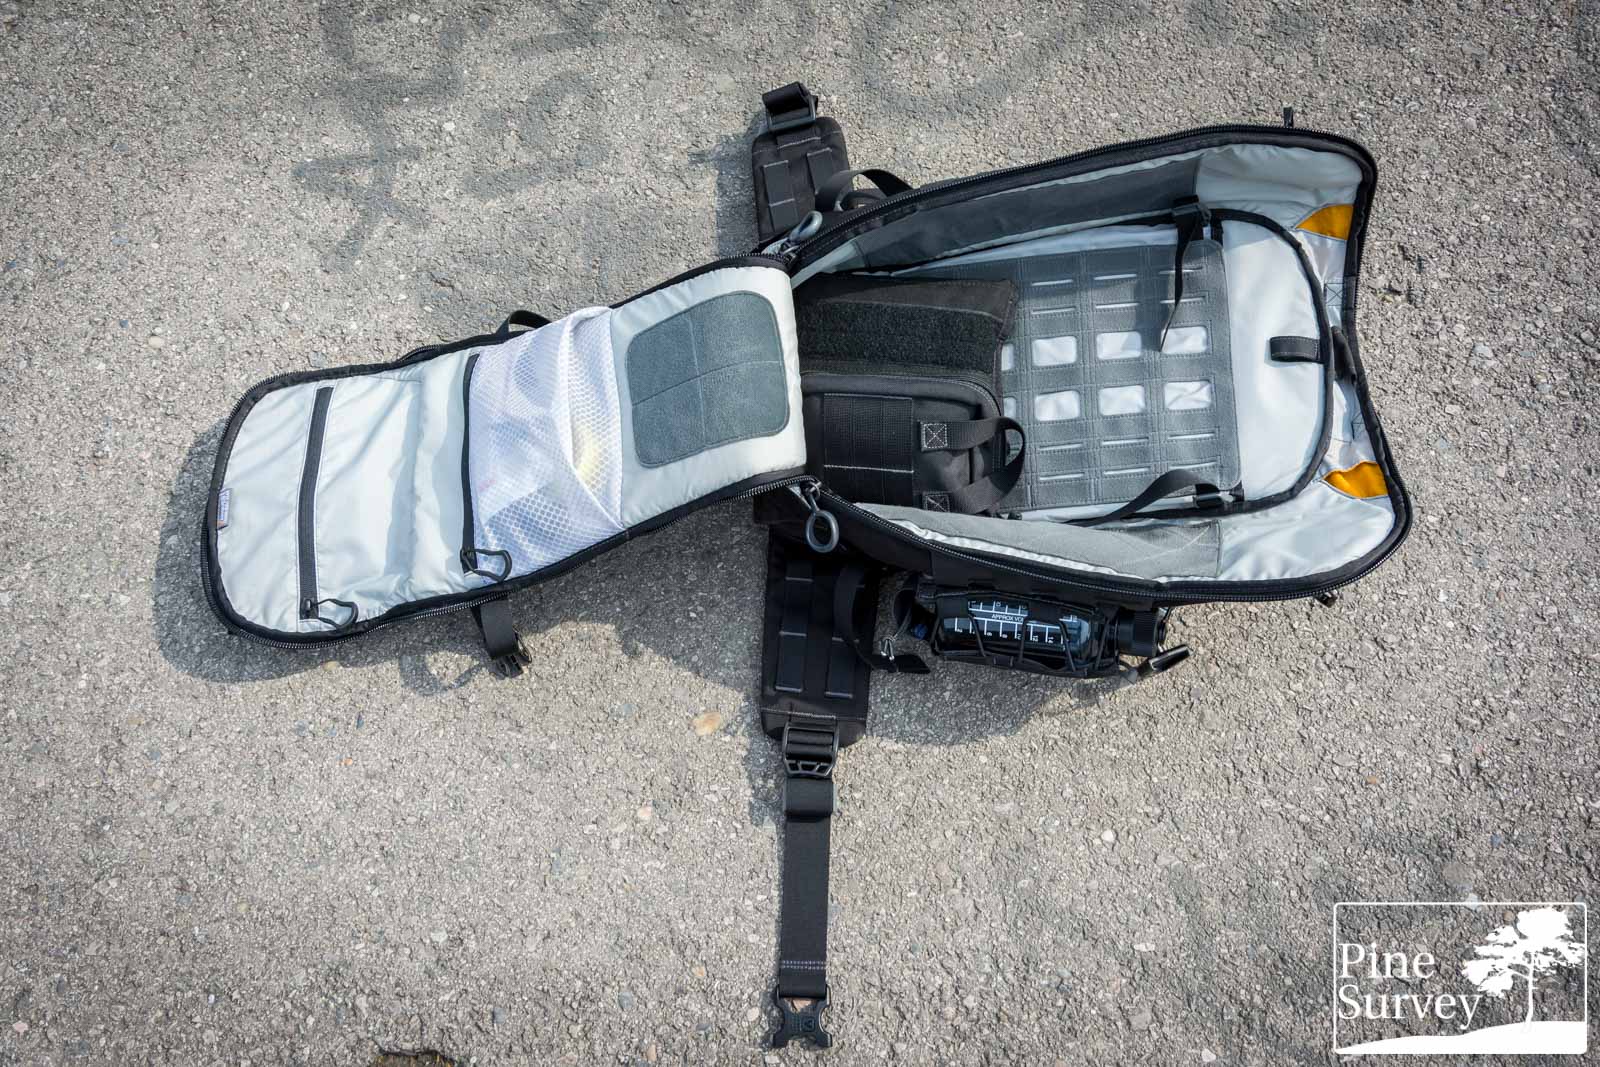
Main Compartment
As already mentioned, the main compartment is fully accessibly due to the clamshell design. To make the most of it, you have several options to organize the interior.
Directly under the zipper which opens from the inside to the already mentioned top compartment, you will find a zippered mesh pocket on the front flap of the pack. This is expandable and is made of a highly abrasion resistant material.
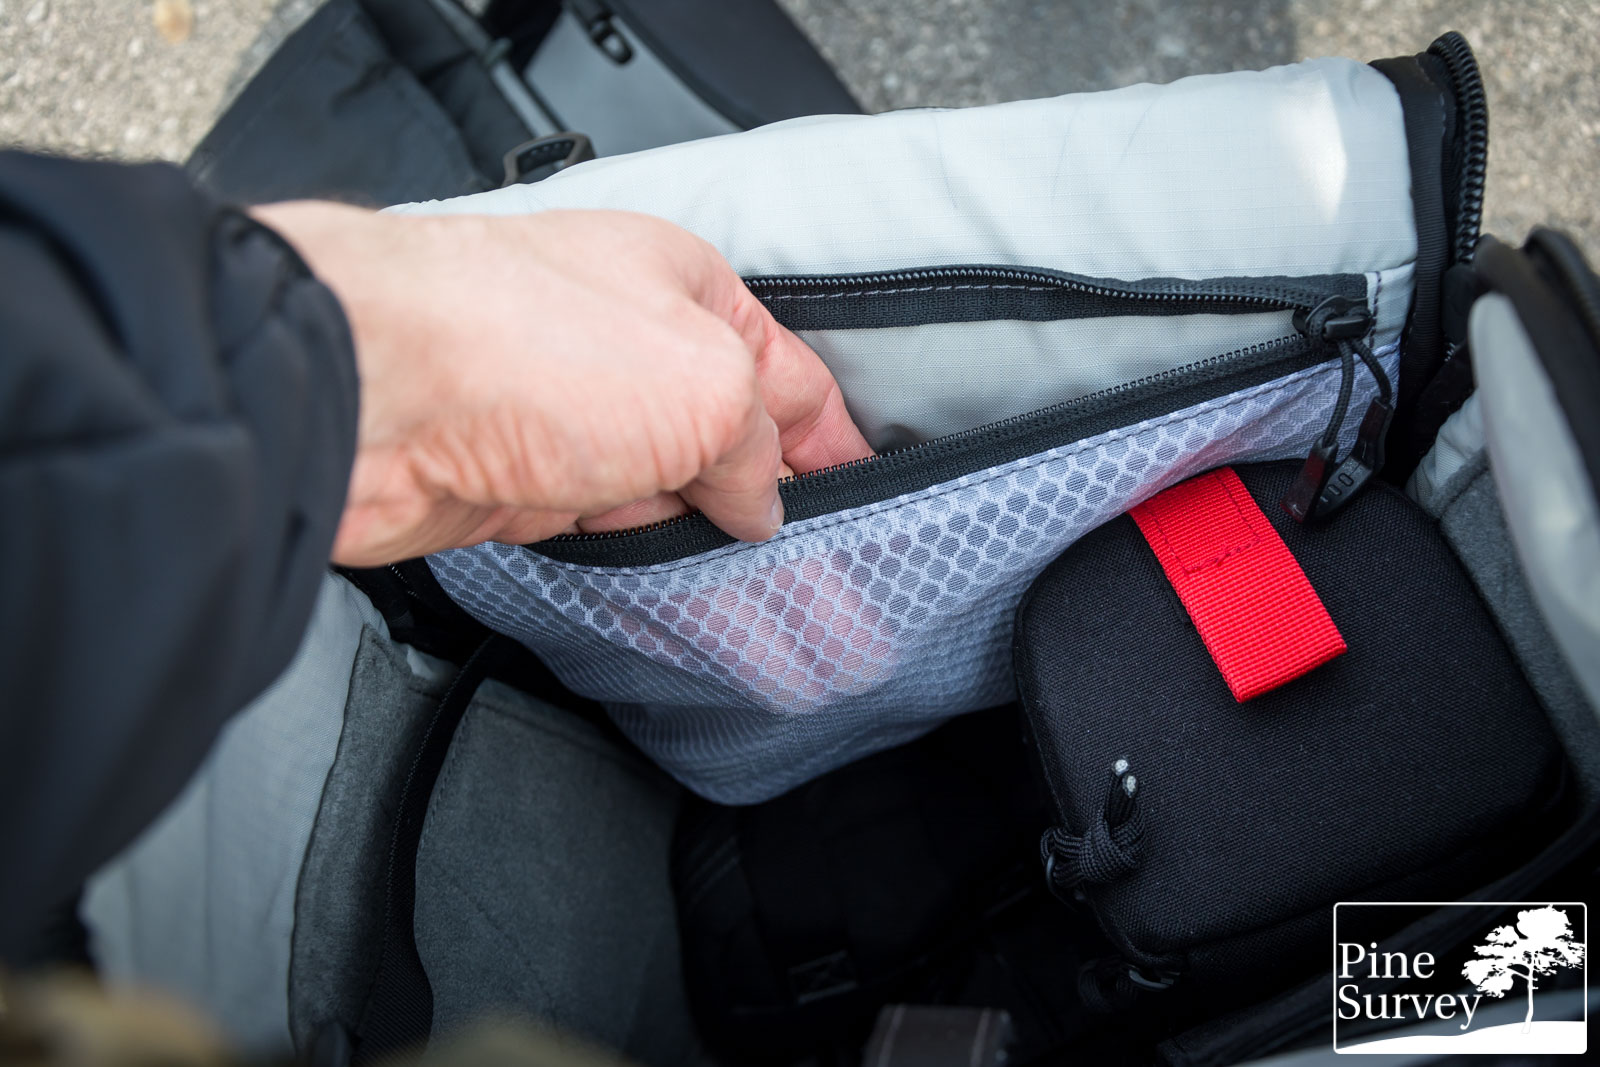
Zippered Mesh pocket
Zippered mesh pocket (above you will see the zipper that leads into the top compartment)
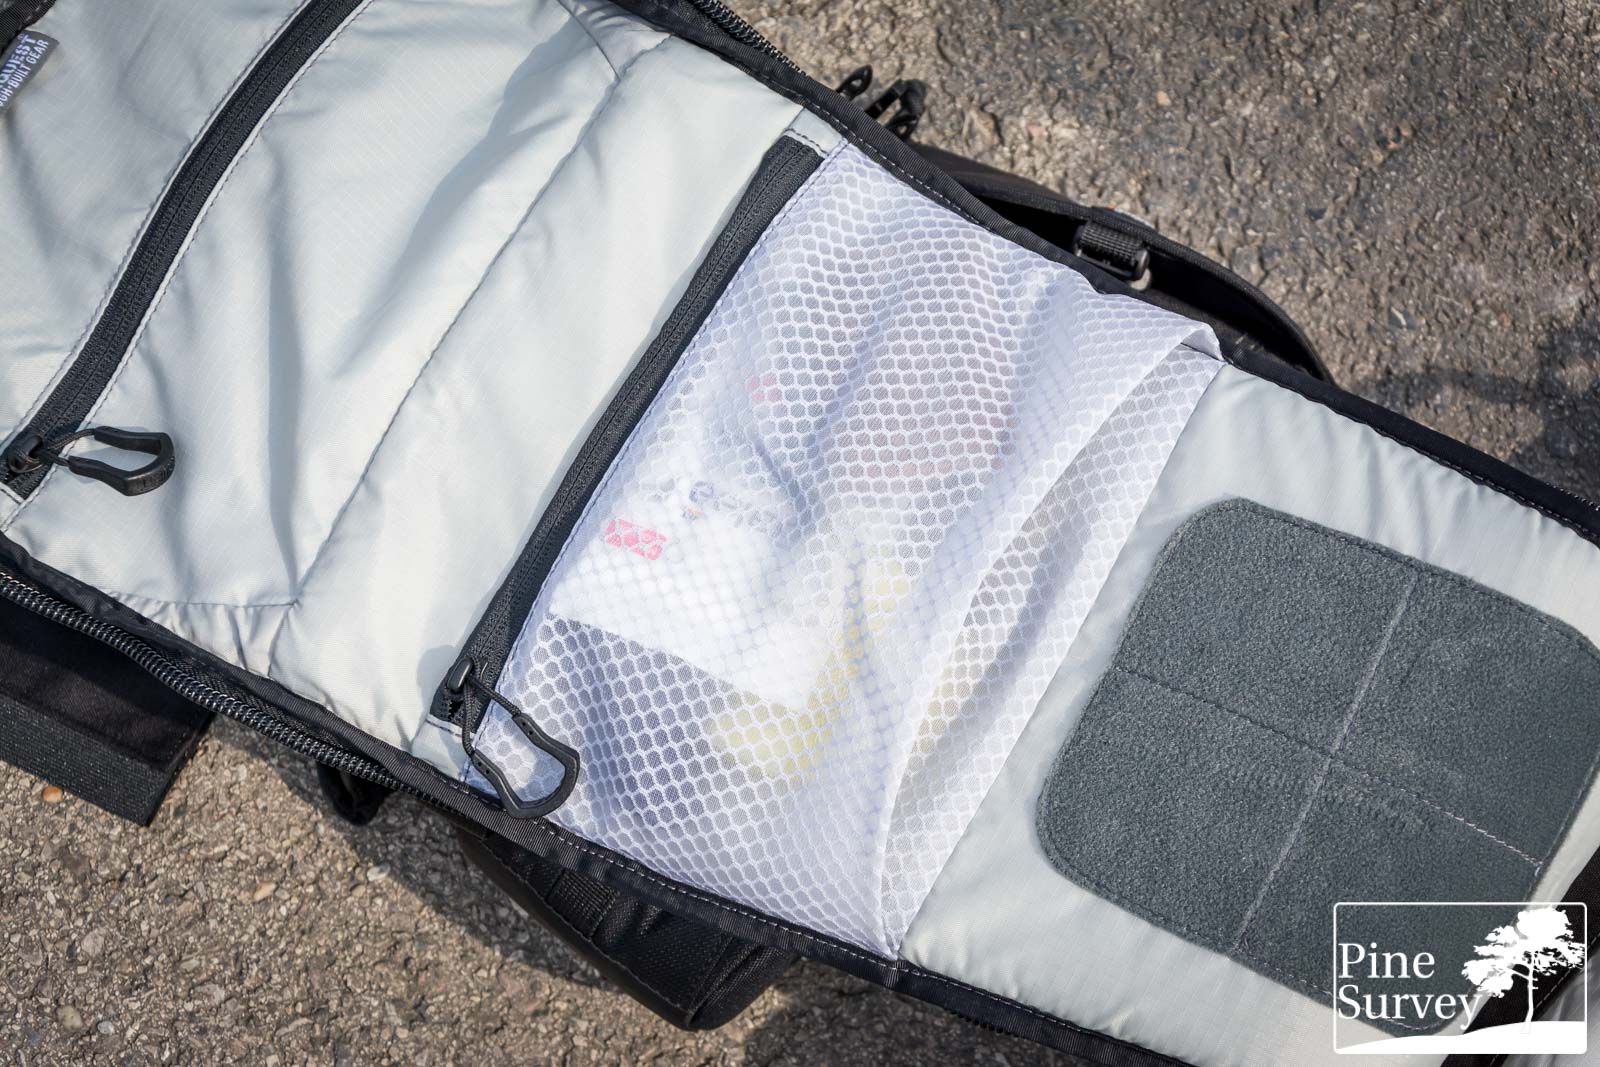
Adding to that you will find a velcro panel below the said mesh compartment. Here you can attach a variety of different velcro accessories, from loop panels to additional pockets. The inner left and right feature similar velcro panels, covering almost the whole area on the sides.
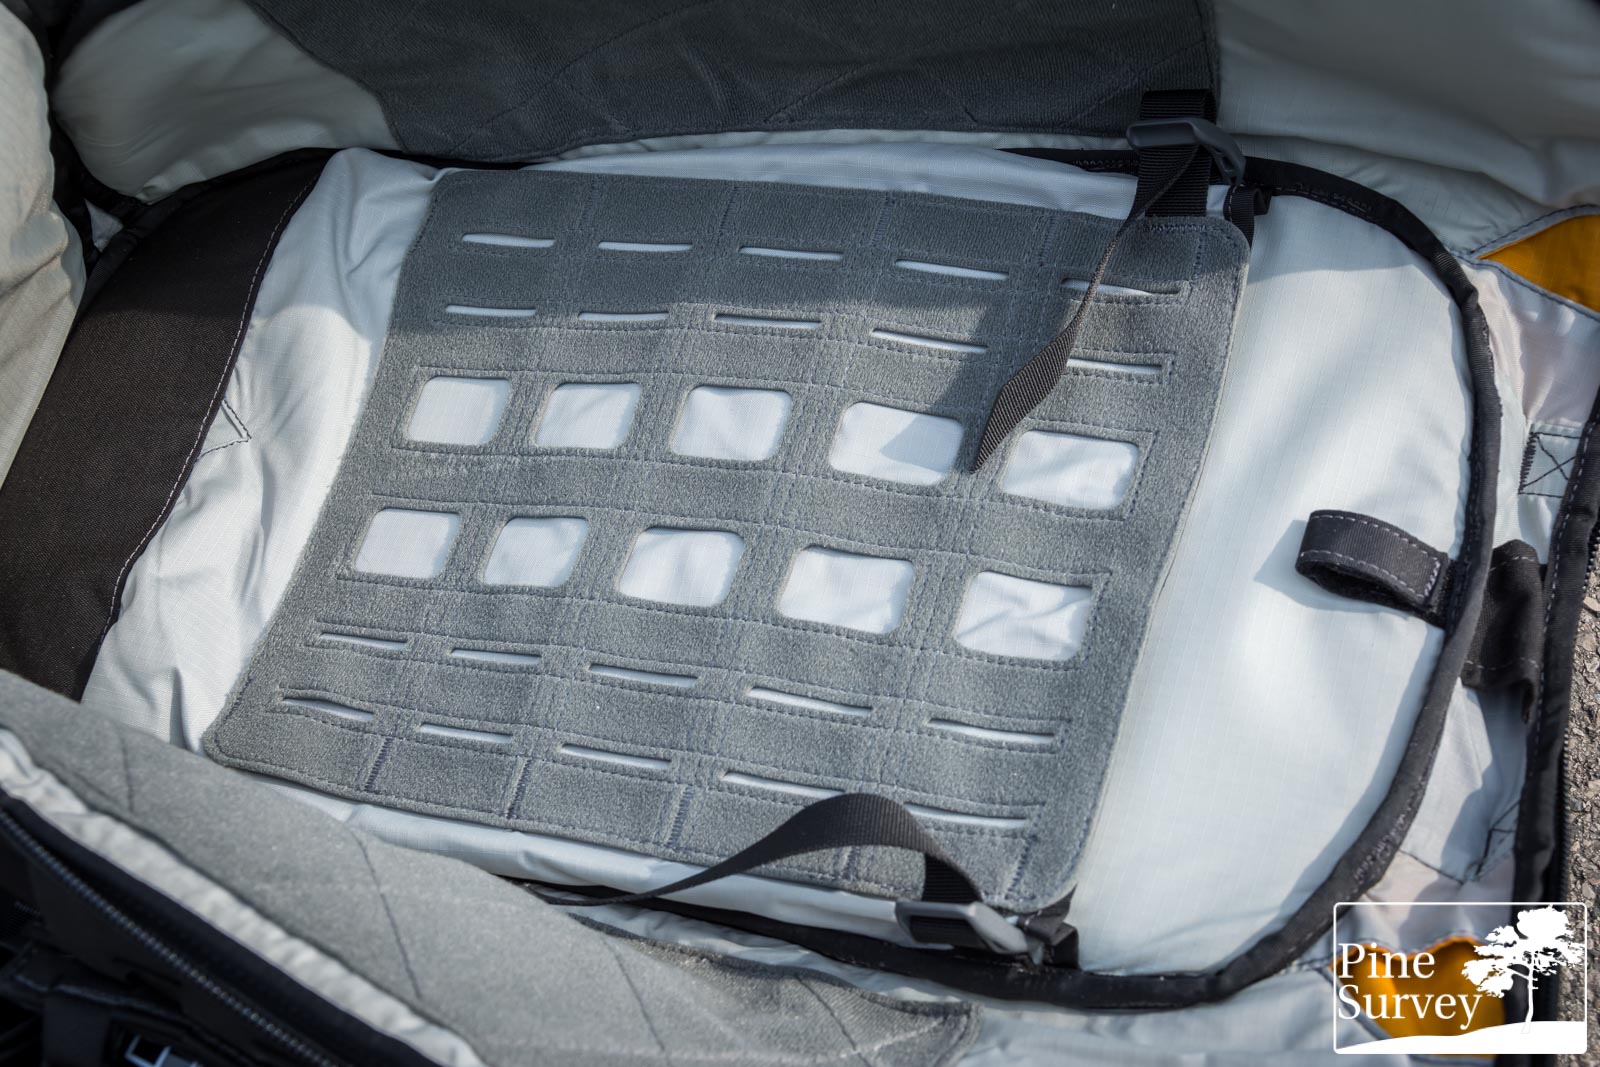
The inside of the main compartment: plenty of velcro areas
Which brings us to the backside of the main compartment. A large sleeve is providing the storage option of a hydration bladder or a laptop (up to 15”). It can be tightened down by two straps on top.
straps to tighten the sleeve
Furthermore, you will find a large velcro area on the sleeve, with laser cut slits. Five channels of MOLLE give you the option to mount additional pouches or other accessories to the inside. Please note that the slits are 90° to the side. This is done to give you the option to open the pack from the side (remember: clamshell) and access the main compartment. So if you want to swing the pack from your back to the chest and access the content on the go, you can do so easily.
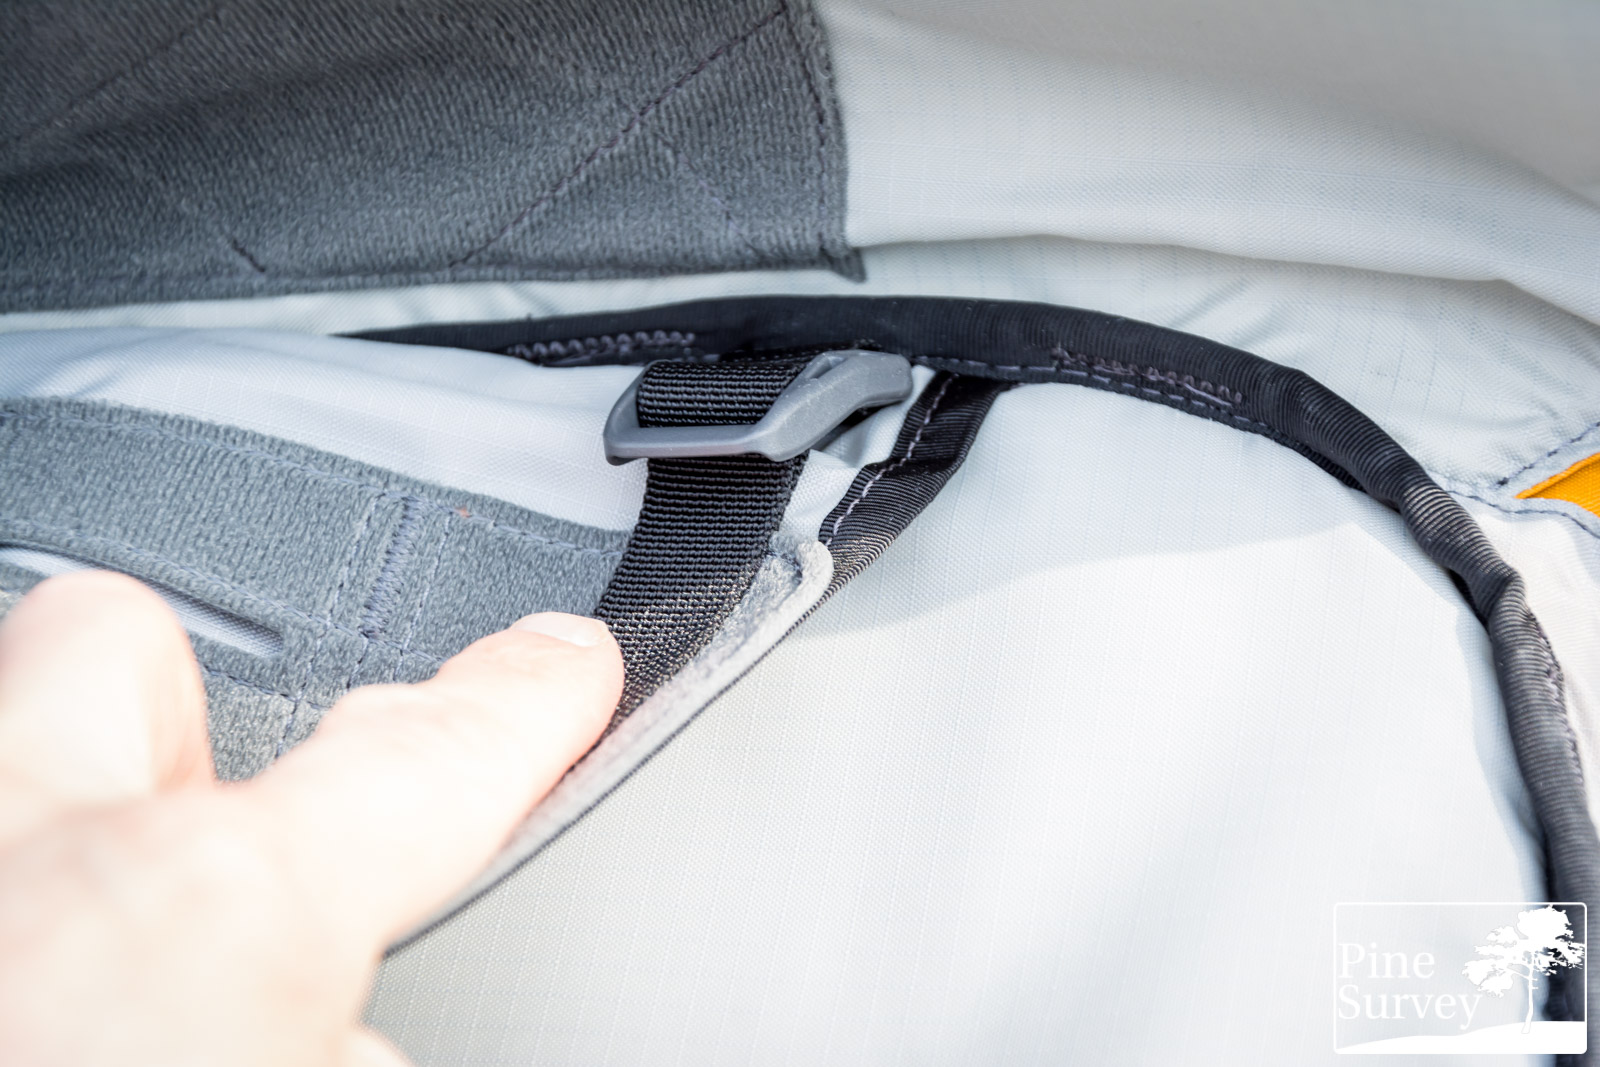
Last but not least: The whole main compartment is padded, so if you are carrying sensitive kit, you have additional protection. And since I mentioned the sleeve as an option to carry your hydration bladder, it is worth mentioning, that you will find a dedicated velcro strap over the sleeve to hang it in. A port in the middle routes the tube to the outside. In the upper corners you will also find openings to the side pockets, I will come to that in a second.
various ports on the inner top side
Side Pockets
The zippered side pockets feature a high vis orange interior, making it easier to identify the content. To the bottom you will find a bellow pocket like design. So even if the side pockets look quite flat, they are actually quite expandable!

Side pocket with high vis interiour
Internal organisation features two slip pockets to the bottom and a loop velcro area, like in the other parts of the pack to attach optional velcro accessories.

velcro strap for hydration bladder
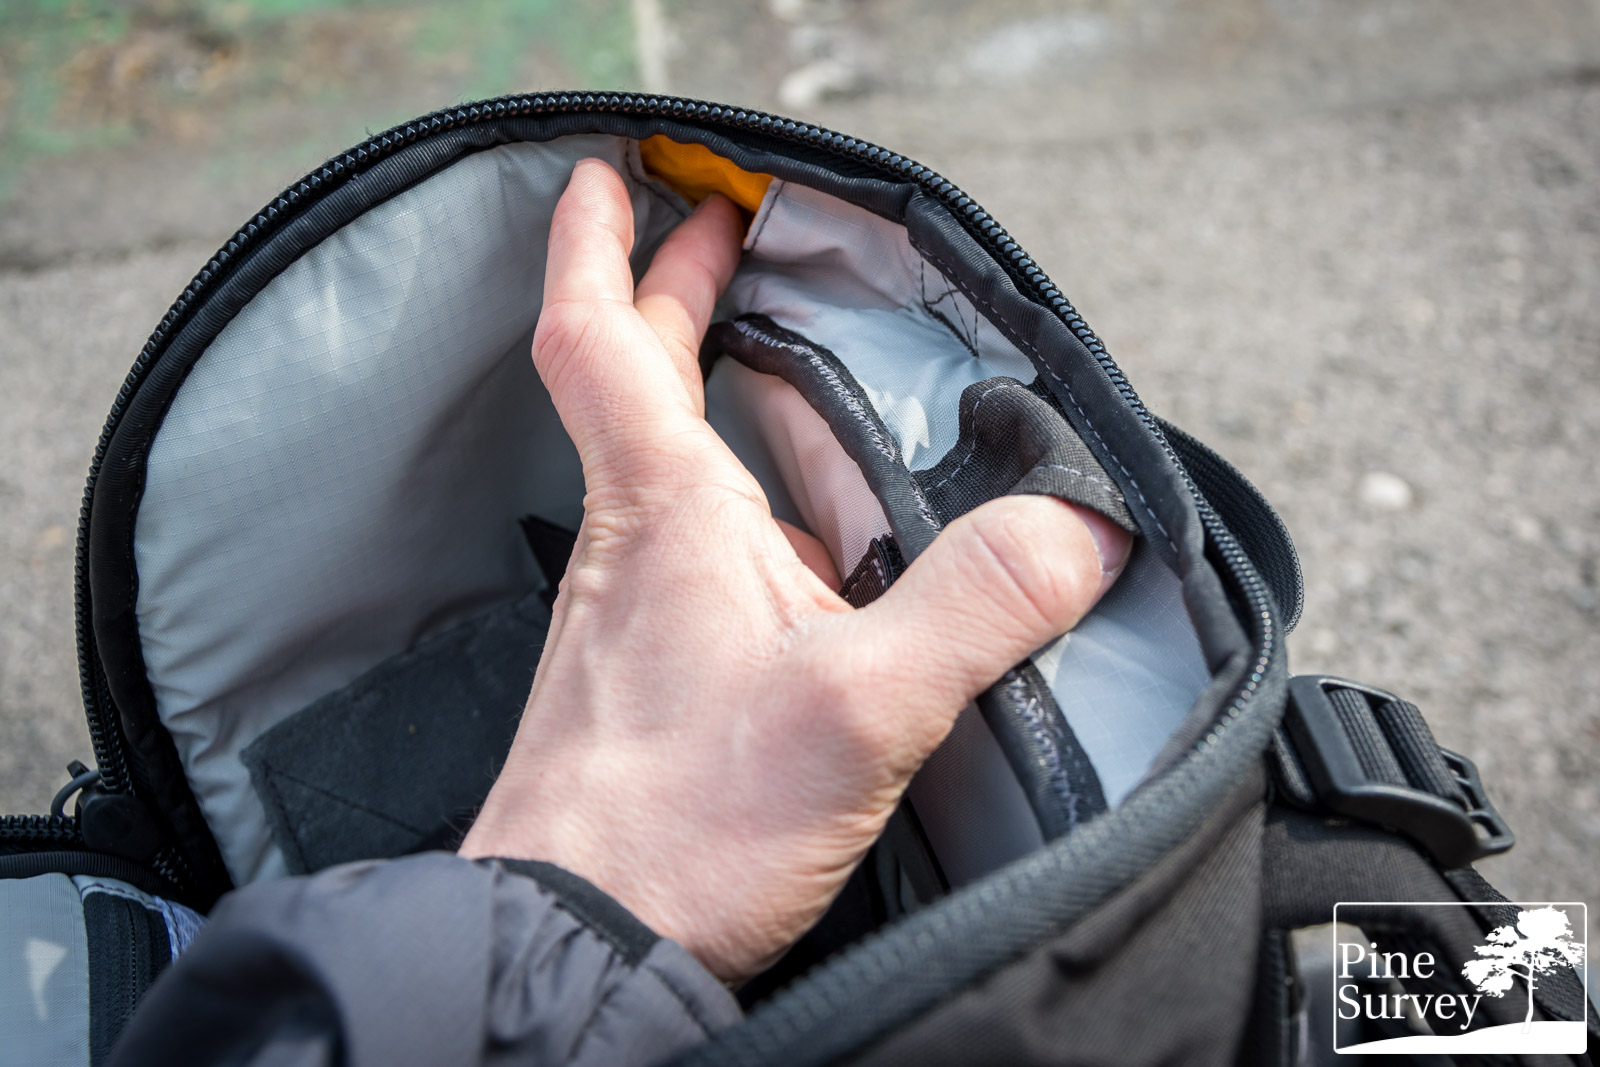
Hidden in the top of the side pocket you will find a velcro strap. As a matter of fact, you can use the side pockets for hydration bladders as well. Which brings us to the already mentioned ports to the main compartment. You can find one port each in the left and ride side pocket, giving you the option to route either the tube of your hydration bladder, or any cables from communication devices into the main compartment and from there to the outside.
Speaking of the outside… there you will find MOLLE panels made of Hypalon. These are laser cut in a particular way (called MOLLE air), making it look less suspicious. So if you do not attach any MOLLE accessories on there, it doesn’t scream military immediately.
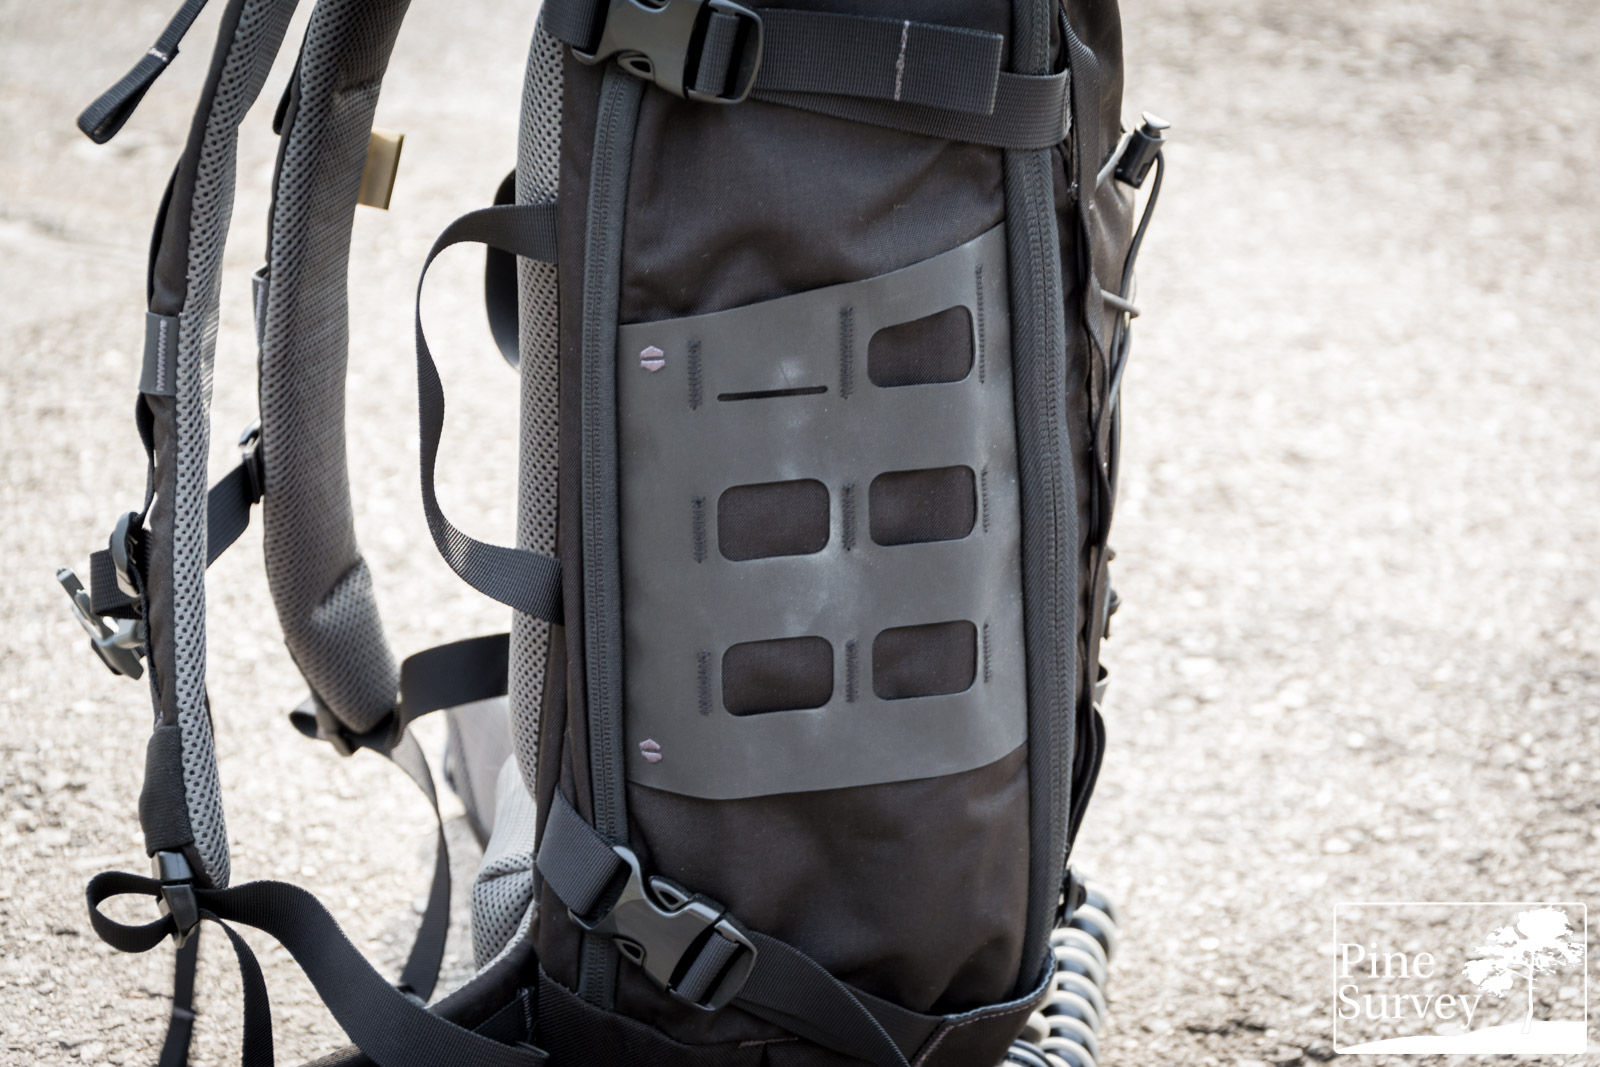
MOLLE air laser cut Hypalon
As you can see on various pictures, I used it to attach Vanquest’s HYDRA water bottle holder, which is a neat and sleek design by itself, being easily compressible and adaptable in size.
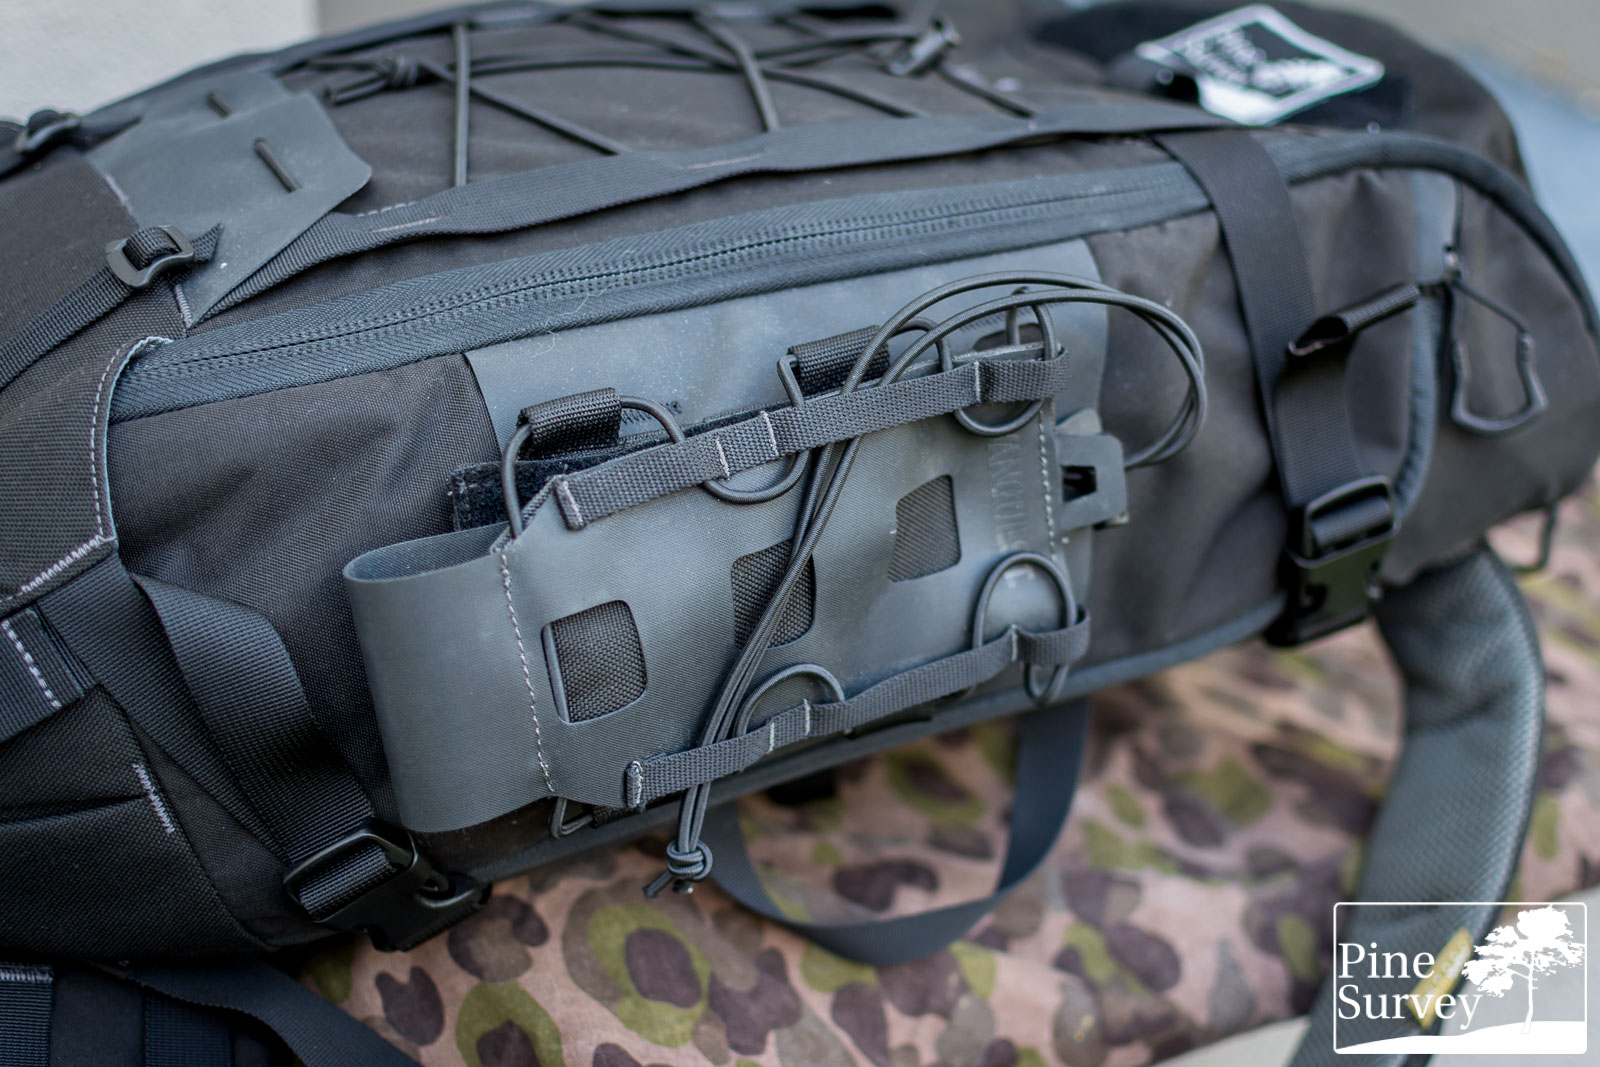
HYDRA water bottle holder on the MOLLE air
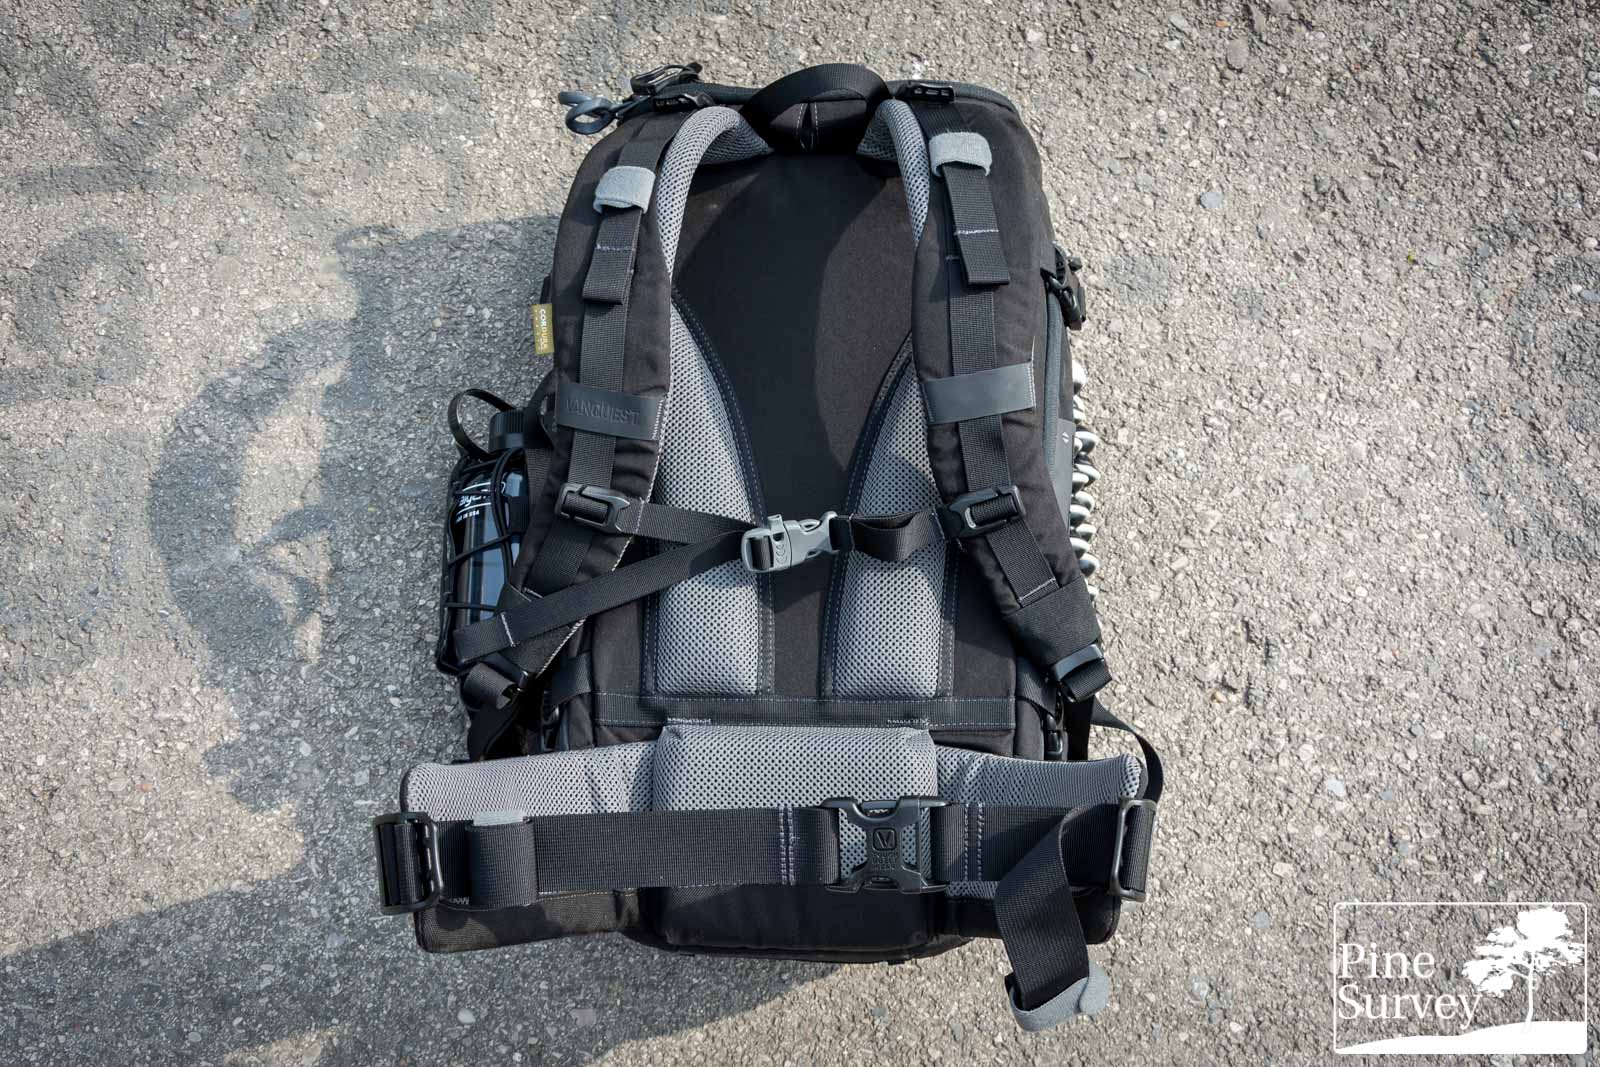
Suspension System
The load distribution system consists of anatomically s-shaped shoulder straps and a dedicated waist belt. Adding to that you will find a padded back, with a frame sheet.
Suspension system
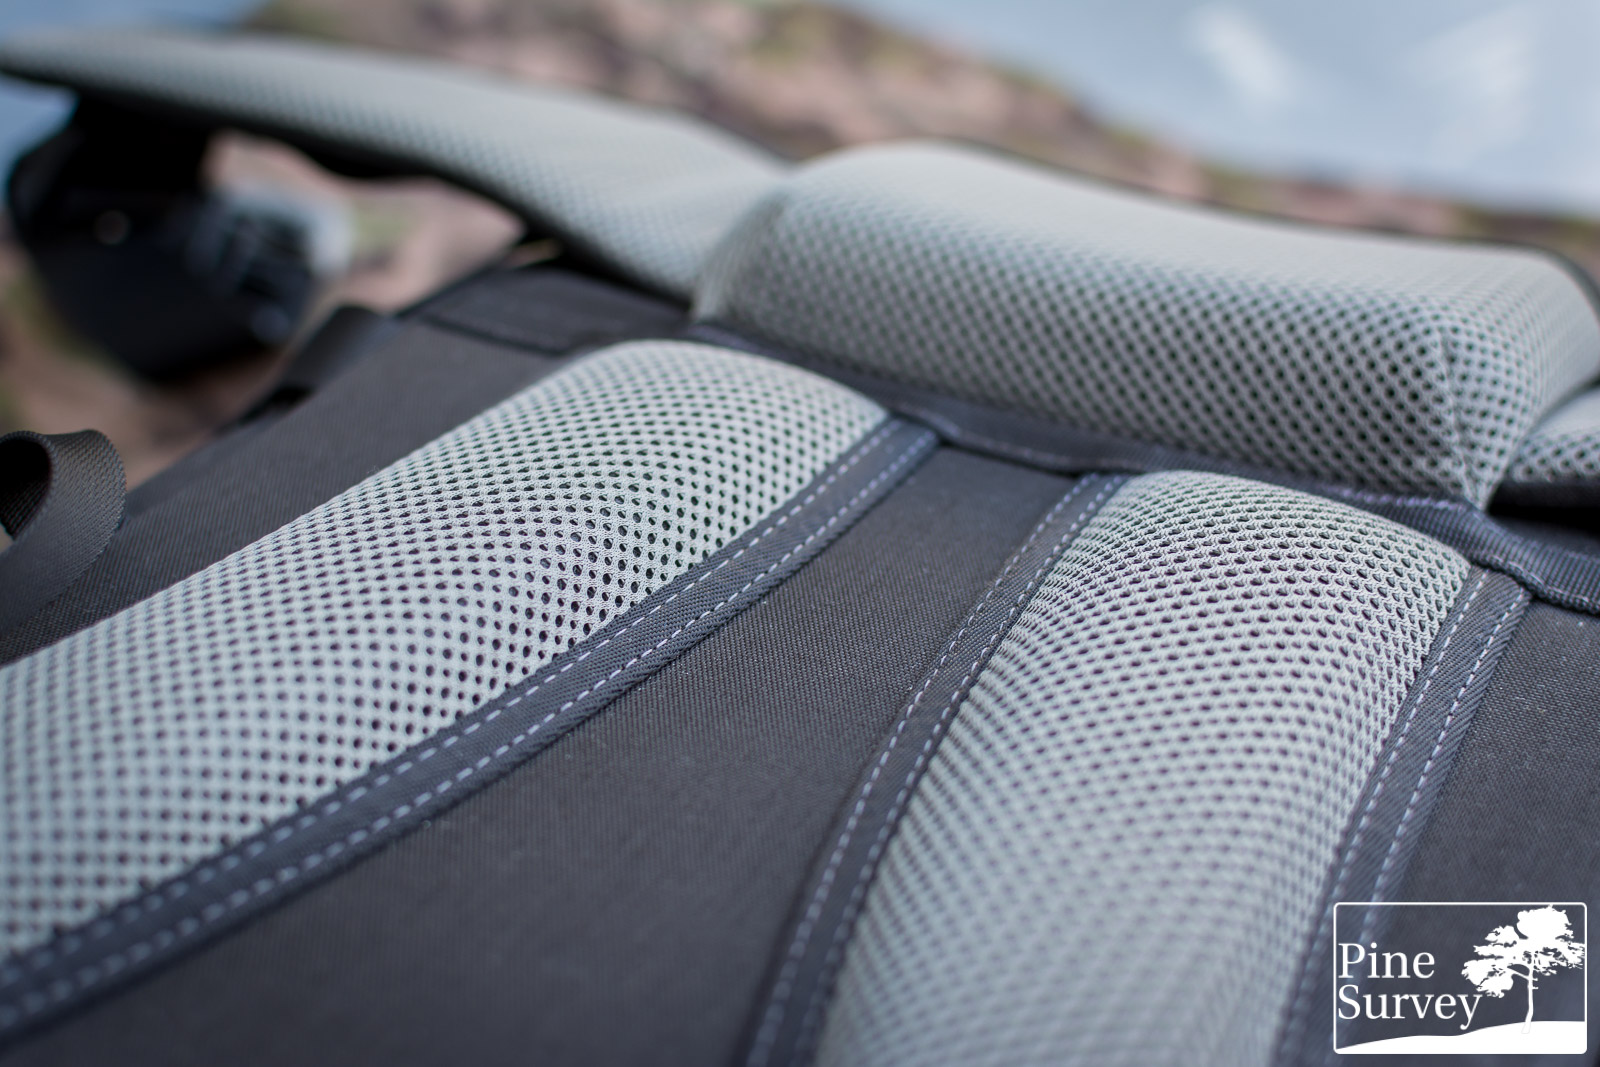
Starting with the shoulder straps, you will notice load adjusters on the top. While the topside of the straps is made of Cordura, the other side is made of mesh and padded with EVA foam. The upper side of the straps feature the mesh even a little on the top. That way the straps basically do not rub your neck, which increases comfort drastically.
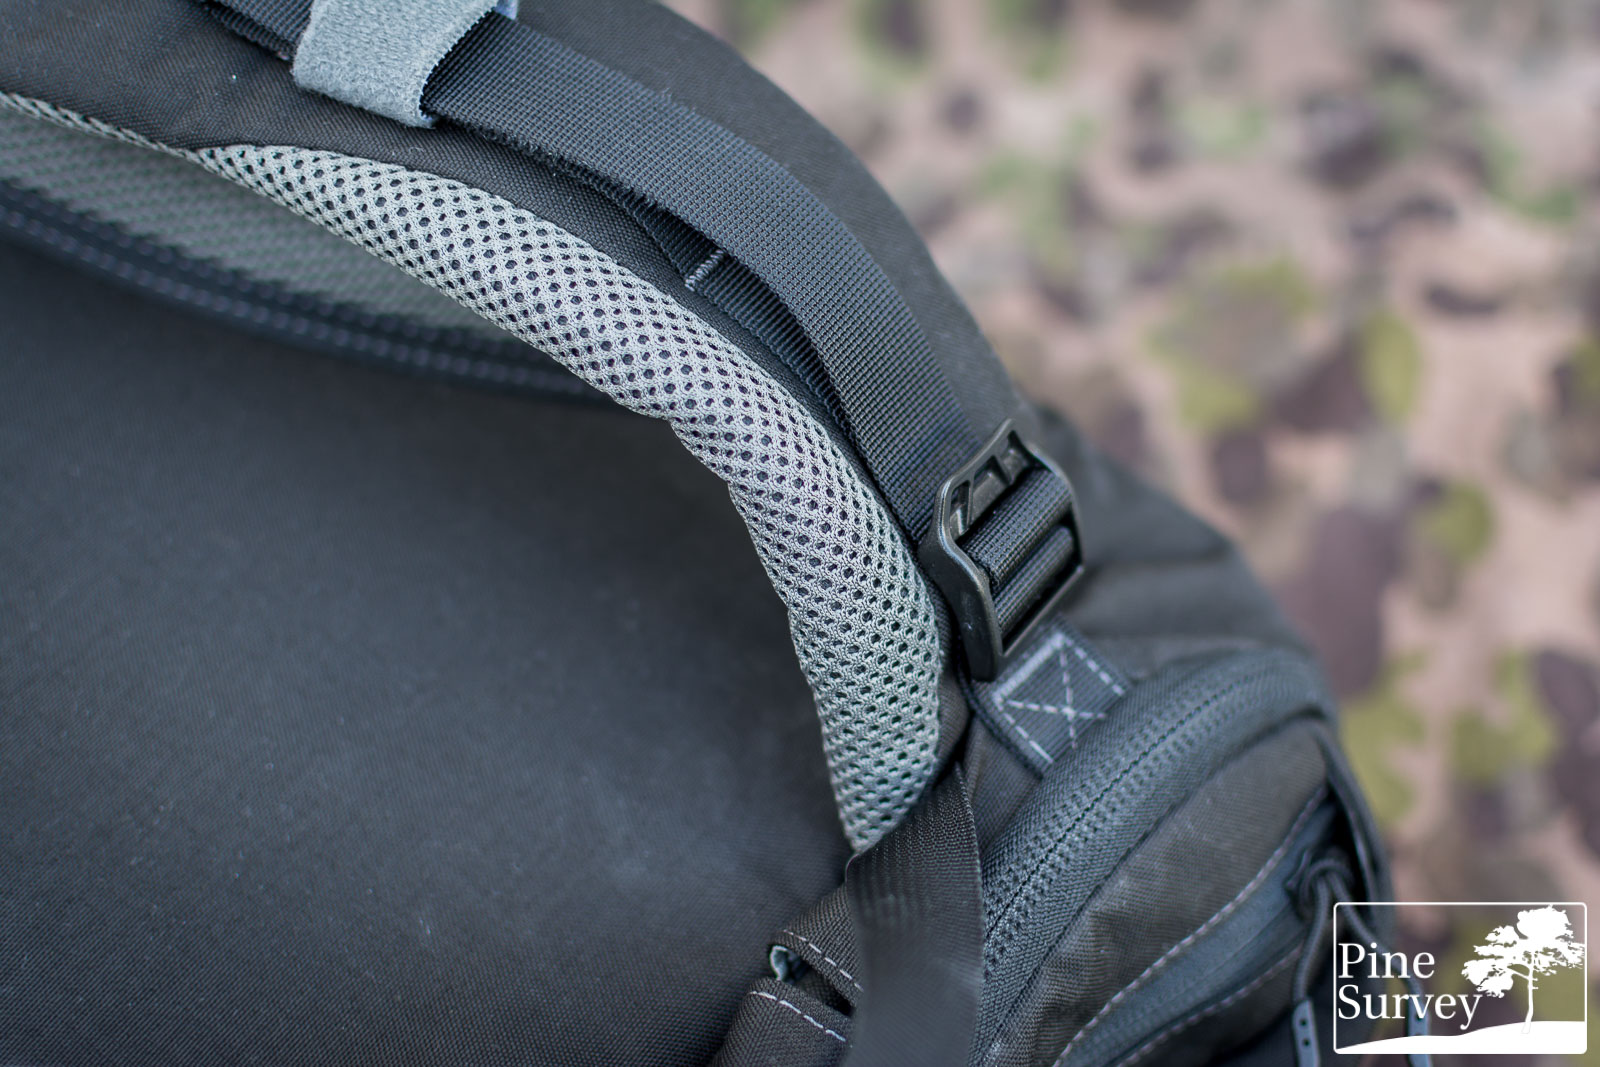
Mesh covers also the sides
At the center you will find a Hypalon loop to route your hydration tube to the front. Right below is a sternum strap with elastic webbing. Vanquest went all the way here, using two elastic straps to guarantee a longer life to the sternum strap. A neat little detail is also the side release buckle with a whistle.
Hypalon loop and attachment of sternum strap

Sternum strap with whistle
The shoulder straps are equipped with side release buckles at the bottom to enable the user to quickly release the pack. These are neatly hidden under elastic webbing to protect the buckles.

Quick release buckles
Coming to the back. The frame sheet is sewn inside the pack and not removable (why would you anyway). Two curved padded elements are placed exactly where your shoulder plates would be, creating a big air channel. So ventilation to the back is ensured, as is carrying comfort. This interacts with a dedicated lumbar pad, made of mesh. Reinforced with Cordura on the bottom, it firmly places the pack on your waist. Directly underneath it is the attachment point for the waist belt. It is removable and fixed with velcro.
The waist belt itself is no BS. I rarely see such proper belts with packs this size. It has its own frame sheet on the inside, is lightly padded with mesh and features MOLLE type webbing to the outside, giving you two rows of webbing with three channels.
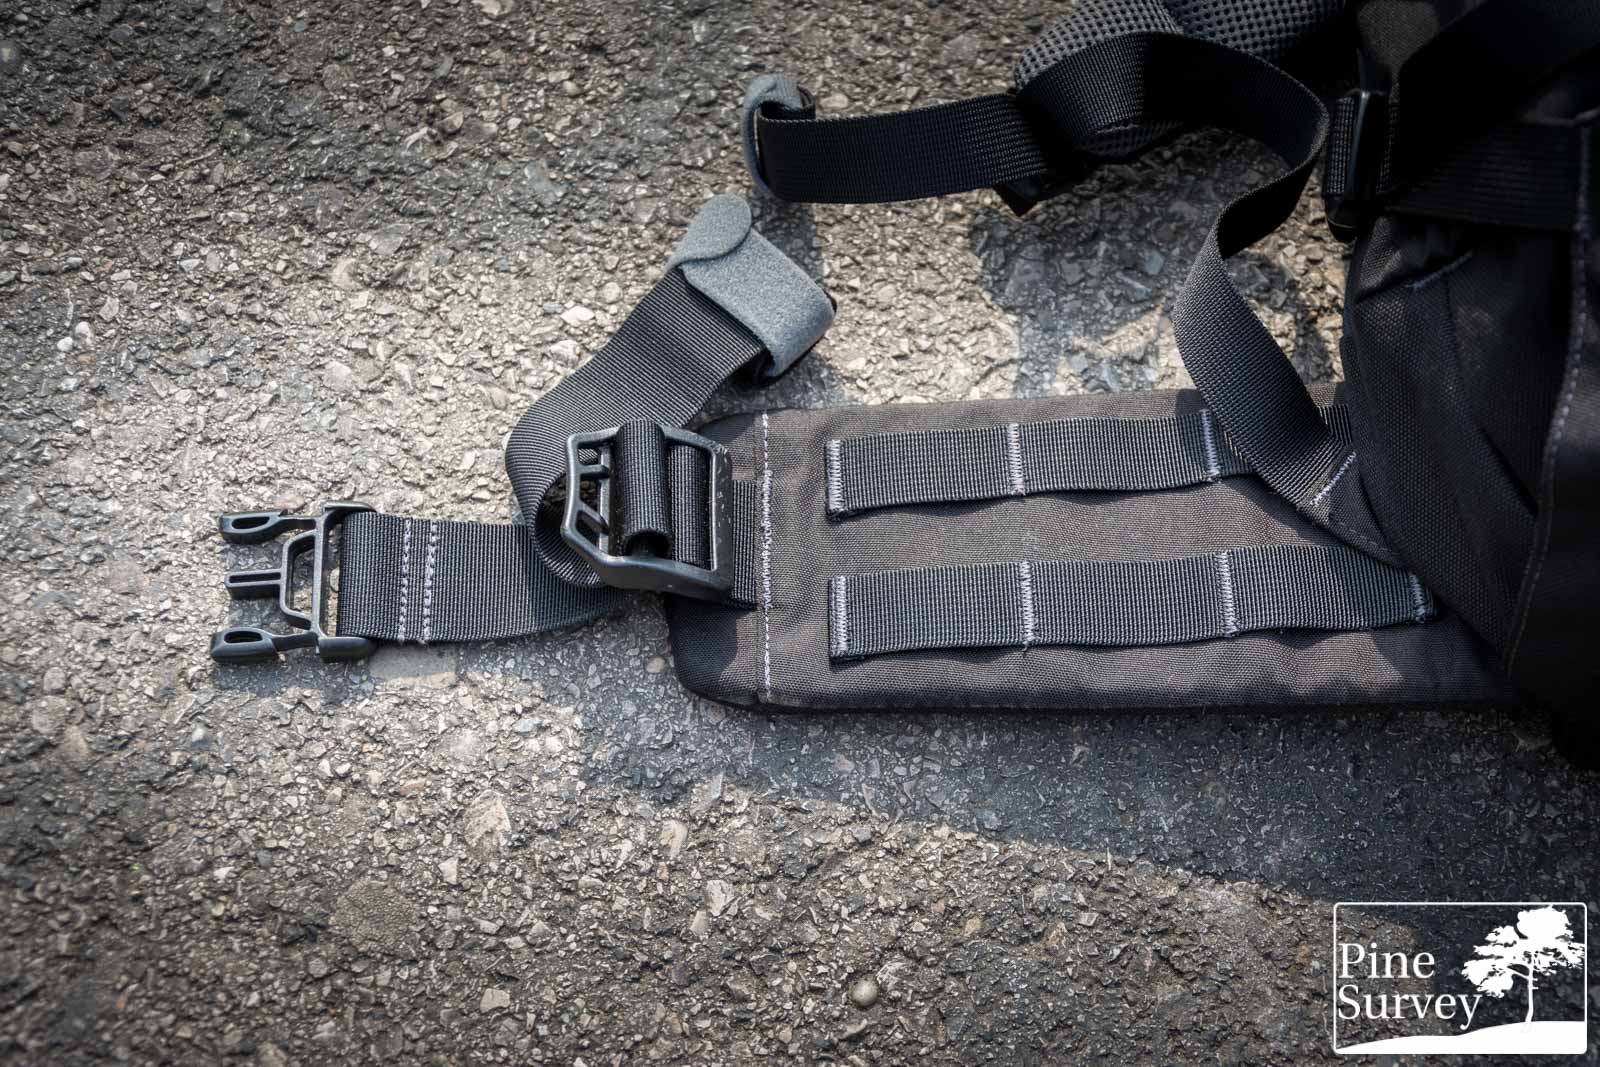
Waist belt, with frame sheet and hoist buckle
The waist belt is connected at the front with a side release buckle and features another buckle through which the excess webbing is laced. But this is not the only use of it. You can use the buckle as a hoist to tighten the waist belt.
hoisting the waist belt
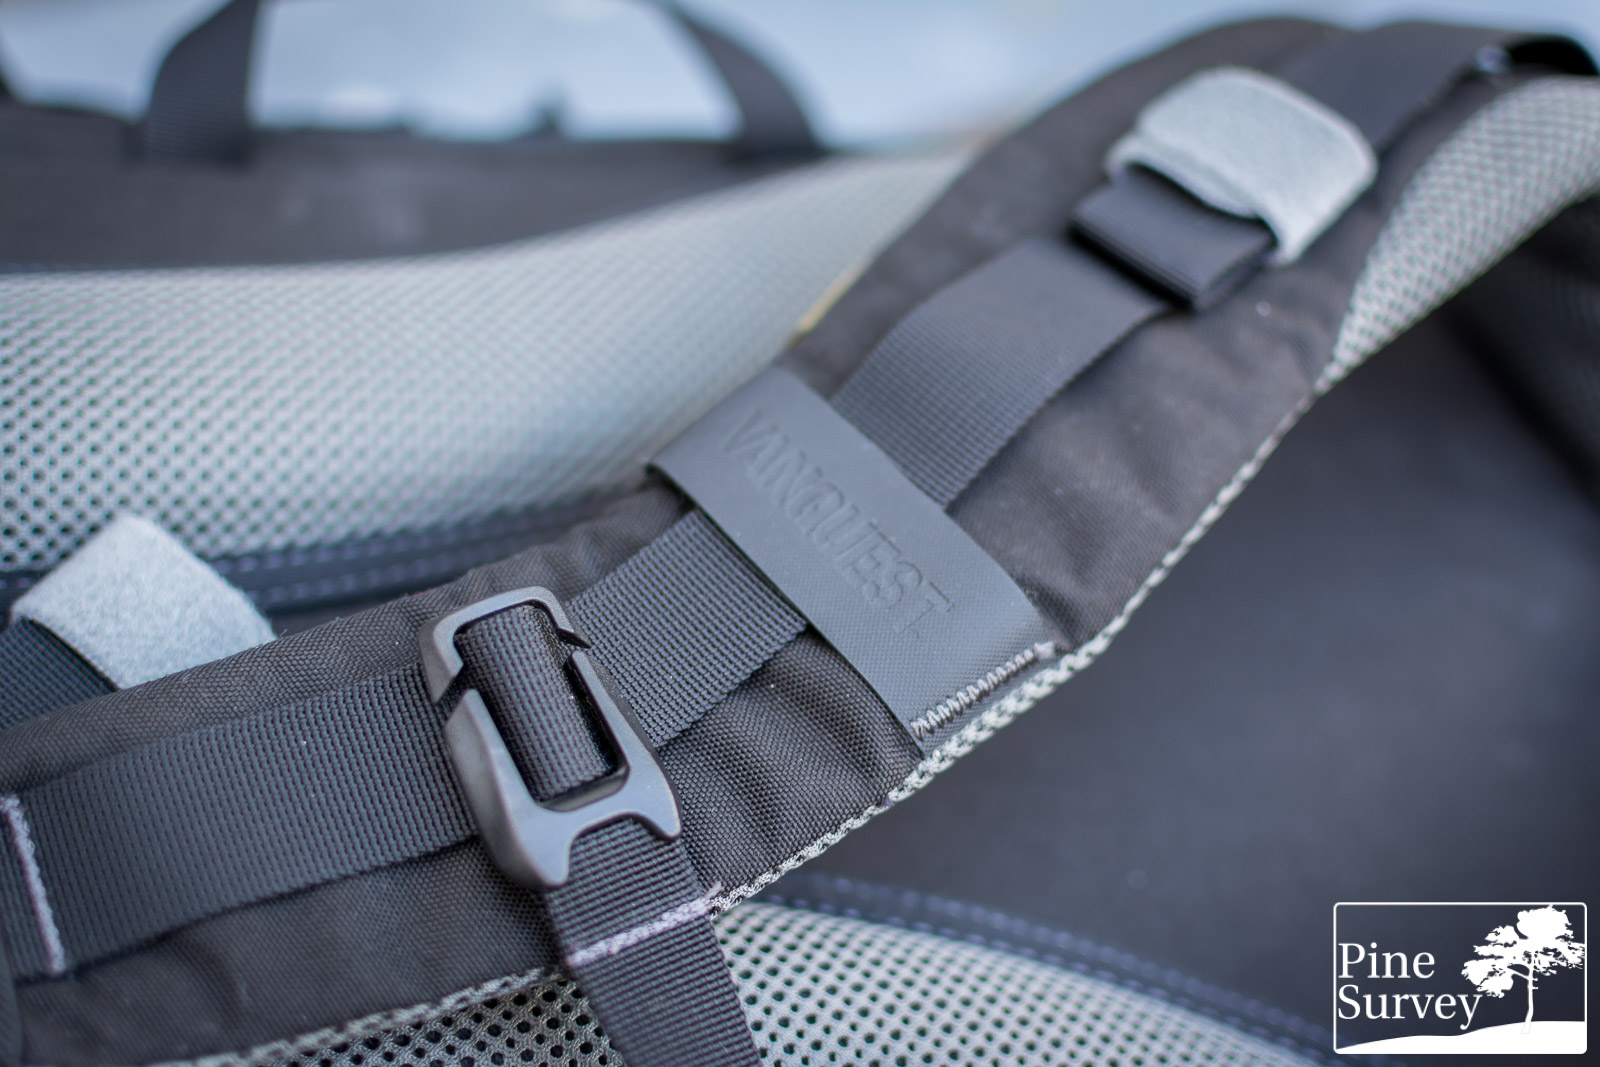
All over the shoulder strap and the waist belt you will also find grey velcro loops to tighten down excess webbing or your gear.
Behold the details
In the introduction I jokingly said that some of the various details might be overlooked by users. Well, as I am writing this words, I have to add myself to that group. During the research for the review I just stumbled over a detail, which I did not realize, even though the pack is in continuous use for months now.
Opening the pack with compression straps still attached
The top compression straps: Well, I knew they are there (obviously), I knew they are designed to limit the clamshell opening at a certain point, so you can use the pack like a top loader, or prevent an overloaded pack from opening too far. I even knew, the spot was chosen in a way that the opening of the mesh pocket in the main compartment would line up with the opening, so you have easy access to it.
What I realized only now is, that you can actually stow the upper compression straps away, if you want to. There is a dedicated channel in the front flap, hidden underneath the Vanquest Logo, where you can easily put the straps in. If you do that, the female part of the buckles will hang loose, but it is not that much of a nuisance. What could be done here is using Split Bar Side Release buckles, then you would only have to deal with a loop here.
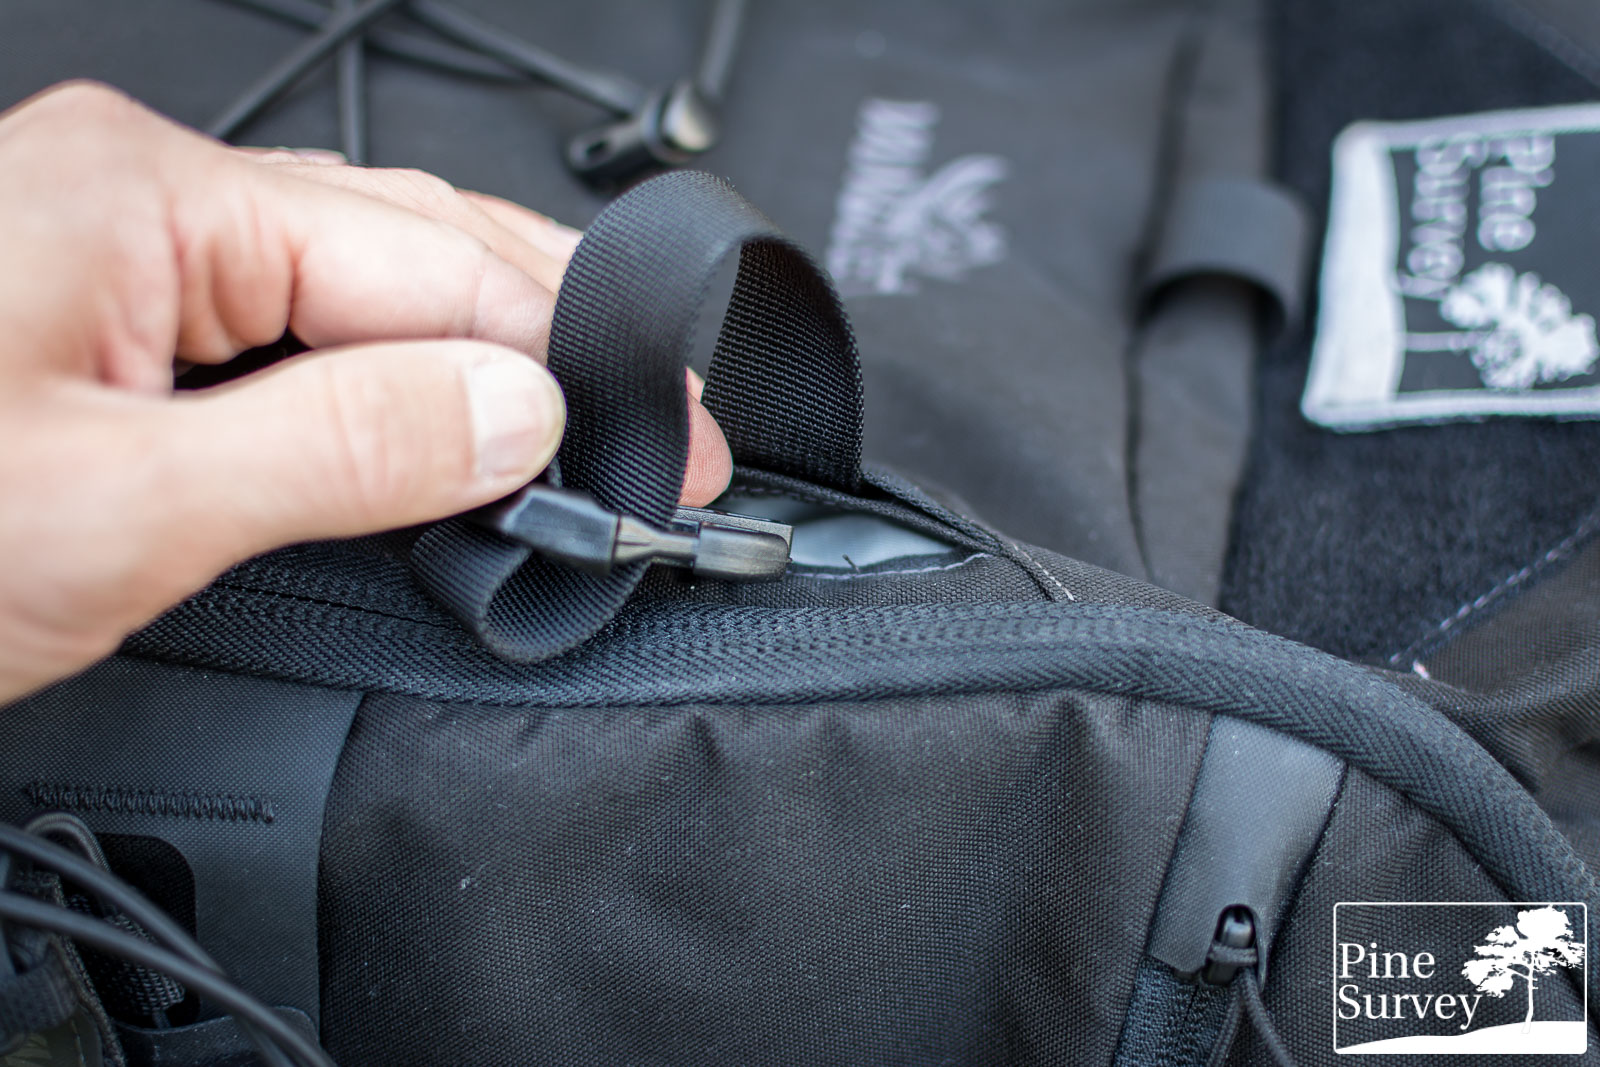
hidden slot for compression straps
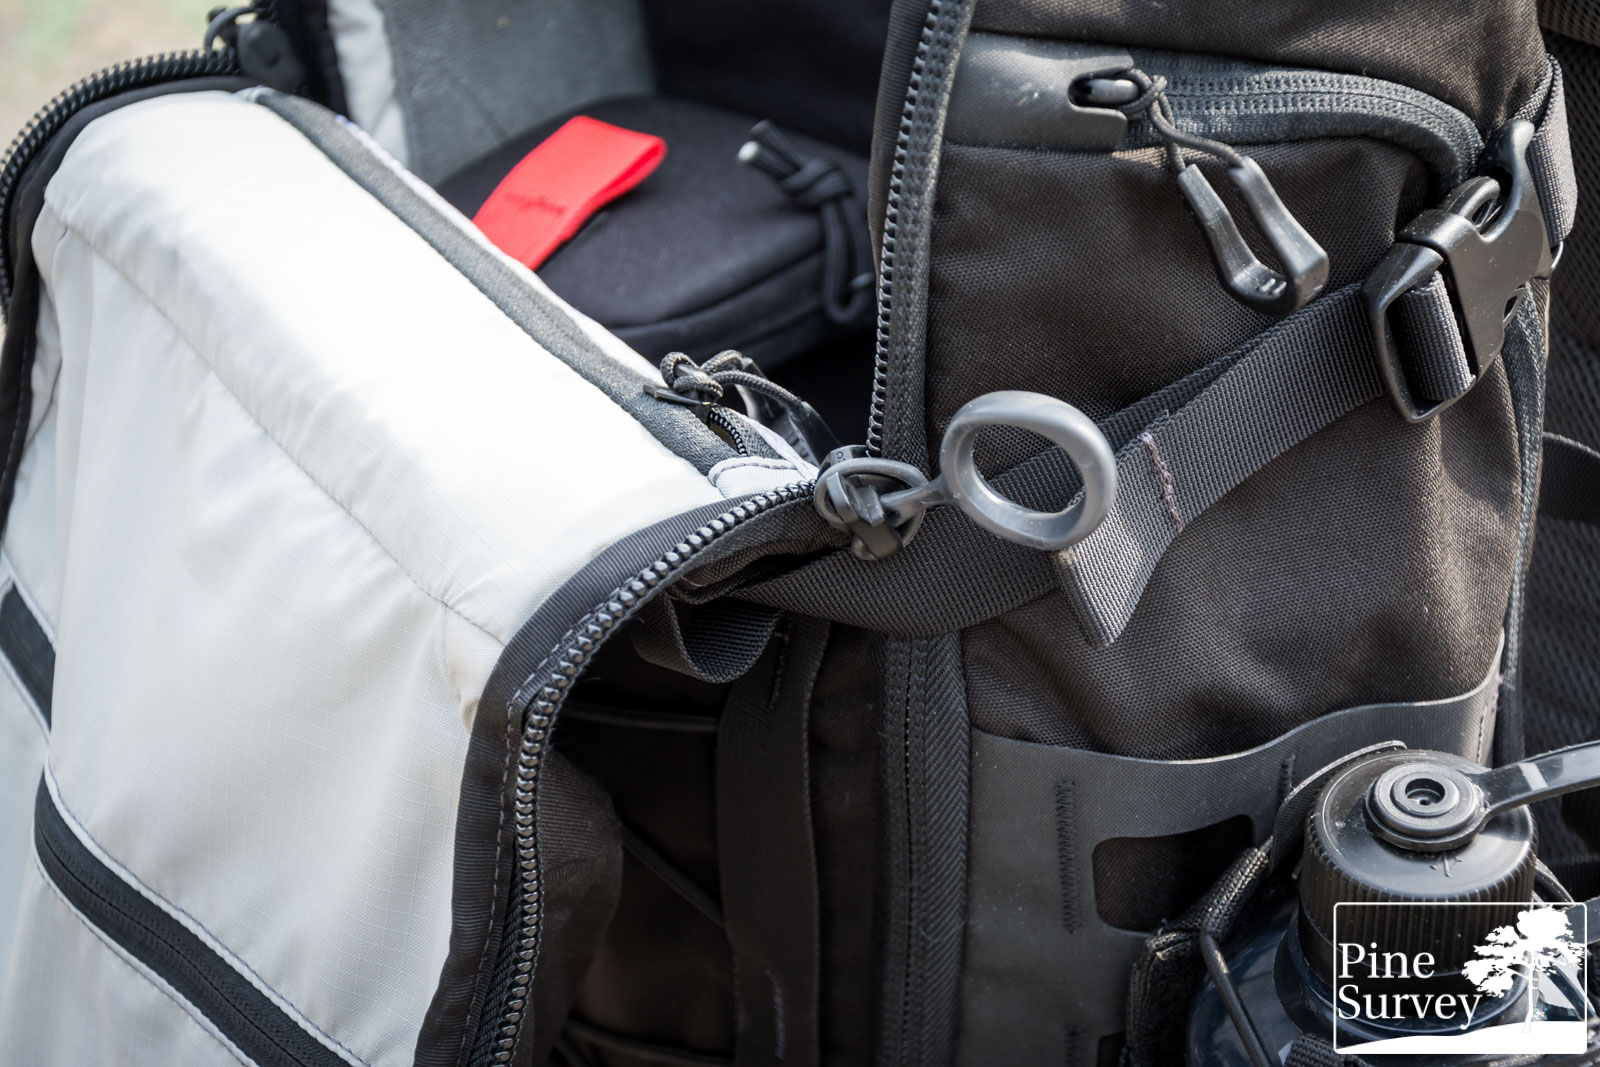
There are two more compression straps to the bottom, ending in a Cordura flap. This lines up nicely when the side pocket is expanded. Also it secures gear from falling through, if you use the side release buckles to tie down something.
ITW Zipline Orbit zipper pulls , YKK glides are lockable, Vanquest Spartan zipper pulls
Moving on… not only one grab handle on the top, but two more on the left and right, making it three in total. Makes it easier to carry the pack like a duffle. Since the Shoulder straps have quick release buckles you can lace them through the side grab handles and tie them down. That way the pack is even more comfortable to carry.
The YKK zipper of the main compartment features holes to put a lock on it. So if necessary, you can secure your pack. The use of Zipline Orbit zipper pulls by ITW Nexus are a nice choice to have a firm grip on the zipper.
But the details not only lie in some hidden features, but also some design choices. To mention only two:
The two straps forming the material loops to the front of the back – the ones used to lace the shock cord through – are not only stitched down with reinforced bartack stitching, it is also done vertically to give the shock cord a better contact area and less stress.
Furthermore, if you look closely at the zipper from the side compartments, you will see that the zipper glides end in Hypalon sleeves with a nice cut-out for the glides attachment point.
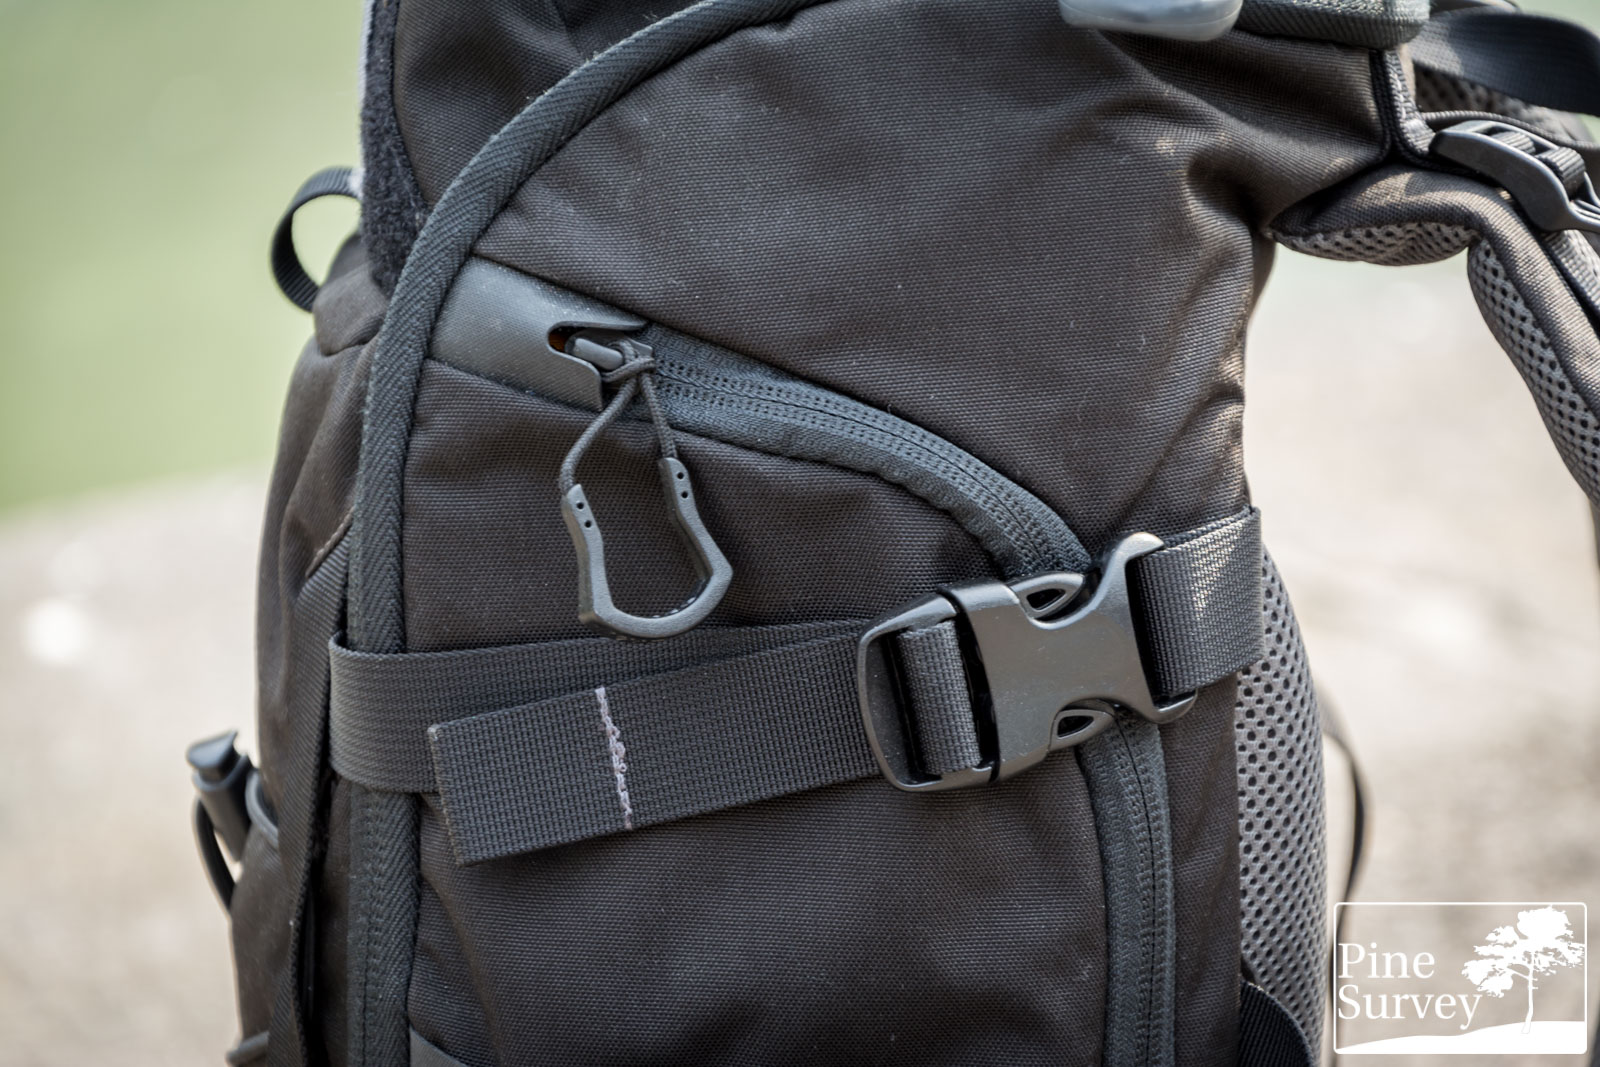
Attention to detail like nice cut-outs for the zipper glides
With that being said, I think I made it quite clear that the thought put into the Vanquest designs is above and beyond, giving the phrase “attention to detail” a new meaning.
Manufacture
By now I am used to high quality gear. Most items from different companies, that wander through my hands, are at least medium and decent quality. Stuff that will always work, even if you might find a few beauty tarnishes.
When it comes to Vanquest Gear, I am still amazed by the level of quality control. Having in mind some of the details, I tip my hat to the people building these packs. The overall look and feel is clean and sturdy. No loose threads, only straight seams and the materials used are top notch.
quality of workmanship
High stress areas are built with 1000D Cordura and feature reinforced stitching. The rest of the pack is done with 500D Cordura – to provide a decrease in weight.
By now I have seen packs from all kinds of companies, including the major players in the industry. When it comes to quality, Vanquest plays in the highest league – period.
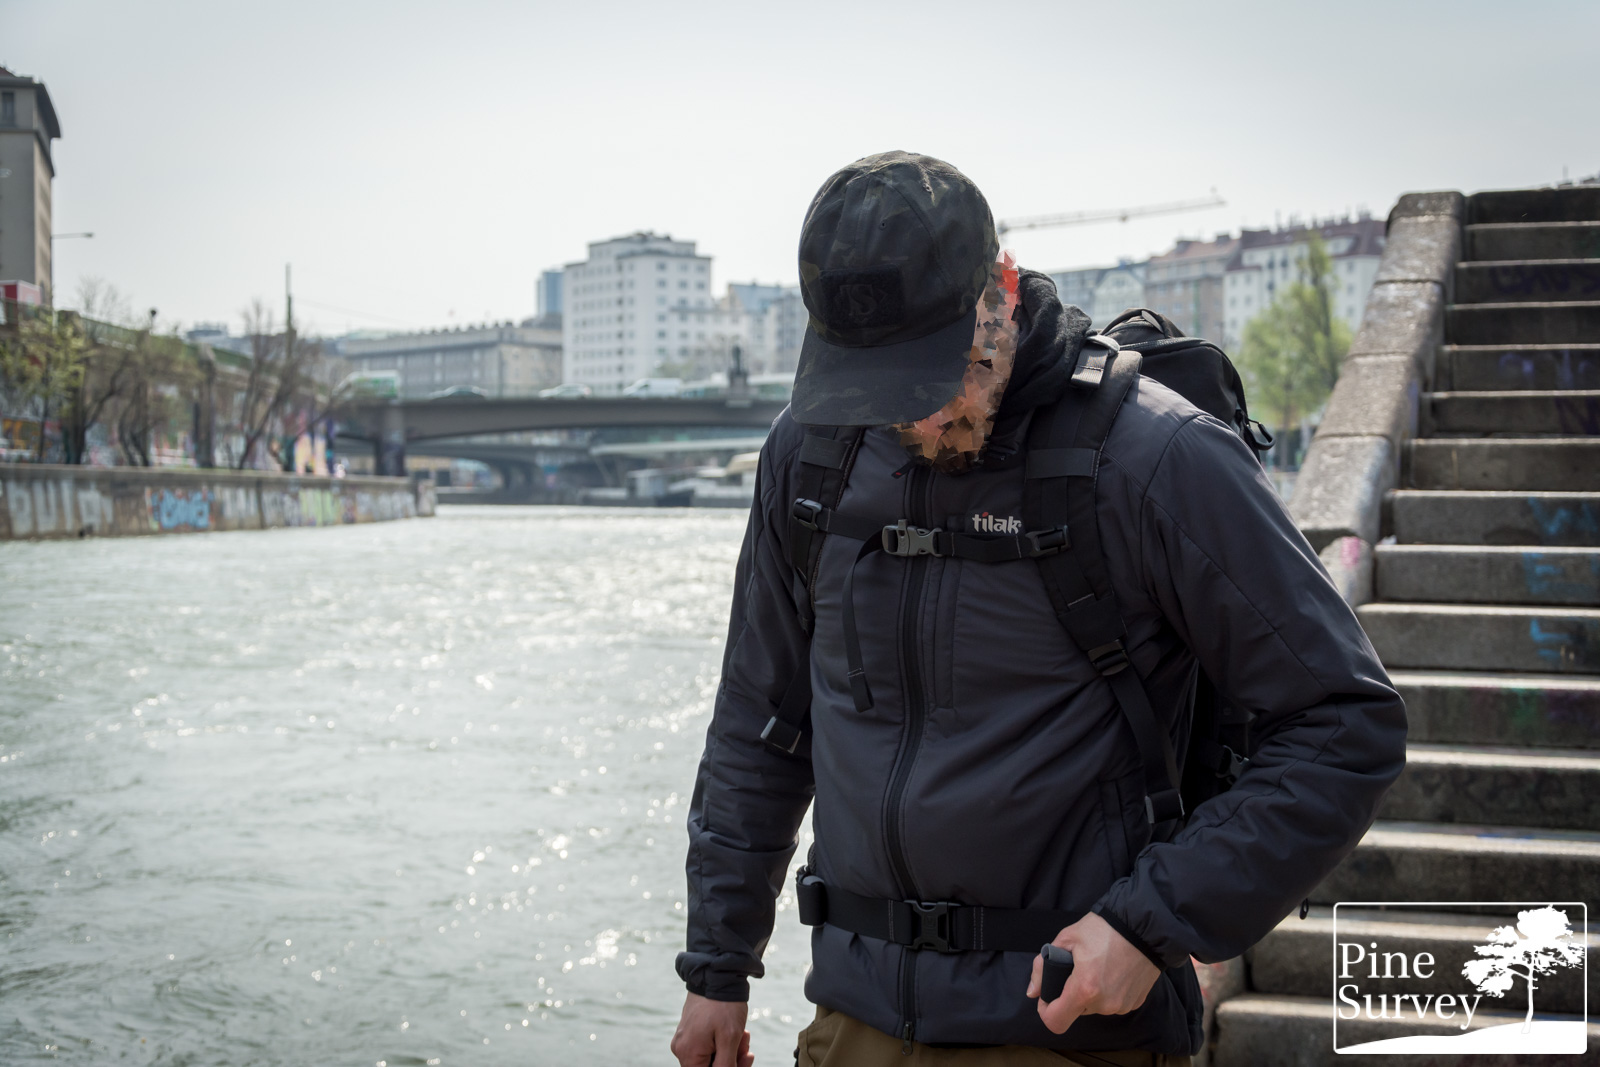
In use – impressions
So far I have used the IBEX 26 on every day errands in the city, travels, photoshoots and trivial things like storing equipment.
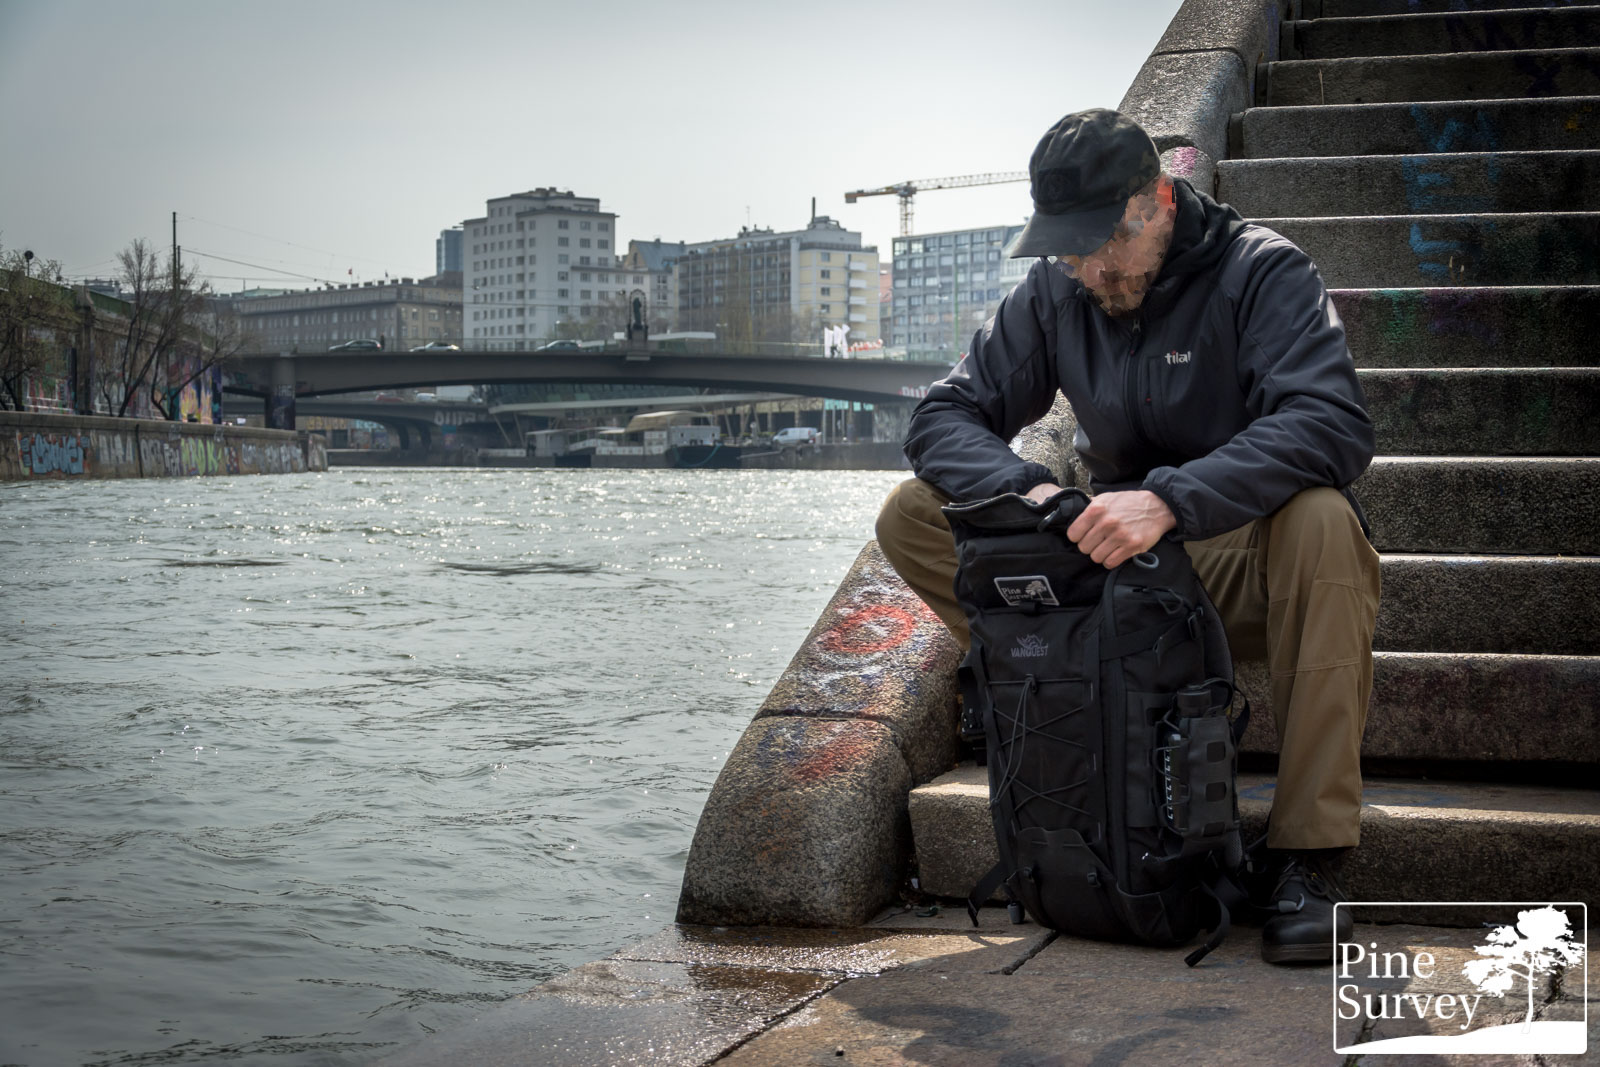
Vanquest IBEX 26 in use
When it comes to size I have to admit that Vanquest found the sweet spot. The pack offers enough space for me to carry my EDC and other every day essentials. At the same time there is enough room left if I pick up stuff during the day.
The suspension system is extremely comfortable and most of the time I do not use the waist belt, since it is not necessary with a pack that size – at least most of the time. But you do not need to remove it since you can easily pull and lock it to the back.
The padding at the back provides good airflow and a comfortable carrying experience. It was quite stiff at the beginning but broke in soon enough. With regard to comfort the two vertical padding elements could be 1-2cm wider to give more contact area to the back, thus distributing the pressure more evenly. But to be honest, this is nagging at the highest level.
The slim profile makes the pack ride close to the body. I find this useful especially in narrow places – be it train aisles and other confined spaces. It makes it also easier to store the pack.
With 26l volume, the clamshell design is the most useful. Carrying camera equipment with you, it only takes a quick opening procedure and I have access to everything I need with a full overview of my kit.
Safe to say, the pack has become one of my most used EDC packs, which says a lot, considering I am drowning by now in packs.
Conclusion
Some friends of mine tend to make fun of me for my constant hunt for the perfect backpack. And I have to admit that over the last 10y a myriad of packs have come and gone, especially since I have started Pine Survey.
The Vanquest Ibex 26 is one of the few that is going to stay. The careful balance of volume, features and versatility have made this one of my favourites. Quality of workmanship is one of the best out there and the moment you get one in your hands, you immediately know it is worth the money.
As always I am amazed by the thought process that went in to the design of the pack. There are so many details put into this that I am honestly wondering if the average user can actually appreciate them.
Just the other day I was told these will be available in Multicam Black as well, so I actually have to restrain myself and not get a second one.
With that being said, I want to thank you for bearing with me. This was a long review. Many thanks to the crew of Vanquest, who made this review possible!
Take care!
No Comment
You can post first response comment.