
Introduction
In comparison with other blogs I am quite late to the whole PHANTOMLEAF topic, even though I regularly mentioned it after my regular IWA visits in Nuremberg. My late entry to the topic is even stranger since the developer of PHANTOMLEAF (Florian Lenz) was introduced to me by Dom Hyde of PenCott several years ago.
While the camo market went nuts over various hyped camouflage patterns in the last years (which came and went), Florian Lenz steadily grew his portfolio and network. This resulted in a very fruitful cooperation with Recon Company and the release of several camouflage patterns. While not all of them are for public use (several are for Law Enforcement and Military exclusively), one camouflage family was released specifically for the civilian market: WASP II.

Phantom Leaf WASP II Z3A
As a result, I contacted Florian and we quickly reconnected over our shared camouflage madness. Long story short, I am now able to give you a more detailed view on the one WASP II pattern you probably know from other internet sites already: Z3A, or the green one. And since there is more in the pipeline at PHANTOMLEAF, you can soon expect a follow up with the brown variant called Z2.
But first things first… a look behind the scenes.
PHANTOMLEAF
The person behind PHANTOMLEAF is Dr. Florian Lenz, who is doing his own research on camouflage for almost 30 years. Being a practising medical doctor and specialist for psychiatry and psychotherapy, you can expect a completely different approach to the topic of camouflage and concealment – more on that later.
In 2008 he founded PHANTOMLEAF as a company and started working closely with government agencies and various customers ,looking for specific camouflage solutions. In doing so, PHANTOMLEAF as a company always aimed to provide a full system to the respective inquiry to guarantee a fully working camouflage solution.
Recently he started a strategic partnership with Recon Company to address the growing demand for his camouflage patterns and also offer a bigger variety of products. The main focus, or better said, the main target group are still governmental agencies, law enforcement etc. who have access to a bigger variety of specialised camouflage patterns. At the same time the civilian market is offered its very own camouflage pattern, WASP II which will be available in various specialised versions.
Intro to WASP II and the green pattern “Z3A”
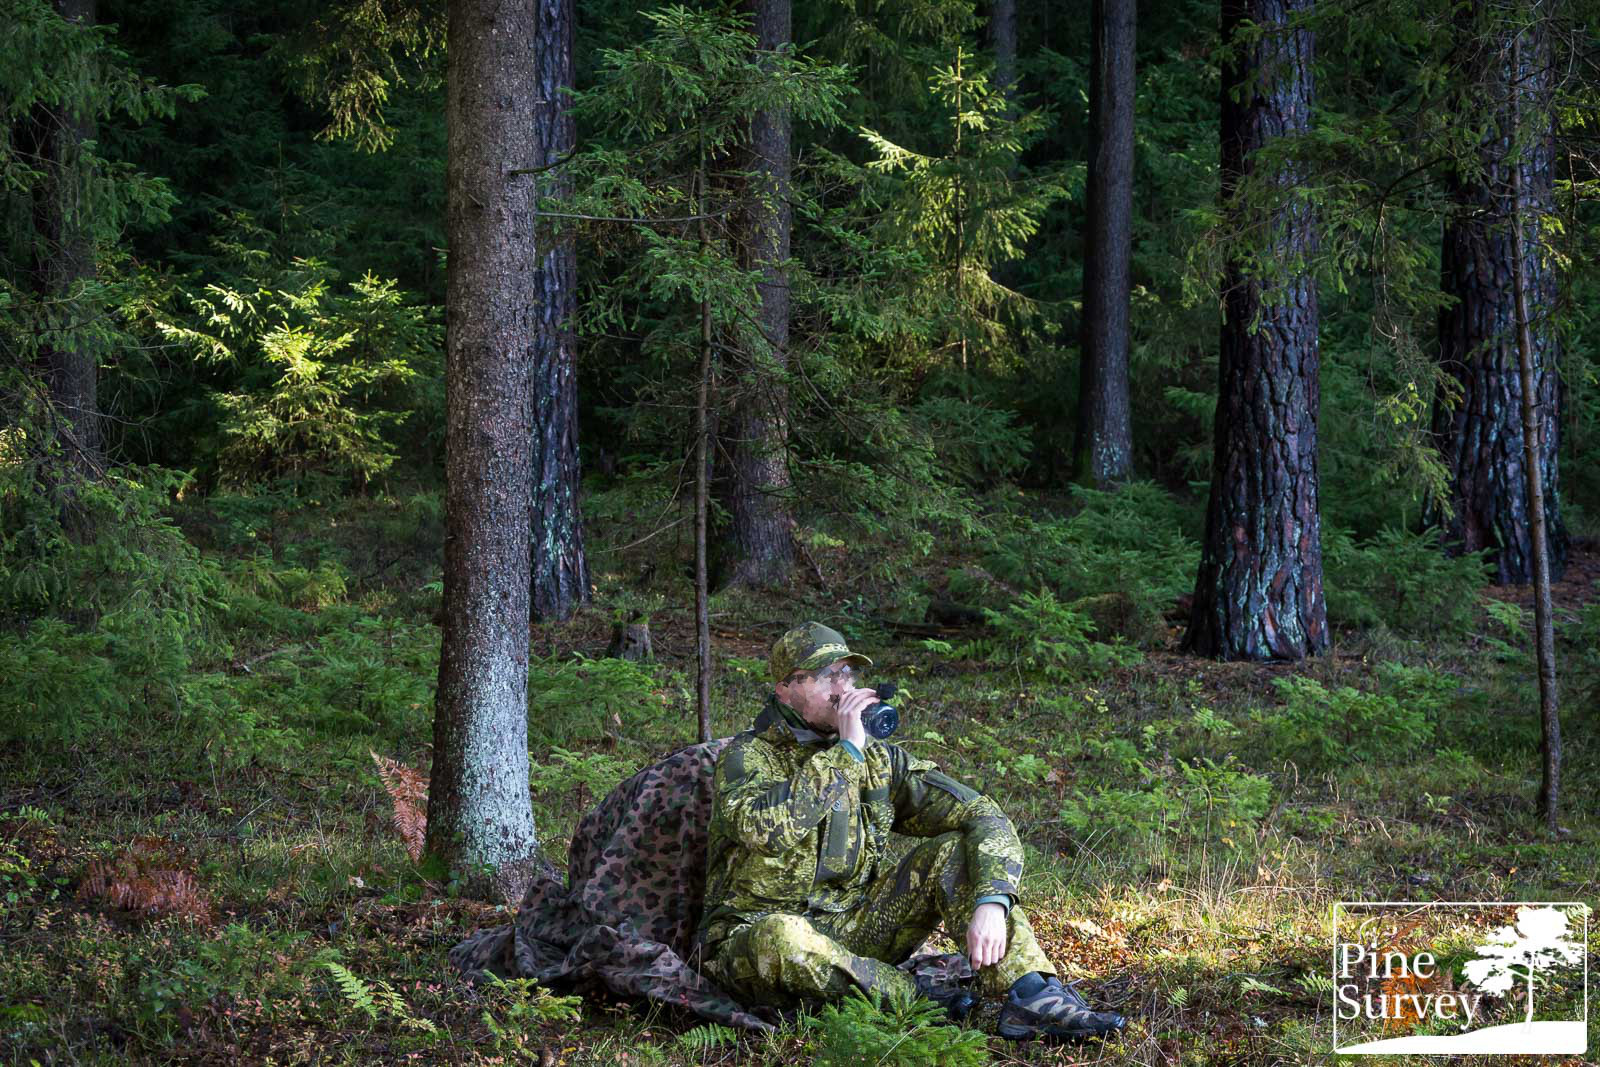
The Z3A Variant is the green variant of the WASP II family. Specifically designed for areas “with higher vegetation from deciduous and coniferous forest to tropical jungles” it encompasses a huge spectrum of green environments.
PHANTOMLEAF WASP II Z3A
The designation Z3A is testament to the scientific approach of the designer, giving each operational environment a distinctive code. The higher the designated number in the code, the higher the objects and vegetation in the various environments become. The added letter is another variant within the same level. Accordingly, you can summarize it as follows:
The designation system
- Z1 for various deserts and badlands with open fields, like deserts. “A” for hot deserts, “B” for rock deserts and above the tree line as well as “C” for snow deserts.
- Z2 for low vegetation like the bush, a traditional transitional pattern (wonderful tongue breaker, i know) and also proven to be effective in autumn environments and the transition to Z3A.
- Z3 for for high vegetation and objects. “A” for green or temperate environments and ”B” for snow in that level.
- Z4 is everything Urban and/or human made structures.
If you look at it that way, it is not as confusing, as it appears in the beginning and makes perfectly sense.
The WASP II family of patterns
The Wasp II family uses 7 different colours in its pattern. It is also one of the few camouflage patterns that incorporates micro, midi, and macro elements. As a result it works in close proximity just as much as at longer distances.
People with an interest in camouflage will know that you can achieve concealment in two ways: Mimikry (to make something appear as something else) or by Crypsis (to conceal oneself by blending in the environment).
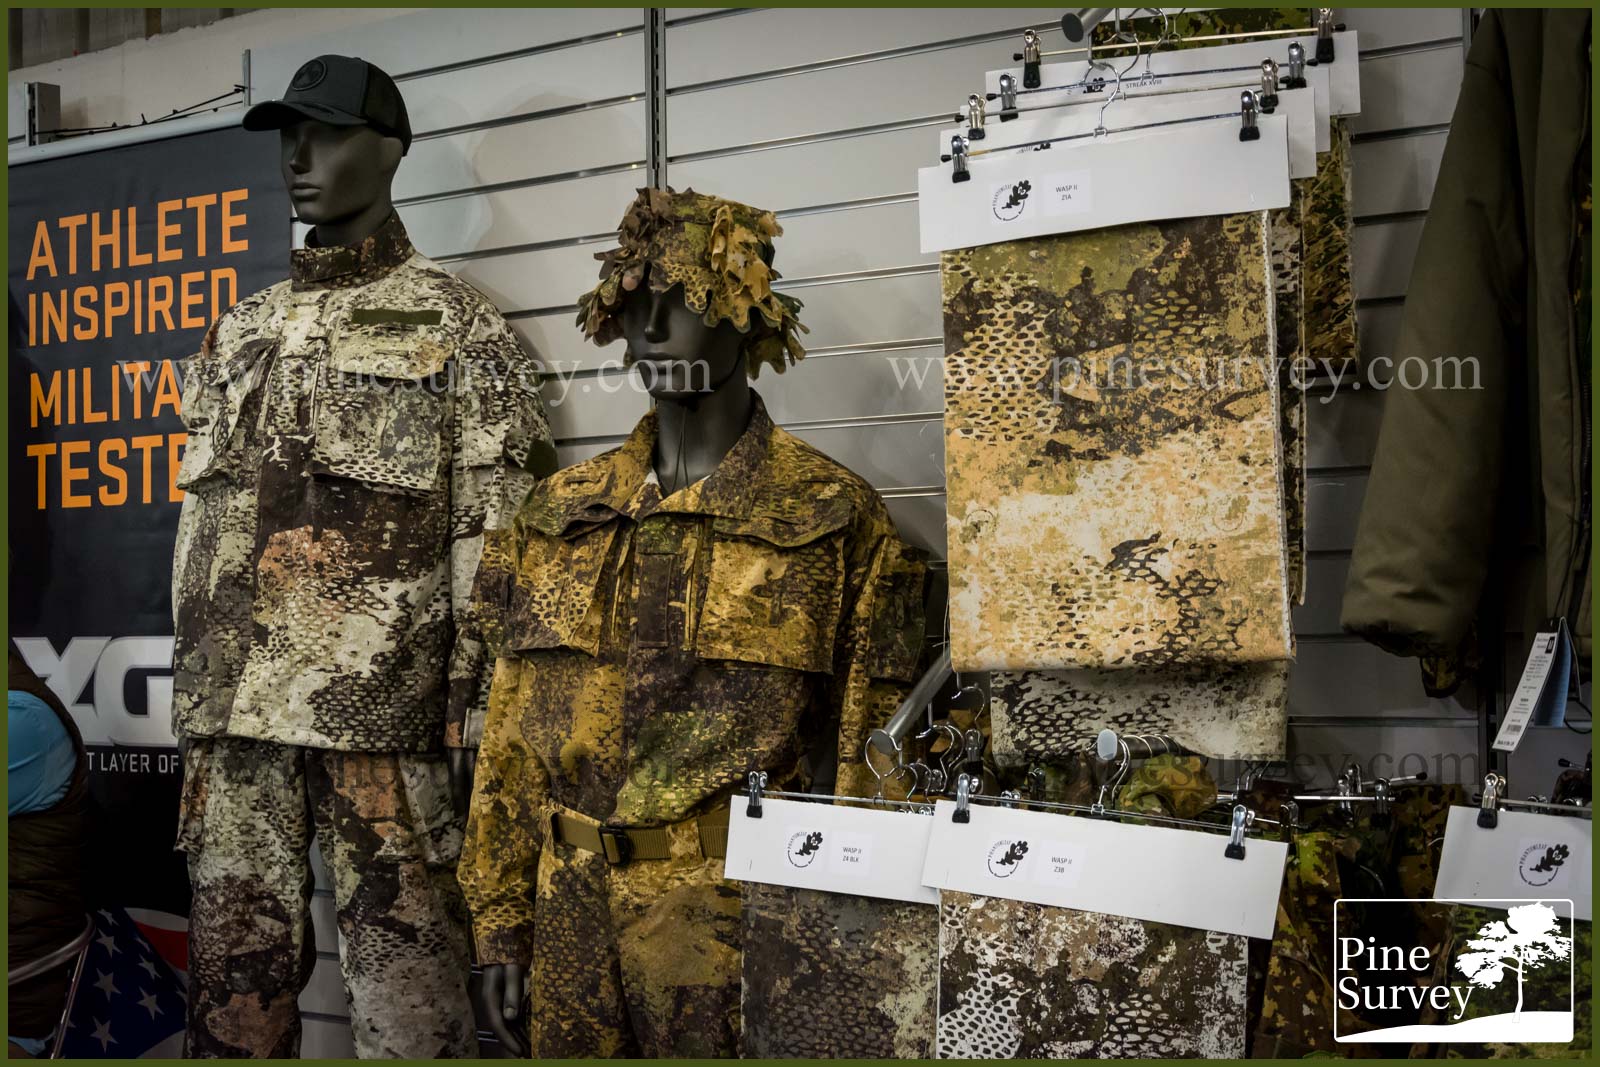
The various PHANTOMLEAF WASP II patterns on display during IWA 2019
Most camouflage patterns use one or the other, PHANTOMLEAF uses both. The various WASP II patterns not only blend into the various colours of the designated environments, the patterns also work with a distinct algorithm to create a pattern that hinders the human perception in detecting the actual user of the pattern.
In that sense the medical background of Florian Lenz was benefitting the development of the pattern, since he was able to incorporate psychiatric and neuro-psychologic expertise into the design. Simply put: we as human beings have learned to identify objects, shapes and our environment over the millennia of our existence. This is literally rooted in our system. Since science knows how our brain processes visual input, it is also possible to distort this perception by science.
WASP II Z3A in detail
But before I open up chapters of science which are too much for my brain, I want to go a bit more into detail with the WASP II Z3A pattern itself.
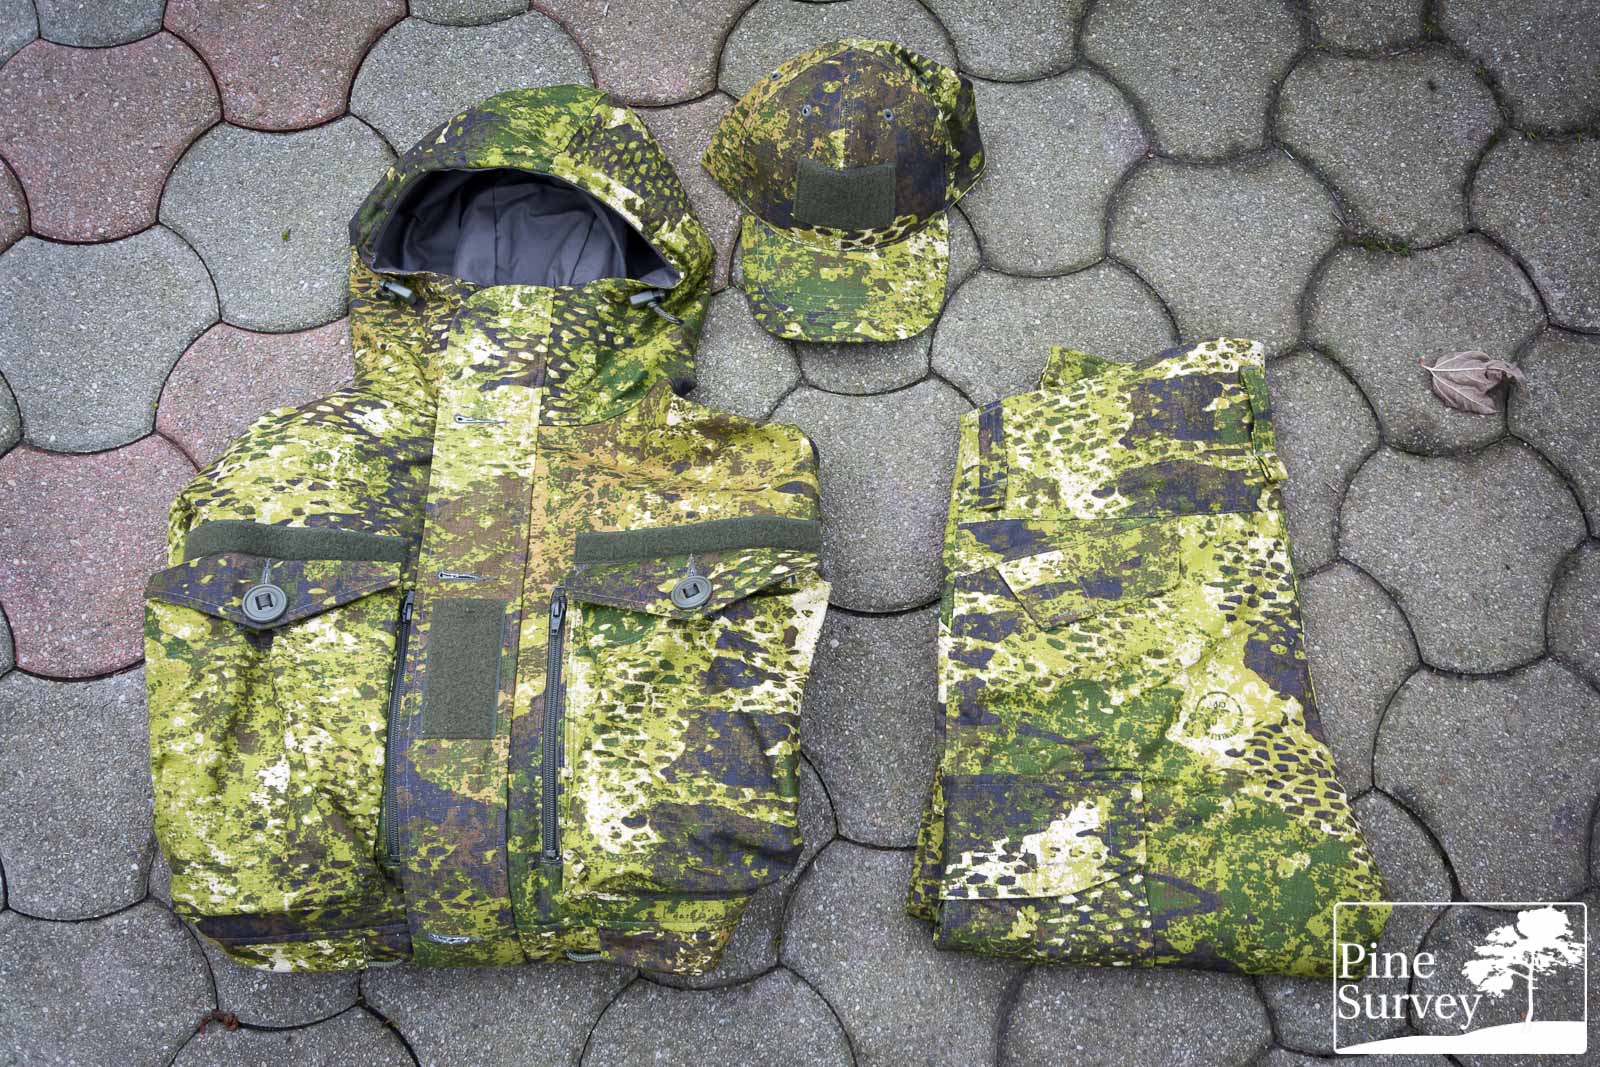
As far as I am informed the pattern consists of 7 colours. You have a variety of dotted micro elements in the colours of ivory, coyote, dark green and dark brown. Several midi elements that actually transition to macro elements, making it hard to describe. In any case I would describe the “perceived” background as a mixture of ivory and lime green, disrupted by makro elements which are basically black with dark brown. The decision to use such dark colours was to maintain a visible contrast even after long use and countless washing cycles.

PHANTOMLEAF WASP II Z3A
the organic appearance of PHANTOMLEAF WASP II Z3A
What is notable visible is also a grid structure, which works as a transition between the midi and macro elements – the best way to describe this design element would be the bark from a tree. Grid structures, nets, and comb like structures are used by various companies. However, with WASP II it integrates well into the pattern, not looking artificial or forced. Looking at the pattern in total, it has one of the most organic appearances I came across.
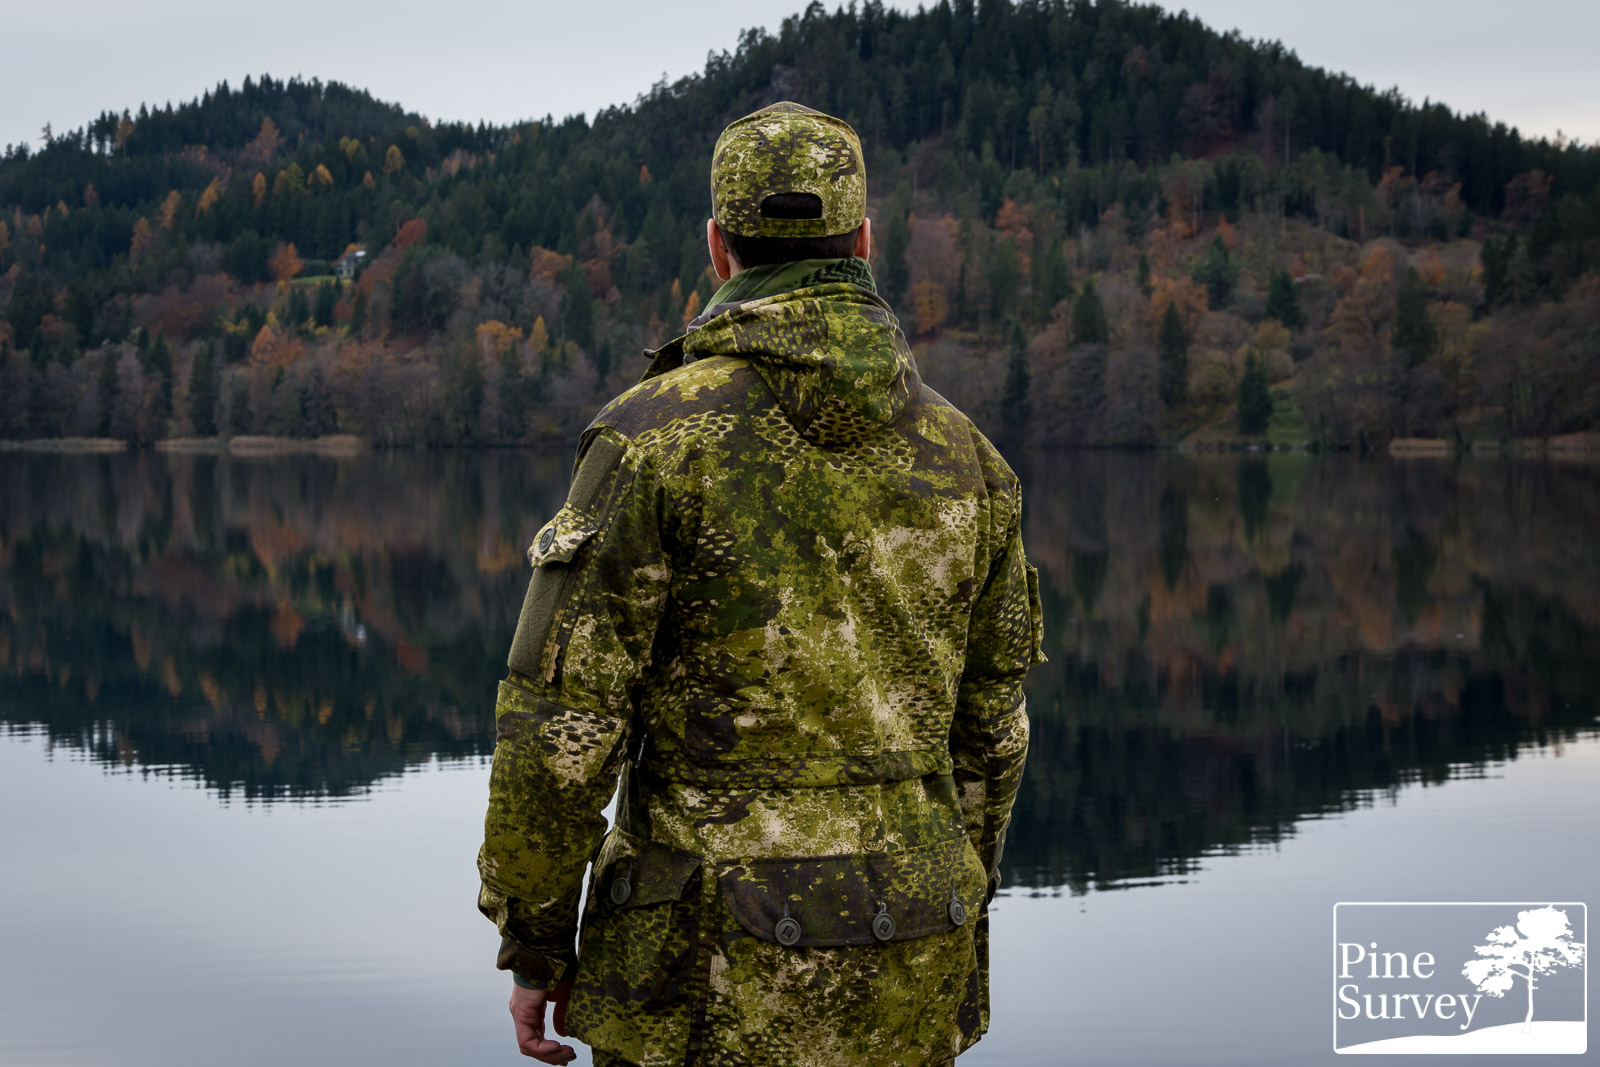
The pattern repetition is actually so large that I was not able to identify it on the print on any of the clothes. To give you an example: the PHANTOMLEAF logo can be found several times hidden on the print of my smock, but always in a different spot of the pattern. As a result the pattern looks different from every angle when wearing the jacket, constantly disrupting.
With that being said, let’s move on. Before I start with the test, I will add the obligatory methodical remarks – loyal followers can skip this part, as you already know it.
Methodic Remarks
As always I will point out a few things beforehand. First of all, I do not claim any scientific standard with my camouflage comparisons. Also, I conduct them with my best knowledge and the available resources.
The pictures were taken at the same locations I always use to make my camouflage comparisons. That way you can compare the various field tests I have done so far with each other.
Before I start, please consider the following – as always:
I did not edit the pictures in any special way, except the following:
- Lens correction
- Watermark
- Blurred my face out if necessary
- .jpeg compression to make it web compliant
- I always do a proper White Balance to make colours appear the way they are.
A short explanation to the environment and the procedure:
The pattern was tested in a Central European environment. Information about the various locations will be stated in the subsections. The pictures portray three different positions:
- Standing in the open (to get an idea of the pattern in this particular surroundings and if the colours match it)
- Kneeling
- The prone position (to mimic basic, up to ideal concealment without using vegetational enhancements)
As always I photographed with a wide angle lens at first and then with 35mm focal length, which mimics the actual picture the human eye would perceive at this distance. Having in mind the three different positions mentioned before, I usually ended up with 6 pictures of each location.
Furthermore:
Given the huge amount of pictures in this field test, I will continue with my modus operandi from my previous camo review and not describe or comment each picture. Instead I will give a more thorough analysis at the end of each location subsection.
With that being said, let’s take a closer look at the pictures themselves.
Let’s get started…
Field Test of WASP II Z3A
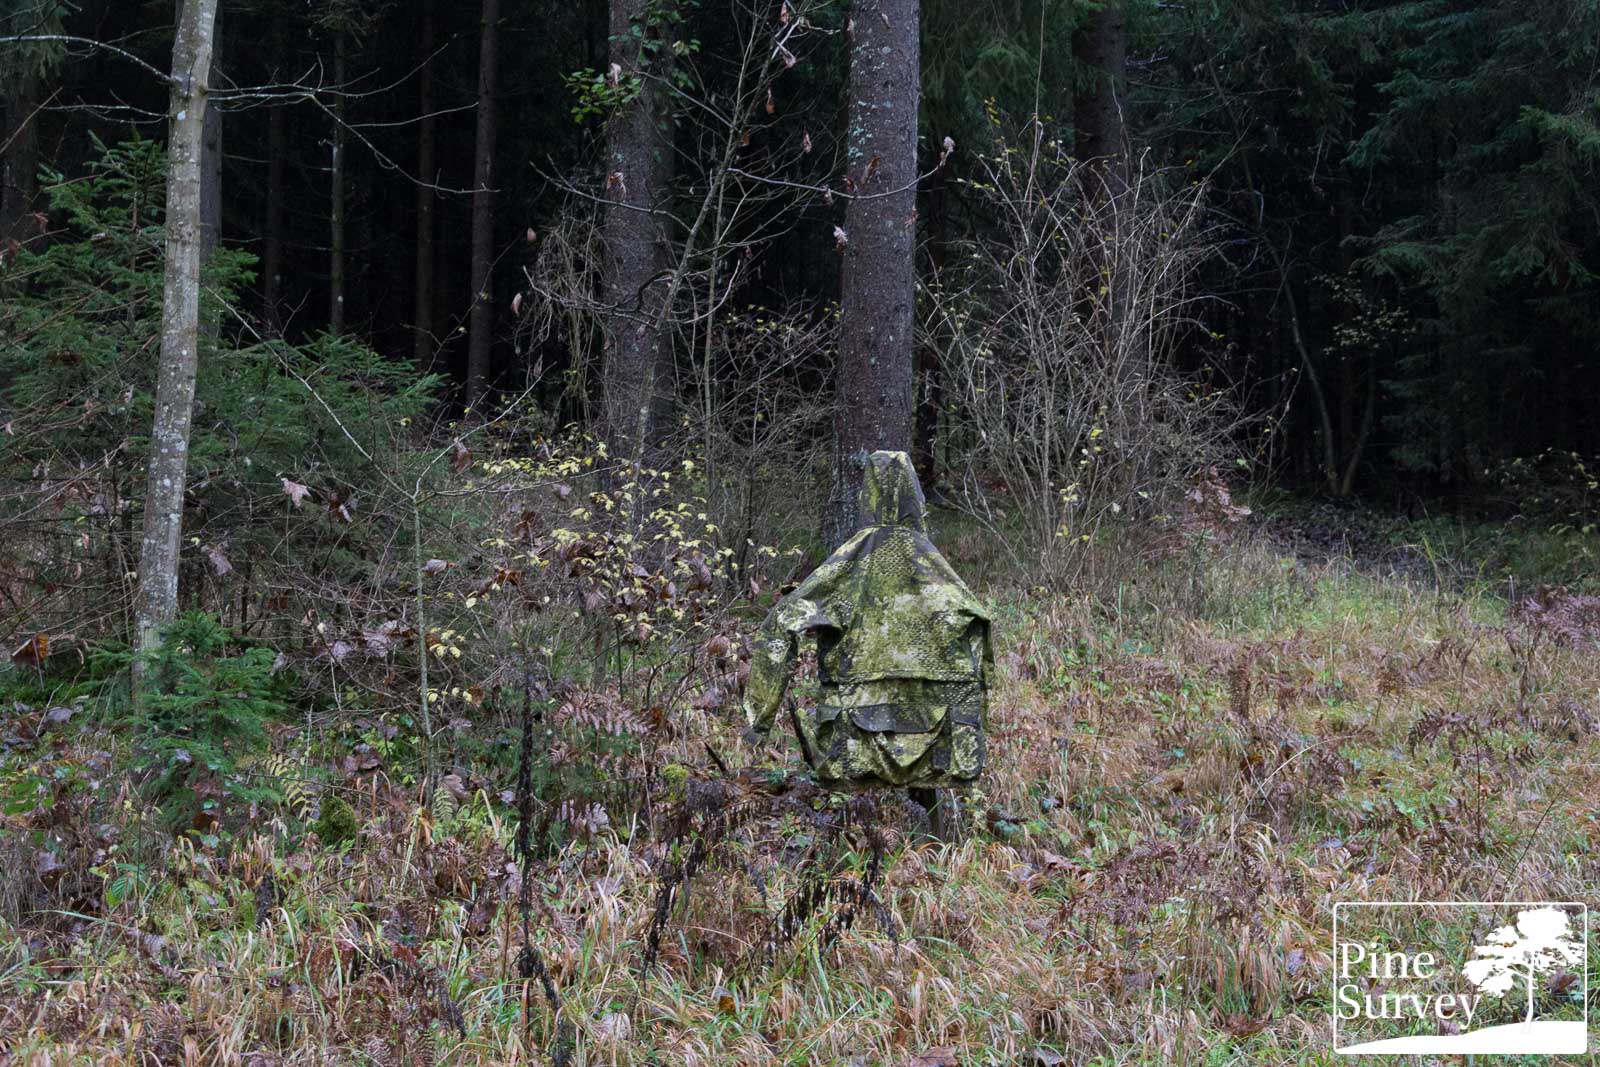
Location 1
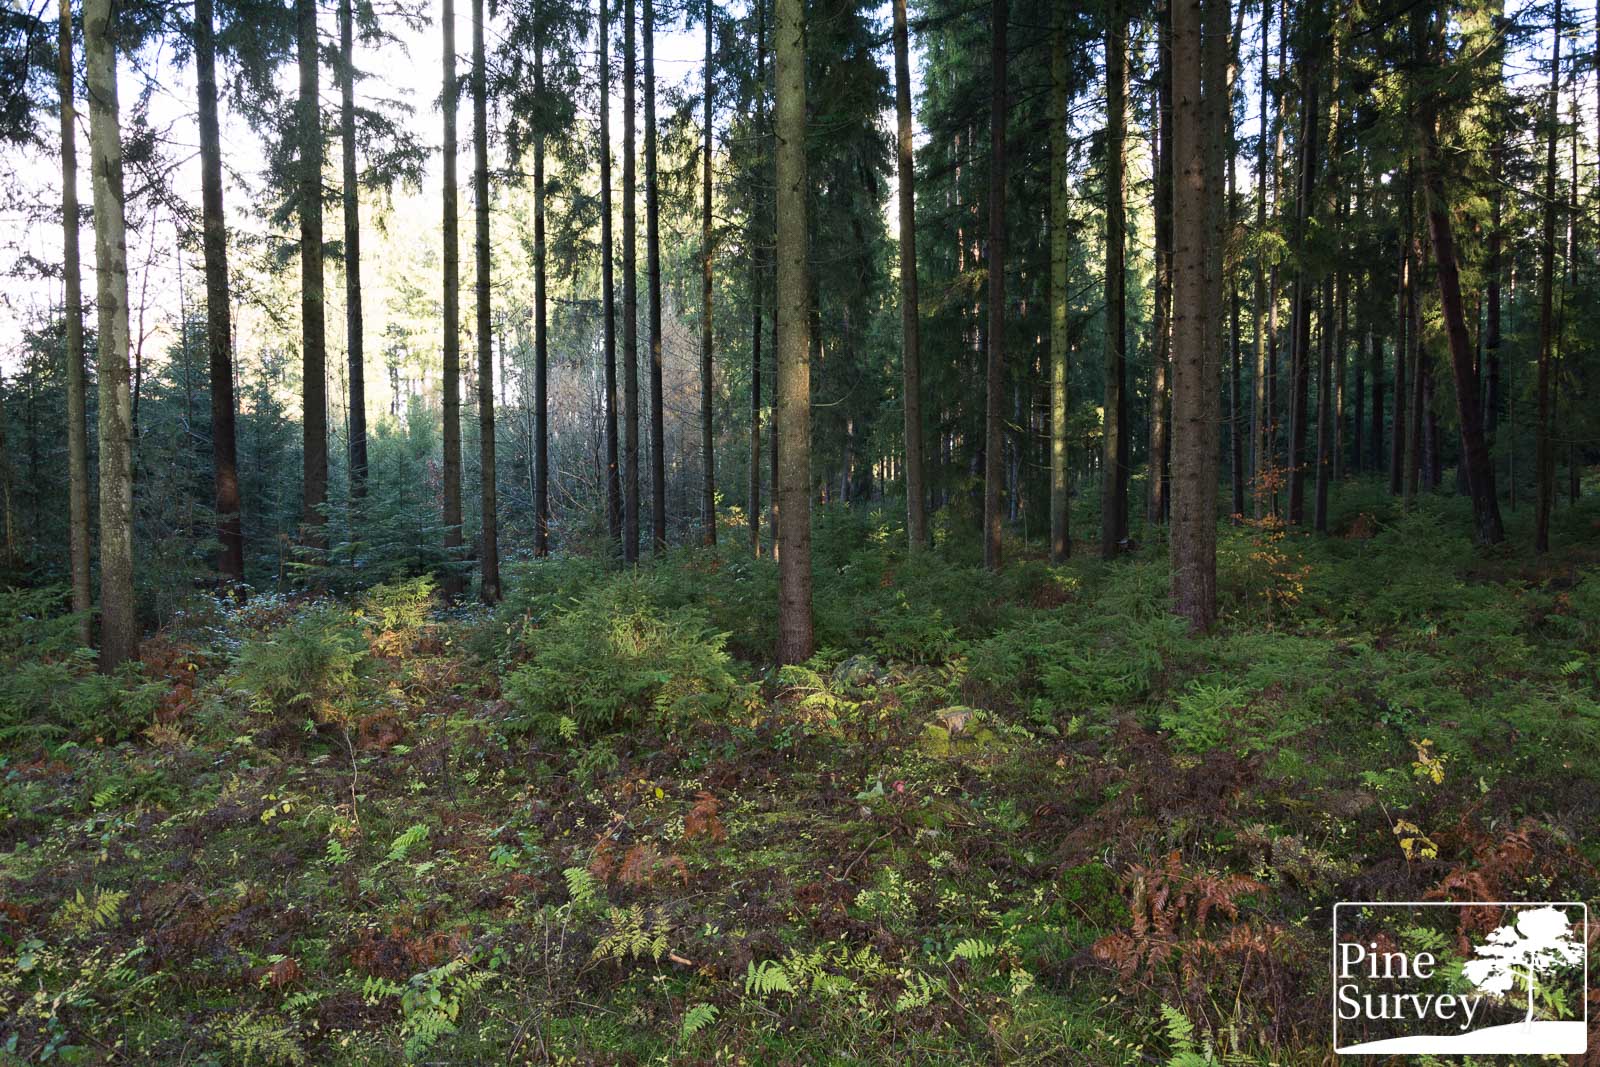
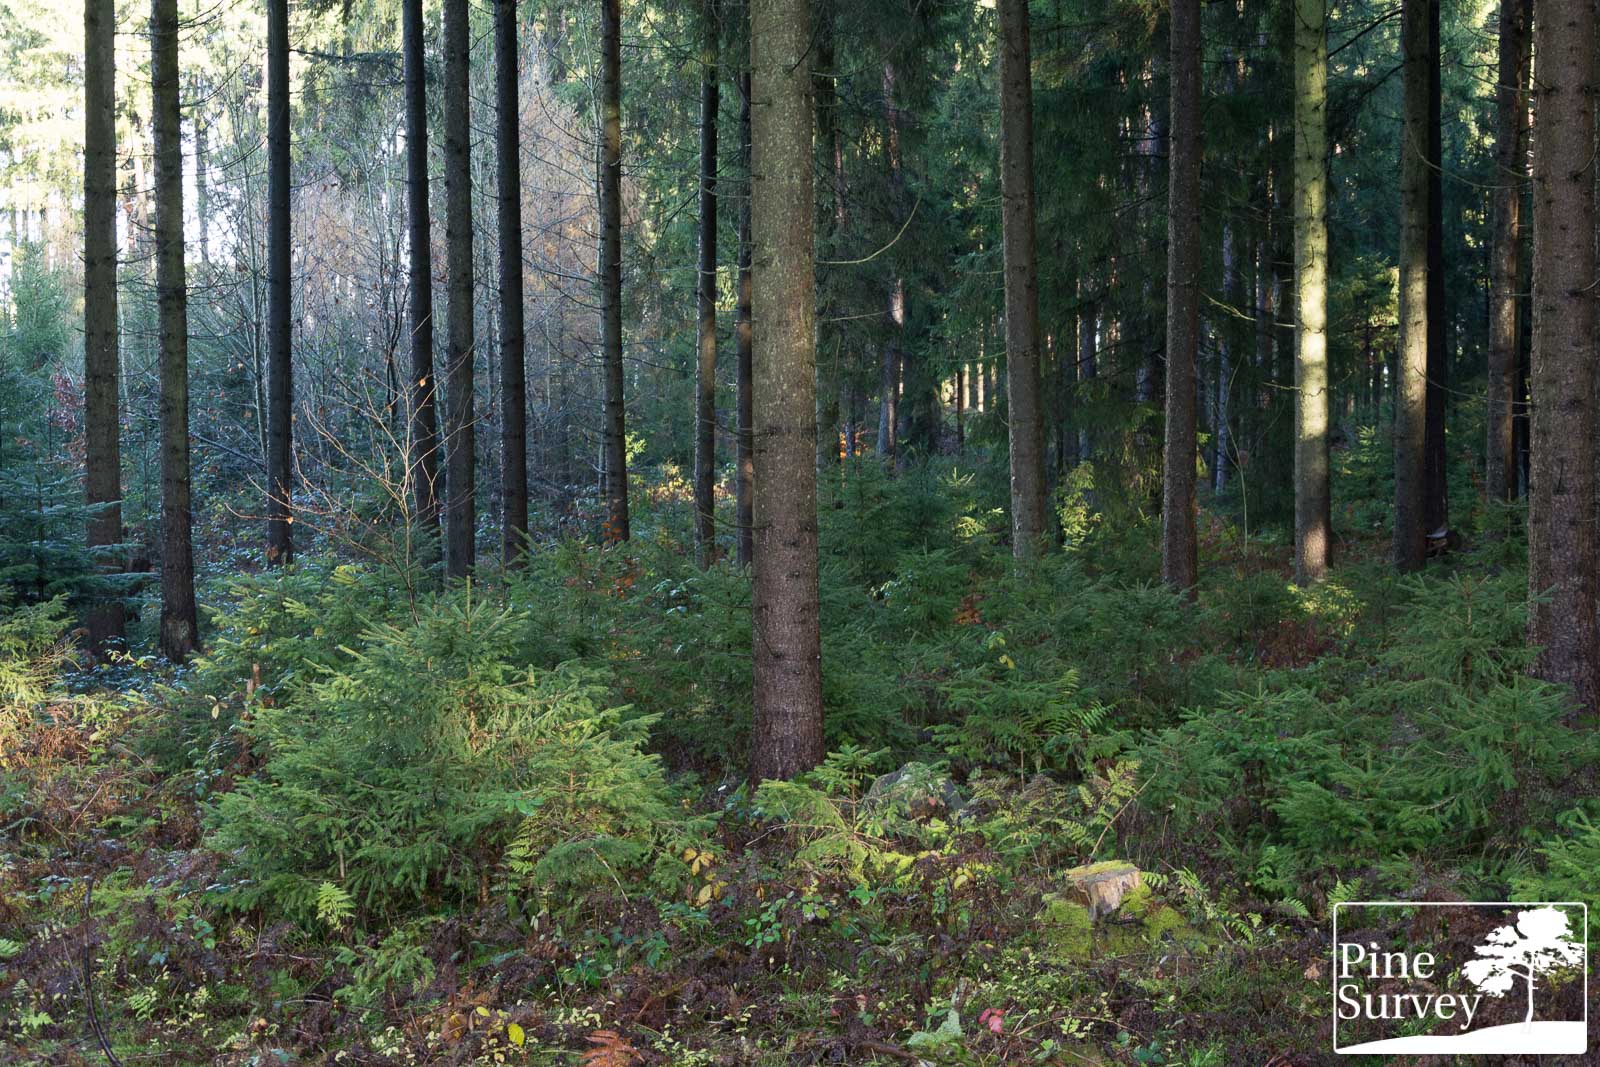
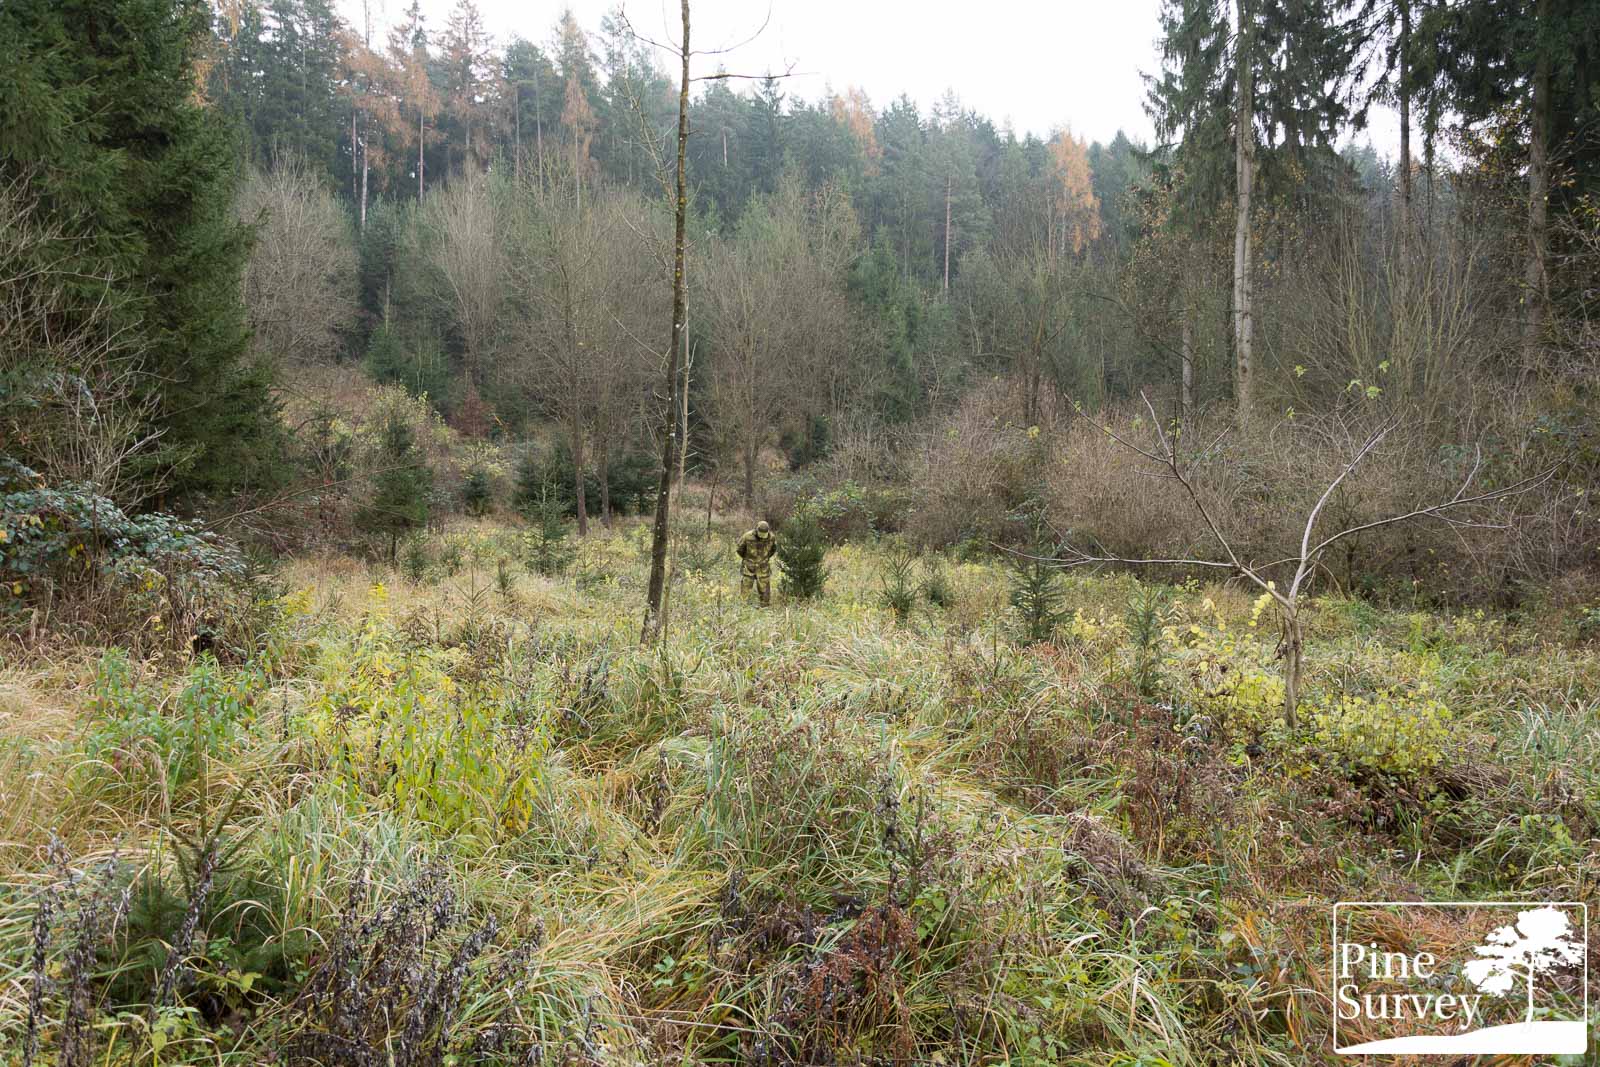
This first location is the one I usually start my field test with and which you already know from my previous reviews. It is a typical European mixed forest with a high foliage canopy and some basic bushes, ferns and little trees on the ground. The pictures were shot during a very wet period of autumn in the morning. As a result the vegetation is still lush and colors are vibrant.
The camera is standing roughly 10m away from the human silhouette.

Standing position – wide angle
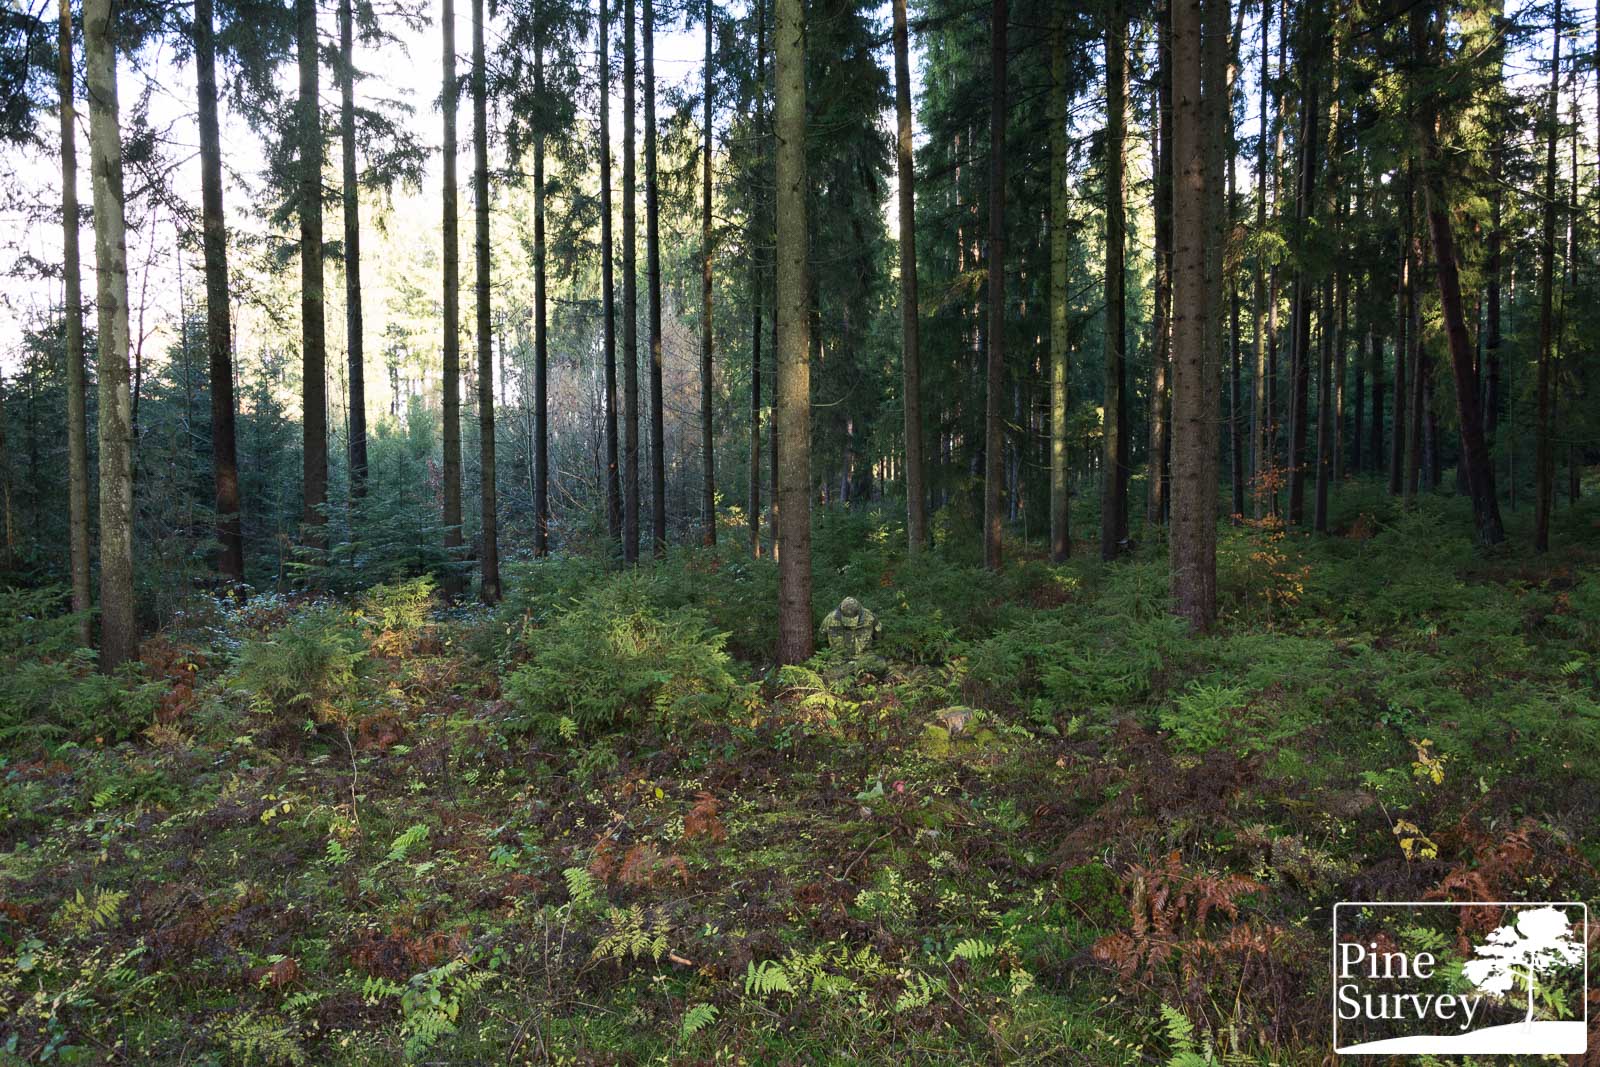
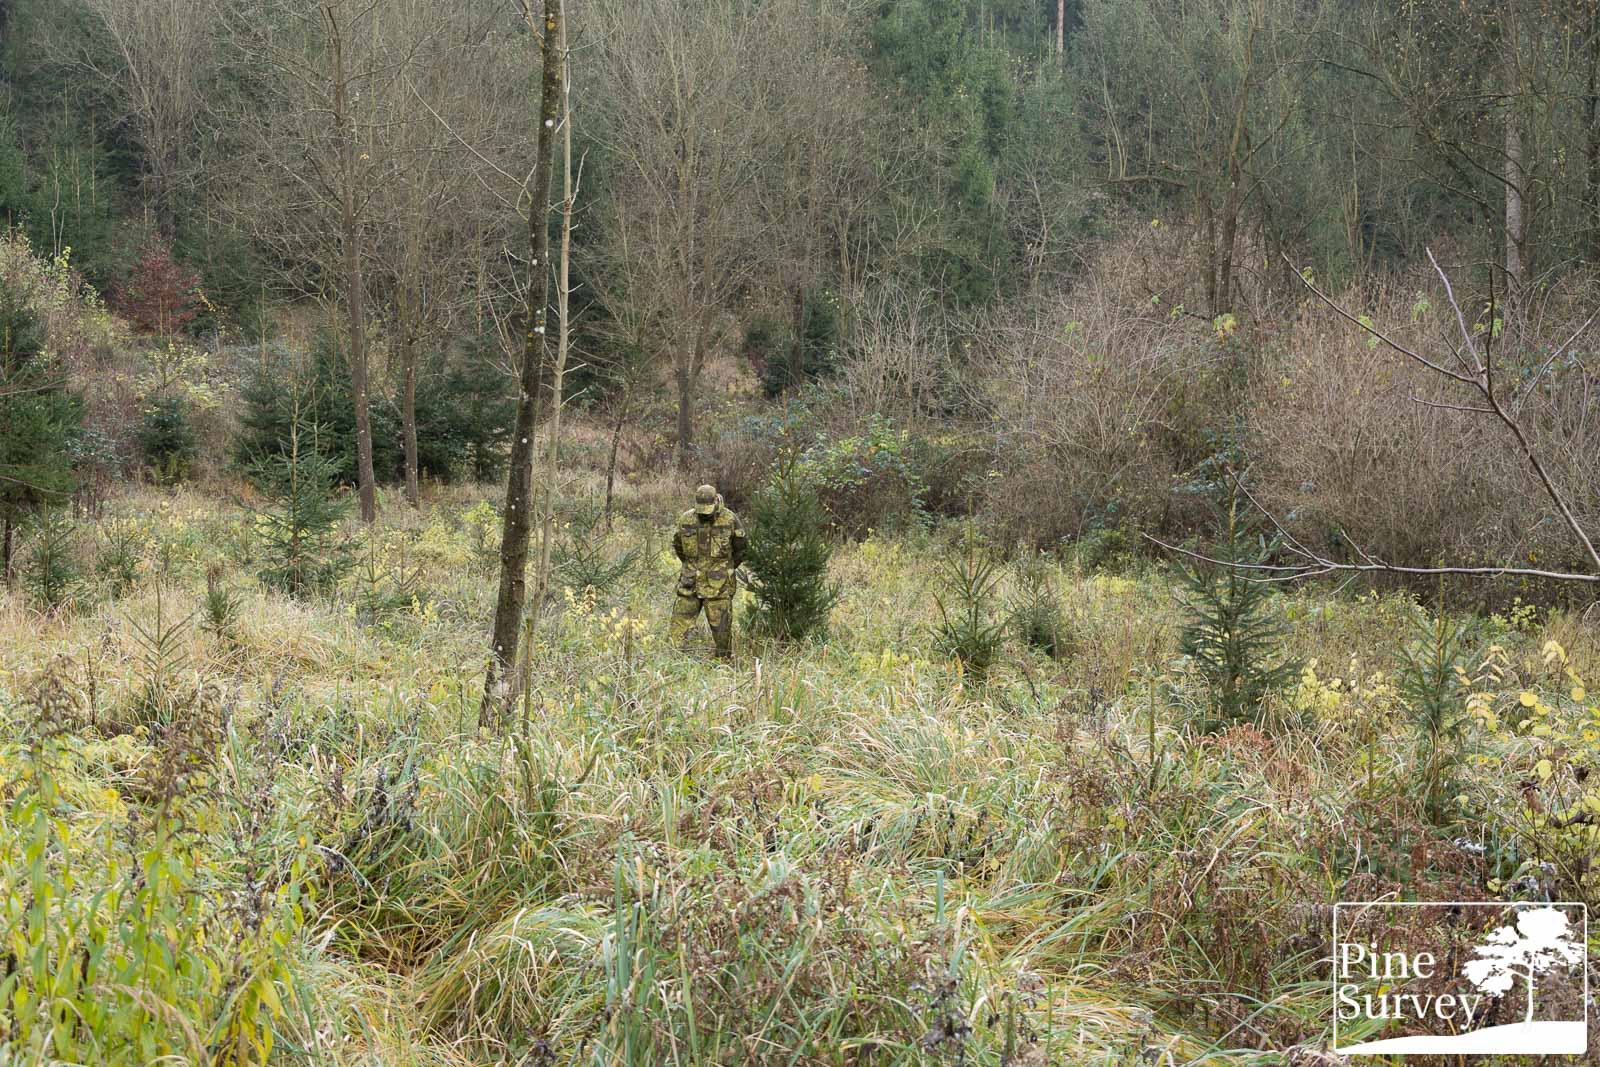
kneeling position – wide angle
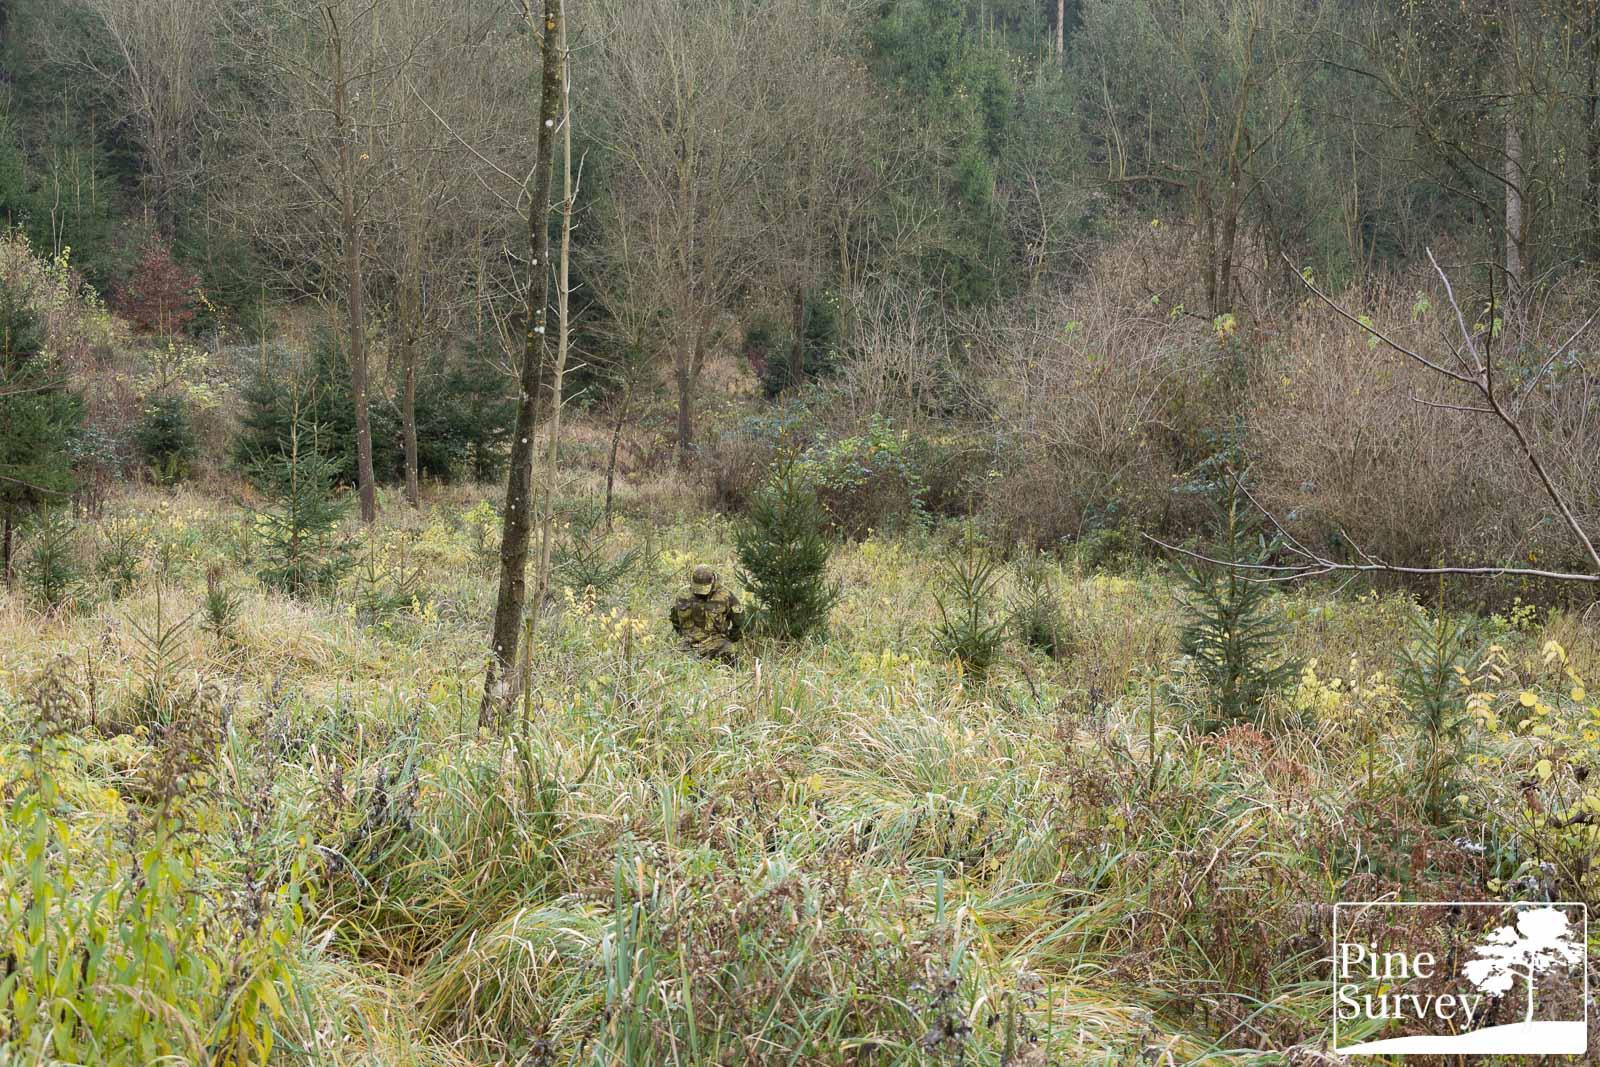
prone position – wide angle
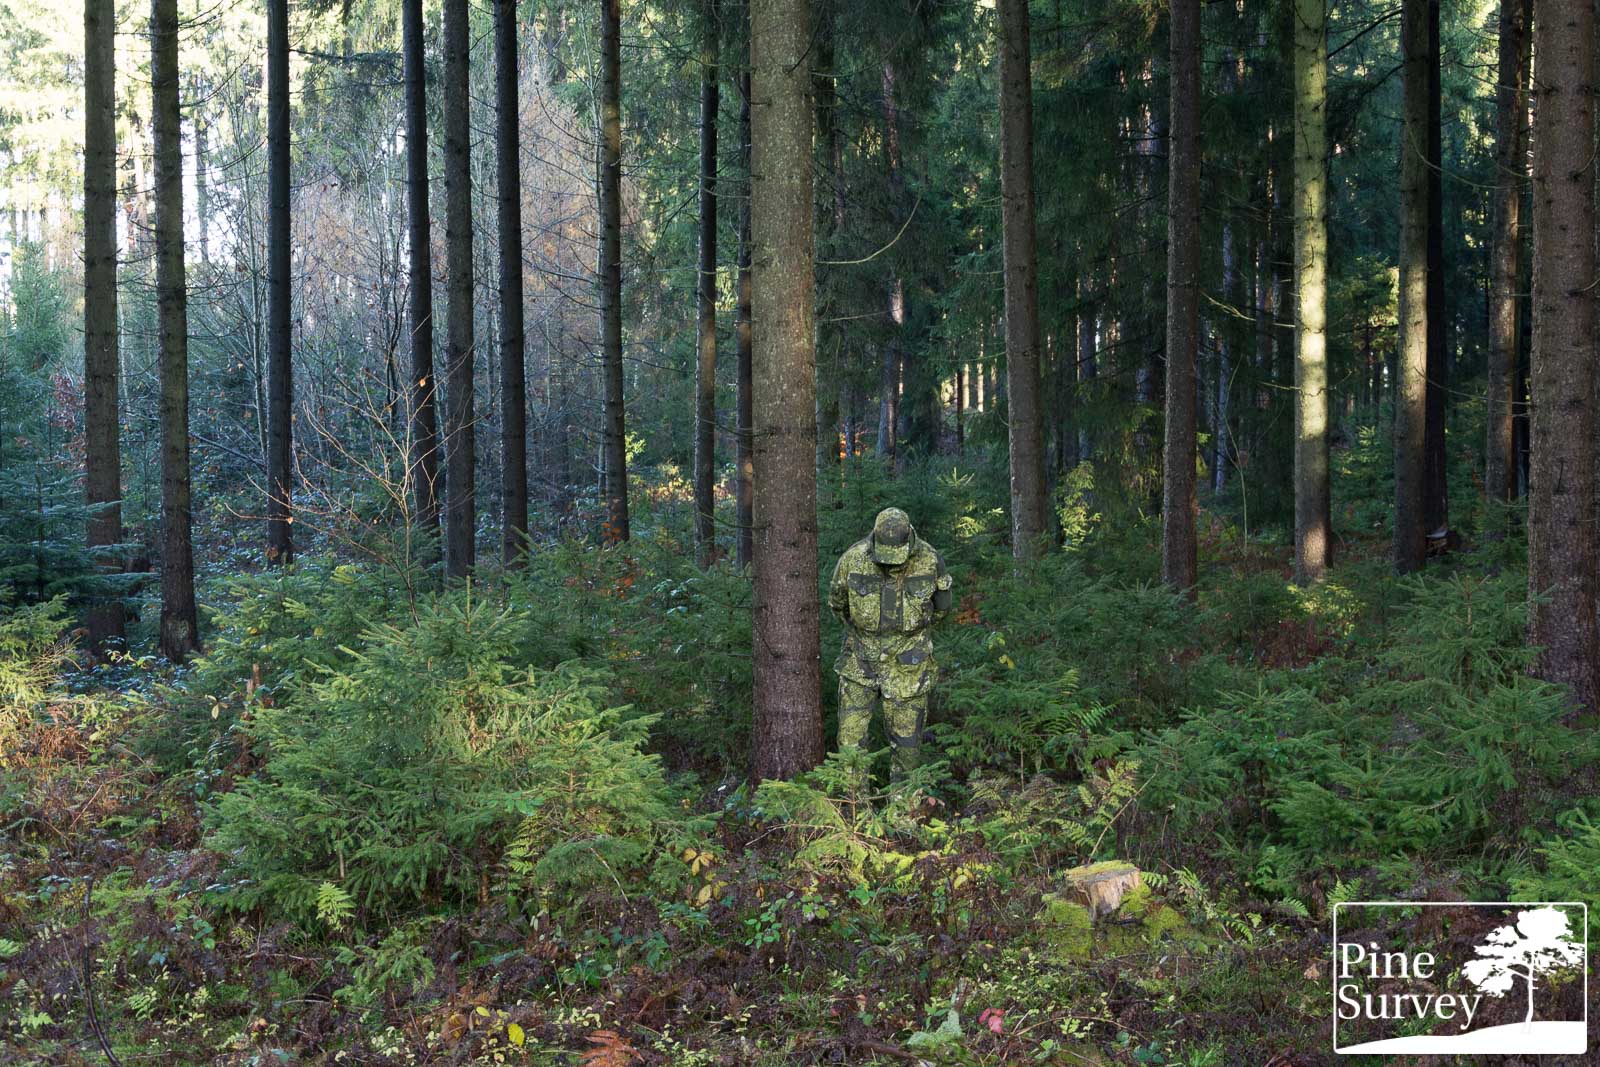
Standing position – 35mm focal length – 10m distance
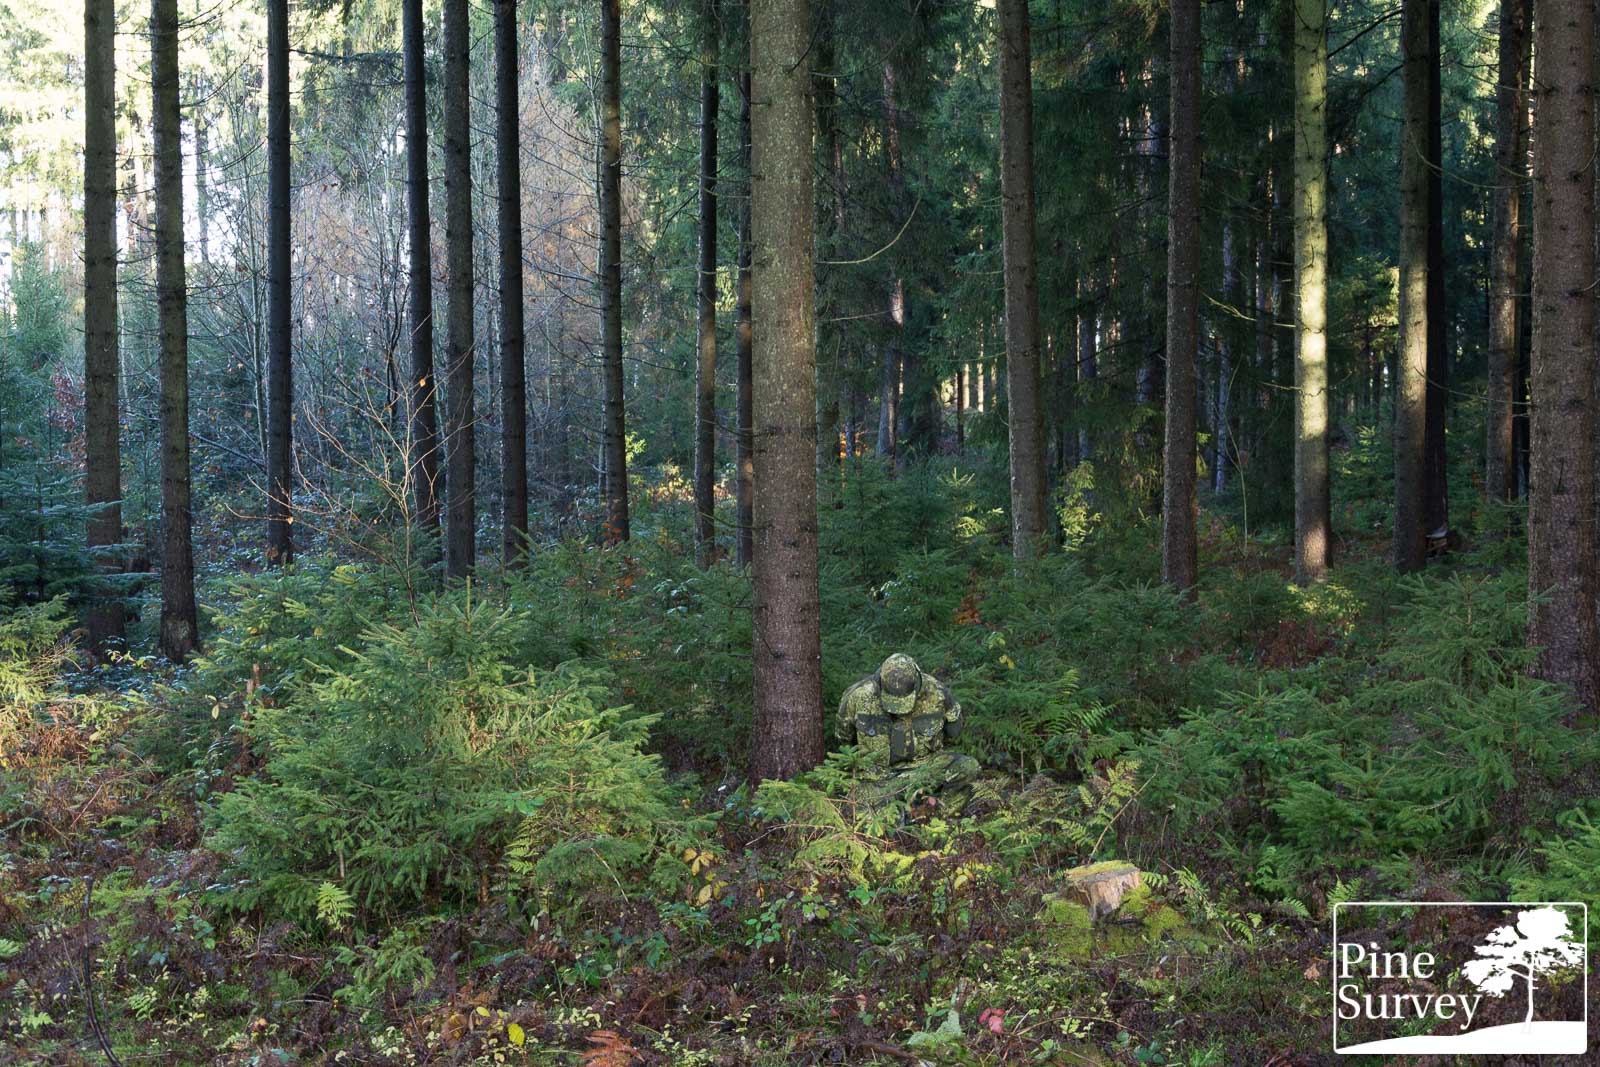
kneeling position – 35mm focal length – 10m distance
prone position – 35mm focal length – 10m distance
Observations – Location 1
When looking at Z3A from a longer distance the effectiveness of the macro elements become immediately apparent. The darker shapes disrupt the openly positioned silhouette effectively. The lighter green colour choice fits the undergrowth and is a bit in contrast to the darker greens of the conifers in the backdrop, this effect is maximised by the general wet conditions.
As soon as you go into a kneeling position, the full potential of the pattern comes into play. The light green colours are matching the undergrowth and the darker macro elements cut the human shape in half, completely disrupting the silhouette.
Going into the prone is of course the ideal concealment, given the height of the ferns and bushes. So no comment needed.
When looking at the actual distance with a 35mm focal length, the above mentioned statements on the standing position become even more apparent. The macro elements come into full play, dividing the torso into several parts. At the same time you can see the various midi elements creating visual noise and additional shades. In this setting some lighter, more reddish browns, as well as some darker greens would be of benefit against the background of the conifers. This changes completely again, when going into a kneeling position. Now the mixture of macro and midi elements blend the human shape into the surroundings.
Lastly, the prone position is an already perfect concealment, giving you only a hint that there might be someone, if you know that there actually is someone.
Location 2
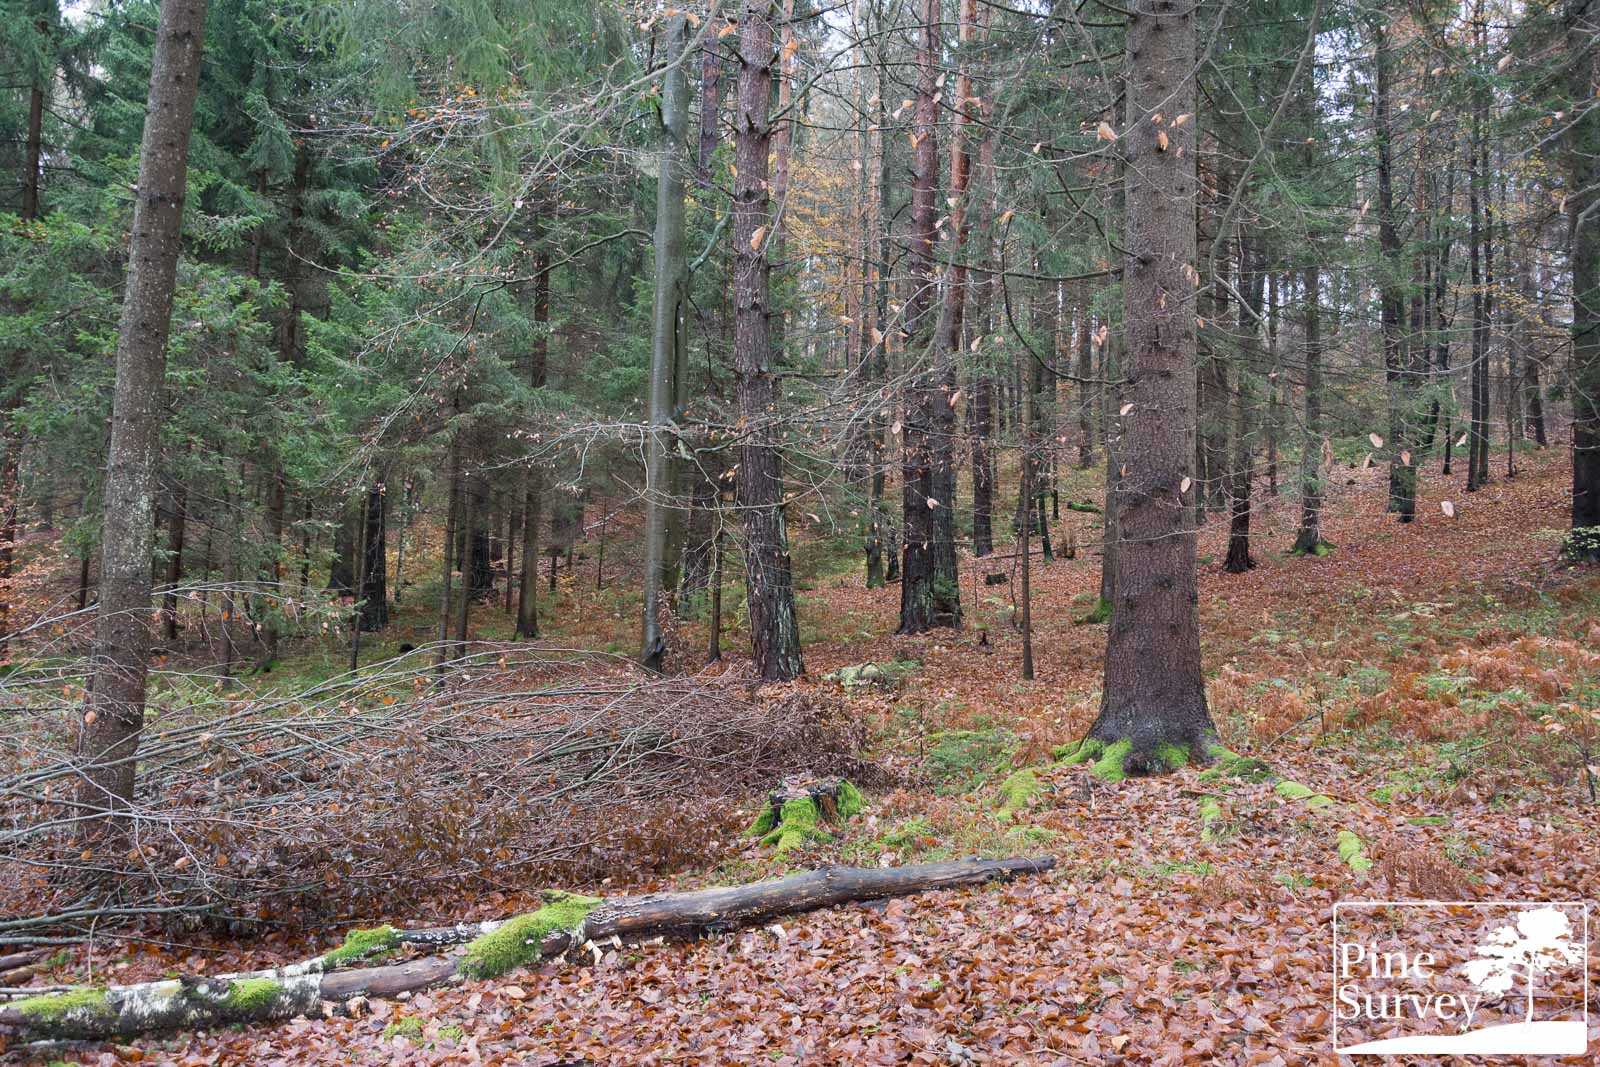
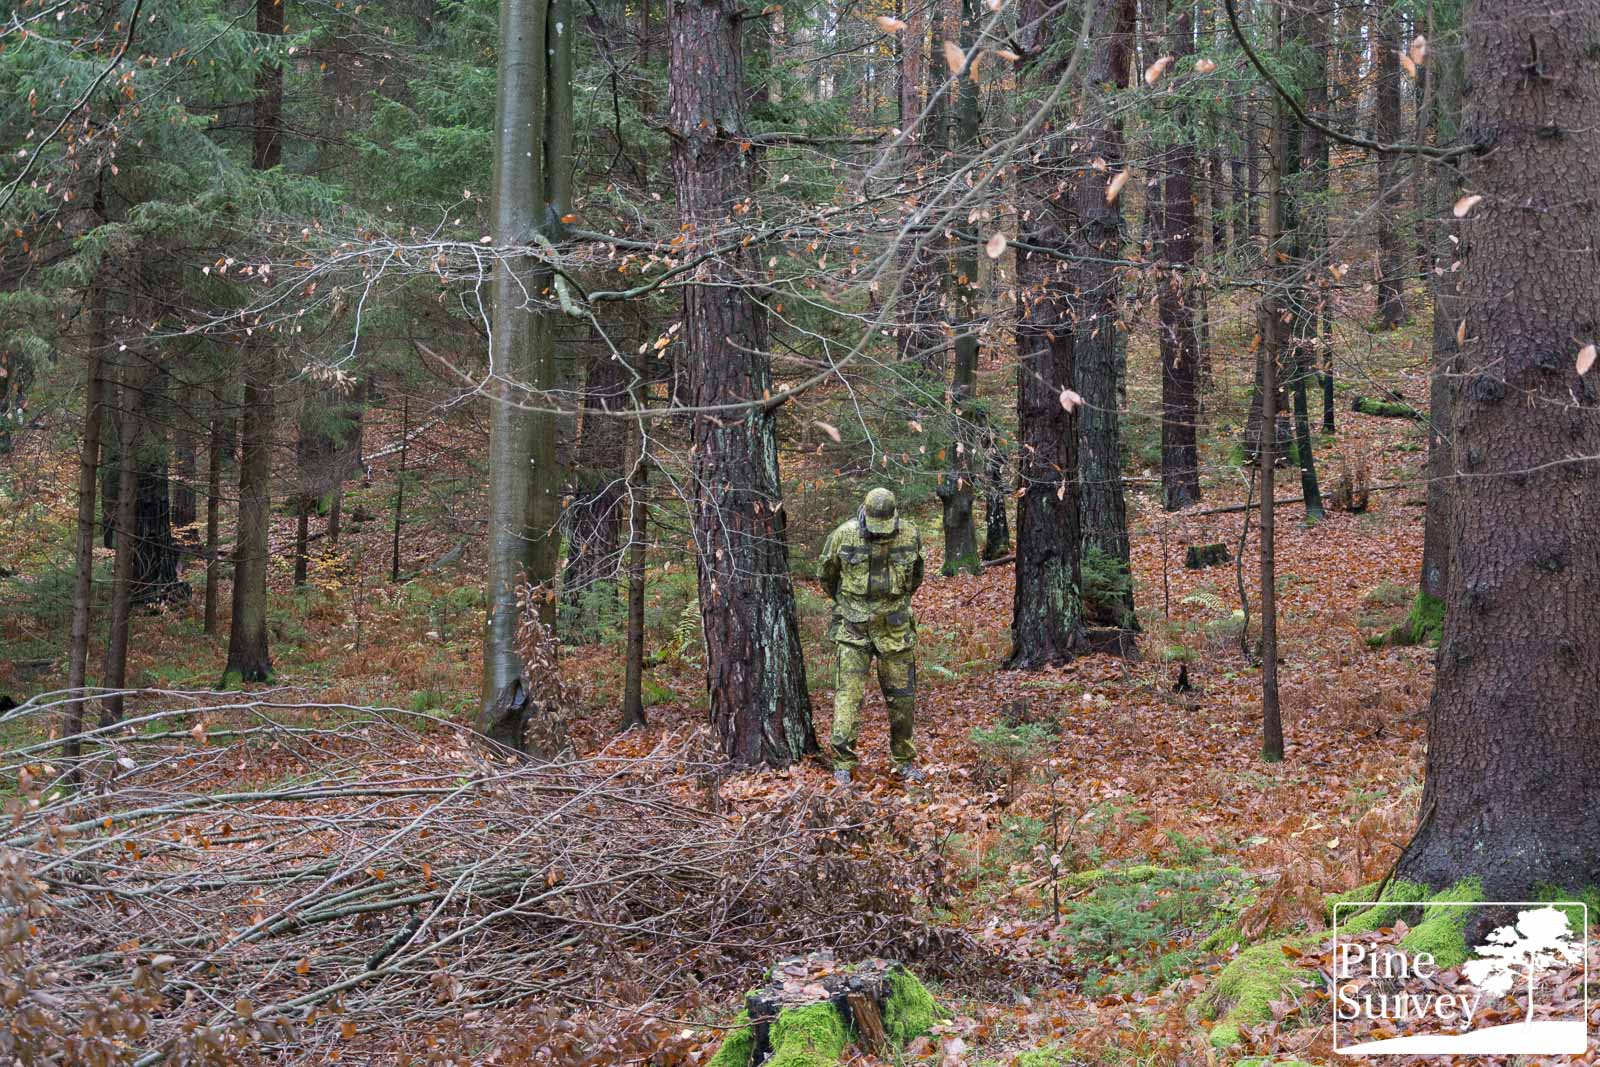
This location was introduced by me to offer more woodland diversity. It is a mixture of deciduous and coniferous forest. Again you will find strong contrasts between brown and green vegetation with a slightly denser undergrowth and a partly closed canopy, with a clearing on the side.
Recently a tree fell down here, so there is additional visual distraction. Again the pictures were taken during a wet period of autumn, resulting in vivid colors. Especially the floor is covered with colorful beech leaves, still having fresh brown colours. As a result it is a difficult environment for a predominantly green pattern.
The camera is standing roughly 15m away from the human silhouette.

Standing position – wide angle lens

kneeling position – wide angle lens
prone position – wide angle lens
Standing position – 35mm lens – 15m distance

kneeling position – 35mm lens – 15m distance

prone position – 35mm lens – 15m distance
Observations – Location 2
Starting again with the standing position, the wide angle lens is giving you a broad picture of the location. Standing in the open is usually a dead give away for most patterns. However, you can see the macro elements breaking up the human shape effectively. In fact the dark elements can be easily seen on the torso, the hip and the leg on the right side. Having my arms to the back creates more shadows. The various green elements mimic the moss on the trees perfectly, making the pattern blend in. As a result, WASP II Z3A is performing astoundingly well, even though the main part of the surroundings here are brown leaves.
Changing to a kneeling position reduces the visibility even more for obvious reasons. The above mentioned criteria apply and the blending effect to the surrounding moss becomes even more apparent since the body is closer to the floor.
Going into the prone makes this argument even more stick. The human shape simply becomes “moss on the forest floor”.
Showing the actual distance at 15m, thanks to the 35mm focal length, provides you with a better look at the situation. The macro elements are better visible in the standing position, as is their performance in breaking up the silhouette. At this distance the midi and micro elements also start working their magic.
Changing into a kneeling position, the blending effect of the various colours come into effect. As mentioned before, a more dominant reddish brown could be of use in the pattern. Nevertheless, WASP II Z3A is doing an extraordinary job in disruption the silhouette, given the overall brown surroundings.
This becomes even more apparent, when looking at the prone. Being situated completely in the brown leaves, it still gives an organic and natural impression within the surroundings.
Location 3
This site was last used by me in one of the earlier reviews. It is right next to the site where I took the pictures of the Austrian “Tarnanzug Neu”. I changed to this site, since the other is too densely overgrown by thorn bushes and therefore inaccessible. It is an open field in a mixed forest, with random conifers, some deciduous trees as well as high grass.
As with the previous locations, this one also experienced plenty of rain, causing fresh vegetation.
The camera is standing roughly 20-25m away from the human silhouette.
Standing position – wide angle lens

kneeling position – 35mm lens – 20-25m distance
Standing position – 35mm lens – 20-25m distance
kneeling position – 35mm lens – 20-25m distance
Observations – Location 3
This open field is interesting insofar, since it offers only concealment through high grass and sporadic trees. It also displays a wide variety of browns and greens.
When looking at the pictures from the wide angle lens, the macro elements are clearly at work again. In fact WASP II is one of the few patterns in my possession which is able to provide a working macro pattern at that distance. Adding to that the colours blend into the surrounding. The elements also create the effect of looking through the human silhouette.
By changing into a kneeling position, the body melts into the surroundings. There is no picture of a prone position, since the grass is too high anyway.
The 35mm focal length provide a better portrayal of the “see through” effect. The various macro and midi elements create a 3D effect and break up the human shape effectively in the standing position.
When kneeling it becomes even more apparent. As mentioned above, the human shape melts into the floor.
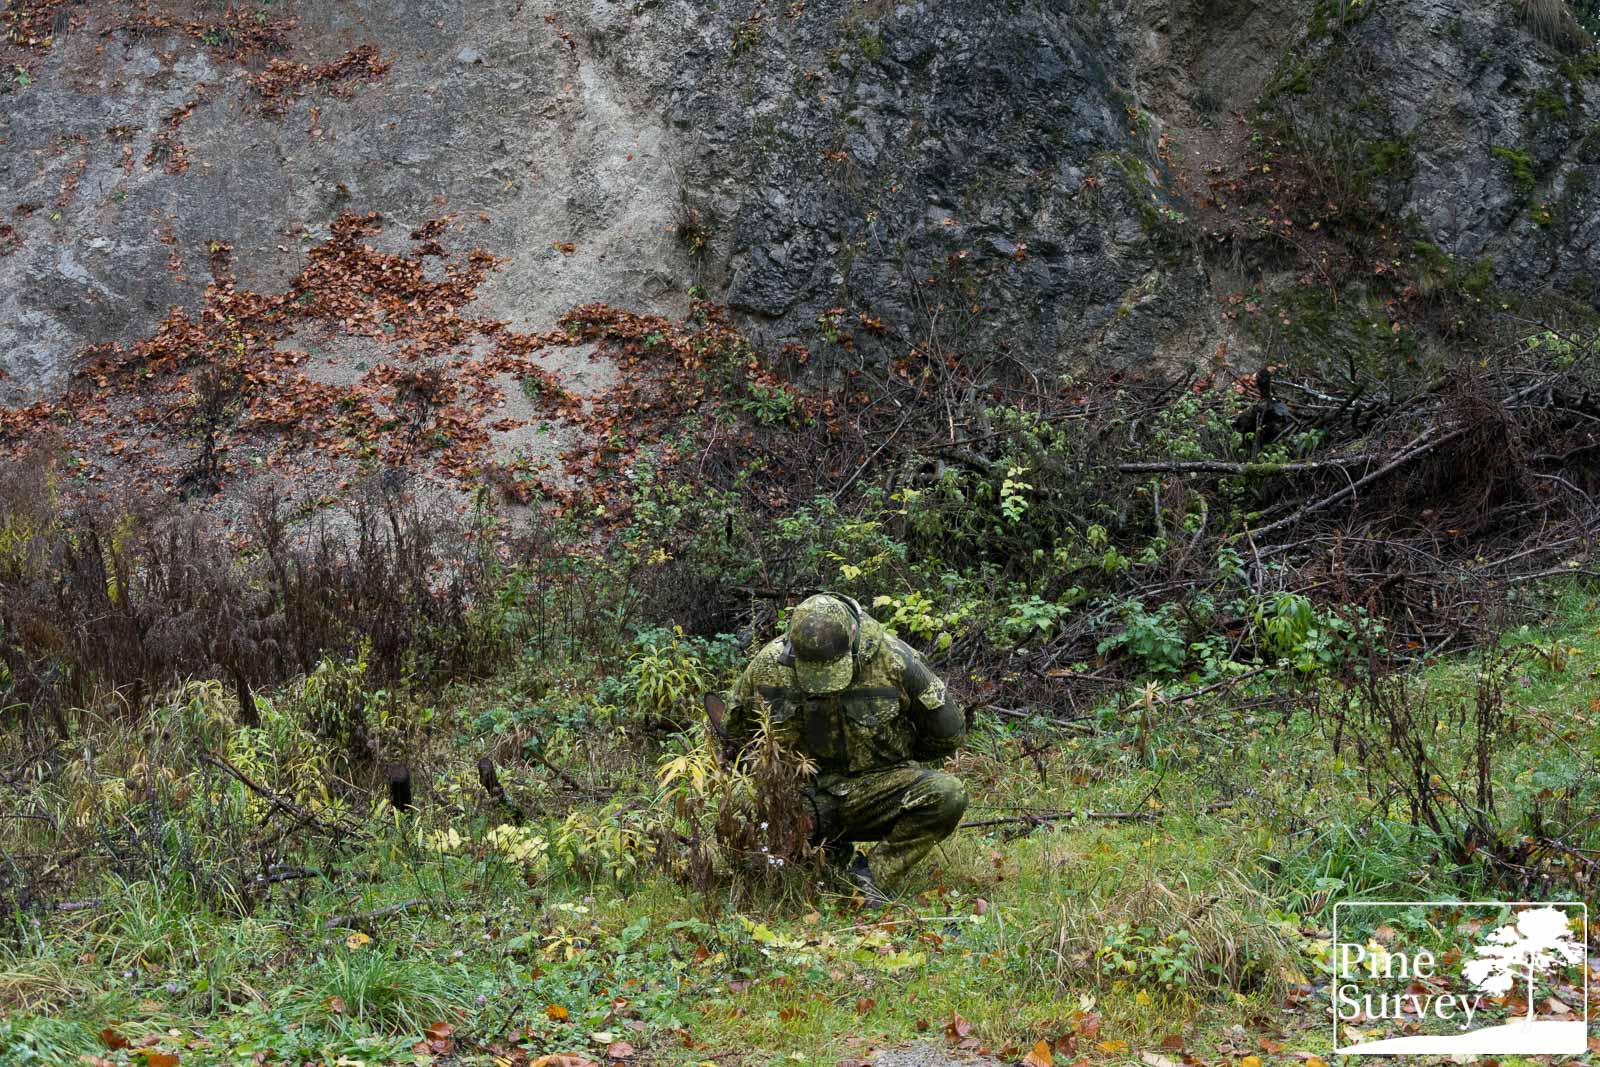
Location 4
Even though I used some pics from this location before, I never really had it as an “official” testing site. It is basically a stone quarry, which is being reclaimed by nature. As a result you have basic undergrowth in combination with stone formations. It is an open area with basic to no concealment. The situation was a clouded sky, shortly after rain and late in the day with some light already passing.
The camera is standing roughly 5m away from the human silhouette.
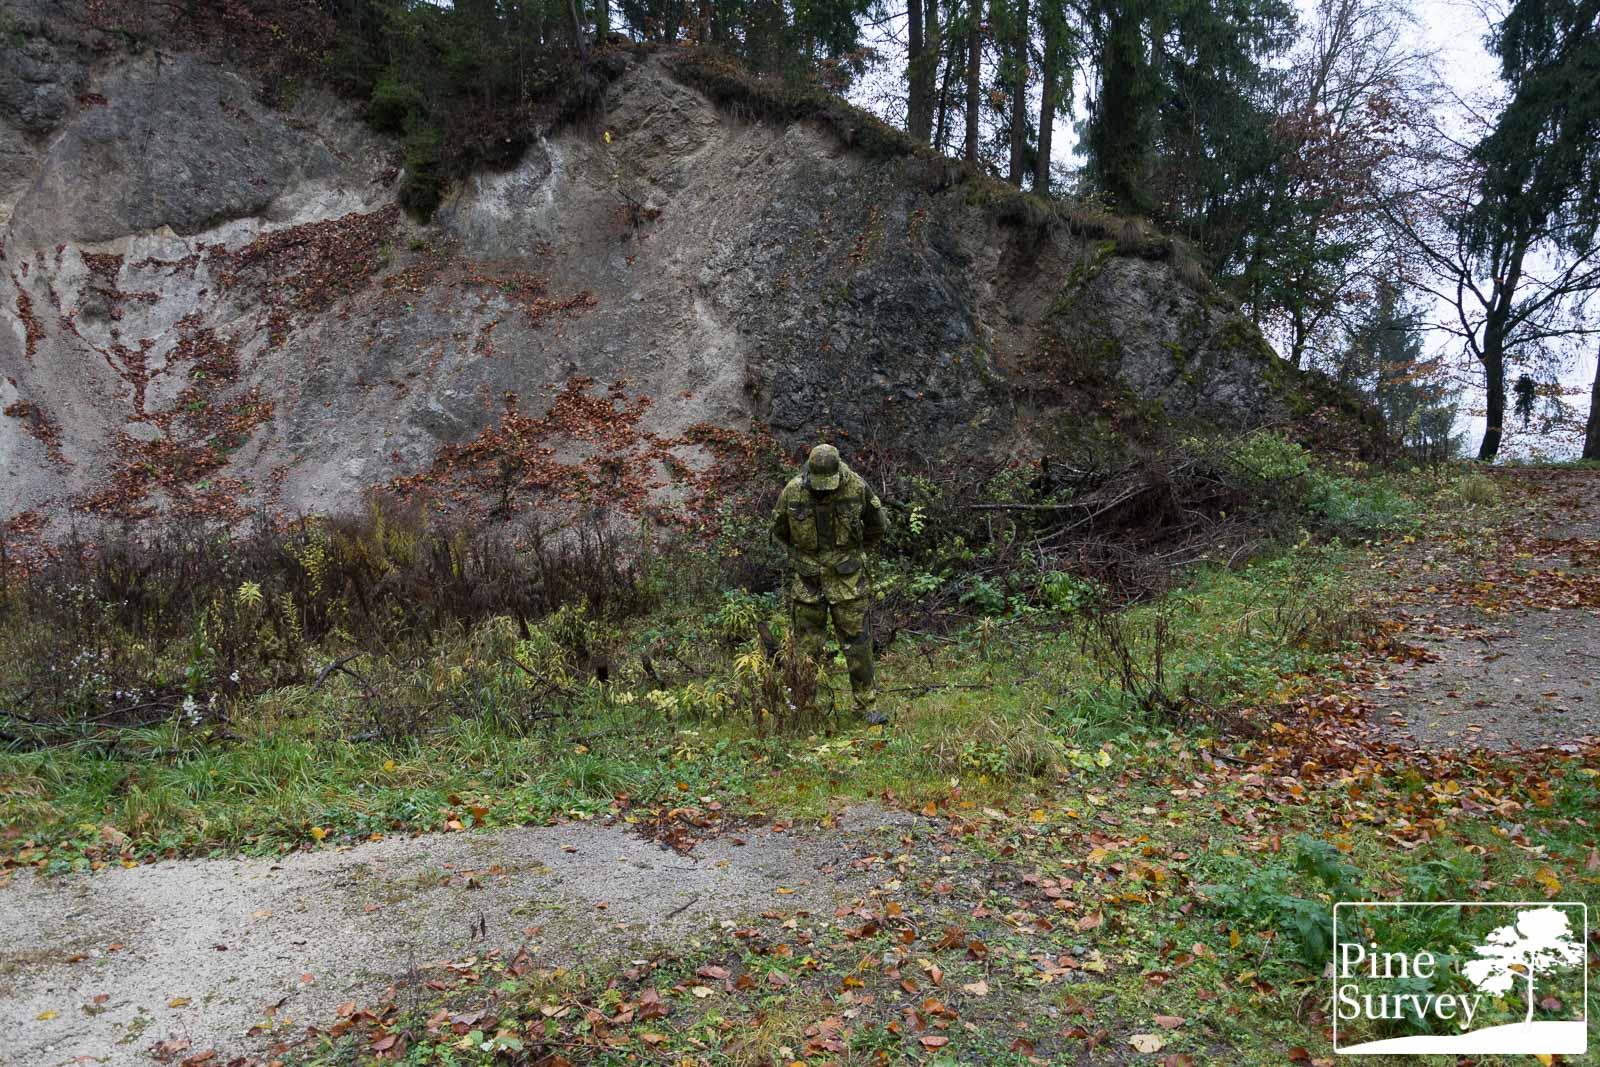
Standing position – wide angle

kneeling position – wide angle

Standing position – 35mm lens – 5m distance
kneeling position – 35mm lens – 5m distance
Observations – Location 4
These last few pictures are more like an addendum than an actual test, since they are very close proximity and in the open within the quarry. The surroundings are quite diverse and it is interesting to see how the WASP II Z3A performs.
In the standing position (photographed with the wide angle), the potential of the disrupting abilities of Z3A becomes clearly visible. The dark macro elements fit the surrounding dead wood, the overall green background colours mimic the surrounding vegetation and the midi elements provide the notably depth in the pattern.
When kneeling down the major give-away is actually the shape of the baseball cap. Other than that the human silhouette is blending into the surroundings.
The 35mm focal length, which shows the actual distance in this case, also gives a better look at the three dimensional effect of the pattern. Especially at the hip area you can witness the interaction of the macro and midi elements.
Lastly, when kneeling down, the close up gives you a very clear picture of how convincing the organic appearance of PHANTOMLEAF WASP II Z3A really is, and how well it blends into the surrounding environment.
Conclusion
Coming to an end it is safe to say that PHANTOMLEAF is a most welcomed addition to the current camouflage market. It is one of a very small number of camouflage patterns providing micro, midi and macro elements, therefore addressing all relevant engagement distances.
Even though I tested the pattern already at the very brink of its comfort zone, it performed remarkably well, breaking up the human silhouette effectively in various environments from mixed forest, to open areas and stone quarries.
The psychological approach of camouflage is fascinating and effective to say the least. These concepts pop up more and more recently. With PHANTOMLEAF you literally have the medical background as well, to back up the claim in the design of the pattern. And judging from various pictures on the net, as well as from depth discussions on the matter, the developer Florian Lenz also did his homework, when it comes to IR standards and the necessary field testing.
With Recon Company as a strategic partner, it will be interesting to see what will come next. While I am writing these words, the brown variant Z2 as well as the urban variant Z4 are on the production line. And with the backing of such a partner, fabric supply issues are less of a problem in this current market, which is becoming more and more competitive because of its oversaturated supply in camouflage patterns. For the near future several projects have been announced: Gear and more cooperating partners for apparel have been announced – even shoes.
Last but not least, I started to make a completely different observation, that not only concerns the PHANTOMLEAF patterns, but camouflage in general. Baseball caps are always a dead give away in the field. The brim of the cap for the most part is always the first thing I see and identify. So stick to your boonies!
With that being said, I want to thank you for your patience, as well as you stamina to finish this reviews. Many thanks to Florian Lenz, for making this article possible!
I hope it was worth your time!
Take care
No Comment
You can post first response comment.