Winter Camouflage – Multicam Alpine (fake)
Introduction
For the moment, this is the last article of the Winter camouflage series, featuring a fake version of Multicam Alpine. I realized the other day I was still sitting on these pictures and never actually used them – the reasons are manifold. It was already summer, the war in Ukraine started and last but not least, it was not the original Multicam pattern.
Also, back in early 2022 when I got the overwhites, the weather had already changed. So just like with PenCott Snowdrift it was difficult to recreate similar pictures as in the first two tests.
That being said, let’s take a look at the pattern, before looking at its performance.
Multicam Alpine
Multicam Alpine was specifically designed to reduce the visual silhouette of users, operating in winter – or better said – snow-covered environments. As it is mostly white, it is meant for areas with an undisrupted snow cover. Because of the same pattern elements, it can be combined with other variants of the Multicam family, thus making it also possible to match actual snow environments, when there is less snow present.
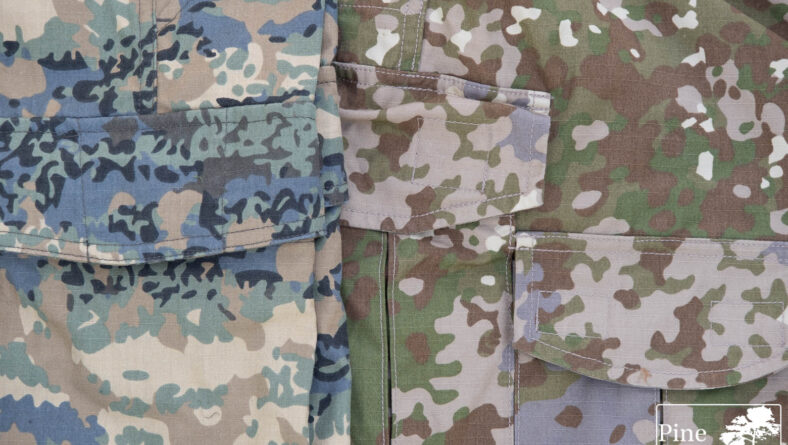
The colors consist of white as base color, and light and darker gray shades for the pattern, to mimic shadows and structures in the snow.
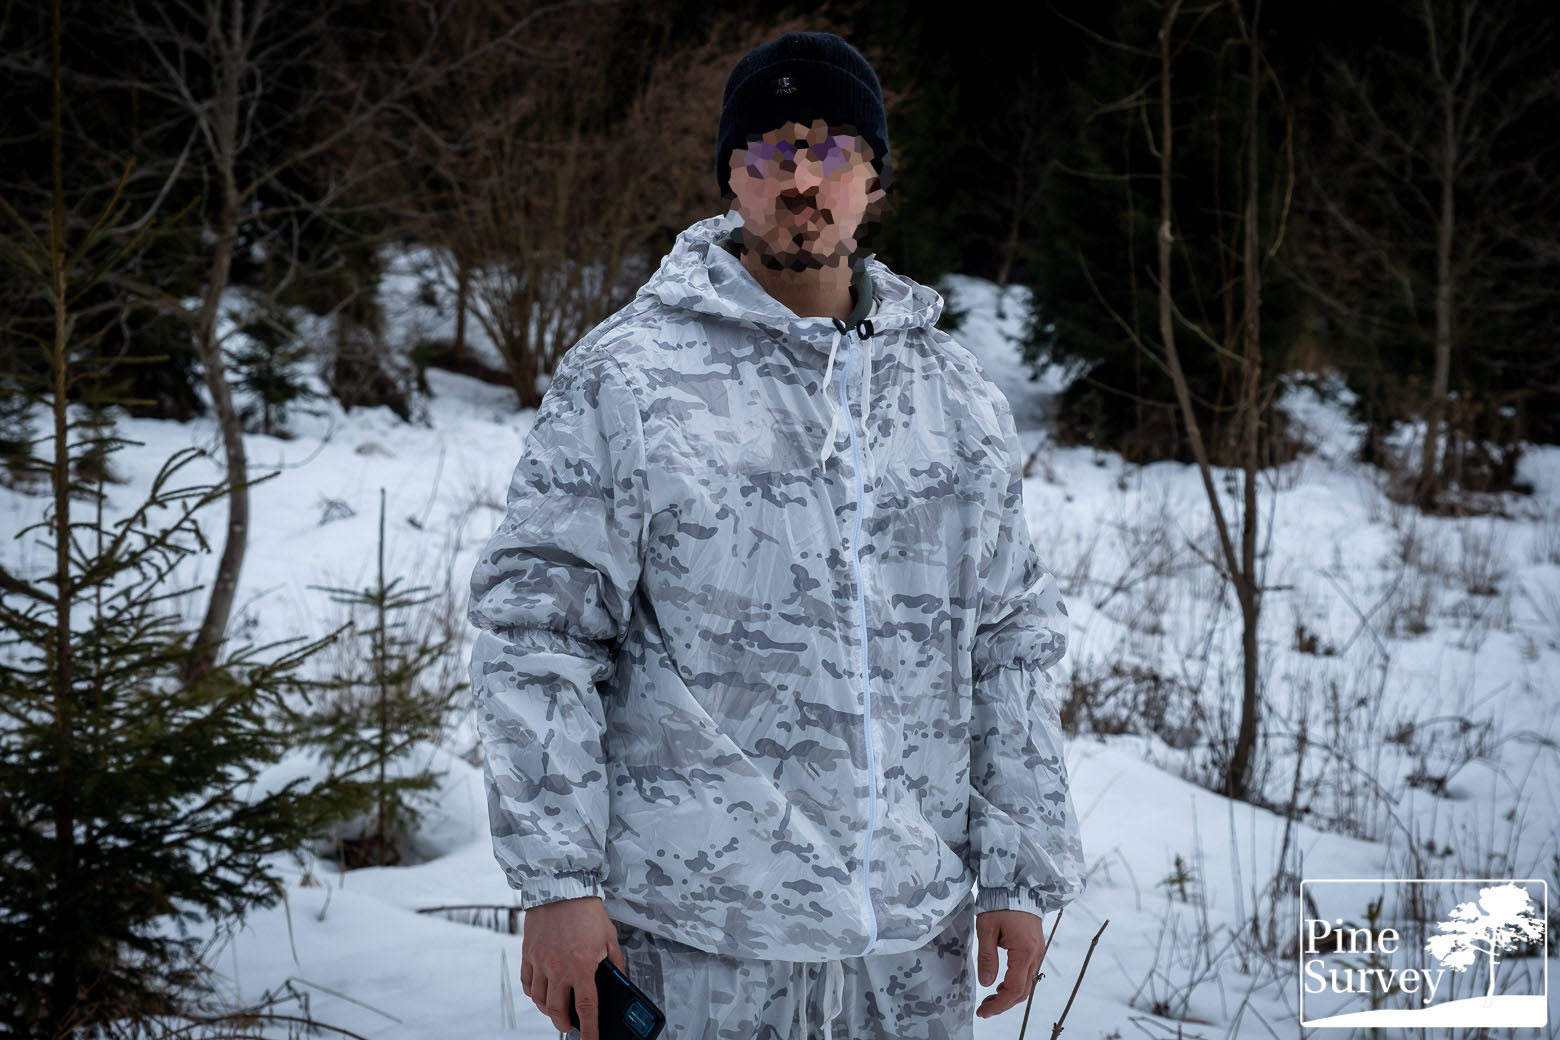
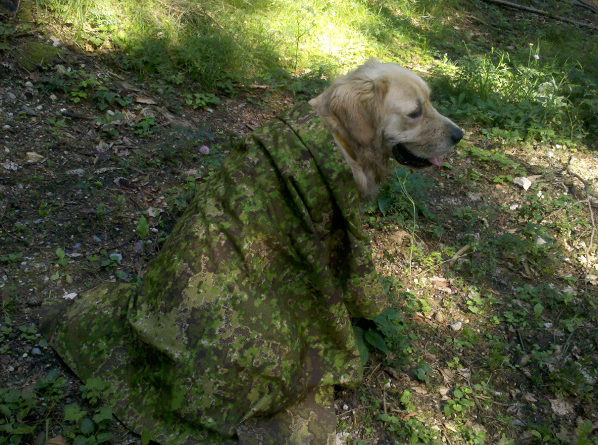
However, this is not the original Multicam Alpine, but a copy which was/is freely available in Ukraine. It features Multicam elements, but with the colors being darker, giving the pattern more contrast as a result.
With that being said, let’s go through the methodic remarks, which you can skip if you are a returning reader.
Methodic Remarks
As always I want to point out several important aspects beforehand. First of all, I do not claim any scientific standard with my camouflage comparisons. I also conduct them with my best knowledge and the available resources.
The pictures are usually taken at the same locations I always use for my camouflage comparisons. That way you can compare the various field tests I have done so far with each other. Recently my main spot was completely lost to deforestation, so I had to add a new location.
Before I start, please consider the following – as always:
I did not edit the pictures in any special way, except the following:
- Lens correction
- Watermark
- Blurred my face out if necessary
- .jpeg compression to make it web compliant
- I always do a proper white balance to make colors appear the way they are.
A short explanation to the environment and the procedure:
The pattern was tested in a Central European forest environment. Information about the various locations will be stated in the subsections. The pictures usually portray three different positions:
- Standing in the open (to get an idea of the pattern in this particular surroundings and if the colors match it).
- Kneeling.
- The prone position (to mimic basic, up to ideal concealment without using enhancements).
As always I photographed the pattern with a wide angle lens at first and then with 35mm focal length, which mimics the actual picture the human eye would perceive at this distance. Having in mind the three different positions mentioned before, I usually end up with 6 pictures of each location.
Furthermore:
Given the amount of pictures in my field tests, I will continue with my modus operandi from previous camo reviews and not describe or comment on each picture. Instead I will give a more thorough analysis at the end of each subsection.
With that being said, let’s take a closer look at the pictures themselves.
Multicam Alpine (fake)
Location 1c
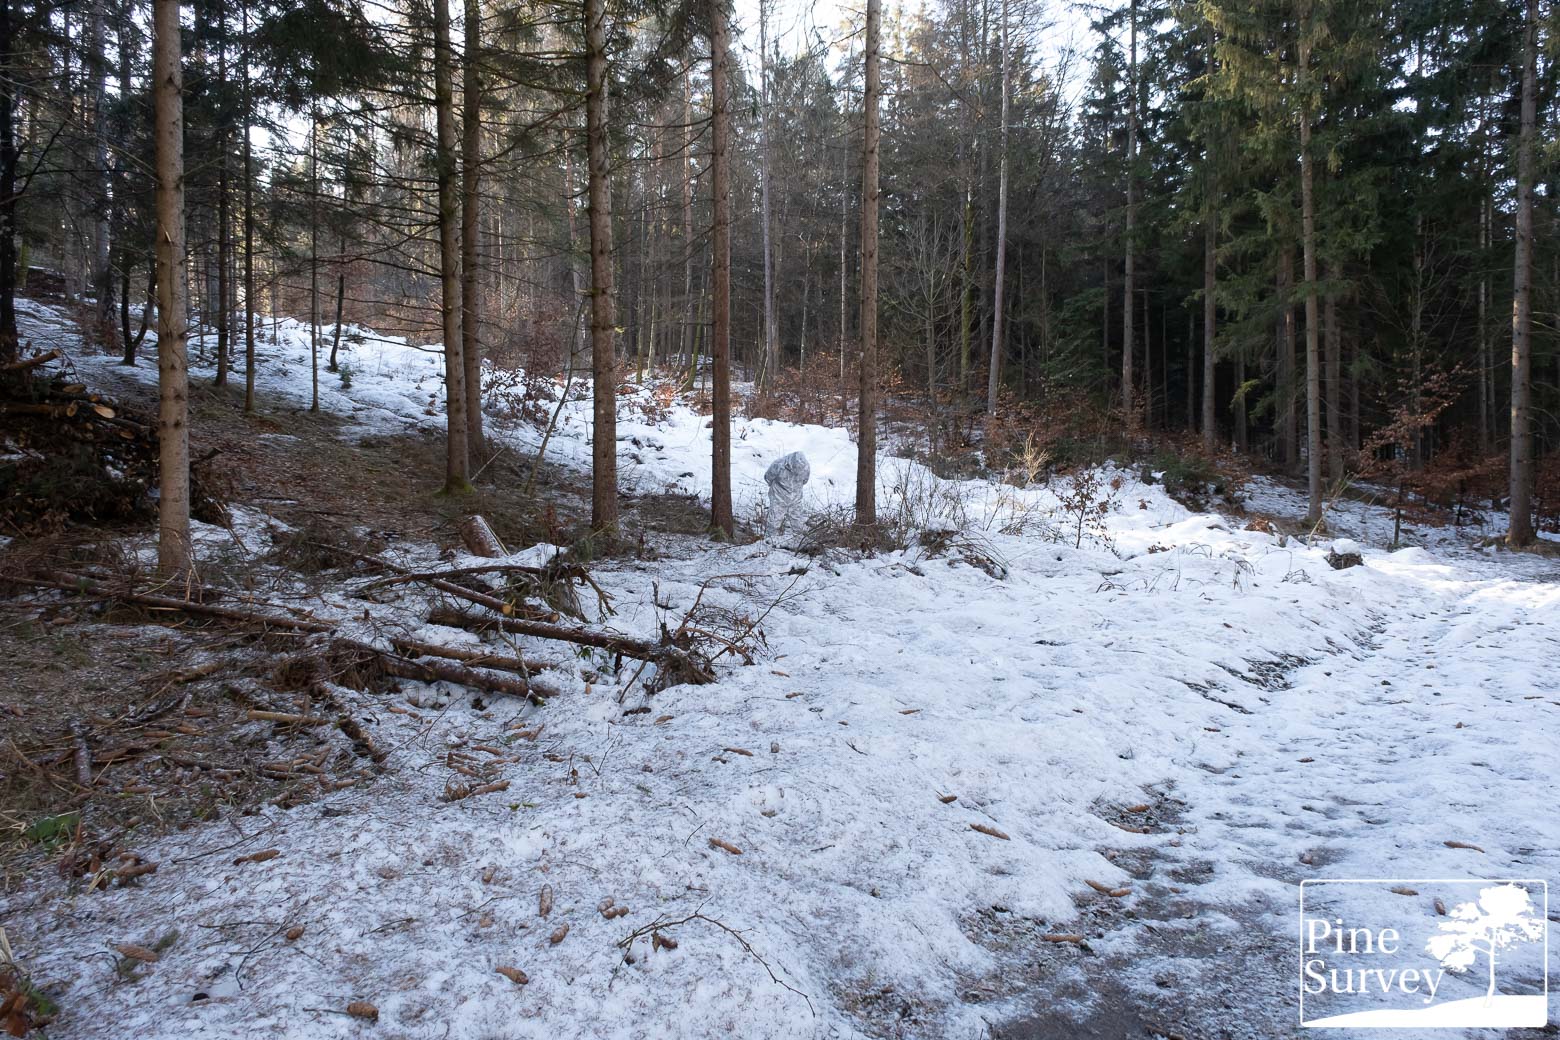
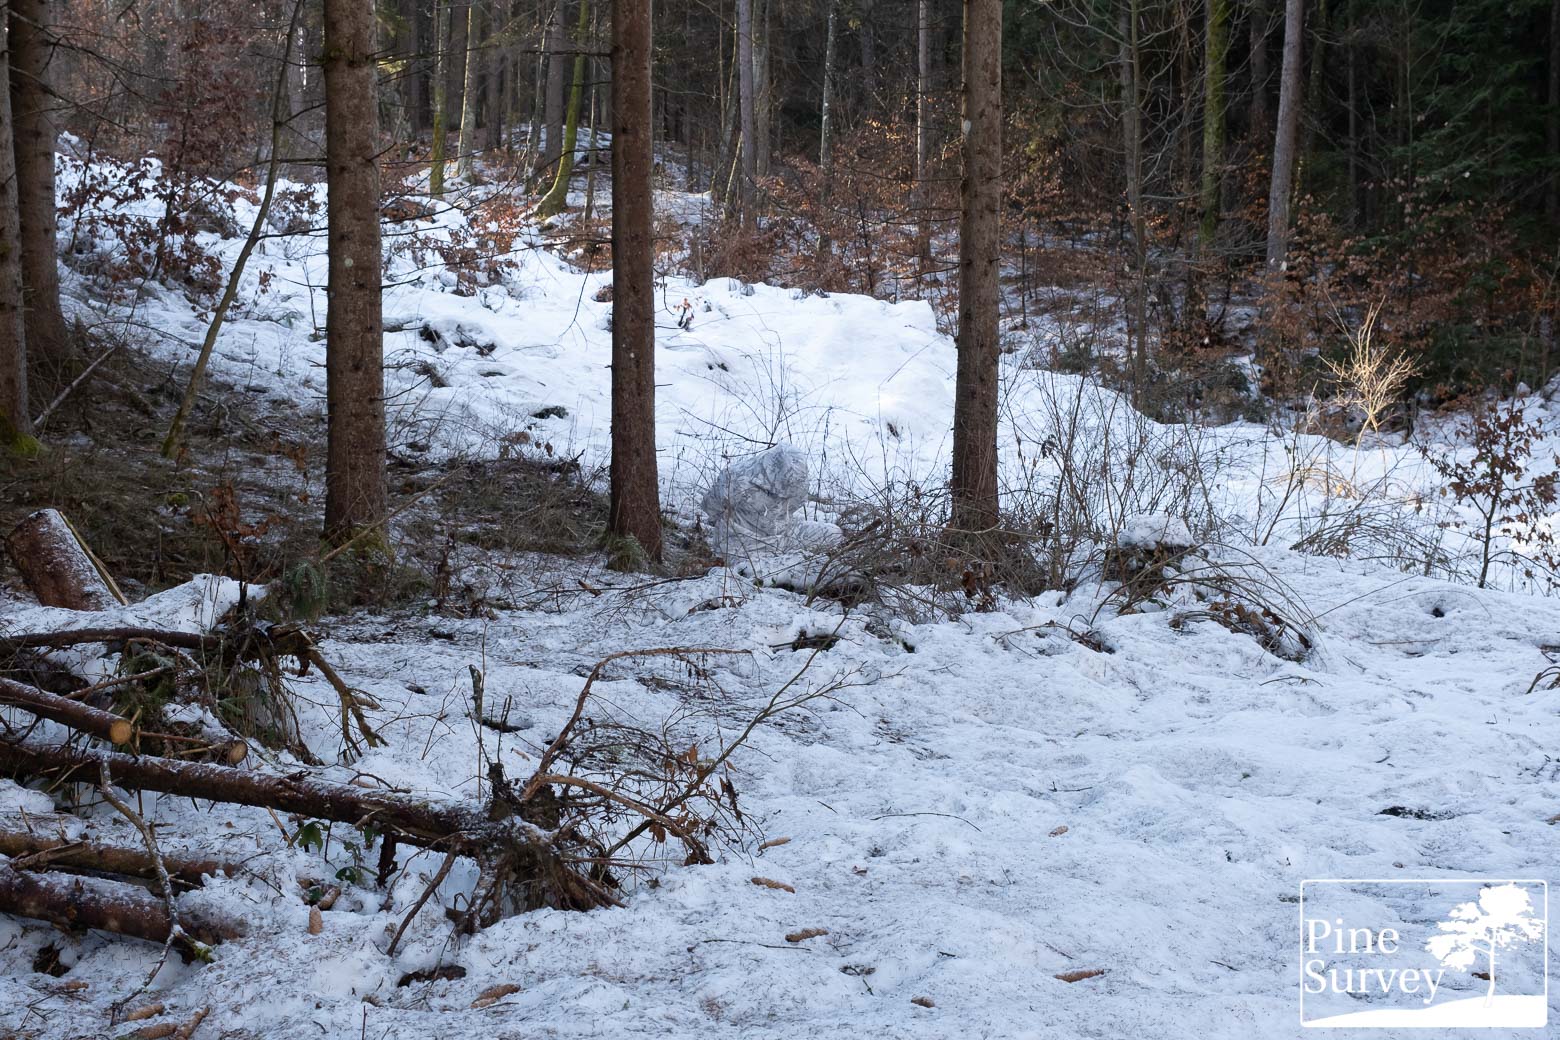
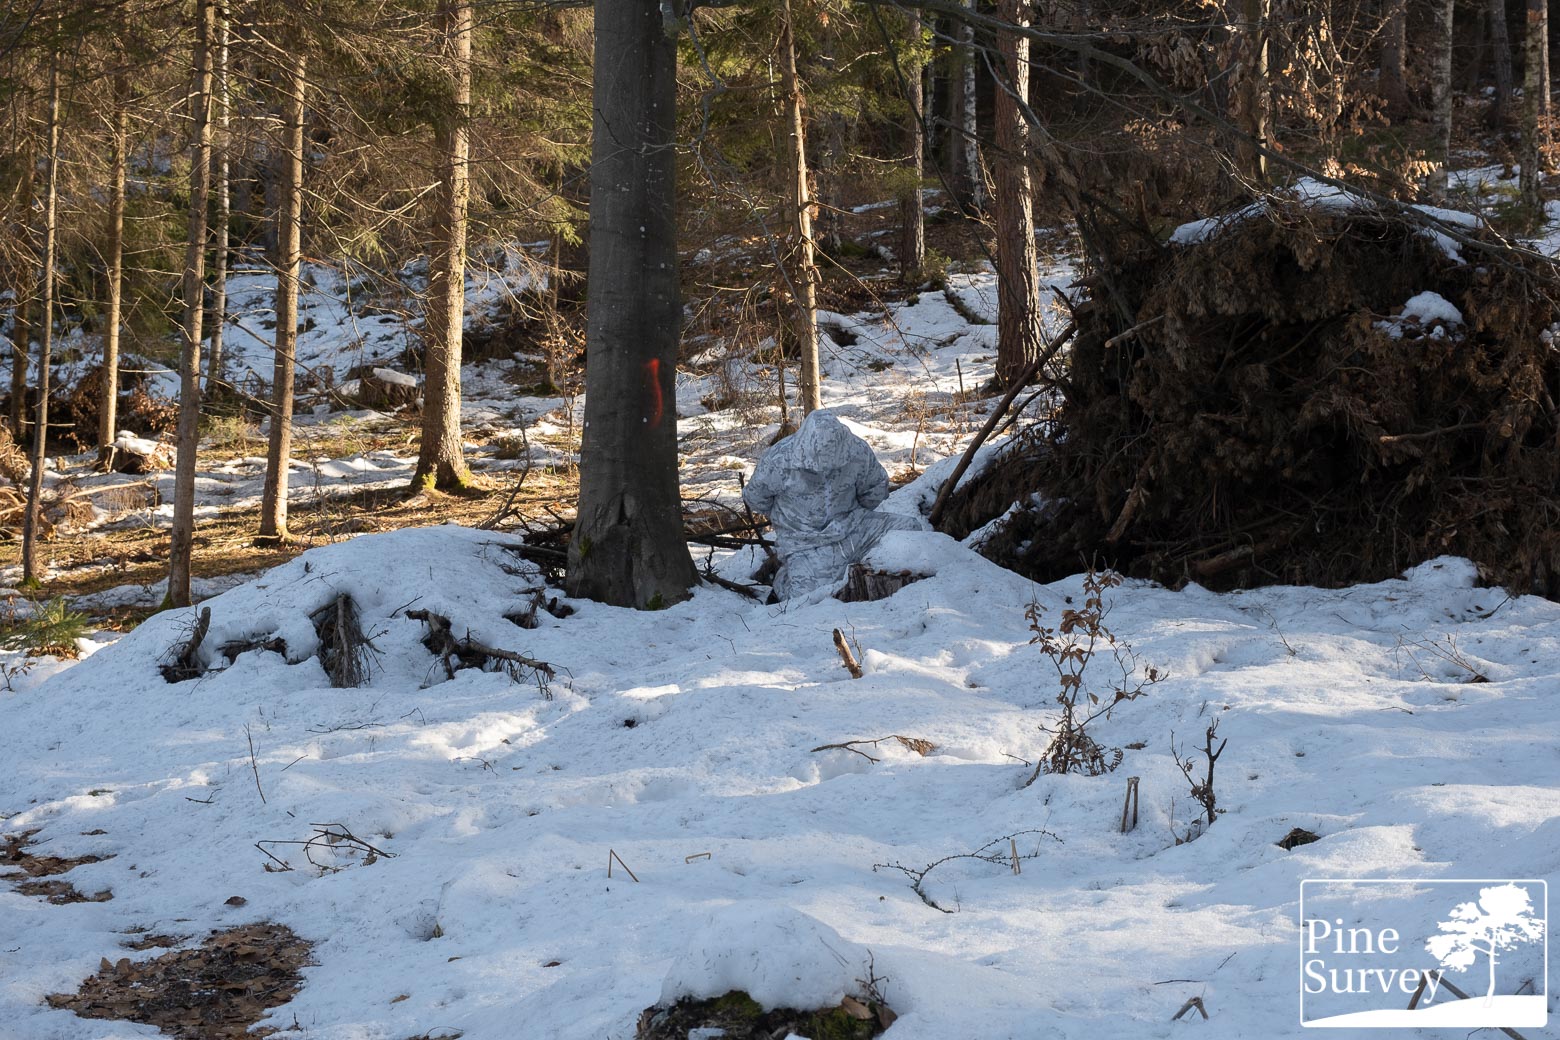
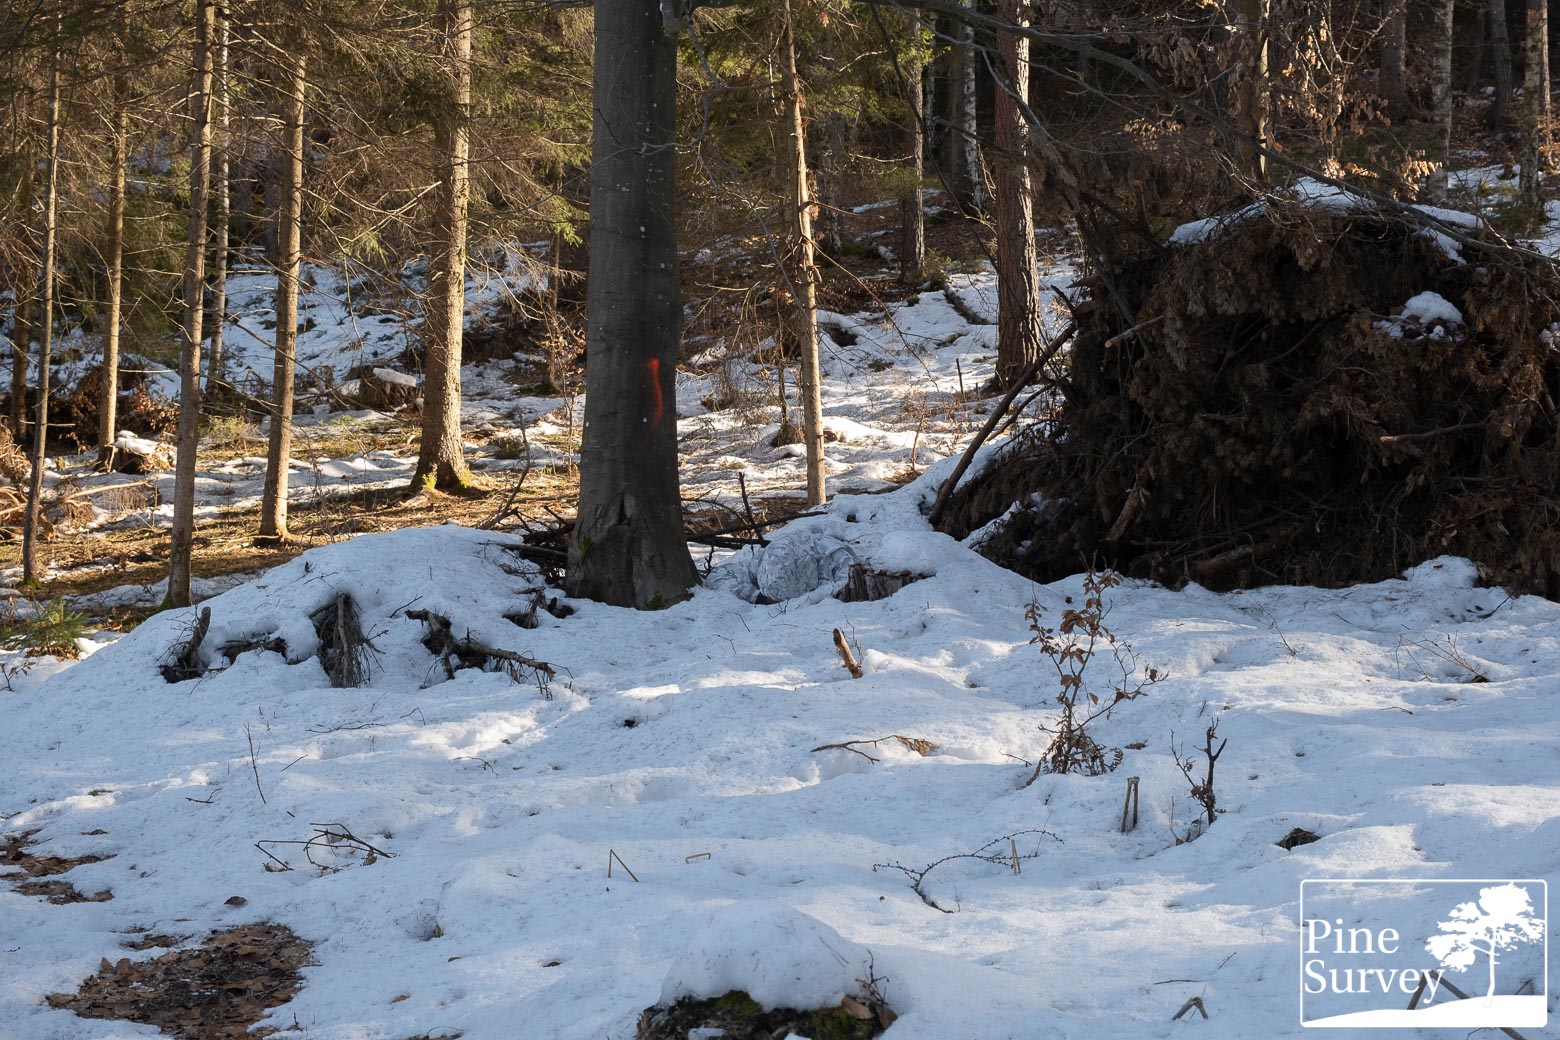
When I was preparing the pictures for Multicam Alpine, the usual locations were already partially snowless. As a result I had to change the spots, which resulted in Location 1c. It is in a European mixed forest, with a high foliage canopy, some basic underbrush on the ground, and with an opening in the background.
As the snow cover was not as deep as in the previous field tests, the dominant color was not white anymore. The background in the opening was snow covered and exposed to direct light, making it the dominant factor. The rest of the area is full of tree trunks and cut branches contrasting the picture.
Just like with PenCott Snowdrift, these pictures were taken before noon under a clear sky. As a result the morning sun hit parts of the snow from time to time, making it brighter than other spots. However, the light was more muted, than with PenCott Snowdrift.
The camera is standing roughly 10m away from the human silhouette.
Observations – Location 1c
Location 1c is indeed a great example of the challenges in a snow environment with bright open areas as well as natural cover. It also depicts the change the positioning of the body brings with it. So when looking at the wide angle lens pictures, one can clearly see the silhouette of the standing person, even though the overwhites match other parts of the immediate surroundings. With the bright background however, this becomes irrelevant.
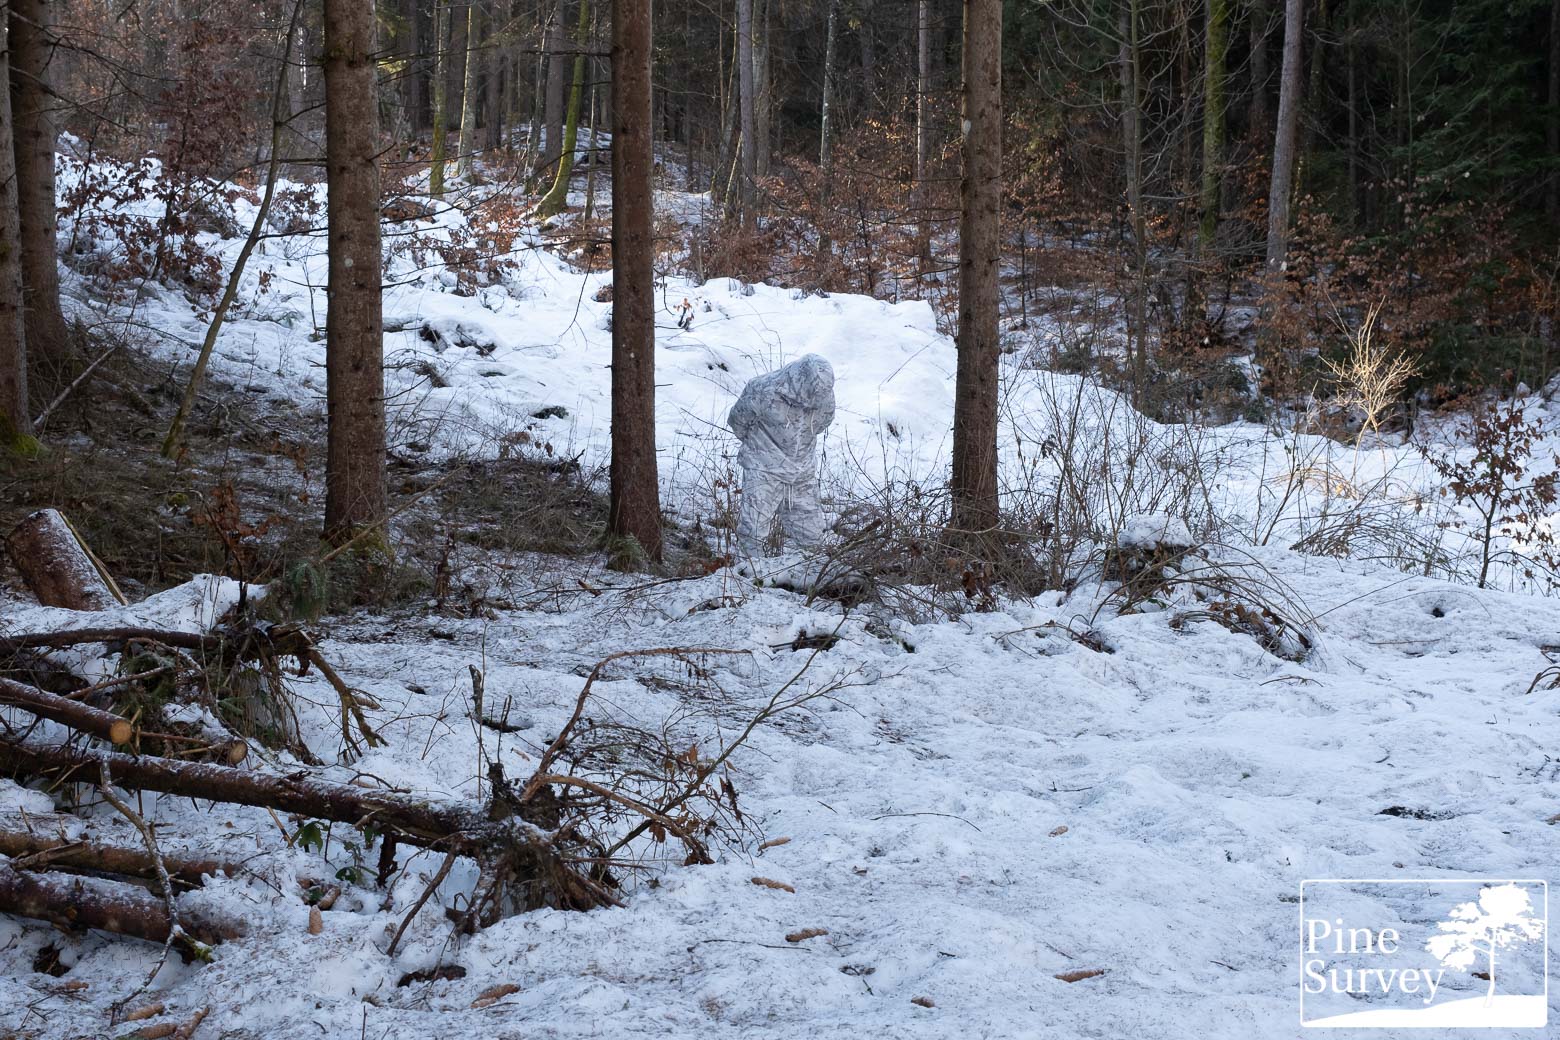
This changes immediately when kneeling down. The outline of the person is no longer visible against the bright white background and the different shades of the Multicam Alpine pattern blend into various structures of the forest floor.
It is important to note that the higher contrast is of much use here, providing a better disruption.
The two pictures taken with 35mm focal length provide more context. One can see better how the torso is contrasting the brighter background even though it is mainly white. It is fair to say that in this particular instance, less contrast might be of more use. However, because of the backlight, the silhouette would still stand out. The legs however blend in nicely, with the pattern melting into its immediate surroundings.
On the second picture, showing the kneeling position, the mix of the colors as well as the pattern, demonstrate a perfectly working snow camouflage.
Location 2
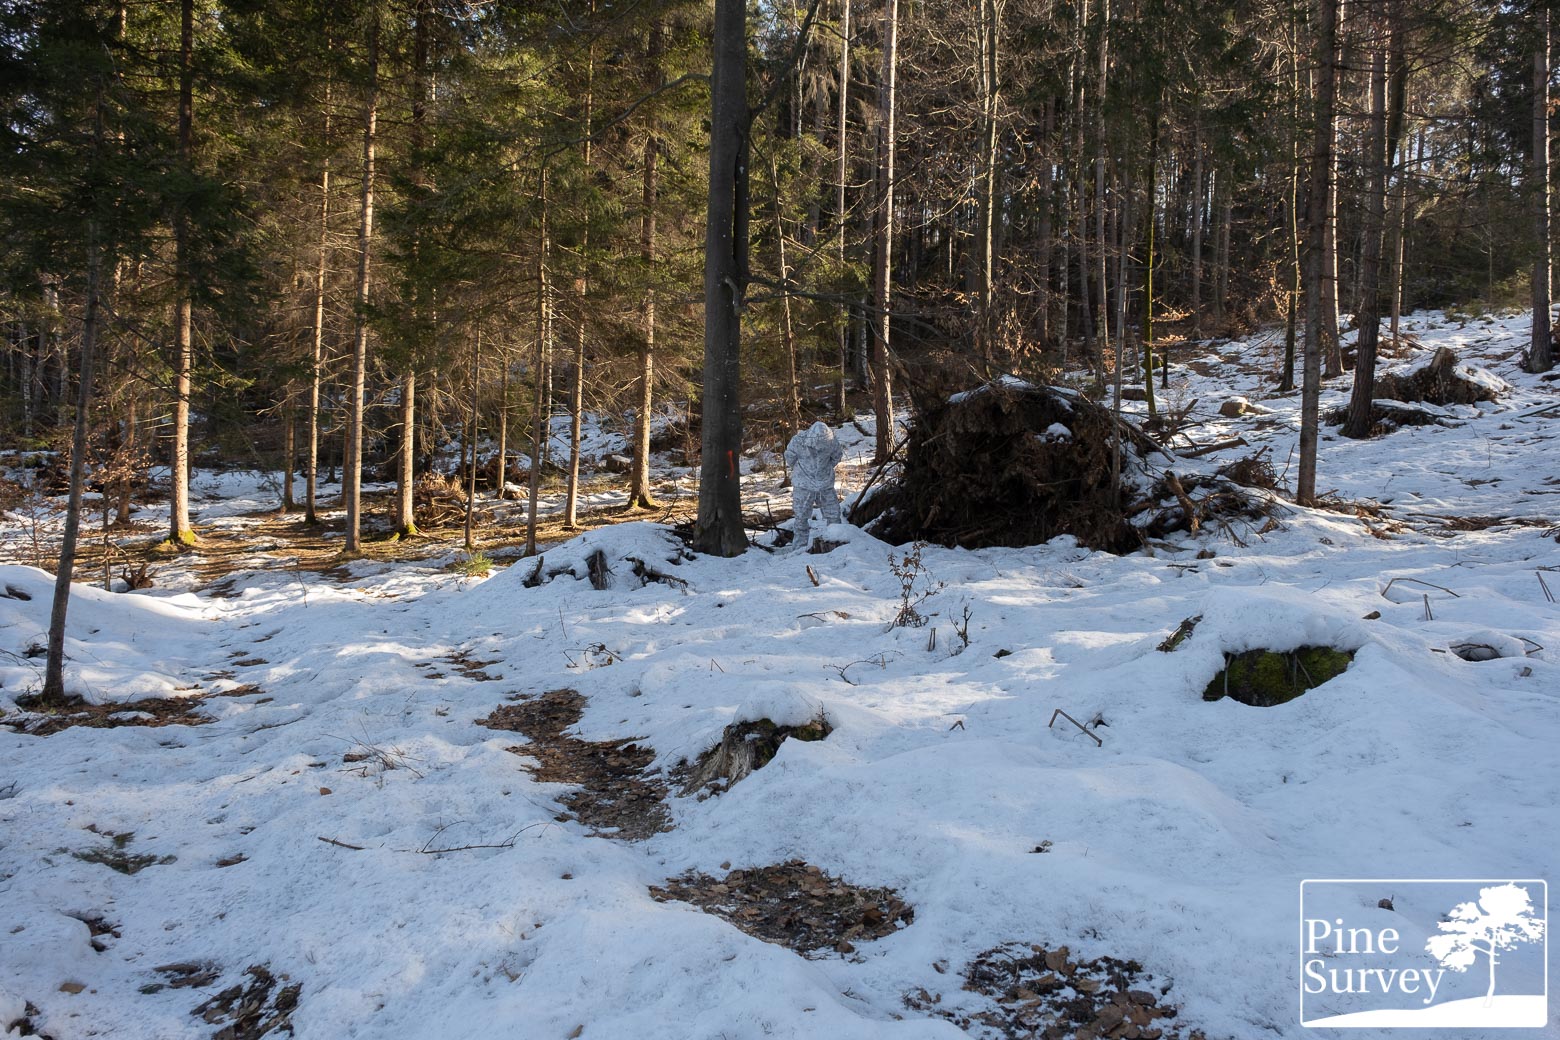
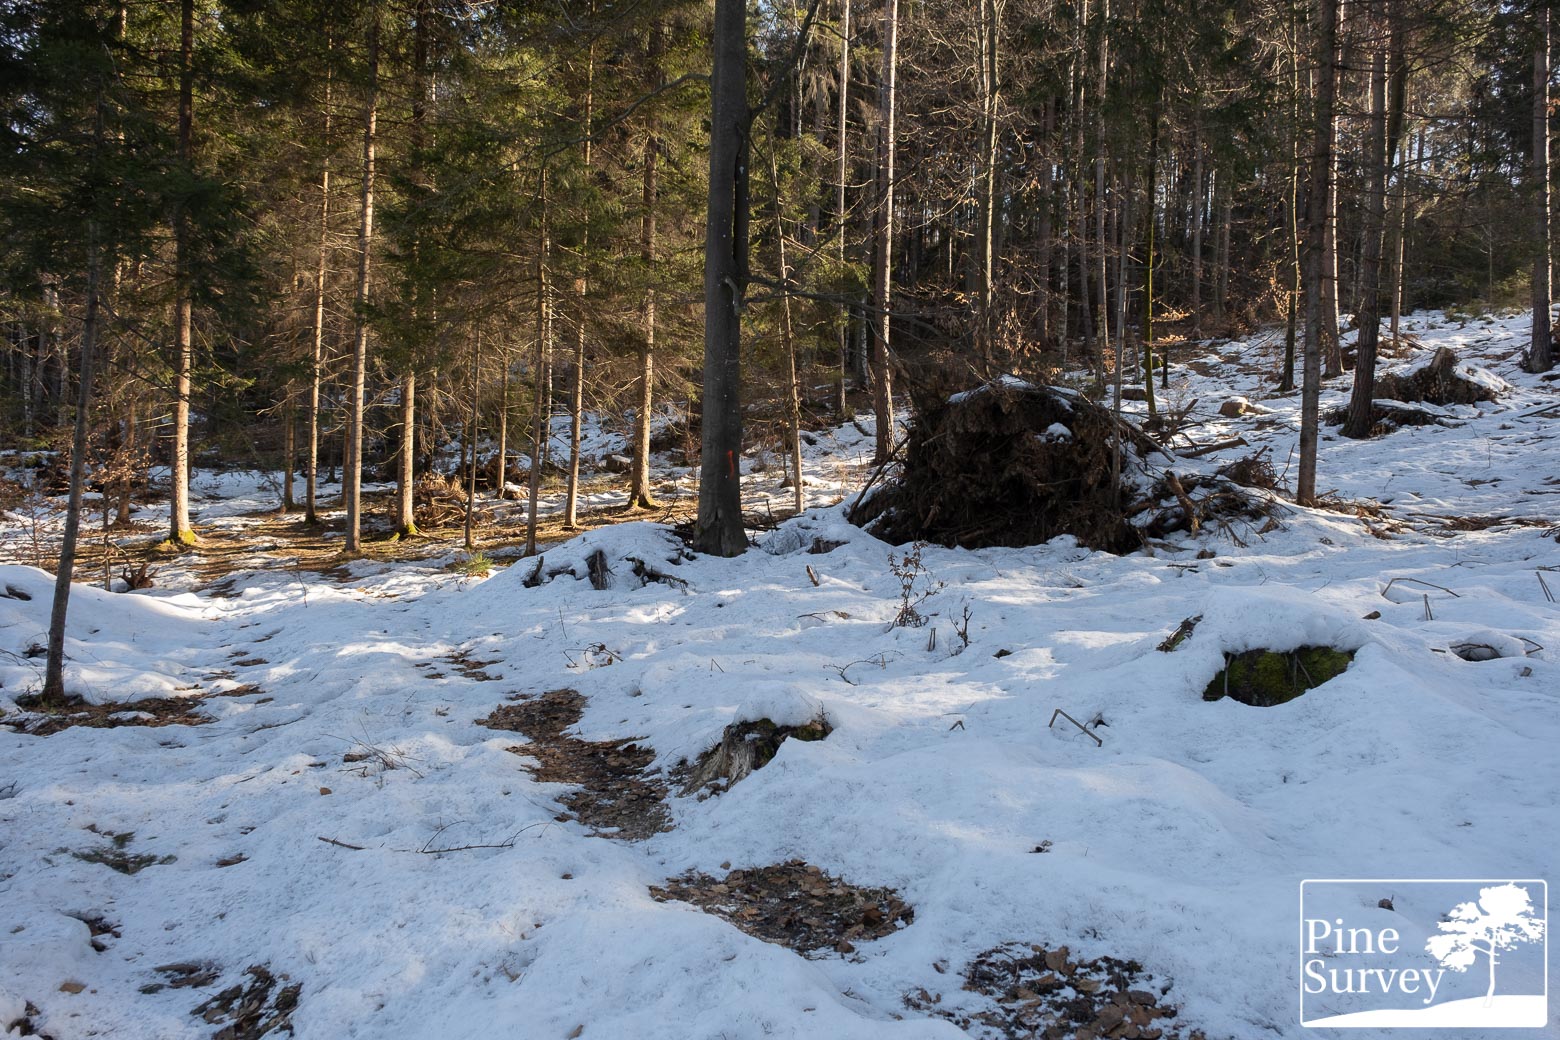
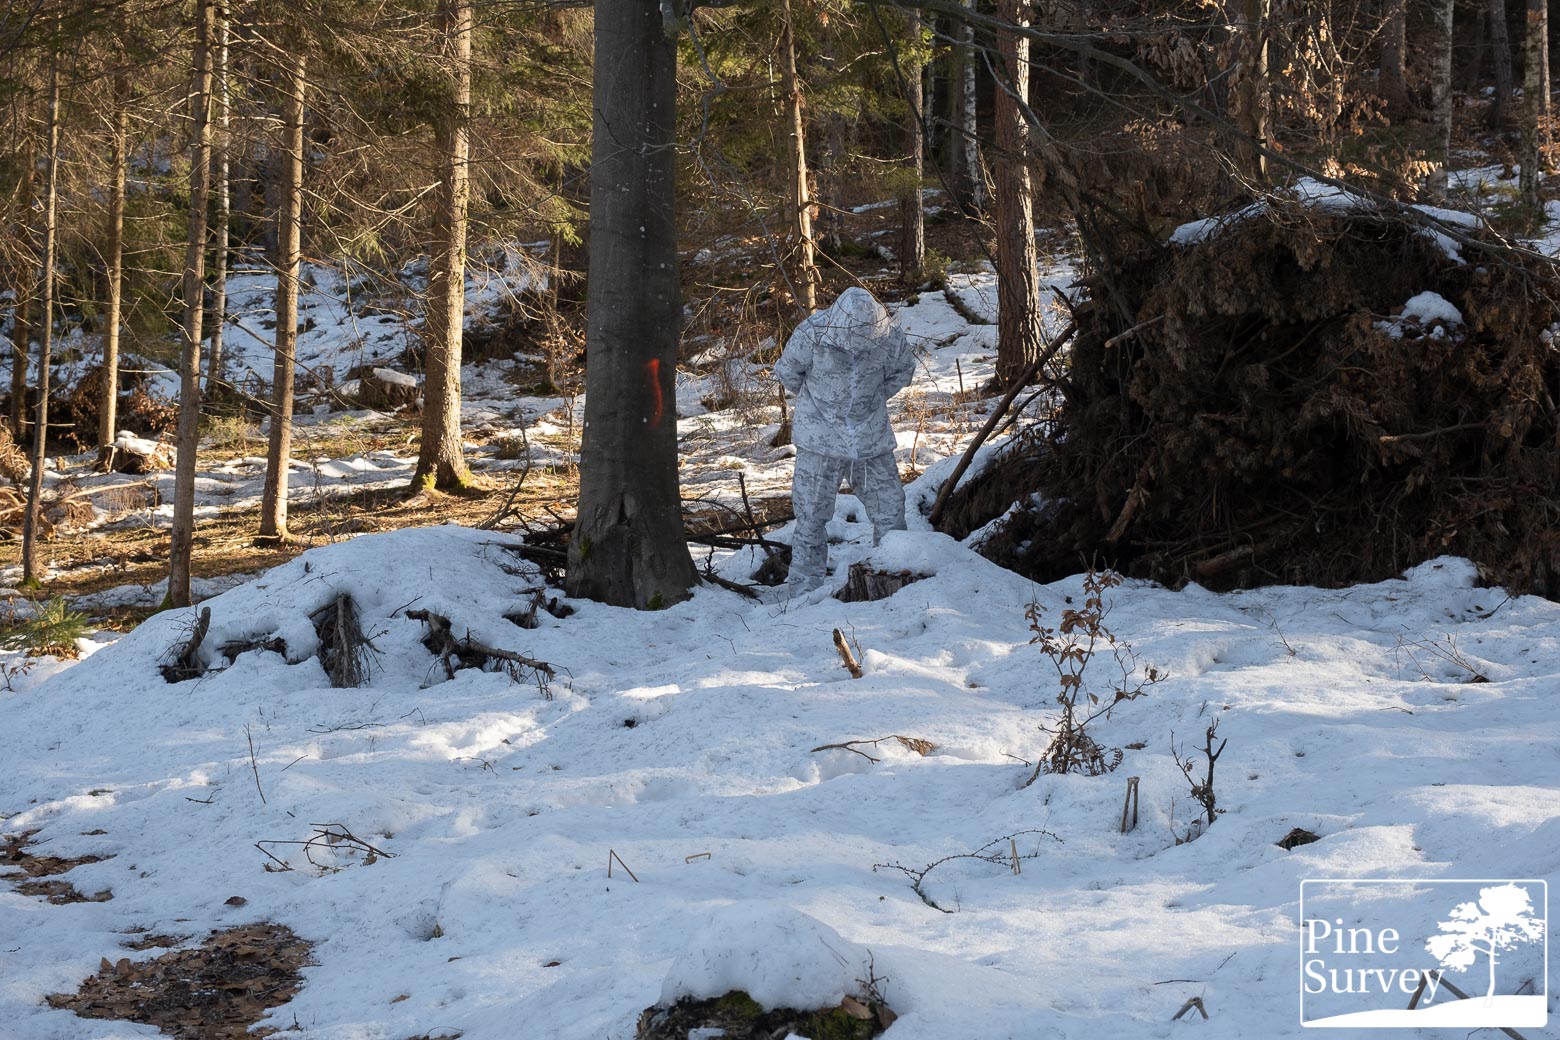
This is one of my standard locations. Being a mixture of deciduous and coniferous forest, it changed over time, with a huge pile of cut branches being very prominent now. Since most of the leaves fell off during autumn and winter, visibility is better and you can see further back. Unfortunately, the snow cover was not as extensive as during the last two tests and one can see that the snow cover in the background has already begun to melt away.
Just like in location 1c, the pictures were taken before noon under a clear sky with the sun coming over the hill. As a result, the background was illuminated and the foreground still dark and in shadows, making it difficult to blend in, because of the contrast and backlight.
The camera is standing roughly 15m away from the human silhouette.

Observations – Location 2
Starting with the wide angle lens. While the front of the area is mainly in the shadows and dominated by cold colors, the background is well lit with warm sun beams. As a result the standing position is a clear give away. However, as a result of the matching white and gray colors, the effect is not as drastic as with e.g. brown or green colors.
The pattern and colors of Multicam Arid match the snow environment, making the overwhites fit into this particular setting, despite the exposed position. In the kneeling position, the silhouette is broken up and the pattern blends into the surroundings. That being said, the darker coloration of these particular overwhites make for a slightly darker look. As soon as the user hits the prone, the blending effect becomes apparent, with the pattern elements disrupting the rest of the visible body and blending into the surroundings.
With the 35mm focal length giving a better understanding of the actual distance, one gets a better look at the midi fractals of the Multicam Alpine pattern. It also shows the issue of having a bright background and standing out as a result.
The kneeling position shows how well the pattern blends into this location, with it being still slightly darker than the surrounding snow. Changing into the prone also provides a very convincing picture of the performance of the pattern.
Location 3
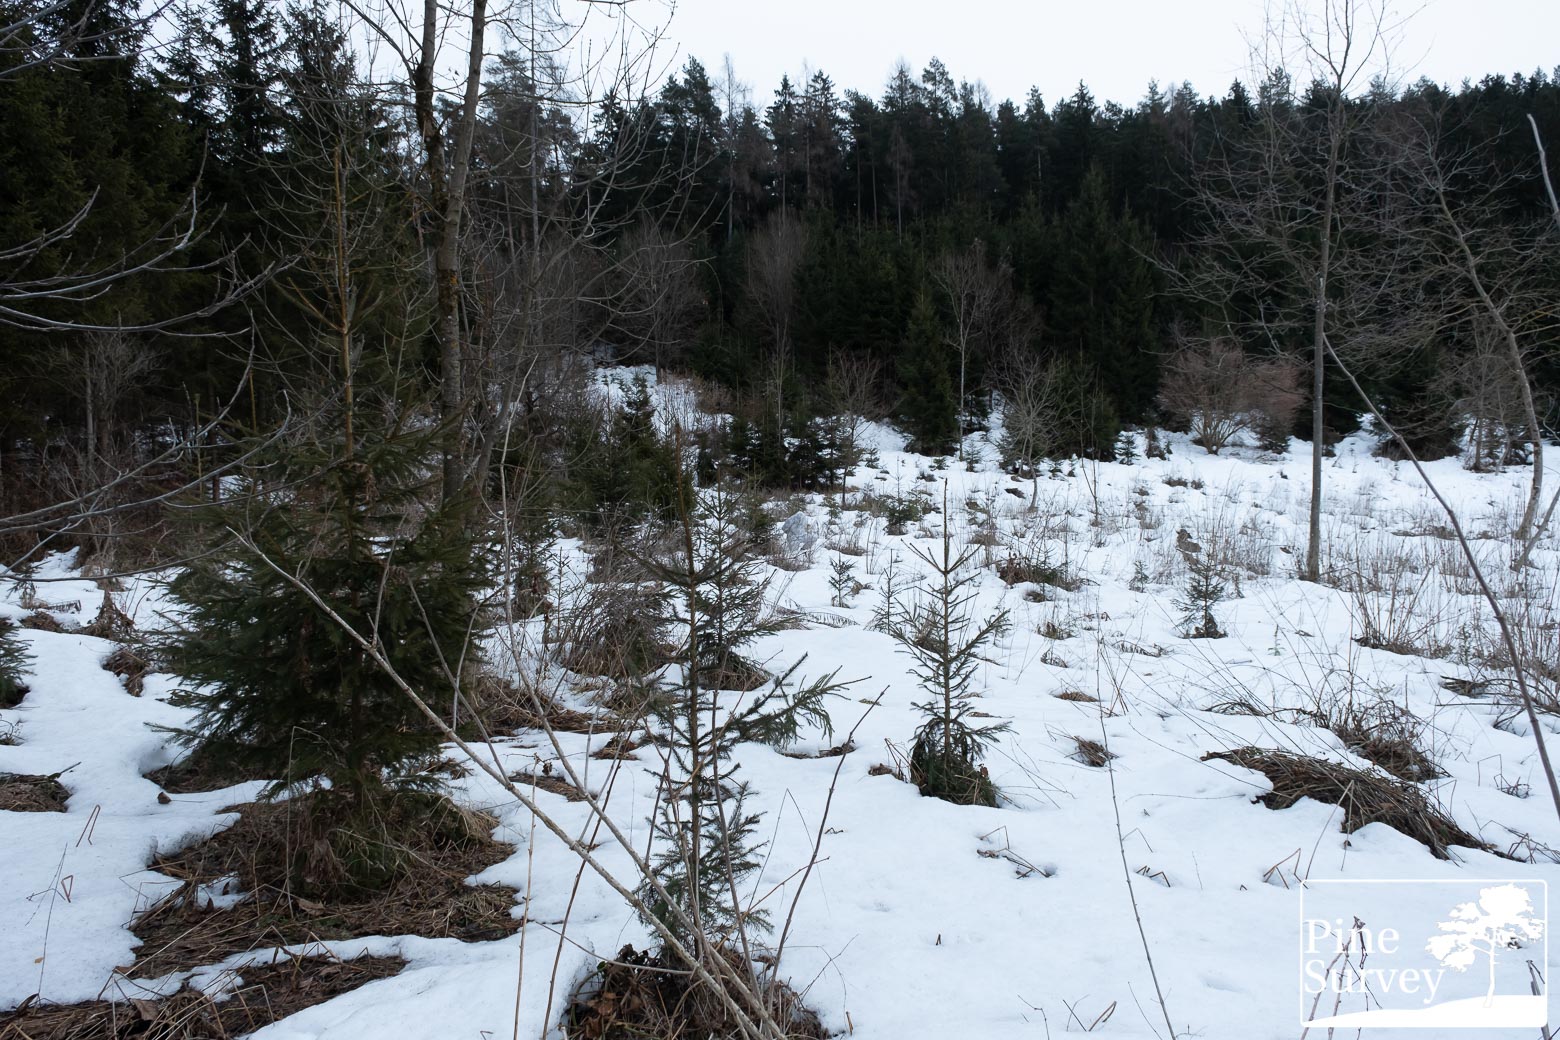
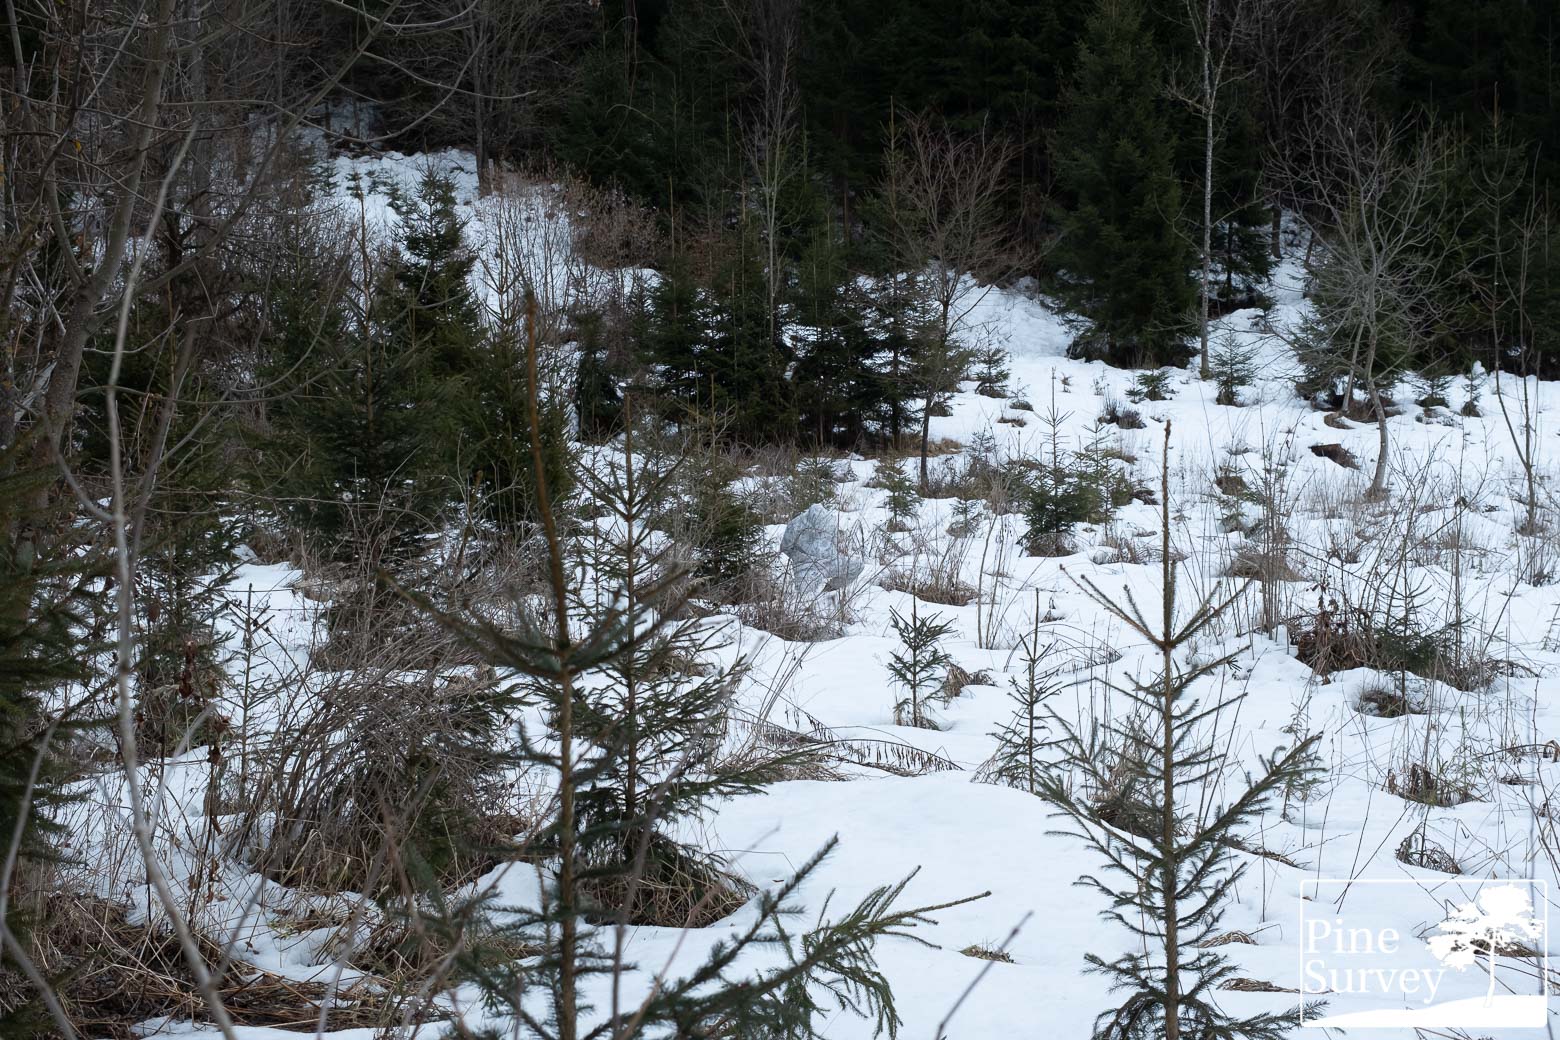
This site is an open field in a mixed forest, with random conifers, some deciduous trees as well as high grass.
The location is not as heavily covered with snow as in the first tests, but the surface is only interrupted in small parts. The setting is a chaotic field, mixed with monotone whites and a wide range of disrupting dark areas of branches and evergreen trees. These pictures were taken in the late afternoon under a cloudless sky so it offers the best comparison to previous tests, even though there is less snow.
The camera is standing roughly 25m away from the human silhouette.


Observations – Location 3
Last but not least, a more typical winter/snow setting provides a more thorough impression of Multicam Alpine – both with the wide angle lens and the 35mm focal length. In the standing position one can observe how the white oversuite blends into the surrounding snow cover, with the pattern making it appear slightly darker, but also offering minimal disruption by midi fractals. In the kneeling position the pattern elements match the surrounding grass and brush, while still blending into the snow. The prone needs no comment, as it usually is the best way to visually conceal oneself on horizontal level.
The 35mm focal length pictures show the actual distance again. In the standing position the silhouette stands a bit out, even though the white blends in nicely. The gray fractals of the Ukrainian Multicam Alpine copy make it appear a bit more bluish, thus making it darker. In the kneeling and prone position, the pattern works very effectively in blending into the surroundings by providing contrast.
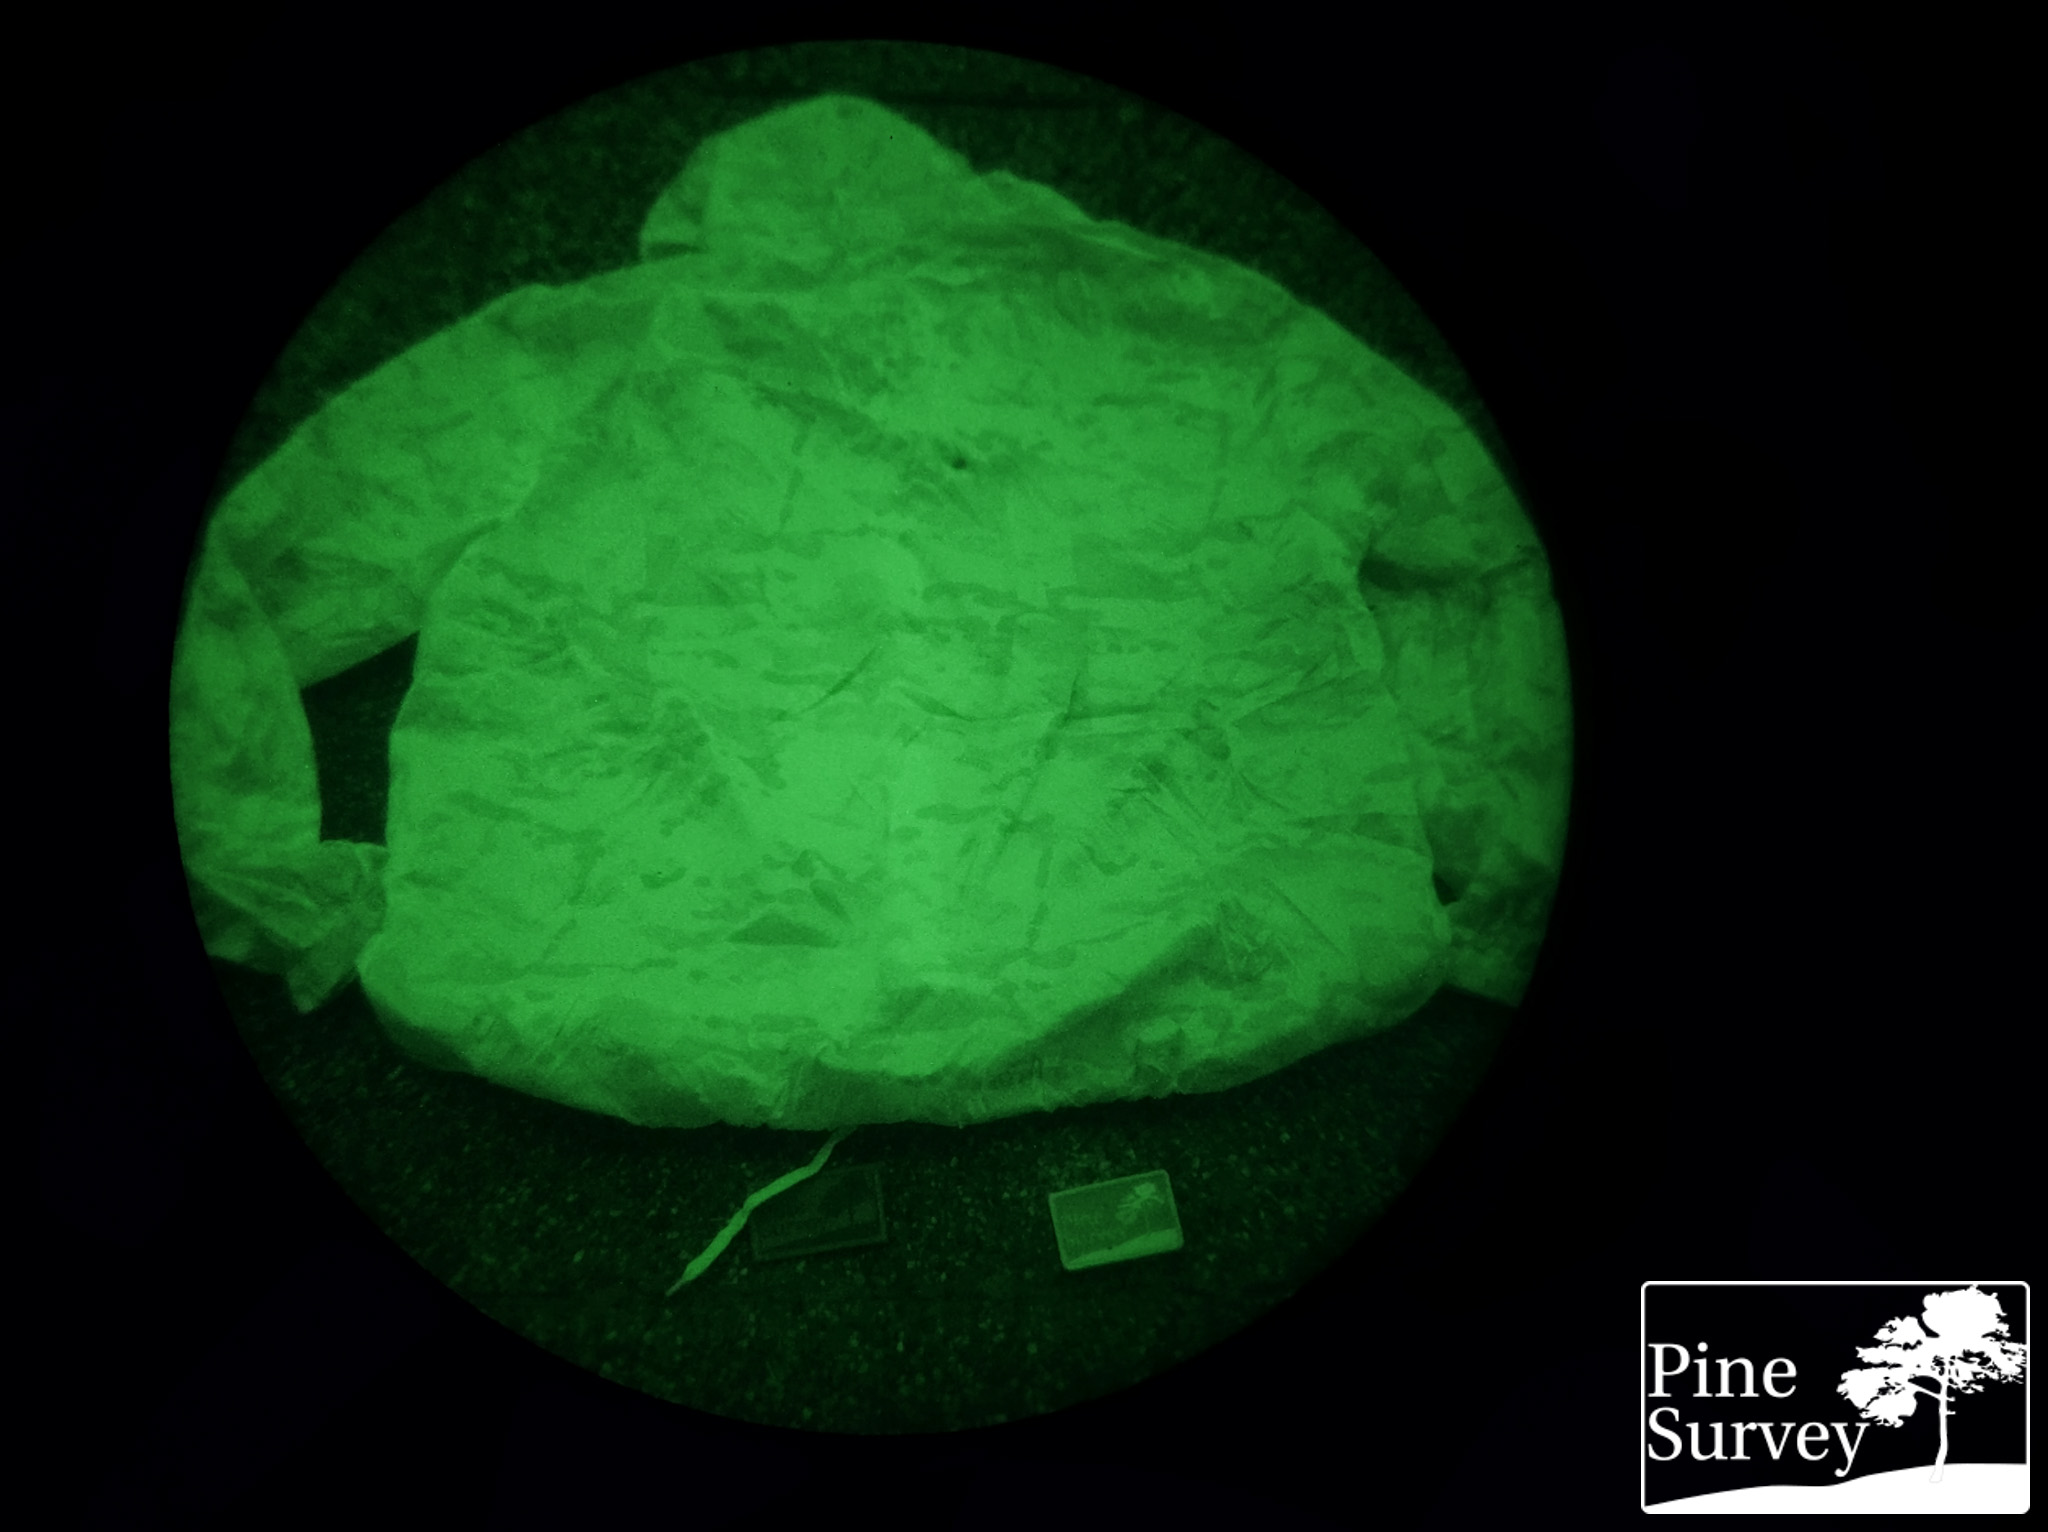
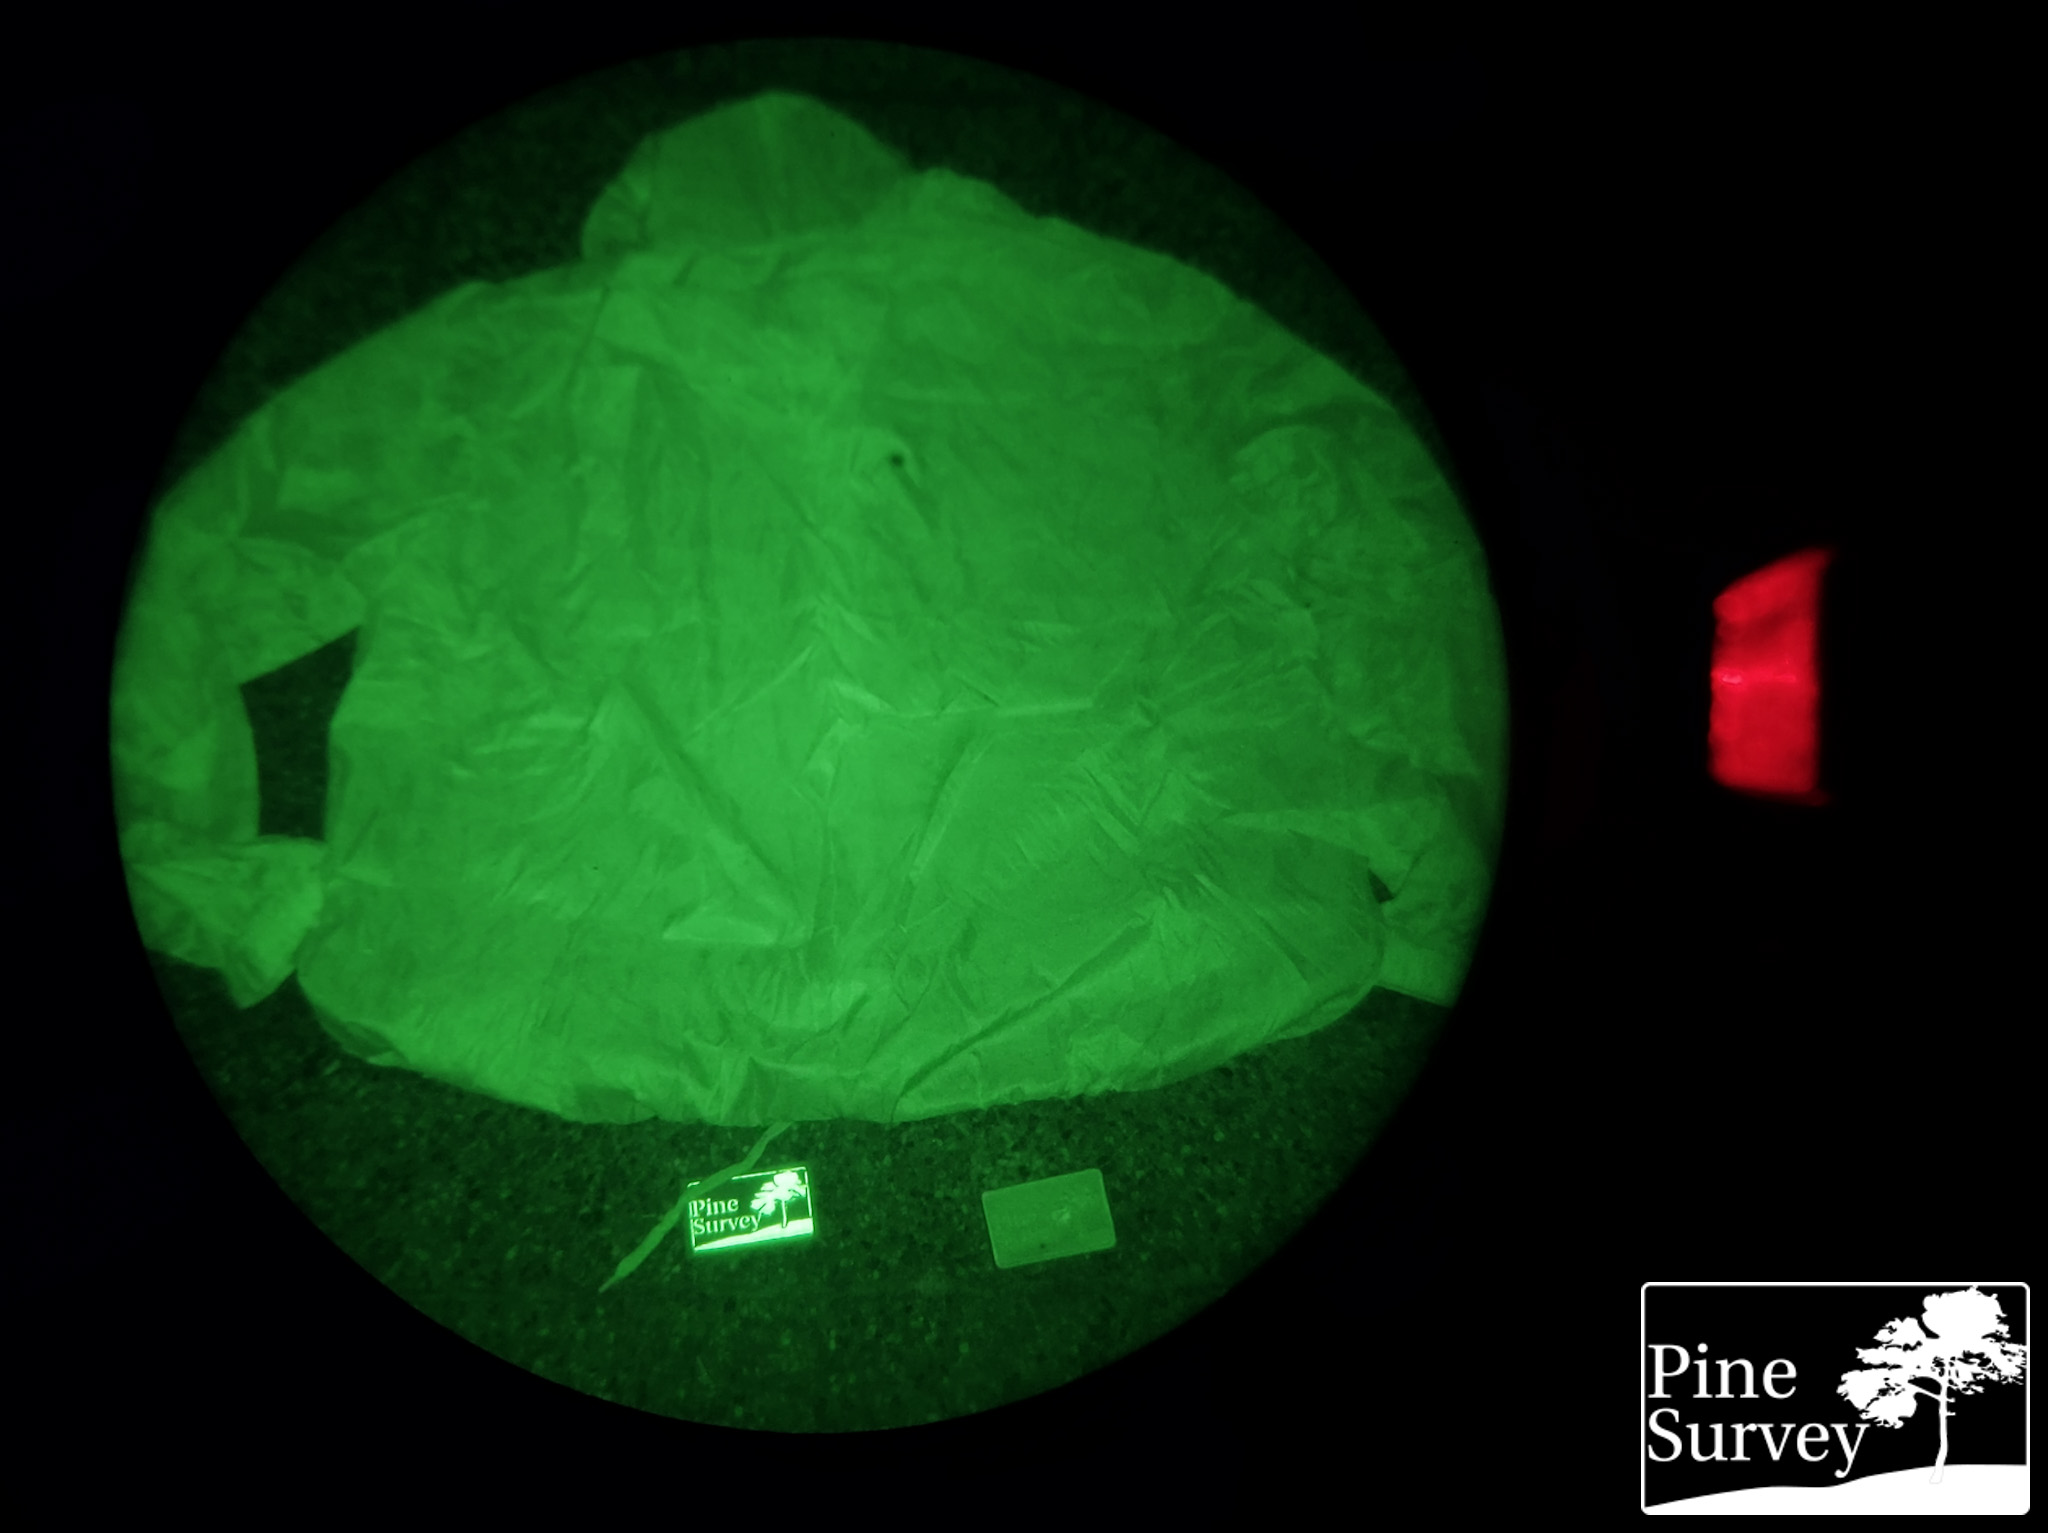
Addendum
Two quick pictures of the NIR performance of this oversuit. As it is a cheap polyester/nylon garment it has no NIR treatment, thus having the typical reflectance value under Near Infrared that usually is described as “glow”. The pattern itself is not visible under night vision, making it useless under NIR. That being said – it is a snow camouflage, so the outcome is not as problematic as with any other environment.
Conclusion
With Multicam Alpine as one last addition to the winter/snow camouflage series, it is worth mentioning the issues of snow environments and light once more. As discussed in the PenCott Snowdrift article, winter camouflage is as complicated as urban camouflage because of the changing nature of snow environments.
With heavy snow and cloud cover, almost anything that is white will work perfectly. This is the main reason that snow camo usually consists of plain white oversuits. With winter changing however, disruption becomes more important to deal with interrupted snow fields.
Multicam Alpine is meant for the first instance – when there is an uninterrupted snow cover. With minimal color contrast, it only provides fractals that help with blending and which mimic shades and angles on the snow.
The Ukrainian copy provides more contrast – a decision that improves the pattern in more interrupted snow environments, but also worsens its performance in plain white areas. Especially when brightness increases. The NIR performance has to be considered as well, as these are cheap and widely available over suits.
With that being said, thank you for reading and take care!
P.S.: NIR pictures were made possible thx to Lunox Nightvision!